How to Design, Digitize, and Make Custom Embroidered Hoodies?
Custom embroidered hoodies rule streetwear, corporate branding, and e-commerce in 2026. With demand surging 35% year-over-year, businesses earn $60-150 per hoodie while scaling to 500+ units monthly. In this guide, I’ll show you how to plan designs, pick the right materials, and get clean results on embroidered hoodies without wasting blanks.
By the end, you’ll have a complete workflow you can follow for personal projects or production, start to finish.
How to Design, Digitize, and Make Custom Embroidered Hoodies?
Essential Tools and Materials for Custom Embroidered Hoodies
Hoodies are bulky, stretchy, and thick, so your tools matter more than your talent. You’ll also see a clear software table so you can choose confidently for custom hoodies.
1. Best Embroidery Machines for Hoodies
A hoodie-friendly machine needs strong needle penetration, stable tension, and enough clearance for thick seams.
Janome MB-7S ($9,000): 7 needles, compact for garages, excels on fleece.
Tajima TMBU-SC ($15,000+): Commercial beast for 500+ hoodies/month.
Budget: Brother PE800 ($700) for starters, but upgrade for hoodies.
Embroidery Digitizing Softwares for Custom Embroidered Hoodies
Your software decides stitch quality before the machine even starts. If you want clean results (especially on fleece), good digitizing tools save time and reduce thread breaks.
Embroidery Digitizing Softwares for Custom Embroidered Hoodies
Software
Price
Learning Curve
Hoodie Features
Stitch Types
Export Formats
Rating
Wilcom E5.5
$5,995
Expert
3D puff auto, gradient fills, hoodie templates
45+
All
9.8
Hatch Digitizer
$1,299
Intermediate
AI resize, SVG import, video tutorials
28
PES/DST/EXP
9.5
Ink/Stitch (Free)
$0
Beginner
Inkscape params, open source
12
All
8.7
Brother PE-Design 11
$1,299
Beginner
1,500 fonts, wireless transfer
20
PES
8.2
Embrilliance StitchArtist
$649
Intermediate
Modular, applique auto
22
All
9.0
Winner for hoodies: Hatch for mid-tier pros, balances power and ease.
Materials Guide
Fabrics:Gildan 18500 (50/50 cotton-poly, $15) or Next Level 6411 (tri-blend, $20). Avoid 100% cotton, it puckers.
Stabilizers: Cut-away (2.5 oz.) under fleece; water-soluble topping for high-pile.
Threads: Isacord 40wt polyester for fade resistance over rayon. (Stock 15 colors minimum for multi-position designs)
Use jumbo hoops (8×12″) or hoopless frames for drawstring areas.
Step-by-Step Embroidery Digitizing for Hoodies
Digitizing is not “convert image → done.” It’s stitch engineering for thick fabric, stretch, and wear. If you want professional results for embroidery on hoodies, these details are the difference.
1. Start with a Hoodie-Smart Design Plan
Start with a Hoodie-Smart Design Plan
Before software, choose a design style that stitches well. Use clean shapes, strong outlines, and avoid ultra-thin lines on fuzzy fleece. For inspiration, build a small library of hoodie embroidery designs that match your brand style and stitch well at real size.
2. Artwork Cleanup and Size Rules
Convert artwork to clean vector when possible
Avoid tiny details under 3-4 mm if the hoodie is fuzzy
Plan final size first so your stitch types match the real scale
This is where strong hoodie design planning saves you rework.
Underlay, Density, and Pull Compensation (The Hoodie Trio)
Underlay: Helps prevent sinking into fleece and keeps edges crisp
Density: Too dense = stiff patch feel; too light = gaps and weak coverage
Pull compensation: Protects borders from “shrinking” inward due to fabric tension
Stitch Type Selection for Thick Fabric
Use simple, stable stitches that hold shape on fleece. Plan fills, satins, and borders like a system, not random choices. This is exactly how you choose the best embroidery stitches for hoodies without making the garment stiff.
Stitch Type Selection for Thick Fabric
If you’re working from ready art, ensure hoodie embroidery patterns are tested at real stitch size, not only previewed on-screen.
Logo Digitizing That Stays Clean on Fleece
For brand marks, the goal is readability from 3–6 feet away. That means controlled density, strong outlines, and fewer tiny cut-ins. This is where embroidery design for hoodies needs practical compromises.
Exporting Correct Machine Files
Always test a sample stitch before bulk production
Keep trims sensible and avoid too many jump stitches
Confirm your machine format export settings and thread chart
When you deliver or store production-ready files like DST embroidery files for hoodies, label them with size, placement, and fabric notes.
Digitizing Logos for Hoodie Placement
Left-chest, sleeve, and full-front behave differently because of seams and stretch. Plan stitch direction and underlay based on the placement, especially for digitizing logos for hoodies where brand consistency matters.
Digitizing Logos for Hoodie Placement
(If you do these steps right, custom embroidered hoodies look premium, clean edges, stable fills, and readable text.)
Step-by-Step Process of Embroidering a Hoodie
This is the “do it in real life” section, so you can stitch confidently without guessing. Follow these steps whether you’re making one hoodie or preparing a small production run.
If you’re searching how to embroider hoodies, use this as your repeatable checklist.
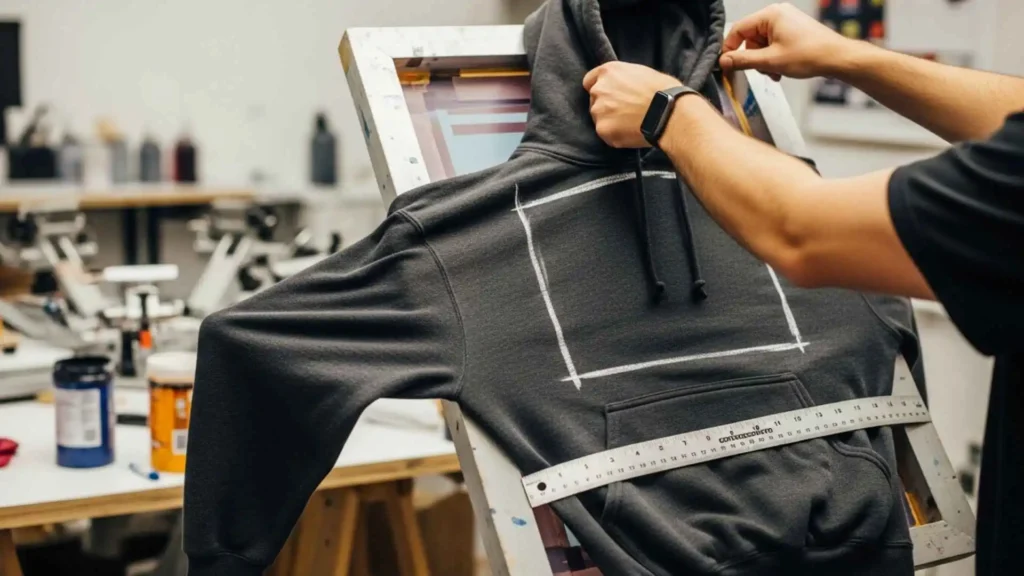
Step 1: Pre-Test Your Hoodie and Mark Placement
Pre-Test Your Hoodie and Mark Placement
Wash/press the hoodie if it will be washed later (reduces shrink surprises)
Mark placement with removable chalk or heat-erasable pen
Keep designs away from thick seams if possible
Step 2: Stabilize the Hoodie Correctly
Stabilize the Hoodie Correctly
Use cut-away backing for most fleece hoodies
Add topping if the surface is fuzzy
Don’t overstretch the fabric while hooping (that causes puckering later)
Step 3: Hoop Like a Pro (Without Distortion)
Hoop Like a Pro (Without Distortion)
Hoop only the area you need, keep fabric flat, not stretched
Use clamps or clips to keep bulk out of the needle path
Re-check alignment before stitching
Step 4: Machine Setup (Needle, Speed, Tension)
Machine Setup (Needle, Speed, Tension)
Use a needle suited for thicker knit/fleece
Reduce speed slightly for dense designs and small text
Run a quick trace to confirm the design won’t hit seams or pockets
Step 5: Stitch the Design and Watch the First 60 Seconds
Stitch the Design and Watch the First 60 Seconds
Most problems show early: thread shredding, unstable fabric, or incorrect tension. Pause, adjust, and restart cleanly rather than forcing a bad run.
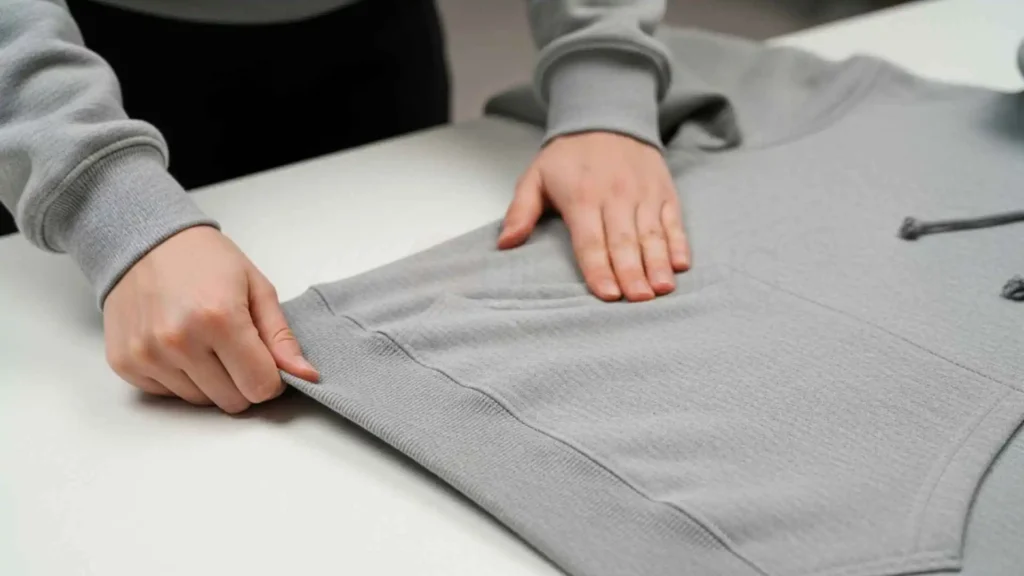
Step 6: Trim, Press, and Finish
Trim, Press, and Finish
Clip jump threads carefully
Remove topping gently
Press from the back side when possible to protect stitches
Step 7: Optional Upgrades (Monograms, Patches, and Personal Touches)
If you want premium personalization, small changes create big perceived value, like monogrammed hoodies for gifts or team merch.
(Use this workflow to make custom hoodies that look consistent, not “home-made.” And yes, this is how custom embroidered hoodies stay clean after wear and wash.)
Cost Analysis and Pricing Your Custom Hoodies
Pricing becomes easy when you separate one-time costs (digitizing) from per-unit costs (stitching + blanks). If you sell merch, knowing your real cost protects your profit.
Item
Cost per Hoodie
Scaling to 100 Units
Blank Hoodie
$15–25
$12–20
Digitizing
$20 (one-time)
$0.20
Embroidery
$5–10
$3–7
Total
$40–55
$15–27
Profit Margins: Selling at $60–100 can hit 50%+ ROI depending on blank quality, stitch count, and brand positioning.
(With proper costing, custom embroidered hoodies can be one of the most profitable apparel products because they feel premium while production stays manageable.)
Common Mistakes and Troubleshooting During Custom Emboidered Hoodies
Hoodies with embroidery are forgiving in style, but not forgiving in stitch mechanics. Here are the top failures you’ll see in real production, plus the fastest fixes.
Puckering around the design → reduce hoop tension, add better cut-away backing, avoid overstretching
Design sinks into fleece → add topping + stronger underlay, adjust density
Thread breaks too often → slow down, check needle, reduce dense overlaps, check tension
Text is unreadable → thicken columns, simplify font, enlarge slightly
Stitches look stiff like a patch → reduce density, rebalance underlay, remove unnecessary layers
Misaligned placement → mark centerline, pre-trace, stabilize bulk out of the way
Uneven fill coverage → adjust stitch angle strategy and consistent spacing
If you want a premium look of your custom embroidered hoodies without wasting blanks, troubleshoot early and test once before bulk runs.
Scaling Your Custom Embroidered Hoodies Business
Scaling isn’t just “more orders.” It’s systems: faster setup, consistent files, repeatable quality, and clear pricing. Here’s what to build if you want predictable output without burnout.
Build a Repeatable Production System
Create standard placements (left chest, sleeve, back) with templates
Make a fabric/stabilizer rule sheet for each hoodie type
Log stitch settings that work and reuse them
Quality Control That Clients Notice
Always keep a stitch-out sample photo per design
Set accept/reject rules (readability, edge quality, thread trims)
Package cleanly, embroidery feels premium, so presentation should match
Quality Control That Clients Notice
Product Ideas and Offer Strategy
Offer variations that sell well: minimalist chest marks, sleeve branding, and premium patch looks. Keep a rotating list of embroidery ideas for hoodies so you can launch quickly.
Team + Workflow Tips
If you outsource some steps, define your file naming, revision rules, and delivery checklists. This is how an embroidery hoodie business stays consistent as volume grows.
(When your workflow is stable, custom embroidered hoodies can scale smoothly from side hustle to real brand revenue.)
2026 Trends and Advanced Tips for Hoodie Embroidery
Trends matter because they influence what customers buy, and what looks premium right now. Use these upgrades to stand out, reduce returns, and increase perceived value.
2026 Trends and Advanced Tips for Hoodie Embroidery
What’s Hot in 2026
Clean minimal marks, tone-on-tone stitching, and premium placement balance
Higher demand for truly personalized hoodies (names, initials, small custom elements)
“Patch look” merch that feels collectible and durable
Advanced Execution Tips
Use controlled density to keep fleece soft
Plan stitches for wear (hood friction, washing, backpack rubbing)
Build a repeatable method for hoodie logo embroidery so branding stays consistent across sizes
Patch and Mixed-Style Looks
A popular premium style is patch embroidery on hoodies because it creates a bold, structured look without over-stiffening the garment.
Digitizing That Matches 2026 Expectations
Today’s buyers zoom in on close-up product photos. Clean edges and smooth fills matter more than ever, which is why hoodie digitizing for embroidery needs real testing, not only auto-digitizing previews.
Conclusion
You now have a complete workflow to design, digitize, and stitch hoodies with clean placement, stable fabric control, and professional finishing, so your results look premium, not experimental. When quality matters, custom embroidered hoodies succeed or fail based on digitizing accuracy, stitch planning, and the right stabilizer/thread setup for thick fabric.
And here’s the truth: even with a great machine, the best results depend on professional digitizing. That’s where digitizing services save you time, reduce mistakes, and help you hit consistent quality for every order.
ZDigitizing provides professional embroidery digitizing services with 10+ years of experience, an expert digitizing team, a 24/7 working team, and 24/7 customer support. Quality is guaranteed, you get a preview before payment, minor edits are free, prices are already lower than the market, and you get 50% OFF on your first order.
Visit ZDigitizing today, place your first order, claim 50% OFF, and experience premium digitizing quality that makes your custom embroidered hoodies look sharp, clean, and ready to sell.
Are you looking for embroidery digitizing and vector art services at low cost with superfast turnaround, guarranted quality and preview before pay? So, you are at right place. We can digitize and vectorize any type of artwork in your required file format.