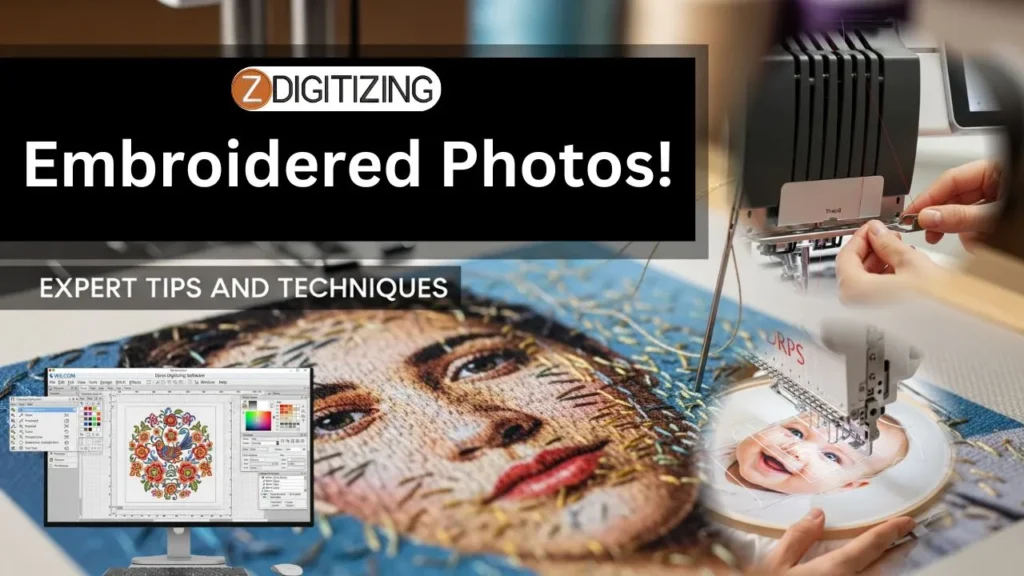
Everyone has that one photo that means the world to them. What if you could stitch it forever? With embroidered photographs, you can transform any picture into a textured keepsake that lasts a lifetime. But to make it truly stand out, you need three things: a perfect picture, high-quality digitizing, and flawless embroidery.
In this article, you’ll learn how professionals combine all three to create realistic, durable embroidered artwork that never fades with time.
How to Create Embroidered Photographs: Expert Tips and Techniques
What Are Embroidered Photographs?
So before we jump into the process, let’s get one thing clear: what exactly are they?
Simply put, it’s when you take a normal photo and turn it into an embroidery using thread, fabric, and your machine. Each stitch works like a pixel, bringing your image to life with texture and depth that a flat picture can’t match.
When done right, this becomes realistic photo embroidery, where your stitched photo looks almost real, but with that beautiful, handmade touch that makes it truly one of a kind.
Choosing the Right Photo Before You Start Embroidery
Before you jump into stitching, the first thing to check is your photo itself, because not every image is perfect for embroidery. Some pictures have too many tiny details or busy backgrounds that don’t translate well into stitches.
For custom photo embroidery or 3D embroidery photos, always choose images with good lighting, clear outlines, and strong contrast. This helps your design look clean, defined, and realistic once it’s stitched.
And if your favorite picture doesn’t meet these conditions, no problem!
You can easily prepare it before digitizing. Try cropping it to focus on the main subject, adjusting brightness or contrast, and removing unnecessary background elements.
These little edits can completely change how your photographs turn out. Remember, the better your image preparation, the smoother your machine runs and the more beautiful your final embroidered images will look.

What You Need Before Starting Embroidered Photographs?
Now that your photo is selected, it’s time to prep your workstation! Getting everything ready beforehand saves time and prevents mistakes later.
A clean setup ensures your embroidery photo conversion turns out exactly how you imagined, neat, colorful, and realistic.
Here’s what to keep on hand:
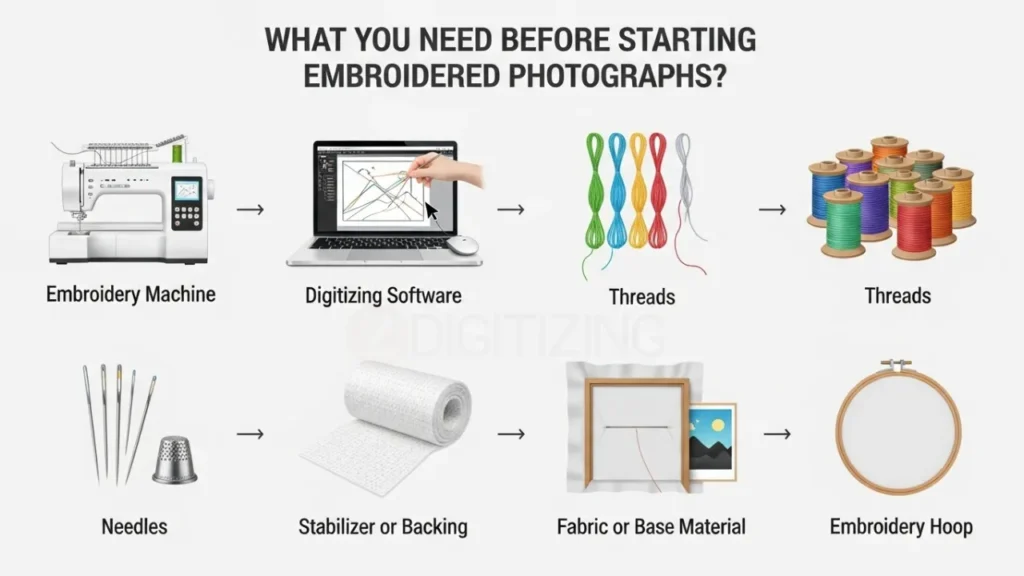
- Embroidery Machine
- Digitizing Software
- Threads
- Needles
- Stabilizer or Backing
- Fabric or Base Material
- Embroidery Hoop
1. Embroidery Machine
In the market, you’ll find both single-needle and multi-needle embroidery machines. For photo embroidery, a multi-needle machine is usually the better option because it allows multiple thread colors to run automatically, keeping shading and gradients smooth without stopping for color changes.
If you’re a beginner or working on smaller projects, a single-needle machine still works great; it just needs a bit more time since you’ll change threads manually.
Machines like the Brother SE1900 or Janome Memory Craft 500E are popular starting choices. For professionals who want faster, high-precision results, the Brother PR1055X or the Baby Lock Venture are excellent picks.
2. Digitizing Software
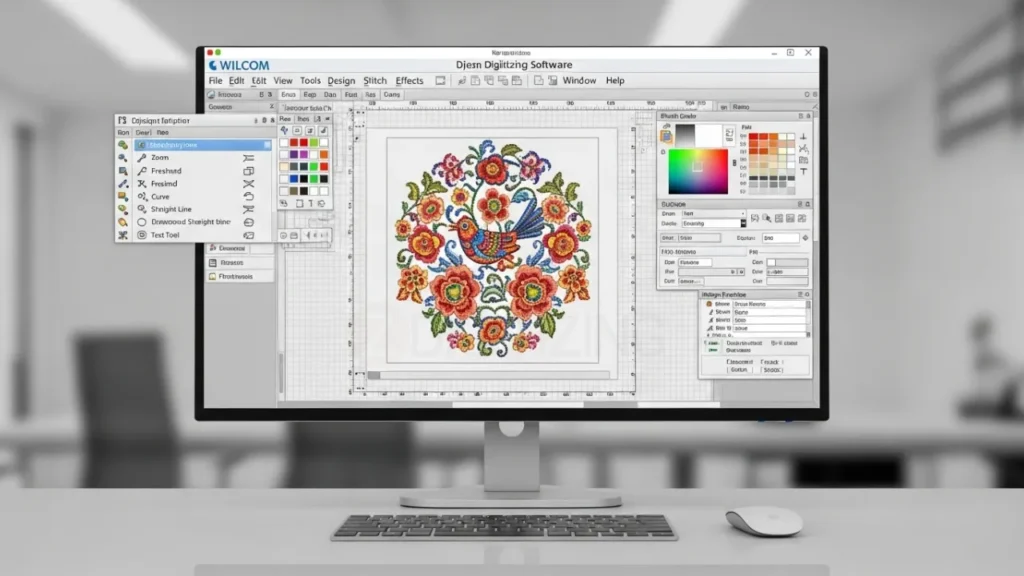
Once you’ve got your machine, you’ll need reliable embroidery software for photo digitizing to convert your photo into a stitch file. This process, known as photo digitizing, tells your machine exactly where and how to place each stitch for the best results.
For beginners, free software options like SewArt (trial version) and Ink/Stitch (Inkscape plugin) are great places to start. They’re simple, easy to understand, and perfect for small designs.
If you’re ready to invest and want professional results, here are some paid options worth considering:
- Wilcom Hatch – Known for its realistic shading and layering features
- Brother PE-Design 11 – Best for Brother machine users
- Embird Studio – Great balance between usability and precision
- Chroma Inspire or Luxe – Perfect for detailed portraits and logo conversions
If you don’t want to invest in expensive software or spend hours learning how to use it, the best option is to simply outsource your digitizing. It’s faster, more reliable, and delivers professional results without the struggle.
At ZDigitizing, we have a skilled team of experts who convert real photos into precise, high-quality embroidery files, with perfect stitch density, smooth color blending, and clean detailing. It’s a smart, time-saving choice that ensures your design looks flawless right from the start.
You can easily place your order at ZDigitizing.com and get your photo digitized by professionals at a very affordable price!
3. Threads
Thread choice affects the final look more than you might think. Always go for high-quality polyester threads; they’re strong, colorfast, and don’t fade easily. For softer, shinier finishes (especially in portraits or wall pieces), you can try rayon threads.
Keep a mix of light, medium, and dark shades in every color you use. This blending helps you achieve the smooth gradients that make custom embroidered photographs look lifelike and professional.
4. Needles
Your needle should match your fabric and stitch density.
- For thin fabrics, use 70/10 or 75/11.
- For thicker fabric or dense designs, go for 80/12.
Always use sharp embroidery needles (not ballpoints), since photo stitching requires clean punctures for accurate details.
5. Stabilizer or Backing
A stabilizer is the foundation of your design; it keeps the fabric from stretching, puckering, or moving. For embroidered photographs, a medium-weight cutaway stabilizer is ideal. It holds up dense stitches well and keeps your design crisp.
If your fabric is stretchy or delicate, use an extra tear-away layer for added stability.
6. Fabric or Base Material
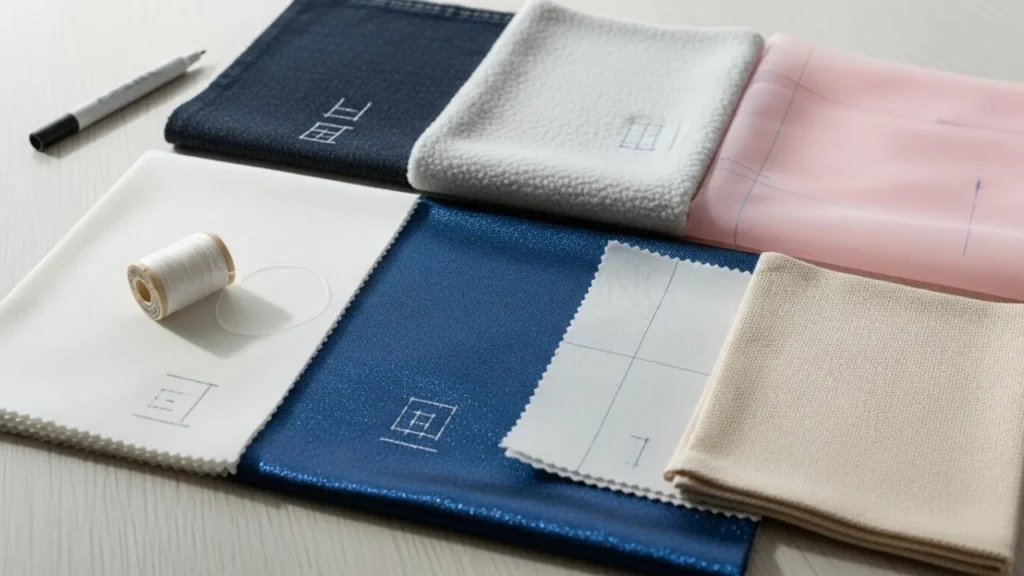
Your choice of fabric will influence the look and durability of your project.
- Cotton or linen: great for beginners, easy to hoop and stitch.
- Canvas or twill: perfect for detailed portraits and denser stitching.
- Printable fabric sheets: best for creative, mixed-style projects.
Choose lighter-colored fabric for clear color visibility and sharper stitch contrast.
7. Embroidery Hoop
A good hoop keeps your fabric tight and stable. Regular hoops work fine, but magnetic hoops are a better option for photo embroidery; they’re easier to adjust, prevent creasing, and hold thick materials securely.
Popular magnetic options like Durkee or Mighty Hoop save time and reduce the risk of shifting during stitching.
Step-by-Step Process for Embroidered Photographs
Now that your photo is digitized and everything is set, fabric, stabilizer, and hoop, it’s time to actually start the photo embroidery design process. This is where all your preparation turns into results.
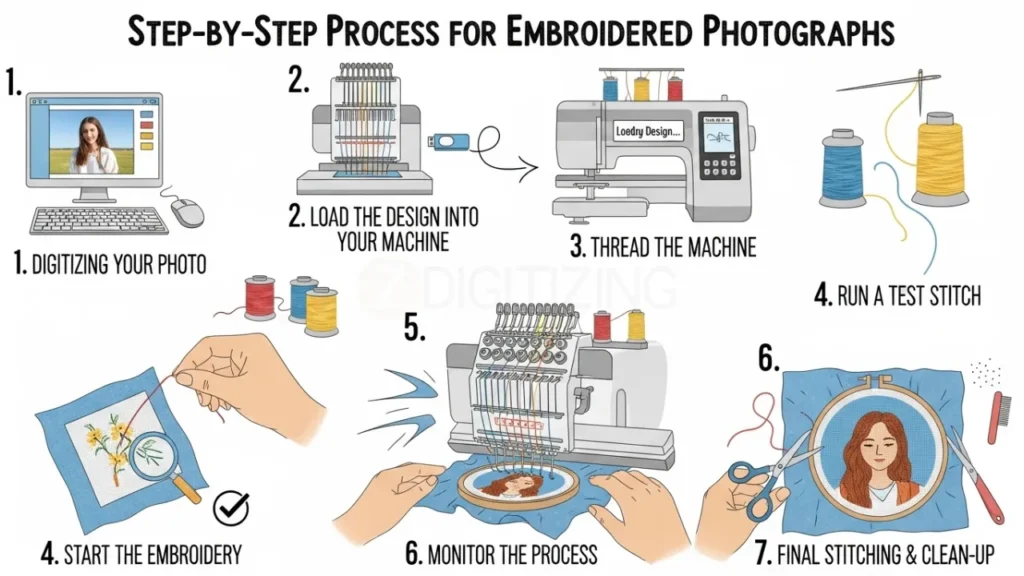
Follow these steps carefully to get clean, realistic, and professional embroidery.
- Digitizing Your Photo
- Load the Design into Your Machine
- Thread the Machine
- Run a Test Stitch
- Start the Embroidery
- Monitor the Process
- Final Stitching & Clean-Up
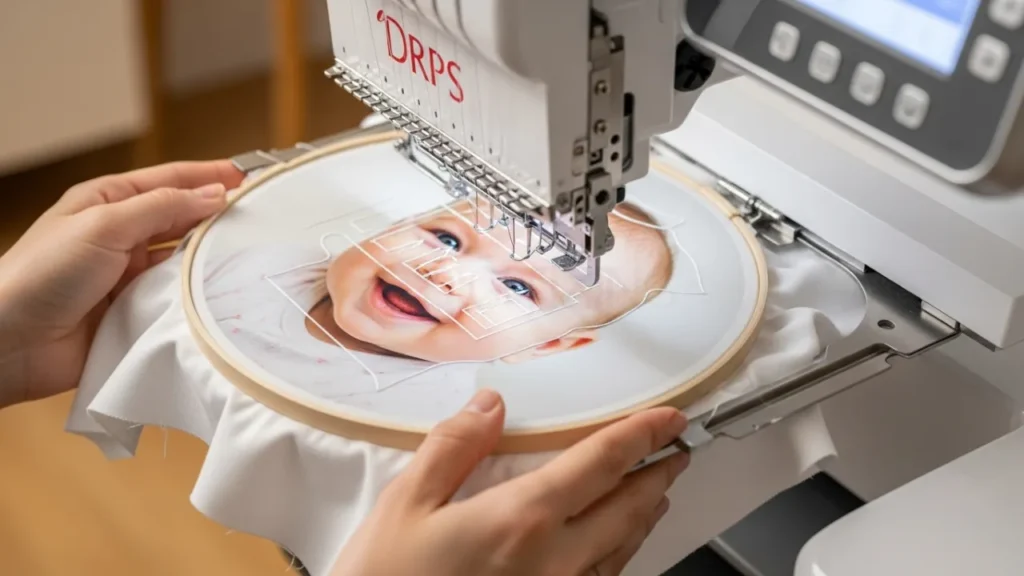
Step 1: Digitizing Your Photo
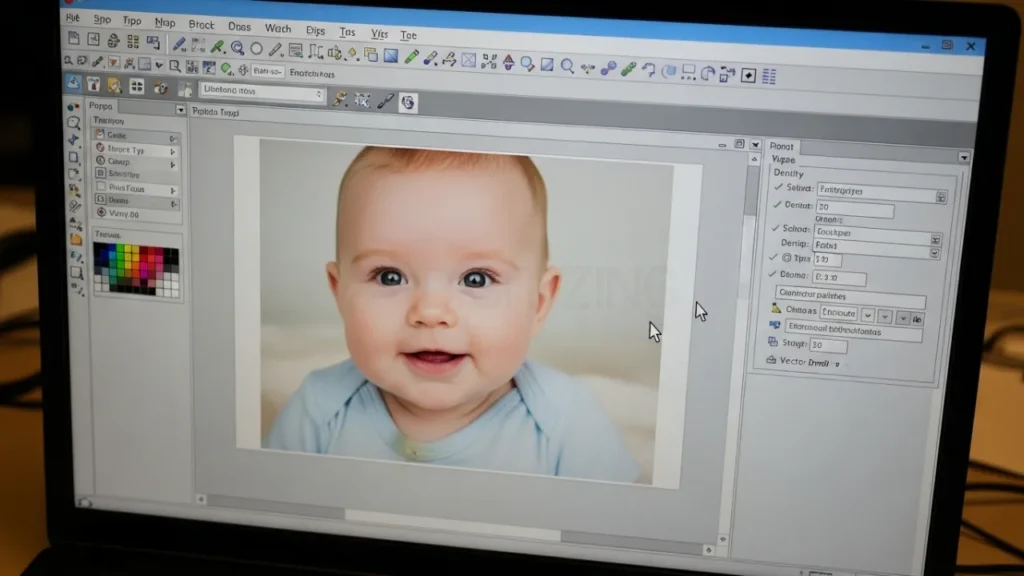
Once you’ve selected and prepared your photo, the first real step is to digitize it, which means converting your image into a stitch file that your embroidery machine can read.
To do this, you’ll need digitizing software like Wilcom Hatch, Brother PE-Design 11, or Embird Studio. If you’re a beginner and want something easier, try SewArt or Ink/Stitch (they’re simple and budget-friendly).
When setting up your design inside the software, follow these recommended settings for photo embroidery design:
- Stitch type: Use fill stitches for most areas; satin stitches only for small outlines.
- Stitch density: Between 0.40 mm – 0.45 mm gives smooth coverage without over-perforating the fabric.
- Stitch length: Around 2.5 mm – 3.0 mm works best for natural gradients.
- Underlay: Light edge-run plus zig-zag to stabilize the base.
- Direction: Alternate stitch angles (45° and 135°) in layered fills to create realistic shading.
- Pull compensation: Keep between 0.15 mm – 0.25 mm to prevent gaps.
Once everything looks good, preview your design in 3D mode to check flow and layering. Then export your stitch file in DST, PES, or EXP format. This completes converting photos to embroidery files.
💡 Pro Tip: If you don’t want to deal with these technical settings, outsource your embroidery digitizing for photographs to professionals at ZDigitizing.com. Our expert team digitizes photos with perfect color blending, depth, and detail, ready to stitch flawlessly on your machine.
Step 2: Load the Design into Your Machine

Transfer your digitized file into your embroidery machine using a USB or direct cable. Check that your design fits properly inside the hoop and aligns with your chosen fabric.
Step 3: Thread the Machine
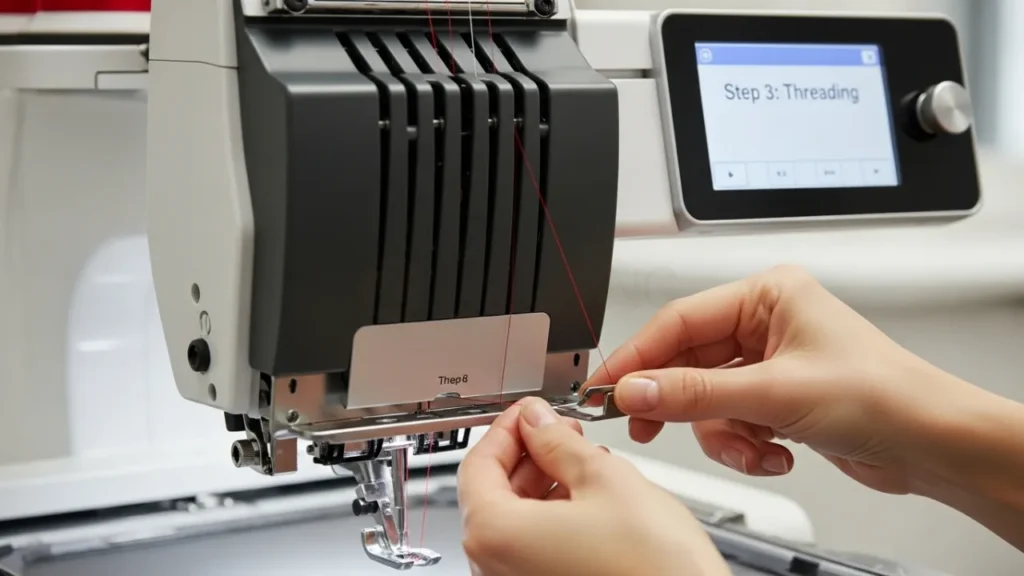
Set up your threads in the exact color sequence of your design. For embroidered photographs, high-quality polyester threads are best because they’re strong, shiny, and hold color beautifully.
Step 4: Run a Test Stitch
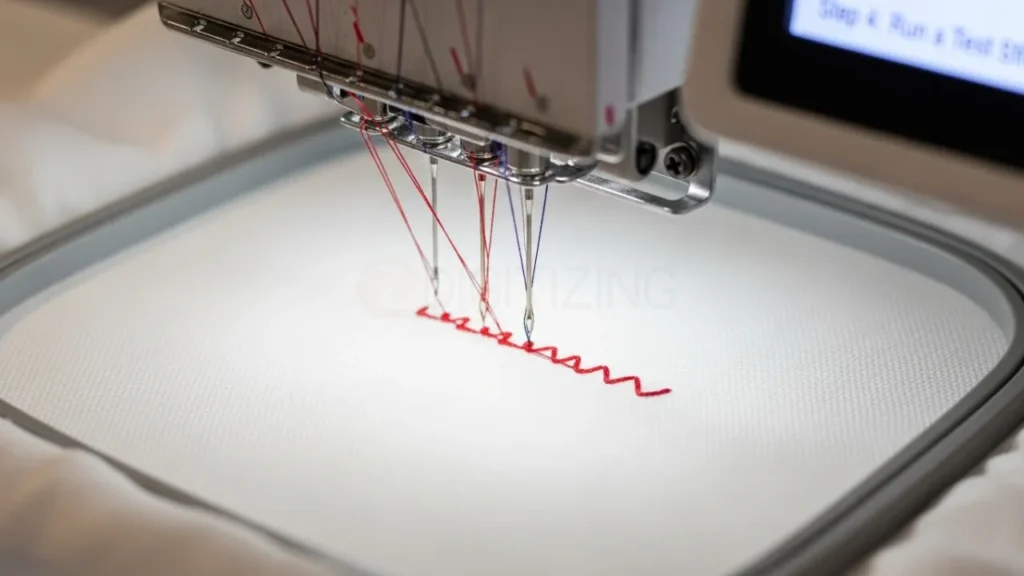
Before starting the final piece, always run a test stitch on scrap fabric. It helps verify color accuracy, stitch density, and machine tension, small adjustments here prevent major mistakes later.
Step 5: Start the Embroidery
Begin stitching slowly. Observe the first few passes, base fills, outlines, and gradient layers. Once everything looks smooth, increase the speed slightly.
Step 6: Monitor the Process
Keep an eye on your thread movement and needle area. If you notice skipped stitches or fabric shifting, pause immediately and re-adjust. Continuous checking keeps the final design perfectly aligned.
Step 7: Final Stitching & Clean-Up
After stitching finishes, remove the hoop carefully. Trim extra threads, remove stabilizer from the back, and lightly press with a warm iron (using a pressing cloth). Your photo embroidery are now complete, textured, realistic, and ready to frame or gift!
Pro Tips and Techniques for Perfect Embroidered Photographs
Now that you know the full process, let’s talk about the little secrets that take your work from “good” to “wow.”
These extra steps help you achieve smoother shading, sharper details, and longer-lasting results for your embroidered photographs.
- Use color blending threads: Combine two close shades in the same needle run for natural gradient transitions, especially in skin tones or sky areas.
- Work in layers: Instead of high-density stitching in one pass, create two lighter fill layers at different angles, it adds depth and reduces puckering.
- Always test your thread palette: Run small swatches before final embroidery to confirm how colors look under stitching (not just on-screen).
- Use a water-soluble topping: When stitching on textured fabric, this keeps the top surface flat and details crisp.
- Clean your bobbin area often: Dust buildup affects tension and can cause uneven stitches.
- Slow down for detail zones: Lower your machine speed when working on eyes, text, or facial features; precision matters more than speed here.
- Trim jump threads immediately: It keeps your design neat and avoids snagging during the next color changes.
- Cool down your fabric before framing: Let it rest for 15–20 minutes after pressing so it settles naturally without distortion.
- Document your settings: Keep a small log of density, stitch length, and thread colors for future photo designs. It saves time and ensures consistent results next time.
- Store embroidered pieces flat: Rolling or folding can crease the threads and reduce the 3D texture of your final embroidery.
Conclusion
So now you’ve learned the complete step-by-step process of creating embroidered photographs, from digitizing your image to the final stitched masterpiece. Hopefully, you now have a clear understanding of how it all comes together and why digitizing plays the biggest role in achieving beautiful results.
We strongly recommend outsourcing your digitizing for the best outcome because professional expertise can make a huge difference in quality.
If you choose ZDigitizing, you’re in safe hands. Our expert team knows exactly how to digitize real photos with perfect detailing, smooth shading, and guaranteed quality. We also offer super-fast turnaround time and 24/7 support, so even urgent edits or rush orders are handled smoothly.
ORDER NOW and Get 50% Off on your first digitizing order to test our quality at half price, with fast, affordable, and reliable service you can trust!
FAQs
You can turn an image into an embroidery design by using digitizing software that converts your photo into stitch data your embroidery machine can read. The process involves tracing, assigning stitch types, and setting density for each area.
Yes, you can embroider a photograph by first digitizing it into a stitch file and then using an embroidery machine to stitch the design on fabric, creating realistic texture and depth.
Popular programs include Wilcom Hatch, Brother PE-Design 11, and Embird Studio, all designed to handle detailed photo-to-stitch conversions accurately.
Use a solid outline, simplified colors, and bold stitching in your digitizing software, then stitch on twill or felt fabric with a clean border to create a patch effect.
Yes, you can use printable fabric sheets or special transfer paper to print photos directly onto fabric before adding embroidery details for a creative mix of print and thread.
Free tools like SewArt (trial) and Ink/Stitch allow basic photo digitizing, where you can convert images into stitch files without paid subscriptions.
Yes, Ink/Stitch and SophieSew are good free options that provide essential tools for beginners to create and edit embroidery designs.
Not directly, Photoshop can edit and clean images before digitizing, but you’ll still need embroidery-specific software to convert them into stitch files.


