Have you ever tried felt embroidery and ended up with puckering, loose threads, or uneven stitches? You’re not alone! Many beginners think embroidery felt is easy to work with because it’s thick and firm, but that’s exactly where simple mistakes can happen.
Before You Try Felt Embroidery, Read This First!
Before you begin, here are a few things you should think about:
- Are you choosing the right type of felt?
- Should you use a stabilizer or not?
- What needle size works best for felt?
- Is your design too detailed for the fabric?
- Which thread should you use for cleaner results?
- How should you hoop the felt without stretching it?
These questions matter whether you’re using felt embroidery kits or creating your own custom piece. In this blog, we’ll break down all these important points in a clear, step-by-step way, so you can start embroidering on felt with confidence. Let’s dive in!

Are You Using the Right Type of Felt?
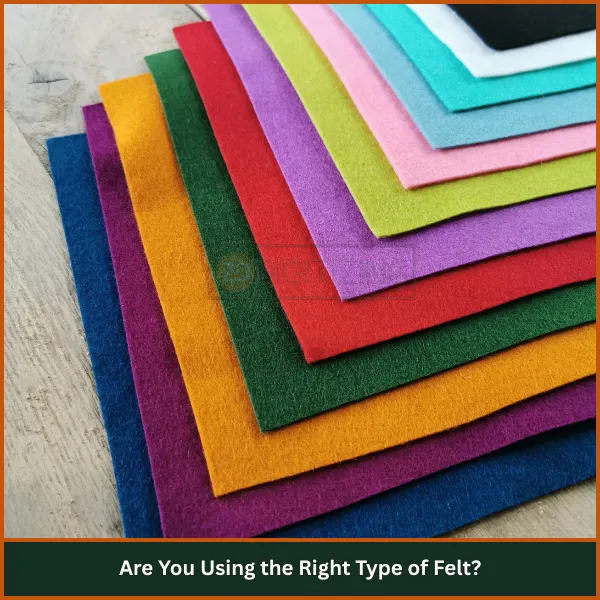
Choosing the right felt is one of the most important steps in felt embroidery. Many beginners think all felt is the same but that’s not true.
Some types are soft and easy to work with, while others may be too thin, too rough, or not strong enough for stitching.
The three main types used for embroidery felt fabric are acrylic felt, wool felt, and blended felt.
Here’s a quick comparison to help you understand them:
Felt Type | Characteristics | Pros | Cons |
Acrylic Felt | Made from synthetic fibers, slightly stiff | Cheap, colorful, easy to find | Pills easily, not strong for dense stitching |
Wool Felt | Natural fiber, dense and smooth | Strong, neat stitches, long-lasting | Expensive, limited colors |
Blended Felt | Mix of wool and synthetic | Good quality at a lower price | Texture can vary, not as durable as wool |
So, which felt should you actually use?
Wool felt is the best choice for most embroidery projects. It’s strong, stitches smoothly, and gives a clean, professional look. If you’re on a budget, blended felt is a good second option better than acrylic but cheaper than full wool.
Avoid acrylic felt if possible, especially for detailed or long-lasting projects. It tends to stretch and pill, which can ruin your design.
If you’re just starting out, try wool felt for the best experience. It may cost more, but it will save you from a lot of common beginner mistakes.
Should You Use a Stabilizer or Not?
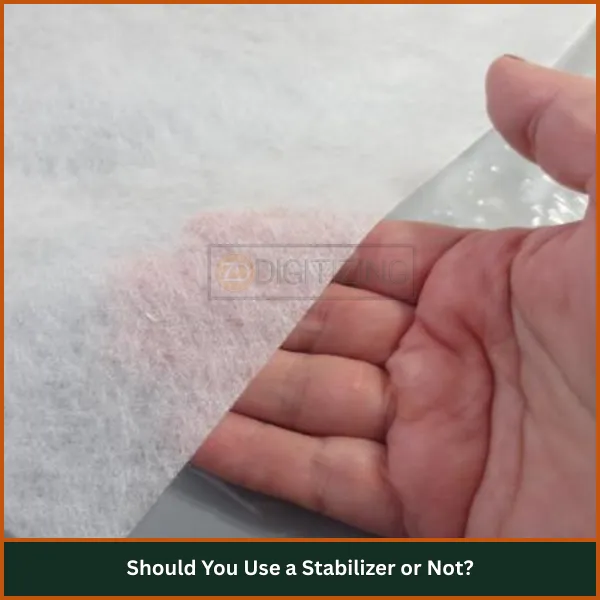
Since felt is already thick and stable, many beginners in felt embroidery wonder if a stabilizer is even necessary. The short answer is: it depends on your design.
If you’re working on a simple or lightweight design, especially on thick, high-quality felt, you can often skip the stabilizer without any issues. Felt doesn’t fray and holds stitches better than many other fabrics, which makes it a forgiving choice for beginners.
However, there are situations where a stabilizer really helps. If you’re using a dense stitch design, working with layered pieces, or having trouble hooping evenly, a stabilizer can prevent puckering and shifting during stitching. It’s also helpful when doing embroidery on felt that’s thinner or softer than usual.
For most felt machine embroidery projects, a medium weight tear away stabilizer is the best choice. It’s easy to use and provides just enough support without making the fabric too stiff.
Helpful Tip: If your felt is thick and your design isn’t too detailed, you can usually skip the stabilizer. But for best results especially with larger or dense patterns using one is a smart move.
Which Needle Size Is Best for Felt?
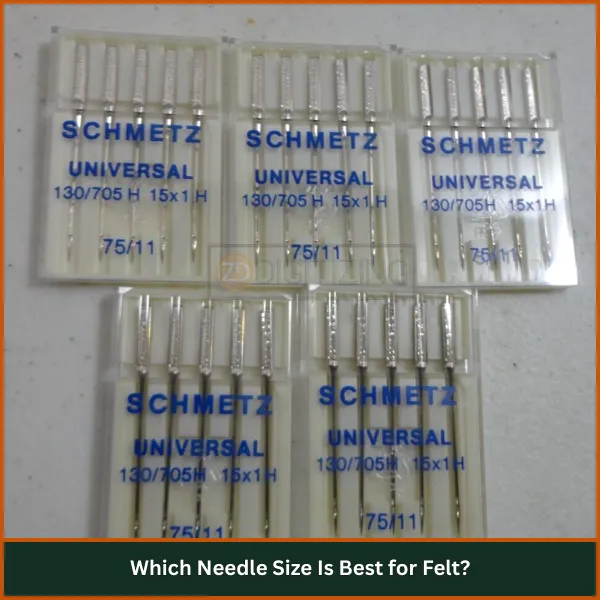
Using the right needle size is key to getting clean, smooth stitches for embroidery on felt. It is thicker than regular fabric, so using the wrong needle can lead to problems like tearing the felt, breaking the thread, or uneven stitching.
For machine embroidery on felt, the best needle sizes are 75/11 or 80/12 embroidery needles. These needles are sharp and strong enough to pass through thick felt without causing damage, but still fine enough to give neat, accurate stitches.
If you use a needle that’s too thin, like 70/10, it might bend or break while stitching. On the other hand, a needle that’s too thick such as 90/14 can leave large holes in the felt or distort the design, especially on small details.
Here’s a simple rule: If you’re unsure, start with a 75/11 embroidery needle it works well with most felt types and designs.
Also, make sure to use good-quality needles made for embroidery, not regular sewing needles. They have a smoother eye and sharper point, which helps when stitching through embroidered felt projects.
Is Your Design Too Detailed for the Fabric?
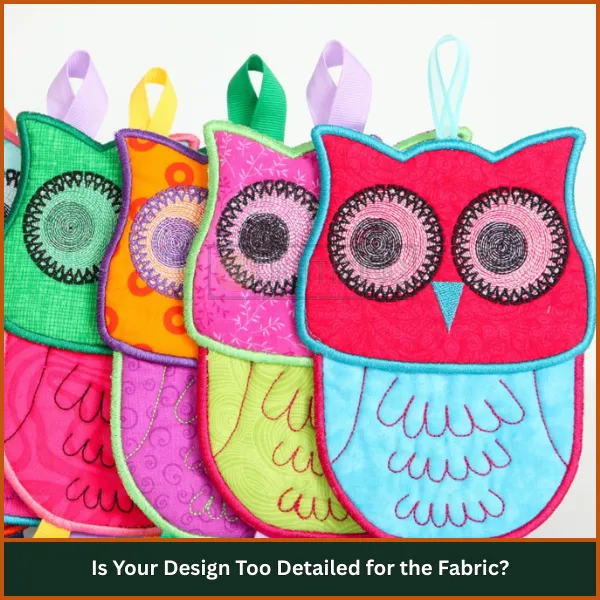
Felt may look sturdy, but it doesn’t always handle tiny details well especially if the design is too dense or not properly digitized. Intricate elements like small text, fine lines, or heavy fill areas can lead to thread bunching, skipped stitches, or puckering.
Tip: For best results on felt, use bold, open designs with clean lines and enough spacing.
At ZDigitizing, we specialize in converting your artwork into high-quality embroidery files that are perfectly adjusted for felt.
Whether you choose a detailed design or a simple one, we’ll optimize the stitch type, density, and layout to suit the fabric ensuring clean, smooth stitching every time.
Send us your design, and we’ll make it machine-ready with guaranteed professional results perfect for felt embroidery projects.
Which Thread Should You Use for Cleaner Results?

Thread choice plays a big role in how your felt embroidery turns out. The right thread gives you smooth stitching, better durability, and a cleaner finish without fuzz or fraying on the felt surface.
The best option for felt is polyester embroidery thread. It’s strong, colorfast, and glides smoothly through thick felt without breaking. Rayon thread is also a good pick if you want a bit of shine, though it’s slightly less durable than polyester.
Cotton thread, on the other hand, isn’t ideal for felted embroidery. It can break more easily and may not look as neat on textured felt, especially with detailed designs.
Tip: For best results, use high-quality 40 wt polyester embroidery thread it handles dense stitches well and keeps your embroidery looking clean and vibrant on felt.
How Should You Hoop the Felt Without Stretching It?
Hooping felt can be a bit tricky. If you pull it too tightly, it may stretch or get crushed, ruining the look of your stitches. Unlike regular fabric, felt doesn’t bounce back easily—once it’s misshaped, it stays that way.

Here’s how to hoop it correctly:
- Lay your felt flat on top of your stabilizer.
- Place the inner hoop under the stabilizer and felt.
- Gently press the outer hoop down without pulling or stretching the felt.
- Adjust it so it’s smooth, but not tight. It should lay flat—not stretched like a drum.
If hooping feels difficult, especially with thick or stiff felt, try the floating method.
In this embroidery technique, you hoop only the stabilizer and then place the felt on top. Use a temporary adhesive spray or a sticky stabilizer to keep the felt in place. This method is great for delicate or small items.
For most designs, a 4″x4″ or 5″x7″ hoop works well. Always choose the smallest hoop that fits your design to keep things stable.
With the right technique, you’ll get smooth stitching without damaging your embroidery felt.
Extra Tips for Cleaner Results of Felt Embroidery
Here are some extra tips that can make a big difference when working with embroidery felt:
- Use the smallest hoop possible for your design. This keeps the fabric more stable and reduces shifting during stitching.
- Avoid overstretching the felt while hooping. It should be smooth and flat, not pulled tight like regular fabric.
- Trim excess threads as you go, especially between lettering or small details. This prevents bulky layers and keeps your design neat.
- Adjust stitch density in your design software or ask your digitizer to lighten it for felt. Too many stitches can cause bunching or warping.
- Do a test stitch on a scrap piece of felt before running the final design. This helps you spot issues early and save material.
- Clean your needle and machine regularly. Felt can create tiny fibers that collect in the bobbin area and cause tension issues.
These small changes can have a big impact on the final look of your project. With the right materials and a few smart habits, your felt embroidery will come out looking clean, sharp, and ready to show off.
Conclusion
Felt embroidery doesn’t have to be complicated or messy. If you’ve made it this far, you now understand the essentials, from picking the right type of felt and knowing when stabilizers are needed, to choosing the correct needle, thread, and hooping technique. These small choices matter a lot, and when done right, they help you achieve that smooth, clean finish you’re aiming for, even if you’re just starting out.
But let’s be honest, no matter how careful you are, a design that isn’t properly digitized for felt can still give you trouble. That’s where we come in.
At ZDigitizing, we specialize in preparing embroidery files that are perfectly optimized for felt. Whether your design is detailed or simple, we make sure every stitch counts. Our files are clean, easy to run, and made to reduce thread breaks, pull, or distortion. We support all machine formats and deliver fast, so you don’t waste time fixing things.
If you truly want your felt embroidery to look neat, polished, and even affordable, we’re here to help. We offer 50% OFF on your first custom embroidery file, and if you have bulk orders, you’ll get even more savings. That’s our way of making sure your embroidery journey feels smooth from the start.
Order now and let ZDigitizing turn your felt design into a perfectly stitched masterpiece!
FAQs
Yes, using a stabilizer is important, especially for machine embroidery on felt. Even though felt is naturally firm, a medium-weight tear-away stabilizer works great for most designs. If your design is dense or large, a cut-away stabilizer gives better support. For soft or plush felt, using a water-soluble topper helps keep the stitches from sinking into the surface.
Not at all! Felt is one of the easiest materials to embroider. Its stiff texture makes it stable, which means you can even do hand embroidery without a hoop. For machine embroidery, just make sure to use a hoop and stabilizer to keep it from moving while stitching.
To transfer a design, print it out and place tracing paper over the top. Trace the design with a pencil, pin the tracing paper onto your felt, and stitch through both layers. When you’re done, gently tear away the paper. Any leftover bits under the stitches can be pulled out carefully.
Wool felt is the best choice, it has a smooth finish, crisp edges, and is strong enough for clean stitching. Wool-blend felt is also a good option and often more affordable. Acrylic felt is less ideal because it’s stiffer, pills easily, and doesn’t handle stitch
For fleece, a water-soluble topper like Sulky Solvy works best to keep stitches from sinking into the soft surface. Depending on your design, you can also use tear-away or cut-away stabilizers. It’s a good idea to hoop the stabilizer and use a temporary spray adhesive to secure the fleece before stitching.
Puckering usually means your stabilizer isn’t strong enough for your stitch density. Try using a fusible backing or switch to a heavier stabilizer that gives more support. Also, make sure the felt and stabilizer are hooped tightly together without stretching the felt.
Yes, but gently! Hand wash only using cold water and mild soap. Avoid harsh rubbing or machine washing, as felt can shrink or lose its shape. For most cases, spot cleaning is the safest way to keep your embroidered felt looking nice.
You can sometimes reuse felt if you carefully remove the stitches, but it might leave holes or damage. For best results, especially on final pieces or gifts, it’s better to start with a fresh piece of felt.