In this article I will be sharing some easy steps on how to convert the tatami design to satin in wilcom software in a proper way.
How To Convert Tatami Design To Satin Properly
Convert Tatami Design To Stain In Wilcom Software:
Step 1:
Open your Wilcom application and import your required design file.
Step 2:
After you have imported your Tatami design file you can easily convert it into Satin.
From the toolbar menu, you can choose the “Satin” option and it will be applied to your design, but make sure you select your design in order to apply that the Satin effect.
Step 3:
Now that you have successfully converted your Tatami design file into Satin, but your concern to convert the file does not end here.
Because if you just try to run the file like this into your embroidery machine, then it might not give you good results.
So, let us guide you through how you can achieve the premium results.
Embroidery Digitizing
&
Vector Art Services
Are you looking for embroidery digitizing and vector art services at low cost with superfast turnaround, guaranteed quality and preview before pay? So, you are at right place. We can digitize and vectorize any type of artwork in your required file format.
The Proper Way Of Doing It
Step 1:
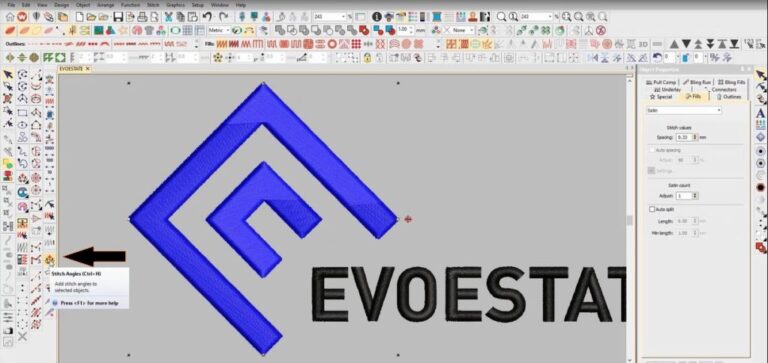
Select your design and from the menu bar, click on “Stitch Angle” or you can press (Ctrl + H) as the shortcut key.
Step 2:
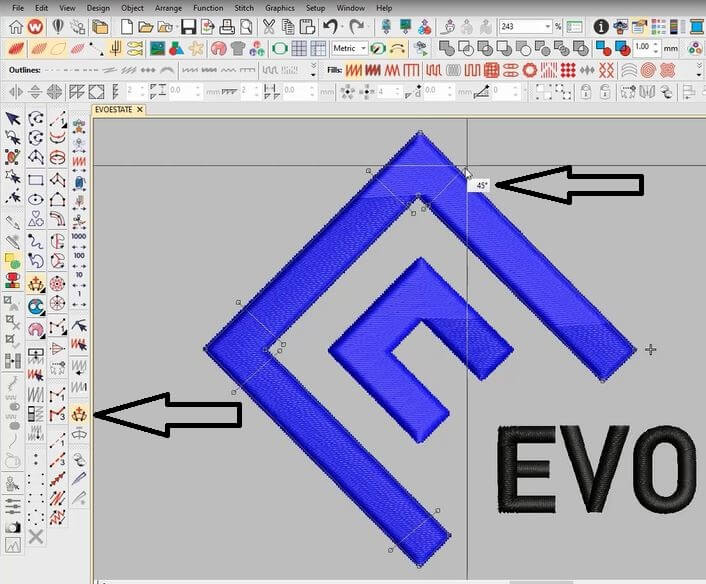
After you get into Stitch angle mode, start making angles on your object, the corners should have a 90-degree angle, based on your design mark the right angels and press enter.
Step 3:
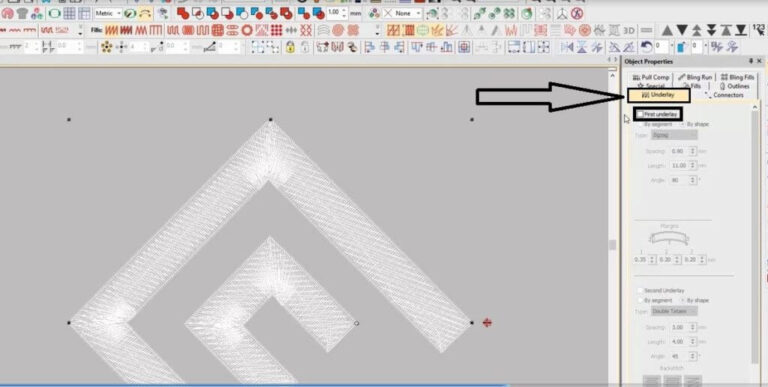
Note: We should not have Tatami underlay in our Satin design, so we must eliminate it.
To remove the Tatami underlay, simply go to the property window on the right side, and from the “underlay” tab uncheck the “First underlay” checkbox.
Step 4:
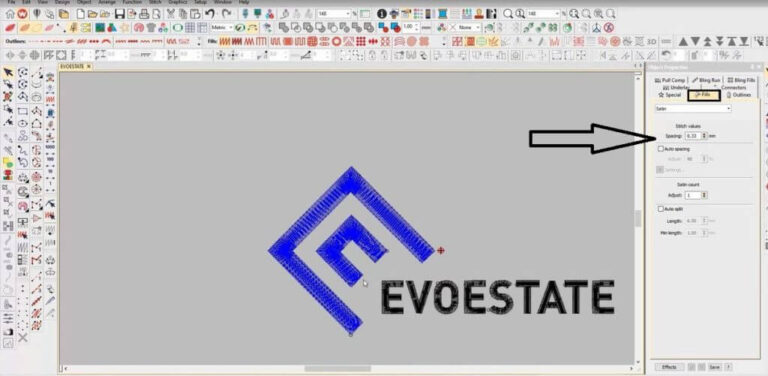
Stitch spacing value is an important factor while converting the Tatami design into Satin.
So, always make sure to set the right stitch spacing value, just click on the “Fills” tab under the property window, and enter your required value.
And that is about it, you have successfully converted your Tatami design into Satin properly.
Now you can run your design file into the embroidery machine. Just make sure to save your file and you are ready to go.
Hope it will be helpful for you guys!
Do you Need digitizing service for your embroidery machine, With super fast turnaround and excellent quality.
How to add embroidery outline border around the tatami object
Frequently Asked Questions
Tatami stitch is usually used for bigger areas to fill in an embroidery pattern, which often would be the background for the lettering or other objects in the design. Generally, this would need an even stitch pattern, with a regular arrangement of stitch diffusions between two rows. Though tatami stitch could be so much more than a backing by changing several properties. Tatami stitch consists of rows of run stitches and is appropriate for filling huge, irregular shapes.
Wilcom is used for digitizing. With new technical and creative stitching effects, even quicker digitizing, and about 226 expert embroidery fonts, you can digitize more creative advanced designs rapidly with complete expert control. Wilcom software is the number one choice for digitizers and companies that offer digitizing services. You can use Wilcom software for thirty days as a trial. Unlimited use of all the outstanding features – Wilcom embroidery designing software, professional embroidery, and apparel decoration design software!
Follow these steps to reduce stitches in Wilcom: Use stitch effects > shortening to lessen stitch bunching in tight curves by lessening a few stitches on the inner edge. Click right to adjust stitch lessening settings. Apply stitch lessening to sharp corners to lessen density on the inner edge. Default settings suit most designs.
Follow these steps to change stitch direction in Wilcom: Use edit > reverse > reverse curves to reverse stitch direction in vector or close embroidery objects. Stitching direction could affect the quality of embroidery because of the push and pull effect. The reverse curves command lets you control the push and pull effect by reversing the direction of the stitch.


