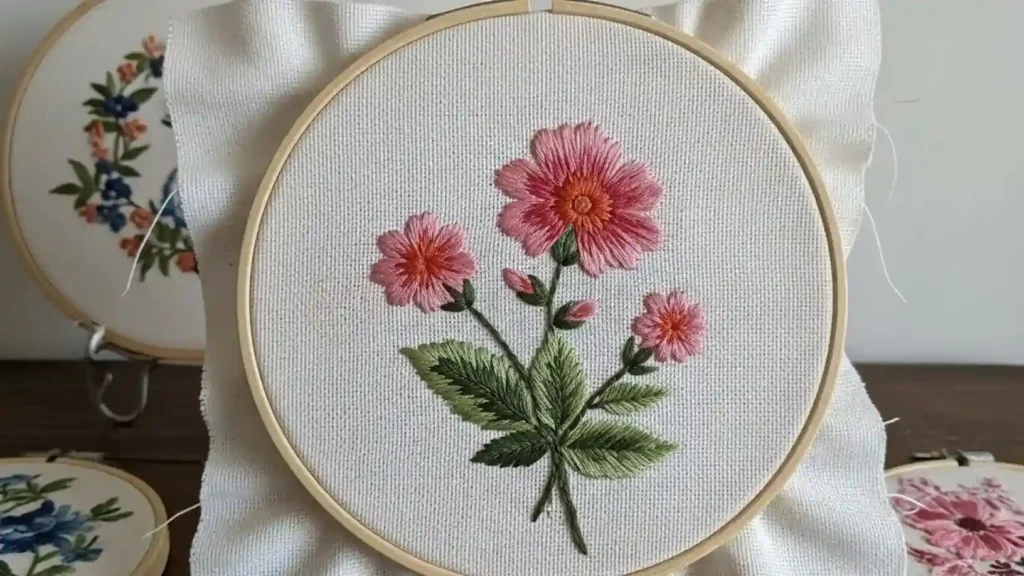
You’ve poured hours into your embroidery design, but now the back looks messy with loose threads everywhere. What if you could learn how to finish embroidery hoop neatly in just 10 minutes? Finishing an embroidery hoop with a running stitch hides those threads, secures the fabric, and turns your work into a display-ready piece. This guide shows beginners exactly how to finish a hoop using simple tools like a needle, thread, and felt.

You’ll get step-by-step instructions, common fixes, and pro tips that beat basic tutorials. By the end, your hoop will look polished on both sides, perfect for walls or gifts.
How to Finish Embroidery Hoop with a Running Stitch?
How to Finish the Back of an Embroidery Hoop?
Finishing the back of your embroidery keeps everything tidy and protected. Loose ends can snag or show through the front over time. A clean back also makes your piece last longer, whether you hang it or frame it.
Many stitchers skip this step, but it makes a big difference. Think about gifting your work, no one wants to see a tangle of threads. This section covers the basics of how to finish embroidery hoop, including why it matters and quick methods.
Why Finishing the Back Matters for Beginners?
A clean and neat back is very important when framing embroidery hoop designs. It helps protect your work and makes it look more professional. Without proper finishing, fabric can start to fray, and threads may come loose when the piece is handled.
Imagine entering a craft fair. A pro finish sets your embroidery hoop frame apart from amateur pieces. It shows care, building trust with buyers or friends.
Beginners often overlook this, leading to puckered fronts or dusty backs. Finishing early saves rework. Plus, it matches the techniques pros use for galleries.
Tools and Materials You’ll Need
Gather these basics before you start how to finish embroidery hoop. Most are cheap and easy to find at craft stores.
- Sharp embroidery scissors: Cut threads cleanly without fraying.
- Needle (size 8-10): Matches most threads.
- Matching thread: Use embroidery floss or strong cotton.
- Felt circle: Cut to hoop size for backing.
- Pencil and ruler: Mark your fabric.
- Glue stick or fabric glue (optional): For extra hold.
- Embroidery hoop frame: Your finished work’s base.
These tools make the job smooth. No fancy gear needed; even beginners can source them online or locally.
Step-by-Step: Finishing with a Running Stitch
The running stitch is the fastest way for beginners to learn how to finish embroidery hoop. It’s simple: in and out along the edge. This method pulls fabric taut and covers threads without bulk. Pros love it for its clean look.
Expect the whole process to take around 10–15 minutes when learning how to frame embroidery in a hoop. If you’re new, it’s always a good idea to practice on a scrap piece first before working on your final design.
Step 1: Prepare Your Hoop and Fabric
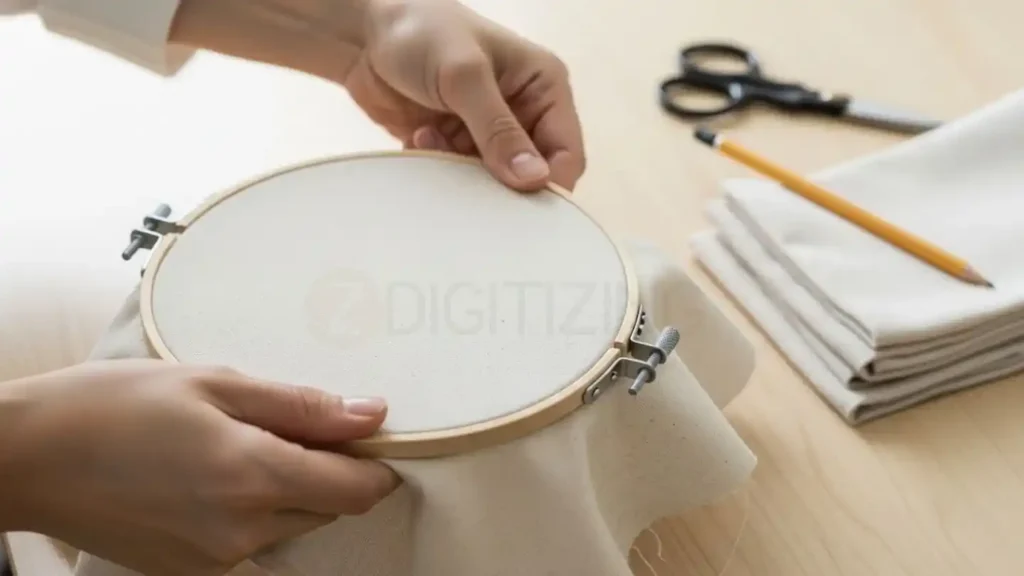
Start right to avoid issues later. Good prep makes how to finish embroidery hoop foolproof.
- Remove excess fabric: Trim to 1-2 inches beyond the hoop’s inner ring.
- Knot threads on back: Tie off all embroidery ends securely.
- Press flat: Iron fabric gently to remove wrinkles.
- Trace felt: Place felt inside the hoop and mark its circle with a pencil.
- Cut felt: Use scissors for a snug fit.
This sets a tight base. Loose fabric causes puckers; fix now.
Step 2: Stitch and Secure the Back

Now the fun part: the running stitch secures everything. This is the heart of how to finish embroidery hoop with a running stitch.
- Thread needle: Double it for strength, knot end.
- Start at edge: Insert from back, 1/4 inch from rim.
- Run stitches: Go in and out every 1/4 inch, keeping even.
- Pull gently: Fabric gathers slightly – that’s good tension.
- Attach felt: Lay the felt over, stitch through to the hoop.
- Circle fully: Overlap starting by 1 inch, knot off.
- Trim extras: Cut any loose bits.
Keep stitches small for neatness. If puckering happens, loosen the thread. This method beats glue for reusability.
Troubleshoot here: Slipping fabric? Add pins first. Uneven stitches? Use a hoop stand.
Step 3: Trim and Final Touches
Polish for a pro shine. Final steps complete how to finish embroidery hoop.
- Check tension: Tug lightly; the fabric should stay firm.
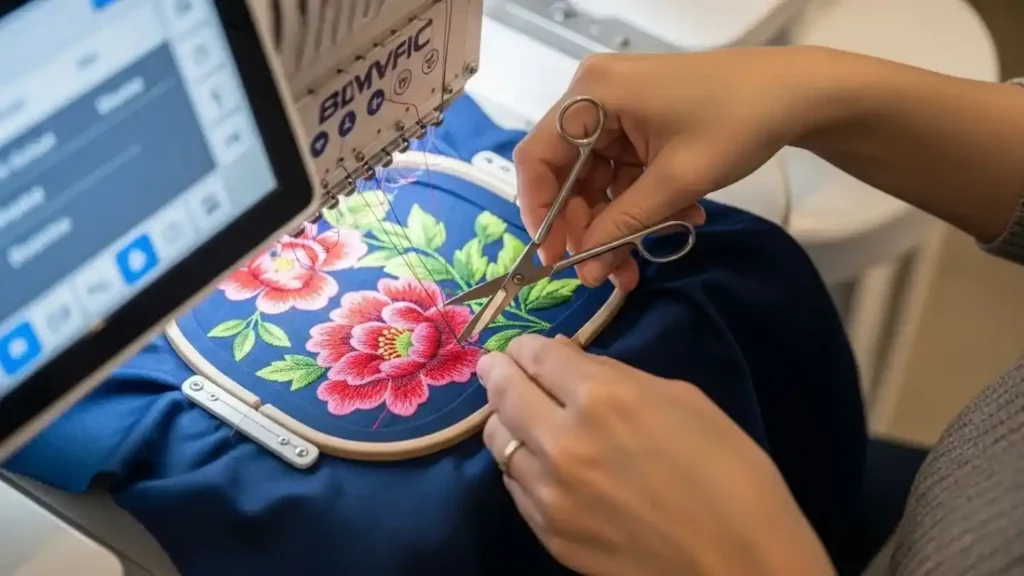
- Trim threads: Use embroidery scissors close to knots.
- Wipe clean: Dust off lint.
- Test hang: Add string if wall-mounting.
For gifts, add a label. This lasts for years without yellowing.
Other Easy Ways to Finish an Embroidery Hoop
Running stitch is great, but try these for variety. They cover how to finish an embroidery hoop without sewing if you prefer.
Each takes under 20 minutes. Pick based on your style.
Steps to Finish Your Embroidery Hoop Using Felt
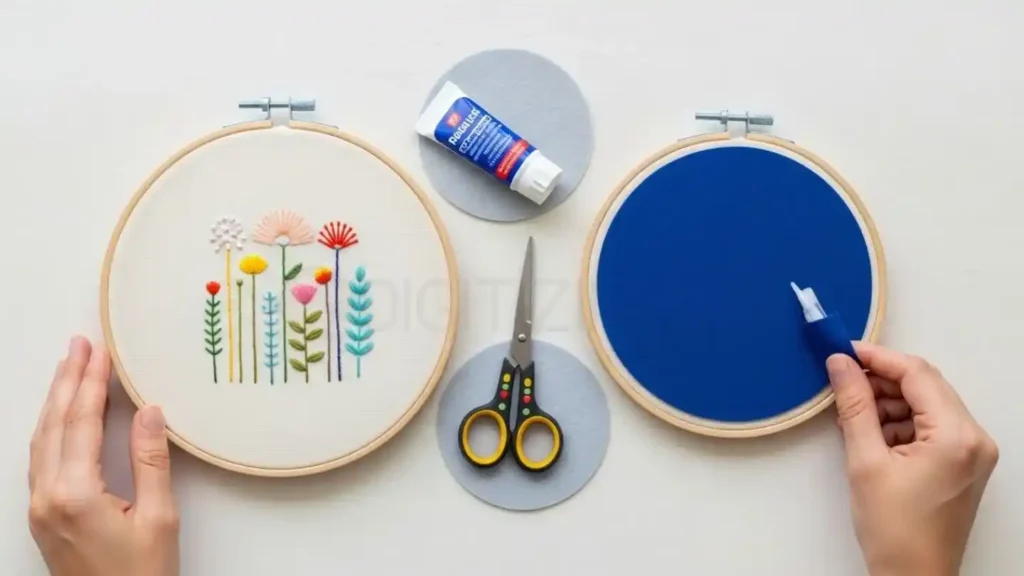
How to finish an embroidery hoop with felt adds a soft, colorful back. No stitches needed.
- Cut felt to fit inside the hoop.
- Dot glue on the hoop rim.
- Press fabric edges down.
- The glue felt over, smooth bubbles.
- Clamp for 5 minutes to dry.
Pros: Hides the mess fully. Cons: Less flexible. Great for kids’ projects.
Finishing with Cardboard or Glue

For a sturdy hold, use cardboard. This answers how to back an embroidery hoop simply.
- Cut the cardboard circle slightly smaller.
- Glue fabric edges to it.
- Sandwich with extra fabric.
- Glue to hoop back.
- Dry overnight.
Ideal for heavy designs. Avoids sagging.
Embroidery Hoop vs Frame: Which to Use?
If you’re learning how to finish embroidery hoop projects, you might wonder whether framing embroidery in a hoop or using a traditional frame is the better choice.
Embroidery hoops are quick, simple, and perfect for beginners or small designs. On the other hand, frames are better suited for larger or more detailed pieces that need a more polished display.
The comparison below will help you decide which option works best for your project.
Feature | Embroidery Hoop | Frame |
Cost | Low ($5-15) | Higher ($20+) |
Tension | Good for small designs | Better for large |
Finishing Ease | Simple stitch/glue | Advanced mounting |
Display | Wall-ready instantly | Custom, shadowbox |
Portability | Lightweight | Stable but bulky |
Choose a hoop to speed up how to finish embroidery hoop. Frames for heirlooms.
Common Mistakes and How to Fix Them
Even experts slip up. Spot these on how to finish embroidery hoop to save time.
- Loose threads: Double-knot your thread before stitching.
- Puckered front: Keep stitches loose and steam-iron the fabric.
- Felt backing is too large: Trim the felt 1/8 inch smaller than the hoop.
- Glue bleeding: Avoid hot glue; use fabric-safe adhesive or rely on the running stitch.
- Uneven tension: Mark stitch lines with a pencil for even spacing.
- Hoop slipping: Tighten the hardware before you start.
- Frayed edges: Use fray-check liquid on raw edges.
Practice is the best teacher; your first few hoops will provide the most valuable experience.
You can also get help from ZDigitizing, an online embroidery digitizing service provider in USA, for better design quality and expert guidance. Place one order and get double benefit, premium digitizing plus useful framing tips to improve your final result.
Framing Your Finished Embroidery Hoop
When you are ready to display your work, how to finish embroidery hoop for a gallery-style presentation is simpler than you might think. Framing your embroidery hoop elevates a casual craft into a sophisticated piece of art that looks polished in any home.
To get started, follow these professional steps for the best results:
- Select the right frame: Choose a shadowbox frame that matches the diameter of your hoop. This provides the necessary depth for the hoop to sit flush against the glass.
- Insert the hoop: Carefully place your finished hoop inside the shadowbox. Ensure the tension of your fabric is uniform so it sits perfectly level.
- Add a backing board: Place a rigid backing board behind the hoop to stabilize it. This ensures the piece does not shift or sag over time.
- Secure the piece: Use small clips or adhesive strips to secure the hoop to the backing board, ensuring it remains centered.
- Hang with wire: Use a professional-grade wire on the back of the frame for a secure, level hang.
Tips: Care: Dust monthly; use UV-protected glass to prevent thread fading. Display: In the embroidery hoop vs frame debate, hoops are the easiest way to achieve a high-quality, professional finish.

Conclusion
In this guide, you learned how to finish embroidery hoop projects using a simple running stitch. This method keeps the back neat, secures the fabric, and gives your work a clean, display-ready look. Small finishing details can make a big difference in how professional your embroidery appears.
Good finishing improves durability and overall presentation. But remember, even the best finishing won’t fix a poor design file. That’s why professional digitizing, especially for needs like cap logo digitizing services, is important for smooth and high-quality results.
ZDigitizing provide professional digitizing services with 10+ years of experience. Our expert team works 24/7 with full customer support. We offer quality guaranteed, a preview before payment, free minor edits, and prices lower than the market.
If you want better results while learning how to finish embroidery hoop designs, combining proper finishing with expert digitizing is the key.
Get Started Today! Visit ZDigitizing now, place your first order, and get 50% OFF. Experience premium embroidery digitizing quality today.


