Making custom patches at home is easier than most people think, especially if you already own an embroidery machine. You can learn how to make custom patches on almost any machine, from basic Brother models to high‑end commercial multi‑needle setups. In this guide, you’ll discover a simple, repeatable workflow that works whether you’re a hobbyist, a small business owner, or a professional embroiderer.
How to Make Custom Patches with any Embroidery Machine?
What Types of Patches Can You Make with an Embroidery Machine?
An embroidery machine can’t do everything, but it can create a wide range of functional and decorative patches. The key is understanding what you can fully stitch and what you need to assemble or outsource.
1. Embroidered Patches
These are the most common and easiest to make at home. They are stitched directly onto fabric such as cotton twill, felt, or suede. You can make:
- Logo patches for uniforms
- Name tags for backpacks and jackets
- Decorative patches for hats and caps
- Brand patches for small‑batch fashion labels
You control the design, colors, and shapes, which makes how to make custom patches a powerful skill for small businesses and crafters.
2. Woven Patches
They are made on special looms, not on embroidery machines. Your machine can’t weave them, but it can:
- Attach woven patches to garments
- Sew around the edges for extra durability
- Add small embroidered details on top
If you see “how to create custom patches” discussions that include woven elements, they usually mean mixing weaving and embroidery.
3. PVC Patches
PVC (rubber‑like) patches are also made by factories, not by home machines. However, you can:
- Cut and trim PVC shapes
- Sew them to the fabric backing
- Reinforce edges with stitching
This is useful if you want raised, durable emblems that still look handmade.
4. Chenille Patches
They have a soft, fuzzy texture and are usually made on industrial chenille machines. At home, you can:
- Use chenille‑style stitches or appliqué
- Sew chenille‑backed fabric pieces
- Add embroidered borders around chenille shapes
It’s a hybrid approach but still falls under how to make custom patches for clothing.
5. Iron-on Patches
Iron‑on patches consist of a fabric or embroidered patch with a heat‑activated adhesive backing. You can:
- Embroider the patch first
- Add a heat‑n‑bond or fusible web backing
- Make it into a peel‑and‑stick patch
This is one of the most popular techniques for beginners learning how to make custom patches because it doesn’t require extra sewing.
6. Velcro Patches
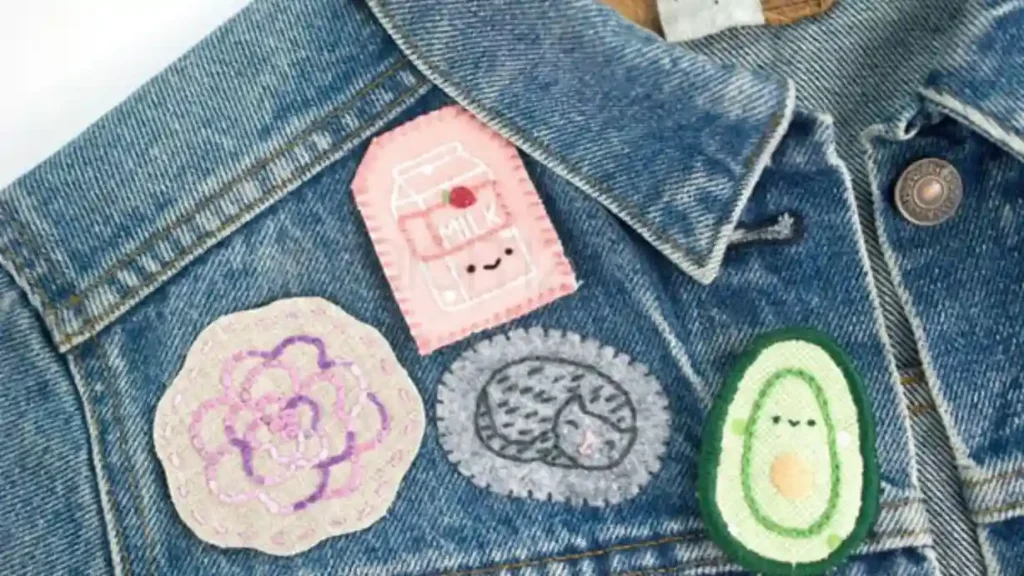
They are embroidered patches with hook or loop (Velcro) backing. You can:
- Sew Velcro strips to the back of patches
- Make removable patches for hats, bags, and uniforms
This directly answers users searching for how to make custom velcro patches or how to make custom patches for hats.
By understanding these options, you can match your skill and equipment to the right patch type and skip the things your machine can’t realistically do.
Tools and Materials You Really Need (For Beginners and Pros)
You can start without any expensive equipment. The right combination of tools and materials will make how to make custom patches faster, cleaner, and more profitable.
Embroidery Machine
Any embroidery machine for patches, but the quality and ease depend on:
- Hoop size and available hoop shapes
- Stitch speed and tension control
- Thread handling and bobbin system
If you’re just starting, a standard Brother or Janome single‑needle machine works fine. For larger orders, a multi‑needle machine or patch making machine setup improves speed.
Stabilizers
Stabilizers are important when learning how to make custom patches because they stop the fabric from stretching, shifting, or puckering during embroidery.
- Tear‑away: Good for light fabrics and simple designs
- Cut‑away: Better for thick or stretchy patches
- Heat‑away: Useful when you don’t want a visible stabilizer
Stabilizer choice directly affects how clean the edges look and how durable the patch feels.
Backing Options
Patches need strong backing so they don’t tear or peel off clothing. Common options:
- Fusible web (heat‑n‑bond): For iron‑on patches
- Heat‑seal topping: For smooth edges and extra durability
- Adhesive backing: For Velcro or repositionable patches
Using the right backing also helps with how to make custom patches for hats, where the curve of the cap adds pressure on the edges.
Thread Types and Weights
Use polyester embroidery thread for most patches because it:
- Resists fraying
- Holds up well to washing
- Stays bright and sharp
For borders and edges, choose a slightly heavier thread (40 wt) if your machine supports it. For fine details, 60 wt thread works well.
Patch Backing Fabrics
For how to make custom patches, start with a firm fabric that holds stitches well and keeps the patch shape clean.
Common options include:
- Cotton twill: Classic, durable, easy to hoop
- Felt: Soft, hides raw edges
- Suede: Premium look, good for hats
- Nylon or polyester: Great for sportswear
Choosing the right fabric changes how the patch feels, looks, and attaches to clothing or bags.
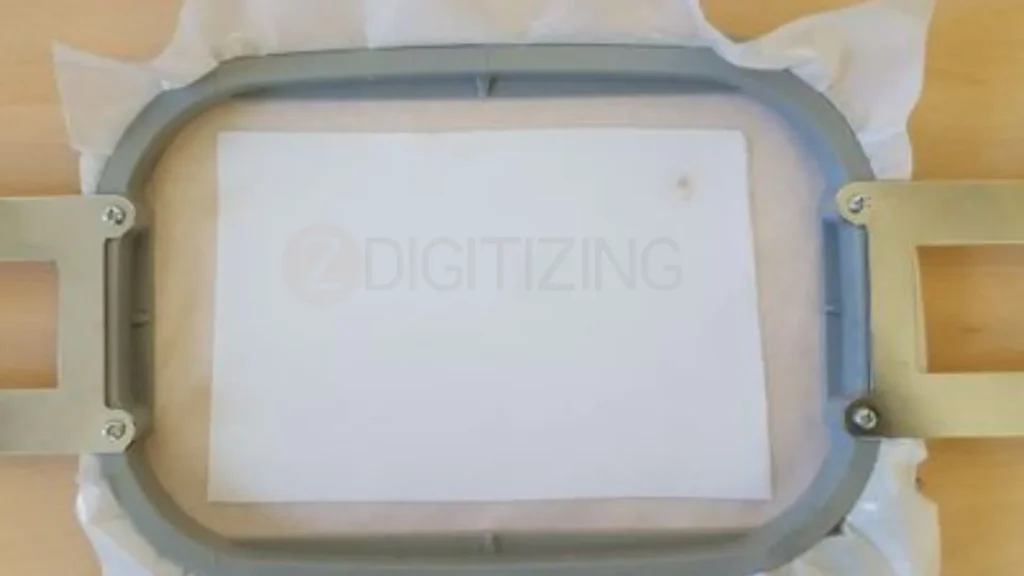
Hoops and Frames
For how to make custom patches, use the right hoop to keep fabric tight and steady while stitching.
For patches, you may need:
- Smaller hoops for tight borders
- Cap hoops for hats
- Extra‑sturdy frames for heavy patches
Using the correct hoop helps prevent stretching and keeps the patch shape consistent.
Cutting Tools
You’ll need:
- Sharp scissors or rotary cutter
- Cutting mat
- Ruler or template
Precise cutting makes the patch look professional and prevents frayed edges.
Preparing the Design: Digitizing and File Setup
Great patches start with a well‑prepared design. This is where how to make custom embroidered patches becomes more about planning than just sewing.
Do You Need to Digitize or Can You Use Ready‑Made Files?
For how to make custom patches, ready-made files work for simple designs, but custom logos or detailed patches need proper digitizing.
When you see “hat digitizing services” or “patch digitizing services” advertised, those are teams that convert your logo into stitch files your machine can read. This is especially useful if:
- You want crisp lettering in small spaces
- You need clean borders for round or irregular shapes
- You want to produce the same patch in large quantities.
If you are just starting out, it’s perfectly fine to buy or download simple, high‑quality patch files instead of learning full digitizing right away.
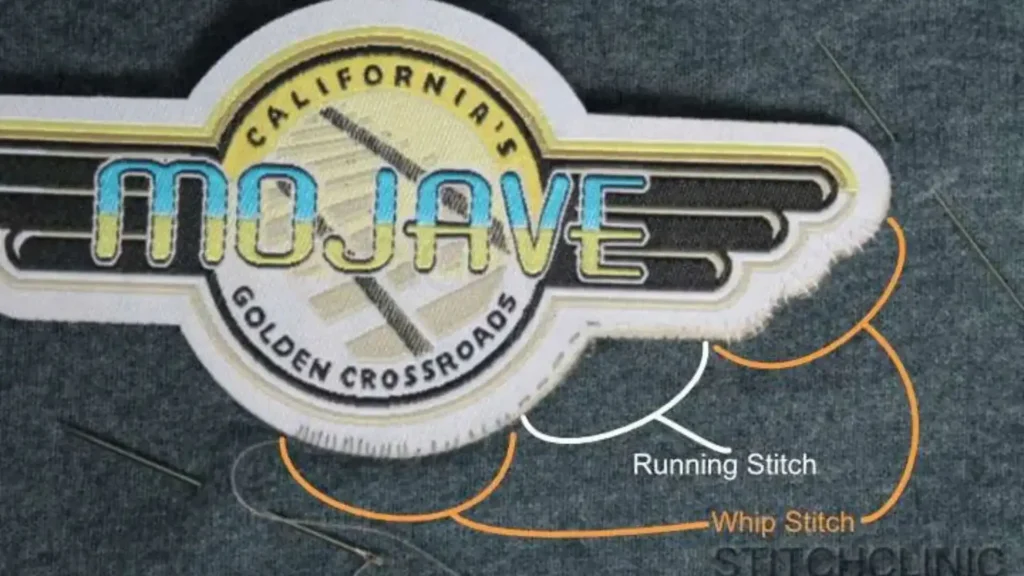
Basic Stitch Types Used in Patch Digitizing
Even if you don’t digitize yourself, knowing basic stitch types helps you judge good designs and avoid problems.
Satin Stitch
Satin stitch is used for:
- Borders and edges
- Small text or fine lines
- Clean, solid lines
It’s dense and smooth, but too much can create a stiff, heavy patch. On the other hand, using satin stitch properly is key to mastering how to make custom patches for hats, where clean edges matter.
Fill Stitch
Fill stitch covers larger areas, such as:
- Solid background shapes
- Large color blocks in logos
- Simple geometric designs
The density of the fill stitch affects both the look and the weight of the patch. Too dense and it puckers; too loose and it looks thin.
Running Stitch and Underlay
For how to make custom patches, running stitch is commonly used to hold the fabric in place, create guide lines, and build a strong base before the final stitches.
- Light underlay beneath other stitches
- Simple outlines and guides
Underlay is the first layer of stitches added under satin or fill to:
- Stabilize the fabric
- Prevent puckering
- Keep the top stitches flat
Good underlay is what makes how to make custom embroidered patches look professional instead of messy.
File Formats Your Machine Must Support
Each embroidery machine supports specific file formats for how to make a custom patch. The most common for home machines are:
- PES (Brother, many Janome models)
- DST (Tajima, many commercial machines)
- JEF (Janome project files)
When you download or buy patch files, make sure they are in a format your machine can read. If they are not, you can:
- Use embroidery software to convert
- Or ask a digitizing service to send a compatible format
Always test a patch file on a scrap piece before sewing on final fabric. This simple step saves time and thread.
Turning Any Embroidery Machine into a Patch‑Making Setup
You don’t need a special “patch making machine” to start. With a few adjustments, you can turn almost any home or commercial embroidery machine into a reliable patch‑making system.
Choosing the Right Hoop Size and Shape
The hoop you choose affects how easy it is to make custom patches for clothing and hats.
For small patches (2–3 inches), use the smallest hoop that fits your design. This keeps the fabric tight and reduces stretching. For larger patches or multiple designs on one fabric, use a bigger hoop.
Cap hoops are shaped to fit around the curve of a hat. They’re ideal if you see “how to make custom patches” as one of your main goals.
Stabilizer and Backing Setup for Patches
How you place stabilizer and backing changes the final patch.
For light fabrics:
- Use tear‑away stabilizer under the patch.
- Hoop the backing fabric with the stabilizer attached.
For thick or stretchy fabrics:
- Use cut‑away stabilizer.
- Consider adding a second layer for extra support.
For iron‑on or Velcro patches, place the fusible or adhesive layer on the back after stitching, not during the main embroidery.
General Machine Settings for Patch Making
For how to make custom patches, adjust your basic machine settings first to keep stitching clean, stable, and accurate.
- Speed: Run the machine at a moderate speed (around 600–700 spm for most home machines). Slower speeds help reduce puckering.
- Tension: Check that the top and bottom thread tension is balanced. Run a test on scrap fabric first.
- Needle: Use a sharp embroidery needle in the right size (usually 75/11 or 80/12).
These settings may vary slightly by brand (Brother, Janome, Singer), but the principles stay the same.
Step‑by‑Step: Sewing a Custom Patch on Your Embroidery Machine
Now to the core of what you want: how to make custom patches from start to finish.
How to Mark and Cut the Patch Base Fabric?
Start with a clean piece of patch fabric (twill, felt, or suede). Place it on a cutting mat, then follow these steps:
- Use a ruler or template to draw the desired shape (circle, rectangle, shield, etc.).
- Leave a small seam allowance (about 0.25 inch) around the edge.
- Cut neatly with sharp scissors or a rotary cutter.
Precise cutting helps you avoid frayed edges and keeps the patch shape consistent.
Hooping and Stabilizing the Patch Fabric
Place the cut patch piece into the hoop:
- Position the fabric so the center of the design will fall where you want it.
- Add stabilizer under or over, depending on your fabric type.
- Tighten the hoop until the fabric is smooth but not stretched too tightly.
If the fabric wrinkles or bulges, re‑hoop it. A perfectly flat piece is essential for smooth stitching.
Starting the Embroidery and Watching the First Stitches
Load the design into your machine and start stitching slowly.
Pay close attention to the first 10–20 seconds:
- Watch for any puckering or thread tangling.
- If the fabric starts to pull, pause and check the stabilizer and tension.
Running a short test on scrap fabric first helps you avoid mistakes on the final patch.
Adding Borders and Finishing Edges Cleanly
Borders are what make how to make custom patches look professional.
For most patches:
- Use satin stitch for the outer edge.
- Keep the border width consistent (usually 0.15–0.25 inch).
- Avoid over‑stitching corners, which can cut the fabric.
If the fabric is delicate, you can use a zig‑zag stitch instead of satin to reduce cutting.
Removing the Patch from the Hoop and Trimming Excess
Once the design is finished:
- Carefully remove the hoop from the machine.
- Take the patch out of the hoop.
- Trim away excess stabilizer, leaving a small margin near the edge.
Trimming too close can cause fraying, while leaving too much can make the patch stiff.
Finishing and Backing Your Custom Patches
Sewing is only half the job. The finishing step turns embroidered fabric into a real, usable patch.
How to Make Iron‑On Patches from Your Embroidered Design?
To convert your embroidered patch into an iron‑on:
- Cut a piece of HeatnBond or fusible web that matches the size of your patch.
- Place the adhesive side on the back of the patch.
- Press with a hot iron (no steam) for the recommended time.
- Let it cool, then peel off the backing paper.
This technique is perfect for answering how to make custom patches for clothing without needing extra sewing later.
How to Make Custom Velcro Patches?
They are great for hats, bags, and uniforms.
Steps:
- Cut two pieces of Velcro: one hook side and one loop side.
- Place the loop side on the back of the patch.
- Use a zig‑zag or straight stitch around the edge to secure it.
- For extra strength, add a second row of stitching.
How to Make Custom Patches for Hats?
Hats add a curve that can make how to make custom patches for hats trickier.
Tips:
- Use a cap hoop if your machine has one.
- Choose a flexible backing (felt or light twill).
- Keep designs moderate in size so they don’t bulge on the cap.
- Test the patch on a scrap hat panel first.
Non‑Embroidered Patch Types (PVC, Chenille, Woven) You Can Assemble on Your Machine
You can’t fully create PVC, chenille, or woven patches on a home embroidery machine, but you can assemble them:
- Stitch PVC shapes onto fabric backing.
- Sew chenille pieces with reinforced borders.
- Add embroidered details on woven patches.
This hybrid approach lets you offer diverse patch styles without investing in industrial equipment.
How to Make Custom Patches for Clothing (Shirts, Jackets, Bags)?
Applying patches to real garments is what most people want when they search how to make custom patches.
Best Placement and Orientation for Shirt Patches
For shirts and jackets:
- Place patches on the chest, sleeve, or pocket flap.
- Make sure they are aligned with seams or zippers.
- Avoid high‑movement areas like underarm unless the design is very small.
Good placement improves both comfort and appearance.
Attaching Patches with a Sewing Machine vs. By Hand
Once the patch is finished, you can attach it:
- With a sewing machine: Use a zig‑zag or straight stitch around the edge.
- By hand: Use a simple whip stitch or backstitch for a more subtle look.
For how to make custom patches for clothing, machine stitching is faster and more durable for everyday wear.
Making Patches for Washable Garments Safely
If the garment will be washed often:
- Use polyester thread.
- Choose durable backing fabric.
- Avoid very dense stitching that can stiffen the patch.
These choices help patches stay attached and look good over time.
Common Patch‑Making Problems and Quick Fixes
Even experienced embroiderers run into issues. Here are some common patch-making issues and simple ways to fix them.
Why Patches Pucker or Stretch and How to Fix It?
In how to make custom patches, wrinkles happen from weak fabric, poor tension, or heavy stitch density.
- The fabric is stretched too tightly in the hoop.
- There’s not enough stabilizer.
- The machine speed is too high.
To fix:
- Use cut‑away stabilizer if needed.
- Hoop more gently.
- Slow down the machine during the first rows.
Why Edges Fray or the Border Looks Messy?
If the border looks rough:
- The satin stitch may be too wide.
- The fabric may be too thin.
- You may be trimming too close.
Reduce border width, use thicker fabric, or switch to a zig‑zag border.
Why the Patch Doesn’t Stay on Clothing or Hats?
If a patch peels off:
- The backing may be weak.
- The stitching may be too loose.
- The adhesive may be low quality.
Use stronger backing, tighter stitching, or better heat‑n‑bond for better hold.
When to Outsource vs. Make Patches Yourself (For Beginners and Businesses)?
For how to make custom patches, make simple designs at home and outsource complex or bulk patch work.
Making Small‑Batch Custom Patches at Home
For:
- Small orders
- Prototypes and samples
- Personal projects
Home embroidery is cost‑effective and flexible. You fully control design and quality.
When to Use Professional Patch‑Making Machines or Services
For large orders, detailed logos, business branding, uniform patches, jacket patches, chenille-style artwork, or complex embroidery work, professional digitizing can save you time, thread, fabric, and production stress.
That is where ZDigitizing can help. We have been providing professional embroidery digitizing services for more than 10 years, helping businesses, apparel decorators, embroidery shops, and patch makers get clean, machine-ready files for every type of embroidery project.
As a trusted provider of premium embroidery digitizing services in Italy, ZDigitizing focuses on quality, speed, and customer support. We provide manually digitized files, 24/7 customer support, free file backup, free revisions, and a fast turnaround within 12 hours. Plus, your first order comes with 50% off, making it easier to test our quality without a big cost.
Whether you already know how to make custom patches or you want expert help preparing your artwork for embroidery, ZDigitizing gives you stitch-ready files that help reduce thread breaks, puckering, and poor patch finishing.
Want professional patch files without wasting time? Order your first patch digitizing design from ZDigitizing today and get 50% off your first order.
