How to Prevent Embroidery Puckering During Machine Embroidery?

When it comes to machine embroidery, achieving flawless embroidery designs is an art. But some challenges occur like embroidery puckering. We know it’s the most frustrating issue that occurs during embroidering. 

But don’t worry!

At Zdigitizing, we understand this problem and gather some tips and tricks to avoid puckering from our experience. So, spare some time and read what the causes are and how to avoid them.

How to Prevent Embroidery Puckering During Machine Embroidery?

Table of Contents

What is Machine Embroidery Puckering?

Puckering happens when the fabric around the stitches gathers or wrinkles, creating a bumpy or uneven look. This issue occurs when the fabric moves during stitching, making it hard for the fabric to stay flat. 

It can affect the appearance of the embroidery design, making it look less smooth and professional.

Fabric Types Most Likely to Pucker During Embroidery

Some fabric types are more likely to pucker during embroidery:

  • Slippery fabrics like satin and nylon can easily move around while being embroidered, causing puckering. These fabrics tend to slip on the stabilizer, making it hard to keep the fabric steady.
  • Lightweight fabrics such as linen and broadcloth are thin and can bunch up during the embroidery process, creating an uneven result.
  • Stretchy fabrics, like knit used for t-shirts or polyester, can stretch too much during embroidery. If not properly stabilized, they can shrink back, causing puckering once the hoop is removed.

To avoid puckering on these fabrics, it’s important to use the right stabilizer and hooping techniques to maintain good embroidery quality.

What are the Causes of Embroidery Puckering?

Puckering in embroidery occurs due to various factors, mainly related to fabric handling, stabilizer use, and the complexity of the design.

  1. Fabric Tension Issues
  2. Incorrect Stabilizer Usage
  3. Poor Digitizing Practices
  4. Thread Tension Problems

1. Fabric Tension Issues

1. Fabric Tension Issues_11zon

When the fabric is not properly tensioned during embroidery hooping, it can easily shift or move while stitching. If the fabric is stretched too tightly in the hoop, it may snap back once the embroidery is finished and the hoop is removed, causing puckering. 

On the other hand, if the fabric is too loose, it will not be held securely, allowing it to gather and create wrinkles around the stitches.

2. Incorrect Stabilizer Usage

The type and weight of the stabilizer you choose play a major role in preventing embroidery puckering. Using the wrong stabilizer or not using enough stabilizer for the fabric can cause the fabric to move or bunch up during stitching. 

For example, lightweight or stretchy fabrics often require stronger stabilizers, such as cut-away, to provide extra support. Without the right stabilizer, the fabric won’t have the necessary backing to stay in place, leading to puckering.

3. Poor Digitizing Practices

3. Poor Digitizing Practices_3_11zon

The way an embroidery design is digitized can also contribute to puckering. Poor digitizing can result in stitch patterns that are too dense or improper for the fabric type being used. 

For instance, if a design has too many stitches close together or lacks a proper underlay, the fabric can become overstressed and start to bunch up.

4. Thread Tension Problems

Having the correct thread tension is crucial to avoid puckering. If the tension on the upper thread or bobbin is too tight, the stitches will pull too hard on the fabric, creating puckers. 

On the other hand, if the tension is too loose, the stitches may not hold the fabric properly, leading to uneven stitching and puckering. 

How to Avoid Puckering When Machine Embroidering?

Machine embroidery puckering can be a common issue that disrupts the look of your design. However, by using the right methods and tools, you can prevent puckering and achieve flawless embroidery results.

  1. Select the Right Stabilizer for the Fabric
  2. Proper Hooping Technique
  3. Use Adhesives for Extra Stability
  4. Expert Digitizing Techniques
  5. Reduce Design Density for Delicate Fabrics
  6. Adjust Thread Tension Correctly
  7. Slow Down Embroidery Machine Speed

1. Select the Right Stabilizer for the Fabric

1. Select the Right Stabilizer for the Fabric_1_11zon

Choosing the correct stabilizer is essential to provide proper support for your fabric during embroidery. Different fabrics require different stabilizers. 

For example, stretchy fabrics like knits work best with a cut-away stabilizer, while lightweight fabrics may need a tear-away or water-soluble stabilizer. 

Using the wrong stabilizer can cause your fabric to shift or bunch up, leading to puckering. Always match the stabilizer type to the fabric’s needs for optimal results.

2. Proper Hooping Technique

2. Proper Hooping Technique_2_11zon

Embroidery hooping is one of the most important steps to prevent puckering. When hooping your fabric, make sure it is taut but not overly stretched. 

Overstretching can cause the fabric to snap back after embroidery, leading to puckering. On the other hand, if the fabric is too loose, it can move around inside the hoop, causing uneven stitching. 

A snug, even tension in the hoop ensures the fabric stays flat during stitching, minimizing the risk of puckering.

3. Use Adhesives for Extra Stability

When working with slippery or delicate fabrics, adhesives can offer additional support. Light, temporary spray adhesives designed for embroidery can hold the fabric and stabilizer together, preventing them from moving during stitching. 

However, be cautious not to use too much adhesive, as this can gum up your needle or leave residue on the fabric. A light spray applied evenly can help keep everything in place and reduce the chances of fabric shifting and puckering.

4. Expert Digitizing Techniques

Having well-digitized machine embroidery designs is crucial in preventing puckering. Poor digitizing can lead to uneven stitches and excessive density, which can distort the fabric and cause puckering. 

A properly digitized design should be optimized for the specific fabric you’re using, with appropriate stitch lengths, underlays, and densities. 

If you’re a beginner digitizer, we recommend getting help from experienced digitizers like Zdigitizing. We manually digitize your design while considering the type of fabric you’re embroidering. 

We use the correct type of underlay when making your design. We also make sure that a solid foundation is embroidered in the area where the design will sewn. This will prevent puckering. 

5. Reduce Design Density for Delicate Fabrics

5. Reduce Design Density for Delicate Fabrics_11zon

Delicate fabrics like silk or lightweight cotton are more prone to puckering, especially when the design is too dense. To prevent this, reduce the stitch density in areas of the design that do not require heavy stitching. 

By decreasing the number of stitches, you reduce the strain on the fabric, allowing it to lay flat without bunching up. You can also opt for lighter designs with open spaces that are easier on delicate fabrics.

6. Adjust Thread Tension Correctly

6. Adjust Thread Tension Correctly_5_11zon

Thread tension is another important factor in preventing puckering. If the upper thread or bobbin tension is too tight, it can pull on the fabric and create puckers around the stitching. 

On the other hand, if the tension is too loose, the stitches may not hold the fabric properly, leading to uneven results. Adjust the tension gradually and test on a sample of the same fabric until you find the correct balance that avoids pulling or slack in the thread.

7. Slow Down Embroidery Machine Speed

The speed at which you run your machine can also affect the quality of your embroidery. Slowing down the machine speed helps the machine place stitches more accurately and reduces fabric movement, which can lead to puckering. 

High speeds can cause the fabric to shift or stretch during stitching, especially on lightweight or slippery fabrics. By reducing the speed, you allow for more controlled stitching, minimizing the chances of puckering.

Conclusion: Key Takeaways to Avoid Puckering

To avoid embroidery puckering, it’s important to use the right techniques and materials. 

  • Start by selecting the correct stabilizer for your fabric, and ensure your fabric is properly hooped without stretching it too tightly.
  • Use adhesives for added stability, especially with slippery or delicate fabrics. Make sure your design is digitized correctly, with appropriate stitch density for the fabric. 
  • Adjust thread tension carefully and reduce your machine speed for better control during stitching. 

By following these steps, you can achieve smooth and professional embroidery results without puckering.

We also have an offer for you. You’ll get 50% off on all our services on your first order. If you need embroidery digitizing services you can contact us. Our expert team manually digitizes your design with a fast turnaround at an affordable cost. 

If you’ve any questions you can comment and share with your friends. Thanks for reading. Happy stitching!

FAQs

Embroidery pucker after washing due to excessive tension or insufficient stabilization of the fabric during embroidery. They can lead to distortion of fabric when you expose it to water. 

If you stretch your fabric you can remove puckering from design efficiently. In this process, place the embroidery face on a flat surface and damp it with water spray. Then stretch it gently until it’s flat. 

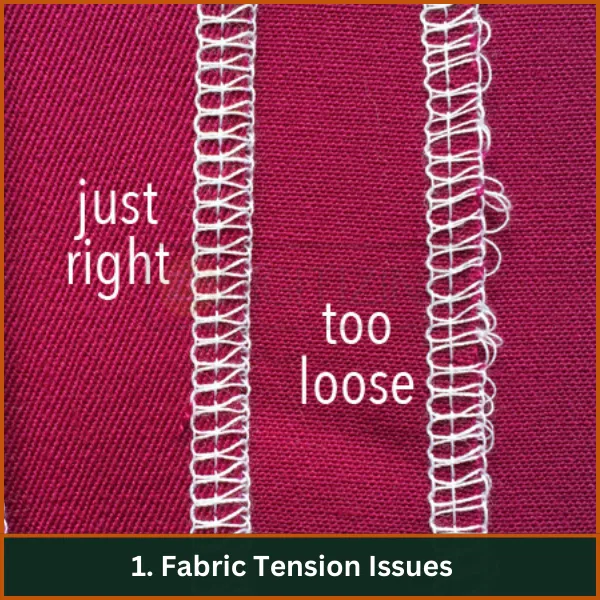
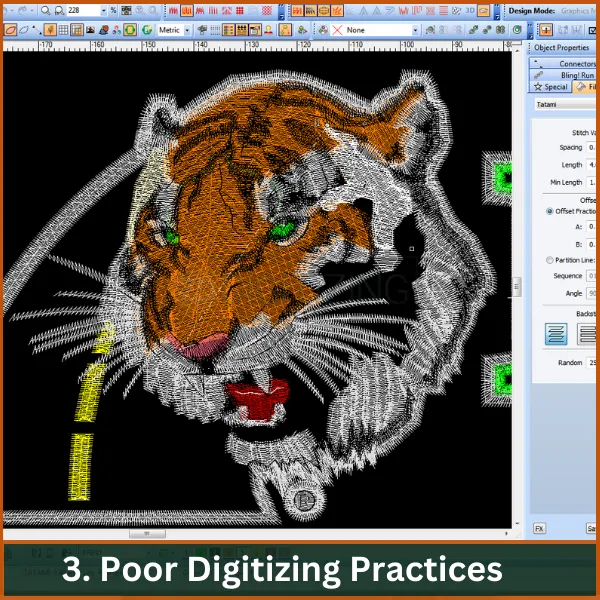
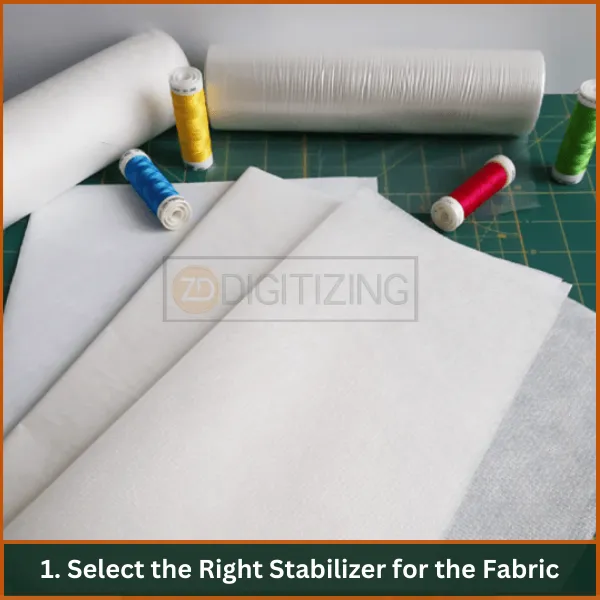
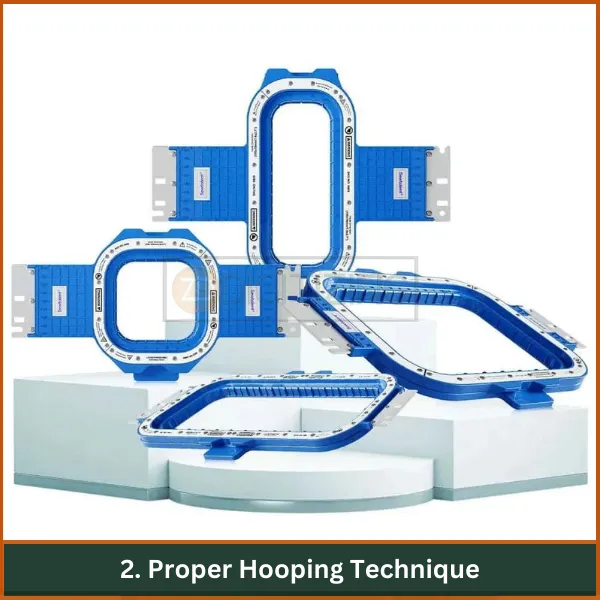
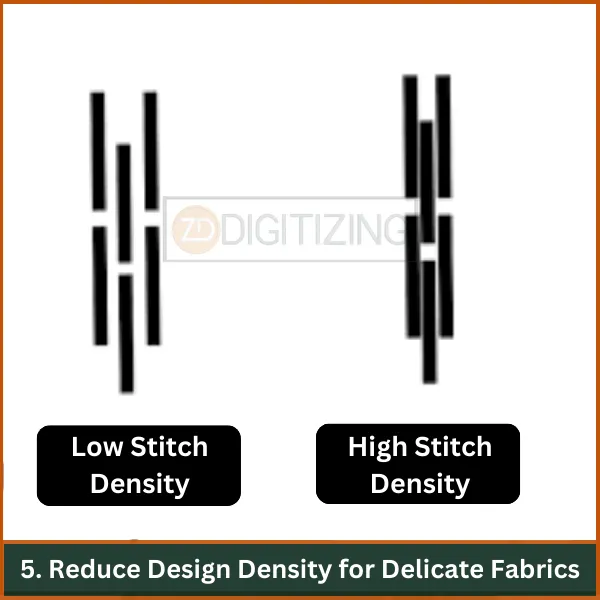
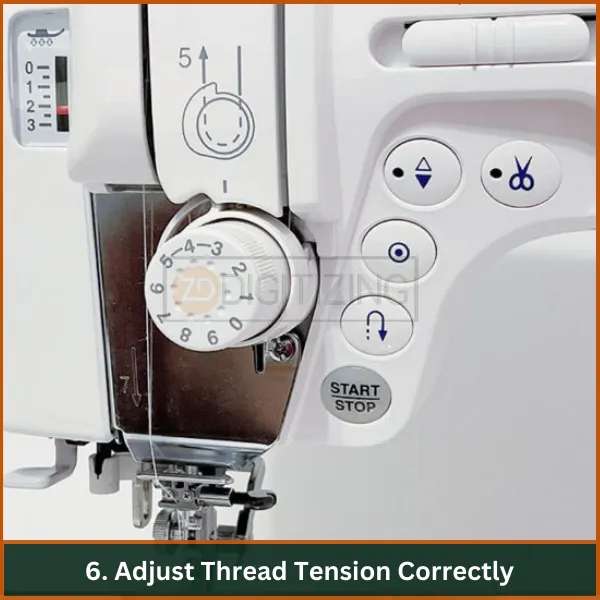
Embroidery is pucker due to many reasons such as improper hooping, under-stabilizing the fabric, poor digitizing and tight thread tension. Also, the most common cause  of embroidery puckering is dense design or too many stitches in a small area and it put too much strain on fabric. 

MOST POPULAR EMBROIDERY DIGITIZED DESIGN

2576 Sold

Girl Flower Embroidery Design
Price 1.99$ Only

1.99$ Only

Your Favorite Design is

JUST ONE CLICK AWAY
Buy Now

1341 Sold

Mickey Mouse Embroidery Design
Price 2.99$ Only

2.99$ Only

Your Favorite Design is

JUST ONE CLICK AWAY
Buy Now

3721 Sold

Cute Bee Embroidery Design
Price 4.99$ Only

4.99$ Only

Your Favorite Design is

JUST ONE CLICK AWAY
Buy Now

1541 Sold

Mermaid Fish Embroidery Design
Price 3.99$ Only

3.99$ Only

Your Favorite Design is

JUST ONE CLICK AWAY
Buy Now

2216 Sold

Love Flower Embroidery Design
Price 1.99$ Only

1.99$ Only

Your Favorite Design is

JUST ONE CLICK AWAY
Buy Now

1724 Sold

Jumping Dog Embroidery Design
Price 2.99$ Only

2.99$ Only

Your Favorite Design is

JUST ONE CLICK AWAY
Buy Now

1721 Sold

Squid Embroidery Design
Price 1.99$ Only

1.99$ Only

Your Favorite Design is

JUST ONE CLICK AWAY
Buy Now

3721 Sold

Skull Embroidery Design
Price 3.99$ Only

3.99$ Only

Your Favorite Design is

JUST ONE CLICK AWAY
Buy Now

1421 Sold

Cute Bear Embroidery Design
Price 5.99$ Only

5.99$ Only

Your Favorite Design is

JUST ONE CLICK AWAY
Buy Now

1245 Sold

Phoo Embroidery Design
Price 1.99$ Only

1.99$ Only

Your Favorite Design is

JUST ONE CLICK AWAY
Buy Now

Embroidery Digitizing & Vector Art Services

Are you looking for embroidery digitizing and vector art services at low cost with superfast turnaround, guarranted quality and preview before pay? So, you are at right place. We can digitize and vectorize any type of artwork in your required file format.