You’ve been doing embroidery for a while now, practicing, improving, and building your skills. And now you’re wondering, “Is it time to start an embroidery business?” You want to take the next step, but you’re not sure where to begin. You keep asking yourself, “Where do I even start?” That’s exactly why we’ve created this simple 7-step roadmap to help you turn your embroidery hobby into a successful business.
Whether you want to sell online, work from home, or take custom orders, this guide will show you how to start with confidence.
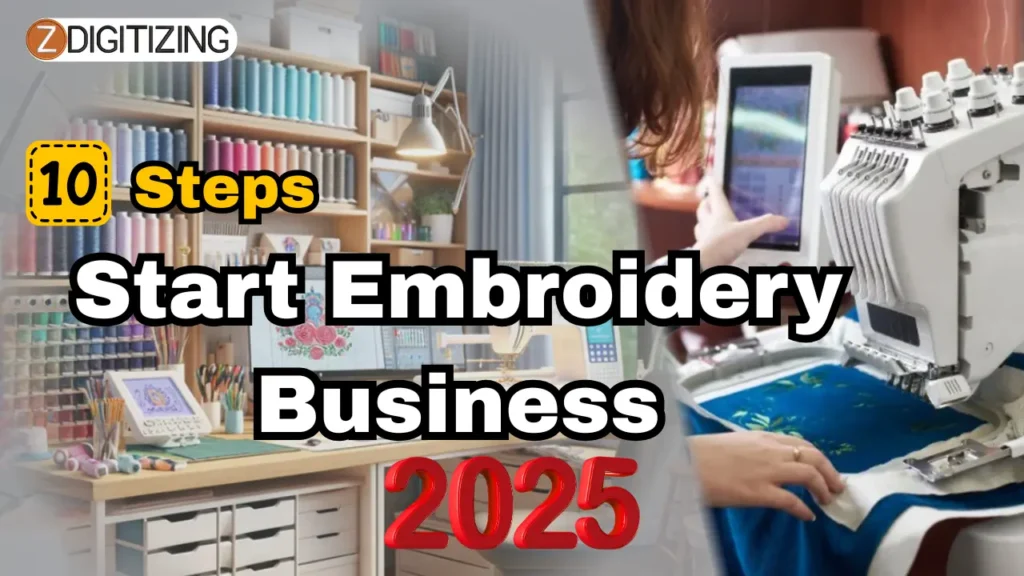
10 Steps Roadmap to Start an Embroidery Business in 2025
Here are the 10 steps we’ll walk through:
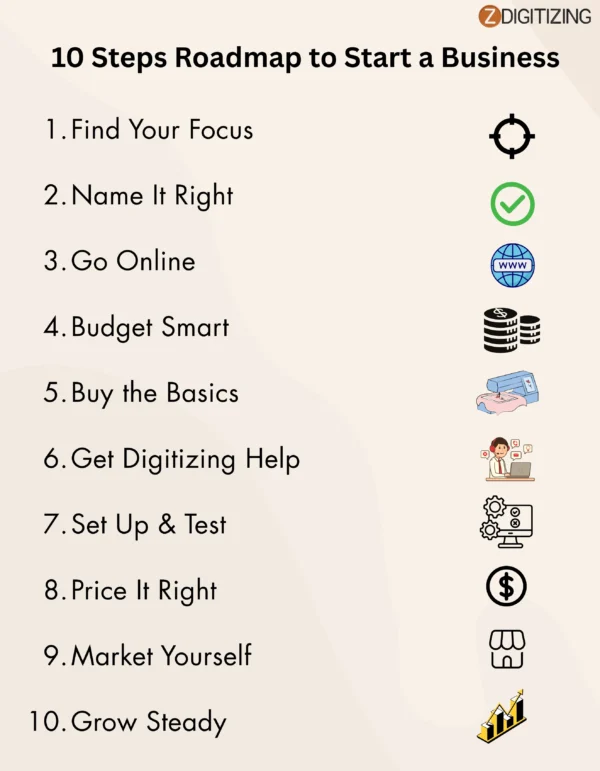
- Choose your business idea and embroidery style
- Pick a business name that matches your style
- Build your website and social media pages
- Plan your budget and know how much you can earn
- Buy only the tools and supplies you actually need
- Hire a professional embroidery digitizer
- Set up your workspace and try test projects
- Figure out your pricing and make a simple price sheet
- Start getting orders through simple marketing
- Grow slowly and improve step by step

Step 1: Choose Your Business Idea and Embroidery Style
Before anything else, you need to decide what kind of embroidery business you want to build. Embroidery offers many directions: do you want to work with clothing, accessories, home décor, or custom gifts?
Picking the right embroidery style will shape your machine needs, your marketing plan, and your customer base.
Ask yourself:
- Do I want to offer custom designs, or sell ready-made products?
- Will I target personal gifts, business logos, or fashion items?
- Do I plan to sell locally or online?
Once you pick your direction, stick to one niche at the beginning. It helps you stay focused, build a strong brand, and become an expert in your category.
Tip: Popular styles for 2025 include pet-themed embroidery, minimal monograms, and embroidered patches for streetwear brands.
Step 2: Pick a Business Name That Matches Your Style
Now that you know what type of embroidery you want to do, the next important step is choosing a name for your business.
This name is how people will remember you, find you online, and share your work with others. That’s why it should be easy to say, easy to spell, and match the feel of your work.
For example, if you’re making baby items, the name should sound soft and cute. If you’re doing logos for businesses, it should feel clean and professional.
Before finalizing the name, check:
- Is the website domain available?
- Can you use the same name on Instagram, Facebook, or TikTok?
This makes it easier for customers to find and trust you.You can get name ideas using AI tools like:
- ChatGPT: Just ask for business name suggestions based on your style.
- Namelix: Type your keywords, and it generates names with logo ideas.
- Shopify Name Generator: Free and simple to use.
Step 3: Build Your Website and Social Media Pages
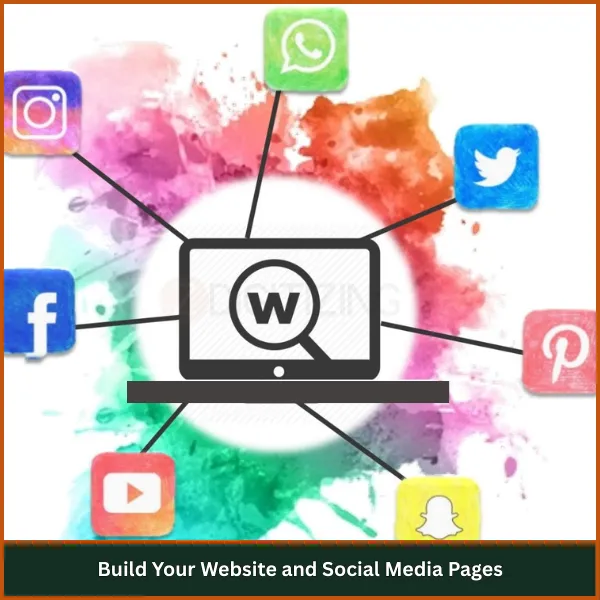
Once your name is ready, the next step is to make sure people can find you. That’s why you need a website and active social media pages.
Your website doesn’t need to be fancy. Even a simple one-page site that shows your name, work samples, and contact info is enough in the beginning.
Platforms like Wix and Shopify are very beginner-friendly. You can drag and drop things into place, and your website will be ready within a day or two.
Social media is where your first customers will probably find you. Instagram is great for posting photos and short videos of your embroidery process. Facebook is useful for local reach, messaging, and running small promotions. Both platforms help build trust with potential customers.
If someone finds your work but doesn’t see a website or page, they may think you’re not serious. That’s why building your online presence early is so important.
Step 4: Plan Your Budget and Know How Much You Can Earn

Every business starts with a plan, and your budget is a big part of that. You don’t need to be a math expert, but knowing how much you’ll spend and how much you can make helps you move forward with confidence.
Now, let’s talk income. If you price correctly, embroidery jobs can earn you $25–$100+ per order.
Many small business owners make between $500–$2,000 per month within their first 6 months, depending on effort and niche.
Let’s break down the cost to start an embroidery business in 2025:
Expense Category | Estimated Range |
Embroidery Machine | $800 – $8,000 |
Software (Digitizing) | $0 – $1,500 |
Threads, Hoops, Supplies | $200 – $500 |
Blanks (T-shirts, hats) | $100 – $300 |
Branding & Marketing | $100 – $500 |
Total Estimate | $1,200 – $10,800 |
So if you’re planning to boldly start an embroidery business, having a budget and income plan makes all the difference.
Step 5: Buy Only the Tools and Supplies You Actually Need
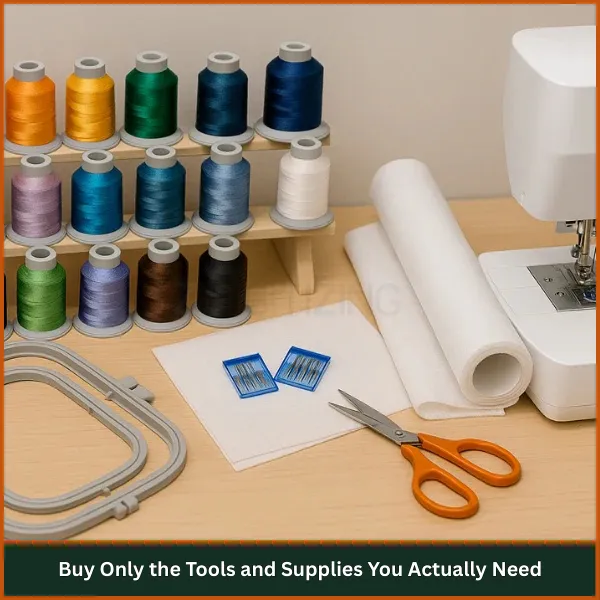
Now that your budget is ready, let’s talk about what to buy. Don’t feel like you have to get everything at once. In the beginning, just focus on the tools that are truly necessary.
First comes your embroidery machine. This is the most important part. If you’re just starting, a single-needle machine like one from Brother or Janome is a smart choice. It’s beginner-friendly, affordable, and great for items like shirts and towels. If you plan to take more orders in the future, you can upgrade to a multi-needle machine later.
Other things you’ll need:
- Embroidery threads – Start with basic colors like black, white, red, and blue.
- Hoops – These hold your fabric tight while stitching.
- Stabilizers – These go under your fabric to keep it from moving.
- Scissors – Small, sharp ones for cutting thread neatly.
- Bobbins – These hold the lower thread in your machine.
- Blanks – Plain items like T-shirts, caps, or towels for practice and orders.
Only buy what fits your niche. If you’re not doing caps yet, skip the cap hoops for now.
Step 6: Hire a Professional Embroidery Digitizer
When you’re starting your embroidery business, you’ll quickly realize that your machine needs special design files to work. These aren’t normal image files, they have to be digitized, which means converting a picture, logo, or text into a format that your embroidery machine can understand.
At this point, many beginners try to do everything themselves. They look for digitizing software, thinking it will be easy. But soon, they find out that these programs are not cheap, and they’re not that simple either. Some software costs $100, $300, or even more.
And learning how to use them properly takes time, practice, and patience. If you’re also busy learning how to use your machine, setting up your space, or finding customers, digitizing can become a big headache.
That’s why the smartest move, especially when you’re just starting out, is to hire a professional embroidery digitizer.
And that’s where ZDigitizing can help you. We’ve worked with thousands of customers around the world, turning their designs into clean, ready-to-use embroidery files. You don’t need to worry about file types or settings, we handle everything for you, so you can focus on stitching.
Our team has lots of experience and knows how to make designs look perfect when stitched. Whether it’s a simple name or a complex logo, we make sure it works smoothly on your machine. We’re fast, our prices are affordable, and we give special discounts on bulk orders. New customers also get a welcome discount. And if you need help, our support team is available 24/7.
So instead of spending hours trying to figure out software, let professionals handle the digitizing. It’s one of the smartest ways to save time and get amazing results, even if you’re just starting your embroidery journey. With ZDigitizing by your side, you’ll never have to worry about design files again.
Step 7: Set Up Your Workspace and Try Test Projects
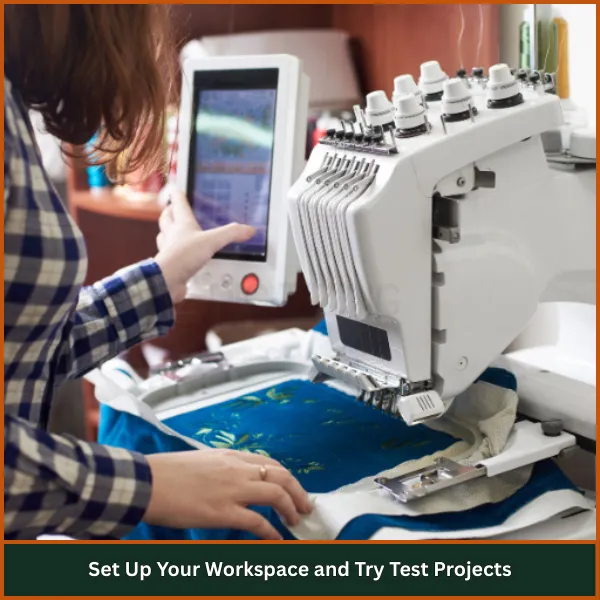
Now it’s time to create a space where your creativity flows. You don’t need a full studio, even a spare desk in your home can work if it’s organized and well-lit. What matters is comfort, easy access to supplies, and space to hoop, stitch, and finish your items.
Before offering any product to customers, test your designs on different fabrics. Try out monograms, logos, and detailed stitching to get a feel for tension, stabilizers, and thread combinations.
Here’s a simple checklist for setting up:
- A sturdy table for your machine
- Storage for threads, stabilizers, hoops
- Good lighting (natural light or an LED lamp)
- A laptop or computer for your software
- A bin or pegboard to keep tools handy
This testing phase is key when you start an embroidery business from home, because practice leads to professional results.
Step 8: Figure Out Your Pricing and Make a Simple Price Sheet
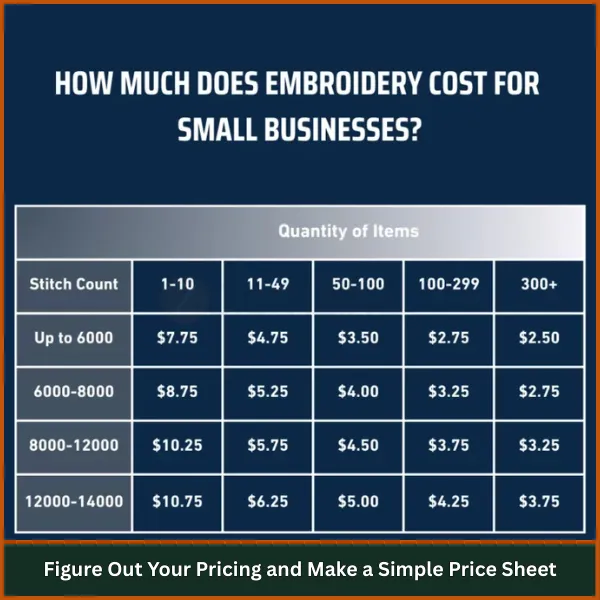
Pricing can be tricky at first. You don’t want to charge too little and lose money, or charge too much and lose customers. A good price includes:
- Material cost (blanks, thread, stabilizer)
- Machine time (how long stitching takes)
- Design time (especially if you digitize)
- Profit margin (typically 30–50%)
If you’re unsure how to start a small embroidery business, having a simple pricing list makes your process clear and trustworthy for customers.
Here’s a quick example:
Item | Cost | Time | Suggested Price |
Custom T-Shirt | $5.50 | 25 min | $18 – $25 |
Logo Hat | $4.00 | 15 min | $15 – $22 |
Baby Blanket (Name) | $7.00 | 30 min | $22 – $30 |
Step 9: Start Getting Orders Through Simple Marketing
Now comes the fun part: getting your first customers.
You don’t need paid ads at this stage. You just need to show your work to the right people.
Start by posting your best designs on Instagram and Facebook. Share short videos of your machine stitching a name or logo. Ask your family and friends to share your posts.
Join local Facebook groups where people might need custom items, like mom groups, small business groups, or school pages. Offer a small discount for first-time buyers or free name embroidery for early orders.
The more people see your work, the more chances you have to get orders. So, if you want to start an embroidery business that actually grows, you need people to know you exist, and marketing helps with that.
Step 10: Grow Slowly and Improve Step by Step
After your first few orders, you’ll start to feel more confident.
This is the time to grow your embroidery business, but don’t try to do everything at once. Grow slowly and smartly.
Repeat your best designs, reuse popular patterns, and try offering products for holidays like Mother’s Day, Christmas, or school seasons. Use Google Forms to collect orders, and keep track of your sales in a simple Excel or Google Sheet.
And as orders increase, keep using ZDigitizing for design work. It will save you hours and keep your embroidery clean and professional. When you outsource digitizing and focus on stitching and selling, your business runs smoother, and your customers stay happy.
Conclusion: You’re Ready, Now Take the First Step
If you’ve followed this guide step by step, you now know exactly how to start your own embroidery business. And we hope you’re feeling confident, because you’re more ready than you think.
From choosing your niche to buying the right tools, setting prices, and getting your first customers, you’ve got a complete plan in your hands. But as you move forward, there’s one thing that can truly make a difference from the beginning: working with a professional digitizer.
Why? Because the quality of your design file affects the quality of your stitches. And when you’re just starting out, you want everything to look clean, smooth, and professional.
That’s where ZDigitizing comes in. Our expert team knows exactly how to turn your ideas into perfect, machine-ready files. We’ve helped thousands of embroidery businesses get great results, and we’d love to help you too.
We offer discounts on bulk orders, and if you’re a new customer, you’ll get 50% off your first order. It’s a great way to test our quality without any risk.
So if you’re ready to start an embroidery business, don’t try to do everything alone. Let us take care of the digitizing, so you can focus on doing what you love—stitching and growing your business.
Reach out to ZDigitizing today and take that first real step!
FAQs
Starting an embroidery business can cost anywhere between $1,000 to $3,000 for basic equipment and supplies. This includes a single-needle machine, threads, hoops, stabilizers, and blank items to stitch. If you add digitizing software or professional help, it may cost a bit more.
To start your own embroidery business, first choose a niche (like gifts, logos, or apparel), get the right machine and supplies, and create digitized designs. Set up social media pages or a simple website, share your work, and start offering custom embroidery to friends, family, and local groups.
Yes, embroidery sells well, especially custom and personalized items. Products like baby gifts, monogrammed towels, company logos on shirts, and holiday-themed designs are always in demand. The key is offering quality work and promoting it to the right audience.
Yes, the embroidery business is profitable when managed well. Most items have low material costs and high perceived value, so you can charge $20–$50 or more per item. With consistent orders, many small businesses earn a solid income even from home.
Embroidery work can pay anywhere from $25 to $100+ per project, depending on the size and complexity of the design. Beginners often earn $500 to $2,000 per month, while experienced business owners can earn much more with steady clients and bulk orders.


