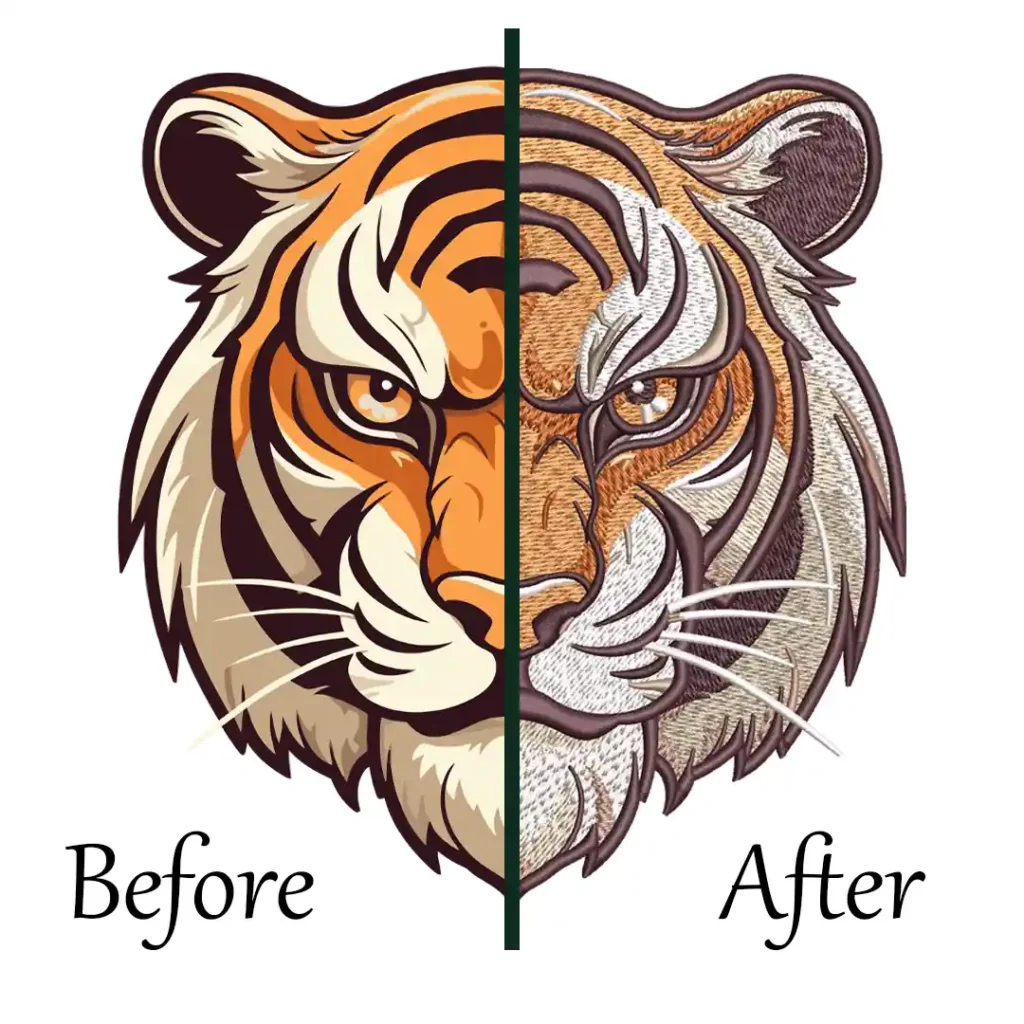
Digitizing photos for embroidery sounds simple, but it’s actually one of the most challenging tasks in machine embroidery. Many people believe they can just upload a photo, click a button, and get a perfect stitch file. But when they see the final result, it often looks nothing like the original image. The face may be blurry, colors may not match, or the design may be too heavy for the machine. That’s when they realize, photo digitizing needs skill, not shortcuts.

We’ve helped thousands of customers who faced this problem. And over 13+ years of experience, we’ve learned exactly what works and what doesn’t when turning real photos into high-quality embroidery.
5 Hidden Secrets of Digitizing Photos No One Talks About
In this article, we’re going to share the 5 hidden secrets most people don’t know, but should, before digitizing any photo.
Here are the secrets you’ll discover:
- Not All Photos Are Digitizable – Here’s Why
- You Can’t Use Unlimited Colors in Embroidery
- Stitch Type Selection Can Make or Break the Design
- File Size and Stitch Count Need a Perfect Balance
- Even the Best Software Can’t Replace Manual Touch-Ups
These tips will help you understand what goes on behind the scenes and how to get the best result from your photo embroidery.

Secret #1: Not All Photos Are Digitizable – Here’s Why
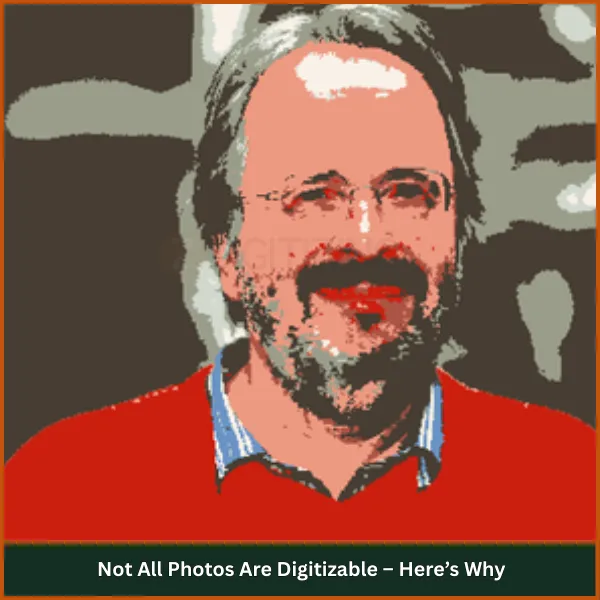
We’ve had many customers send us beautiful photos, but not all of them work well for embroidery. Some photos look nice on screen but don’t work well when converted to stitches. Photos that are blurry, too dark, or full of background distractions are hard to digitize.
From experience, here’s what we suggest:
- Choose a photo where the main subject is clear
- Avoid backgrounds that are too colorful or crowded
- Make sure facial details like eyes and mouth are visible
These steps may seem small, but they make a big difference when you digitize photos. The better the photo, the better the final result.
Secret #2: You Can’t Use Unlimited Colors in Embroidery
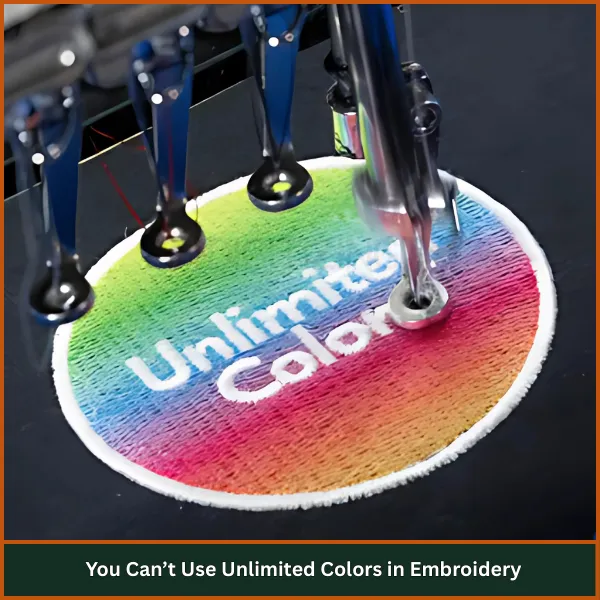
When you look at a photo on your phone, you see thousands of colors. Your screen can show tiny variations in skin tone, hair, and shadows. But embroidery machines don’t work that way.
Most embroidery machines use a limited number of threads, usually between 6 and 15 colors in a design. This is a big challenge, especially for complex photos.
When you digitize photos for embroidery, you need to find a smart way to show depth and detail using only a few threads.
That’s where our experience helps. We use special techniques like:
- Blending stitches to simulate color changes
- Layering light and dark shades to create contrast
- Feathering edges so color shifts don’t look sharp or unnatural
It’s not easy, but when done right, even a limited color palette can look realistic and beautiful.
Secret #3: Stitch Type Selection Can Make or Break the Design
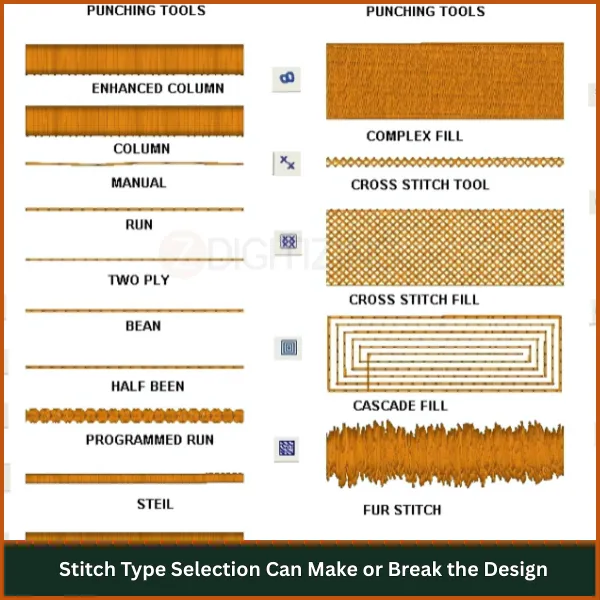
Choosing the right type of stitch is one of the most important decisions in digitizing photos. Most beginners just use fill stitch everywhere, but that’s not a good idea.
Each stitch type serves a different purpose:
- Fill stitches are great for large areas like backgrounds
- Satin stitches are useful for outlines and bold lines
- Manual stitches are best for small facial features, shadows, and detailed texture
Let’s break it down for clarity:
Stitch Type | Best Used For | Should Avoid Using On |
Fill Stitch | Backgrounds, large clothing areas | Small facial features |
Satin Stitch | Borders, outlines | Skin tones, soft shadows |
Manual Stitching | Eyes, lips, subtle shading | Large sections (too time-consuming) |
When you digitize photos, using the wrong stitch in the wrong place can ruin the entire design. That’s why we carefully plan each area, just like painting a picture, but with thread.
Secret #4: File Size and Stitch Count Need a Perfect Balance
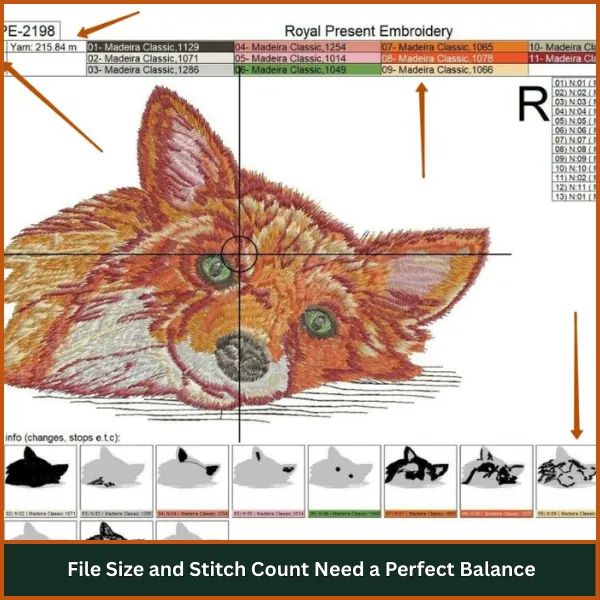
Here’s something many people don’t know: more stitches do not always mean better quality.
In fact, too many stitches can make your file heavy, slow down the machine, and even cause thread breaks.
A design with too few stitches, on the other hand, may look empty or weak on fabric. So what’s the solution?
From our experience, we focus on finding the right balance. We use:
- Smart underlay settings to support the top stitches
- Correct density so the design holds its shape
- Trimming and shortening techniques to avoid over-stitching
When digitizing photos for embroidery software, it’s important to test the file, preview the stitch flow, and adjust it until it’s both beautiful and functional. When you’re learning how to digitize photos, these small things make a big difference.
Secret #5: Even the Best Software Can’t Replace Manual Touch-Ups
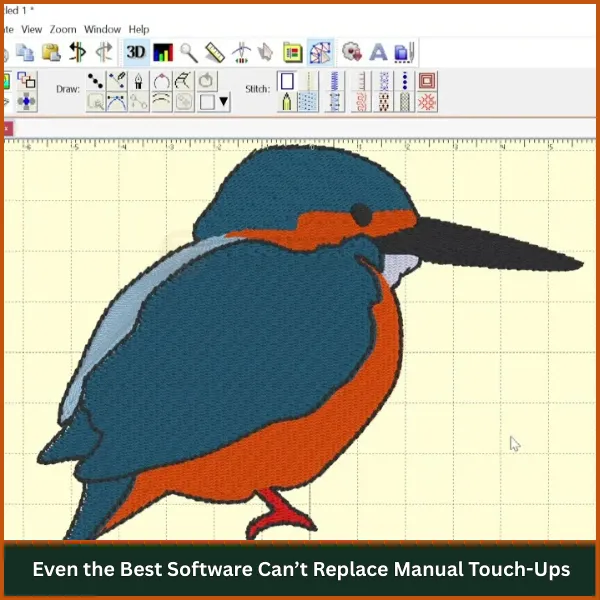
Auto-digitizing software has improved a lot, but it still can’t match the human eye. Software doesn’t always understand where the cheek ends and the shadow begins. It can’t see the emotion in someone’s eyes or the light that softens their smile.
That’s why, even if you digitize photos for embroidery software, the design won’t be truly ready without manual edits. The software gives us a starting point, but the real magic happens when we fix things by hand.
- Adjust the stitch directions
- Remove unnecessary thread paths
- Fix color transitions and smooth out harsh edges
This manual process may take more time, but it’s what turns a basic stitch file into a high-quality embroidery design. If you want your embroidery to really look like the original photo, this step is non-negotiable.
Bonus Tip: Always Prepare Your Photo Before Sending It
Here’s something we’ve learned from working on hundreds of photo digitizing projects. A well-prepared photo makes all the difference. Most people don’t realize that just a few simple edits before sending the image can lead to a much cleaner, clearer, and more realistic embroidery result.
If you’re serious about getting the best outcome, here’s exactly what you should do before submitting your photo:
- Choose the Right Photo: Pick a photo that’s sharp, well-lit, and focused. Avoid blurry selfies, dark images, or pictures with too many people or background distractions. A close-up photo with the face clearly visible is always a great choice.
- Crop Unnecessary Areas: If there’s a lot of background or empty space, crop it out. This helps us focus on the subject and keeps the stitch file clean and efficient.
- Improve Brightness and Contrast: Slightly adjusting brightness and contrast can make facial features pop. It helps reveal important areas like eyes, lips, and shadows, making it easier to recreate them in thread.
- Avoid Screenshots or Social Media Downloads: These are often compressed or of low quality. Instead, send us the original photo file (usually in JPG or PNG format) directly from your camera or gallery.
- Let Us Know What Matters Most: If there’s a specific part of the photo you really want us to highlight, like a face, a name, or a background effect, just tell us. We can adjust the stitch focus accordingly.
Final Verdict
Digitizing photos for machine embroidery is not a simple task. It’s more than just using software, it’s about turning real memories into stitches with care and experience. Unlike logos, photos have soft details, emotions, and small features that need special attention.
That’s why photo digitizing needs an expert who knows how to balance colors, stitches, and textures the right way. At ZDigitizing, we’ve been doing this for over 13 years, and we understand how to make your photo look great in thread.
We offer flat-rate pricing, fast delivery in 4 to 12 hours, and unlimited revisions until you’re happy. And if you’re new, you’ll get 50% OFF your first order so you can try us without worry. Whether it’s for a gift, a personal project, or your business, we’re here to help and guide you every step of the way.
So, get your photo digitized with expert quality, enjoy 50% OFF your first file!
CONTACT US TODAY! Need help or have questions? We’re ready to support you anytime!
FAQs
To get a graphic ready, simplify it by removing extra colors and details. Make sure the edges are clear and the design is not too complex. Clean lines and bold shapes work best for stitching.
If you’re looking for professional results, choose a service with proven experience in photo-to-stitch conversion. ZDigitizing is known for clean stitch files, fast delivery, and great customer support.
Use embroidery software to manually create stitch paths over the image. Choose stitch types for different areas and test the file before using it. Manual tweaks always give better results than auto tools.
You’ll need digitizing software like Wilcom, Hatch, or Ink/Stitch. These programs let you create embroidery files from images. Some are beginner-friendly while others are more advanced.
First, convert the PDF to an image file (like JPG). Then bring it into your digitizing software and trace the parts you want to embroider. Avoid low-resolution PDFs for better quality.
Pick a clear, high-quality picture with good lighting. Import it into your software, trace important features, and set the right stitch types. Manual editing will help match the design to your fabric.