Raster vs Vector: you’ve probably seen these terms many times, especially when sending a logo or design for printing, right? Should you use a regular image file, or do you need a clean, scalable vector? Both formats look similar on screen, but they behave very differently when it comes to printing quality.
In this guide, we’ll break down these formats in a simple way, so you can confidently choose the right one for your logo, design, or branding project. By the end, you’ll clearly know which format gives sharp, professional print results, every single time.
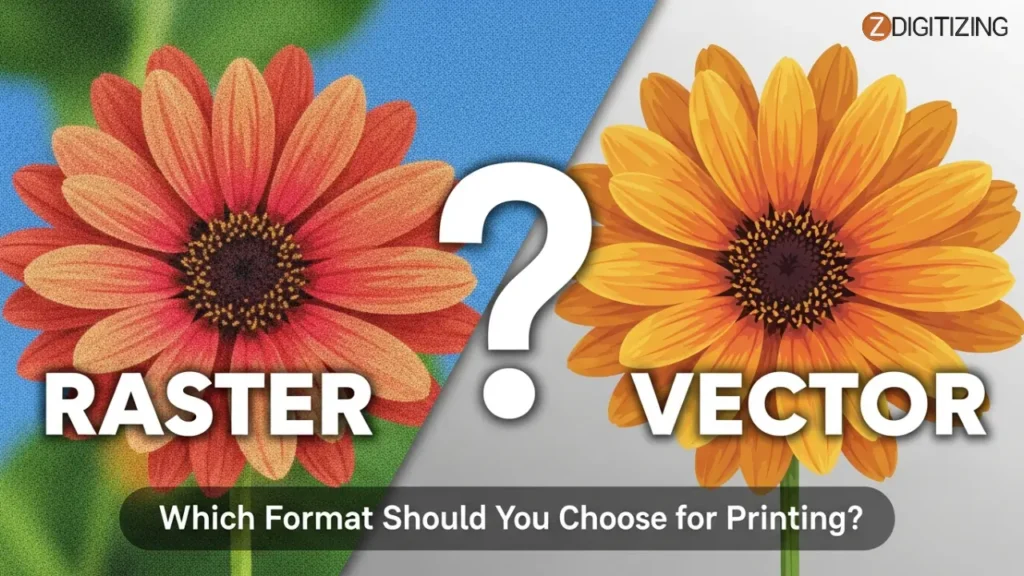
Raster vs Vector: Which Format Should You Choose for Printing?
Understanding These Formats (Raster vs Vector)
To choose the right file for printing, it helps to understand what raster and vector actually mean. Both are image formats, but they are created in totally different ways, and this affects the print quality and clarity of your design.
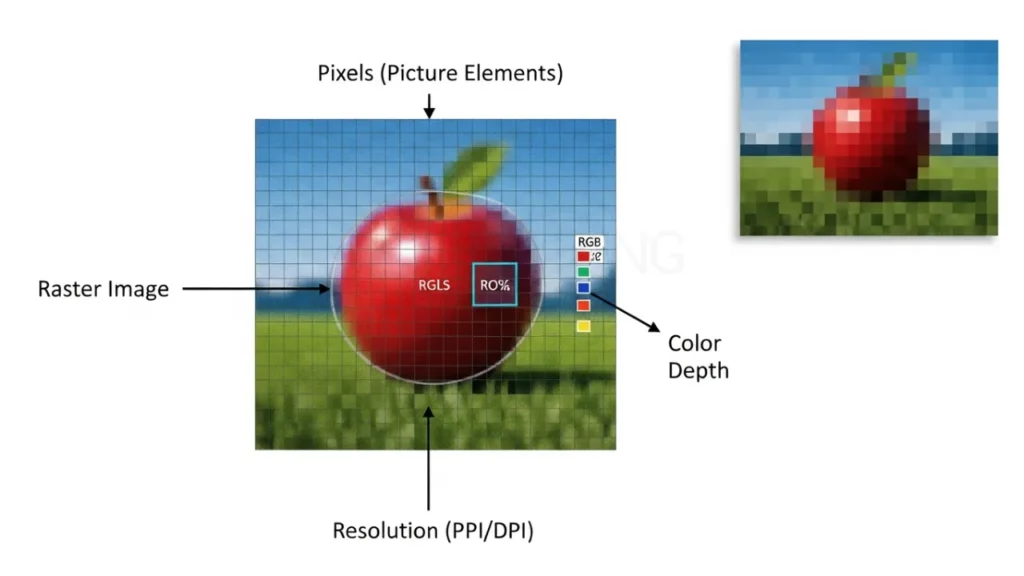
What is a Raster Image?
It is made from thousands of tiny colored squares called pixels. When you see the image on your screen, it looks smooth. But if you zoom in or print it in a larger size, those pixels start to appear, and the image can look blurry or pixelated.
Common Raster Image Formats: JPG, PNG, GIF, TIFF, BMP
These are the formats you usually get from mobile cameras, screenshots, and downloaded pictures.
Raster Images Benefits
- Perfect for real-life photos with detailed shading and soft color transitions
- Supported on all devices and software, no special program needed
- Great color depth, ideal for realistic images
Raster Images Limitations
- Quality decreases when enlarged; the image becomes fuzzy
- Large file sizes if the resolution is high
- Not suitable for logos or big printing where sharp edges are required
What is a Vector Image?
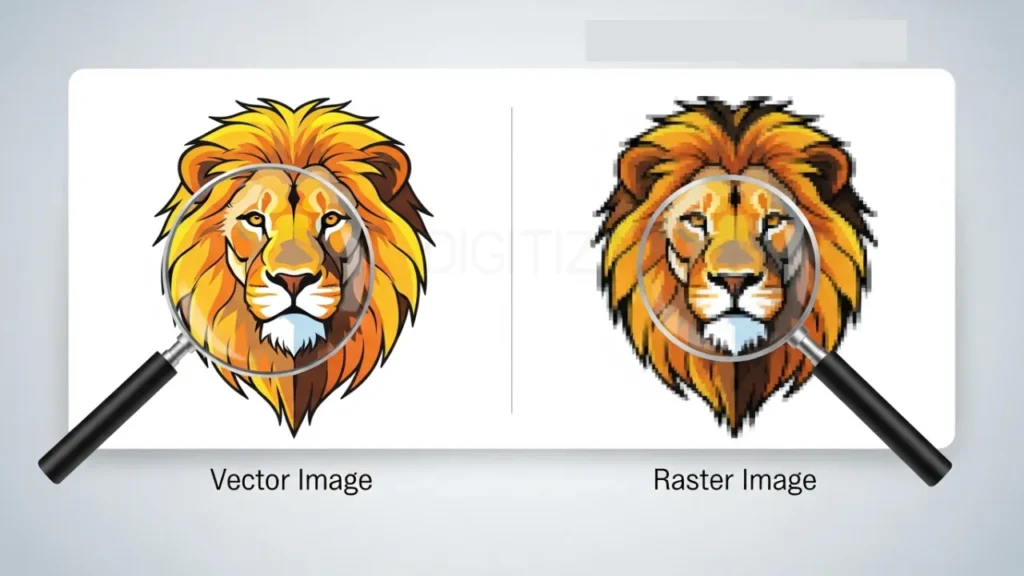
It is not made of pixels. Instead, it’s made of lines, curves, and shapes built through mathematical paths. This means no matter how much you zoom in or how big you print it, the image will stay sharp and clean.
That’s why vector graphics are the first choice for logos, business cards, banners, and any professional printing work.
Common Vector File Formats: AI, EPS, PDF, SVG, CDR
These files are usually created in software like Adobe Illustrator or CorelDRAW.
Vector Graphics Benefits
- Stays crystal clear at any size, no blurriness, no pixelation
- Perfect for printing quality, edges remain sharp and smooth
- Easy to edit, colors, shapes, or text can be updated anytime
- Ideal for branding, logos, icons, badges, patches, etc.
Vector Images Limitations
- Not suitable for real photography, because vectors can’t capture natural photo shading
- Requires specific software to edit (like Illustrator / CorelDRAW)
- Takes more skill to create compared to simple pixel images
Raster vs Vector: What’s the Main Difference?
Now that you already know what both raster and vector formats are, it becomes easier to understand their difference. One format is made of pixels, and the other is built using shapes and paths.
This difference of raster vs vector directly affects printing clarity, resizing, and logo design formats.
So before choosing a file for printing or vector design, you should know how each one behaves.
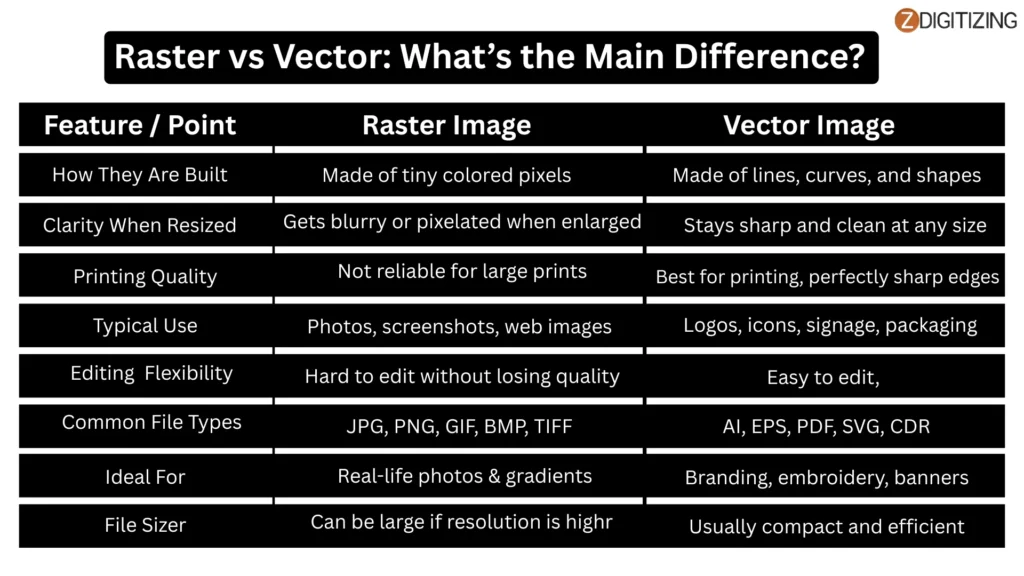
Feature / Point | Raster Image | Vector Image |
How They Are Built | Made of tiny colored pixels | Made of lines, curves, and shapes (mathematical paths) |
Clarity When Resized | Gets blurry or pixelated when enlarged | Stays sharp and clean at any size |
Printing Quality | Not reliable for large prints | Best for printing, perfectly sharp edges |
Typical Use | Photos, screenshots, web images | Logo design formats, icons, signage, packaging |
Editing Flexibility | Hard to edit without losing quality | Easy to edit, change colors or shapes anytime |
Common File Types | JPG, PNG, GIF, BMP, TIFF | AI, EPS, PDF, SVG, CDR (standard for vector art) |
Ideal For | Real-life photos & gradients | Branding, embroidery, banners, business cards |
File Size | Can be large if resolution is high | Usually compact and efficient |
Which Format Should You Choose for Printing?
When deciding between raster vs vector for printing, the main goal is to make sure your design prints clean, sharp, and professional. Vector files are built from shapes and paths, which means they can be scaled to any size without blurring. Raster images, on the other hand, are made of pixels, which can become blurry if enlarged.
Because of this difference, vectors are normally considered the best format for printing, especially in professional and commercial work like logos, packaging, signage, banners, uniforms, and promotional items.
If your design is going on T-shirts or merchandise, using vector artwork for screen printing is extremely important. It ensures that the print lines stay sharp and colors stay accurate during the printing process.
Why Vector Works Better in Printing?
Vectors give you:
- Sharp and smooth edges at any size
- Easy editing, like changing colors or adjusting layout
- Consistent results across different printing file formats
This is why most designers and print shops prefer receiving vector files for final production.
When Raster Is Used?
Raster still has its role, especially when dealing with photographs or images that contain shadows, textures, and natural gradients that vectors can’t replicate.
You can use raster for printing when:
- The image is high resolution (300 DPI or above)
- You are not enlarging the design beyond its original size
- The artwork includes realistic photo details
Raster is great for things like brochures, photo prints, album covers, product photography, and posters that feature real images.
Tools You Can Use for Raster to Vector Conversion
When it comes to raster vs vector conversion, there are many tools available that can help you cleanly convert pixel-based images into scalable vector artwork. Some tools are free and simple to use, while others are professional-grade and offer more precise control.
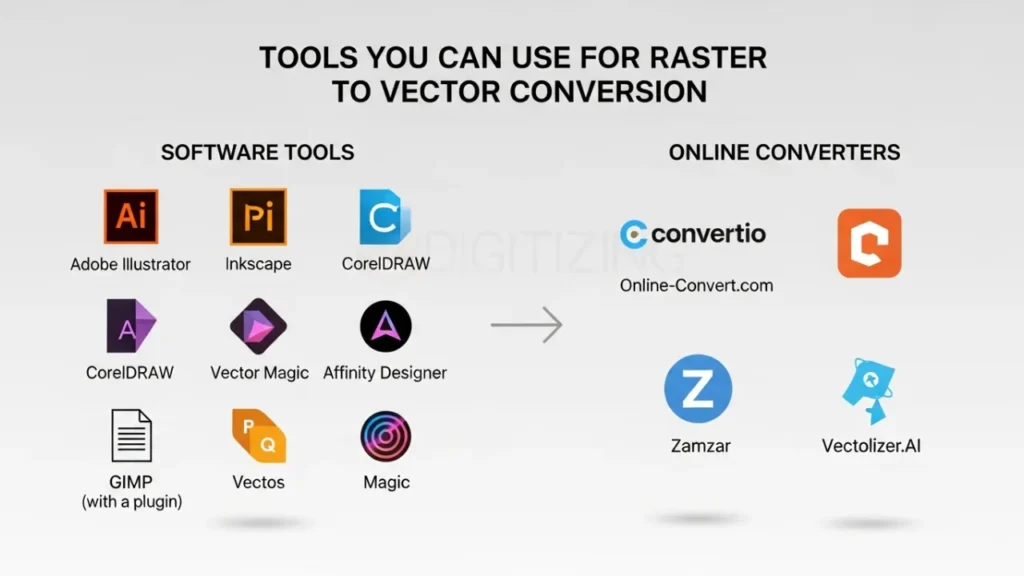
Below are both free and paid options, so you can choose based on your design needs.
Free Tools
Tool Name | What It Does | Best For |
Inkscape | A free and powerful vector tracing software | Converting logos, icons, and simple graphics |
Vectr (Online) | Web-based editor for light vector tasks | Quick conversions without software installation |
GIMP | A strong raster editing tools option | Cleaning or preparing raster images before conversion |
Photopea (Online Photoshop Alternative) | Works directly in browser | Editing and resizing raster files before tracing |
Paid Professional Tools
Tool Name | What It Does | Best For |
Adobe Illustrator | Industry standard vector tracing software with advanced precision | Professional logo recreation, branding files, print-ready vector design |
CorelDRAW | Strong vector workspace with excellent curve control | Printing businesses, screen printing shops, signage work |
Affinity Designer | Affordable vector editor with smooth workflow | Freelancers and small studios needing precision at a lower cost |
Vector Magic | Automatic converting raster to vector with clean outlines | Fast conversions when time is limited |
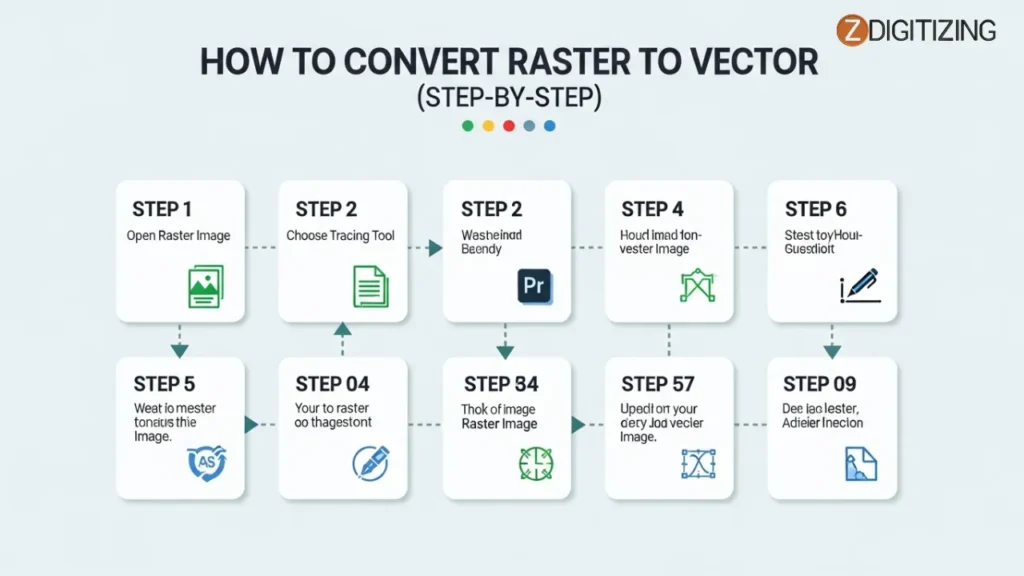
How to Convert Raster to Vector (Step-by-Step)
Before you start (raster vs vector), remember the goal: convert image to vector cleanly so it scales perfectly across different print formats.
You’ll prep the pixel image, trace it into paths, tidy the curves, apply colors, and export. At the end, you can even do a quick vector to raster conversion to preview how it will look in real-world mockups.
1) Prep the raster file
- Use a high-resolution source (ideally 300 DPI+).
- Remove backgrounds, boost contrast, and sharpen edges so shapes are clear.
2) Pick your approach
- Auto-trace (fast): good for simple logos/icons.
- Manual pen/Bezier tracing (precise): best for brand marks and detailed shapes.
3) Set up the document
- Place the raster on a locked layer.
- Create a new layer above for vector paths; choose a visible stroke width for tracing.
4) Trace major shapes first
- Outline the biggest shapes with the Pen/Bezier tool.
- Keep nodes minimal; prefer smooth handles over many points.
5) Add interior details
- Trace inner cuts, counters (holes in letters), and small elements.
- Use shape tools (ellipse/rectangle) and boolean ops (union/subtract) to stay clean.
6) Simplify and smooth
- Run “Simplify” sparingly to reduce points without changing the silhouette.
- Fix kinks and flat spots; maintain symmetry where intended.
7) Apply fills, strokes, and palettes
- Convert strokes to fills if the printer requires solid shapes.
- Match brand colors (Pantone/CMYK) as needed for consistent formats.
8) Handle text correctly
- Replace rough traced text with the actual font for perfect edges.
- If fonts aren’t available, expand text to outlines to avoid missing-font issues.
9) Export the vector master
- Save clean masters in AI/SVG/PDF/EPS depending on the printer’s print formats requirements.
- Keep a layered, editable file plus a flattened production copy.
10) Spot-check with a raster preview
- Do a quick raster vs vector conversion (export a PNG/JPG) at target size to preview edges.
- Zoom to 200–400% to catch any bumps or overlaps before sending to print.

Conclusion
Understanding your file format is important because the final print quality depends on it. When we look at raster vs vector, raster images are fine for photographs, but they lose clarity when enlarged.
For logos, branding, apparel prints, patches, labels, and signage, vector files are always the better choice because vector file printing benefits include clean edges, sharp details, and perfect scalability at any size.
However, converting a raster image to vector the right way requires skill. Auto-tracing tools often create rough edges and broken shapes that look messy when printed.
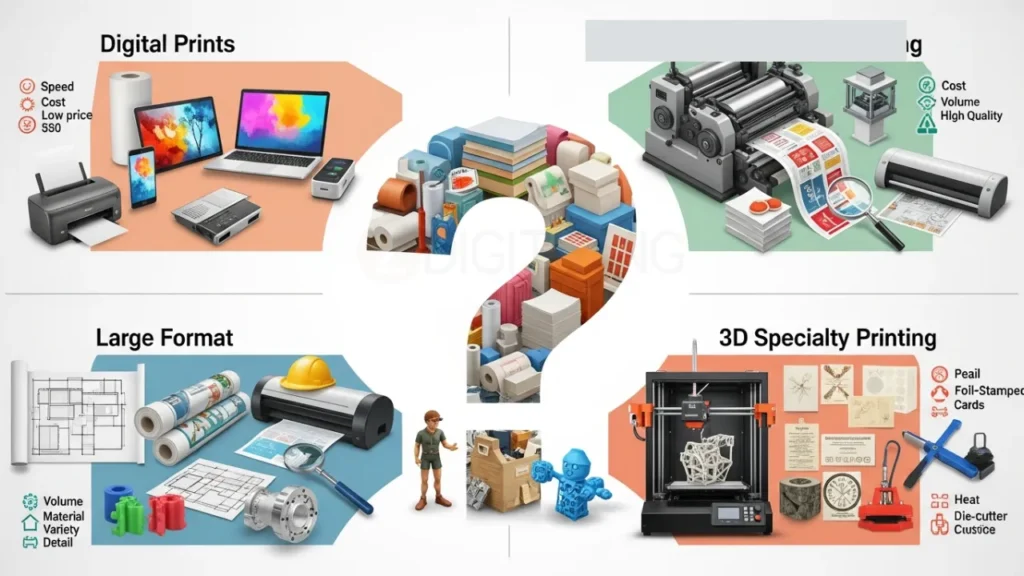
This is exactly where ZDigitizing Vector Art Service helps you. We carefully hand-trace your artwork to create clean, print-ready vector files, ensuring your design looks perfect whether it’s used for screen printing, sublimation, DTF, DTG, vinyl cutting, or large format printing.
And if your design also needs to be stitched on caps, shirts, bags, or uniforms, we provide professional embroidery digitizing services as well, so your design runs smoothly on the machine and stitches cleanly without thread breaks.
You receive your final files in AI, EPS, PDF, SVG, or your machine embroidery formats, with fast turnaround and free minor adjustments. If you want your printing and embroidery to look sharp, professional, and high-quality, letting experts handle your vector conversion and digitizing makes all the difference.
Order your vector art now and get 50% OFF your first conversion as a new customer.
FAQs
Choose vector when your design needs to be scaled to different sizes without losing clarity, such as logos, business cards, signage, T-shirt designs, and branding materials. Vector artwork keeps edges sharp and clean at any size.
For most professional printing, vector is better because it remains crisp and sharp even when enlarged. Raster can work for printing photos, but it must be high resolution (300 DPI or more) to avoid blurriness.
JPEG is a raster format. It is made of pixels and can lose quality if you zoom in or enlarge it beyond its original size.
TIFF is generally the best raster format for printing because it maintains high quality and supports accurate color reproduction. A well-prepared print-quality PDF can also be preferred by some printers depending on workflow.
Zoom into the PDF: if the image becomes blurry, it’s raster; if it stays sharp, it’s vector. You can also try selecting text or shapes, if they can be individually selected, the file contains vector elements.


