Learning how to digitize old photos is easier than most people think, even as physical prints fade, tear, and lose quality over time. The most effective way to digitize old photos is by using a flatbed scanner for maximum image quality, a smartphone scanning app for convenience, or a professional digitisation service for fragile collections. The right choice depends on the size of your collection, the level of detail you want to preserve, and your budget.
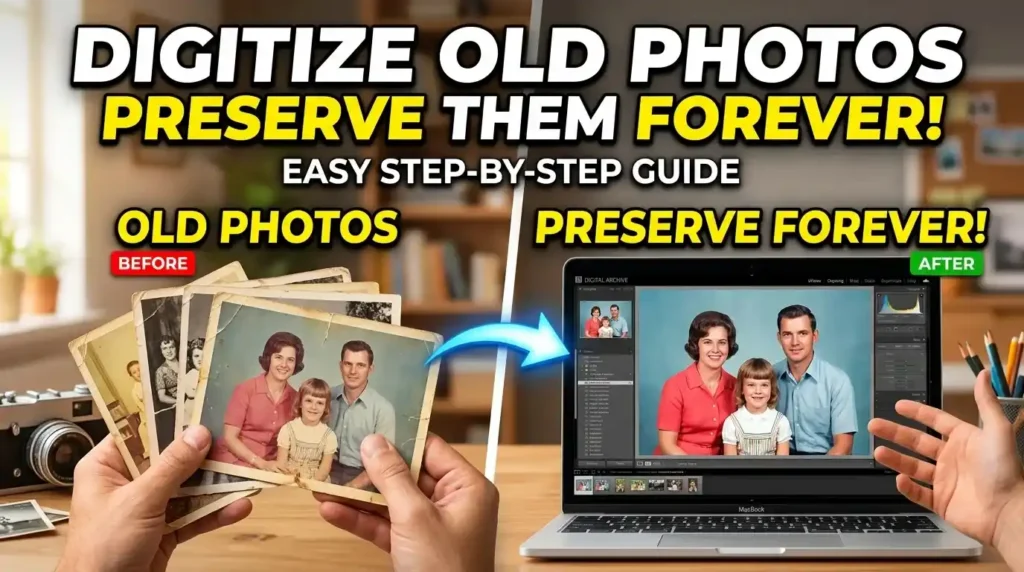
Whether you have a few family albums or thousands of printed photographs, this guide explains the safest and most effective methods, the equipment worth using, common mistakes to avoid, and how to preserve your memories without damaging the original prints.
How to Digitize Old Photos and Preserve Them Forever
How to Digitize Old Photos Step by Step
Every photo collection is different, but the overall photo digitization process follows the same sequence. Whether you’re using a flatbed scanner, a smartphone, or a professional service, following these steps will help you create clear, organised digital copies while protecting the original prints.
Step 1: Gather and Sort Your Photos
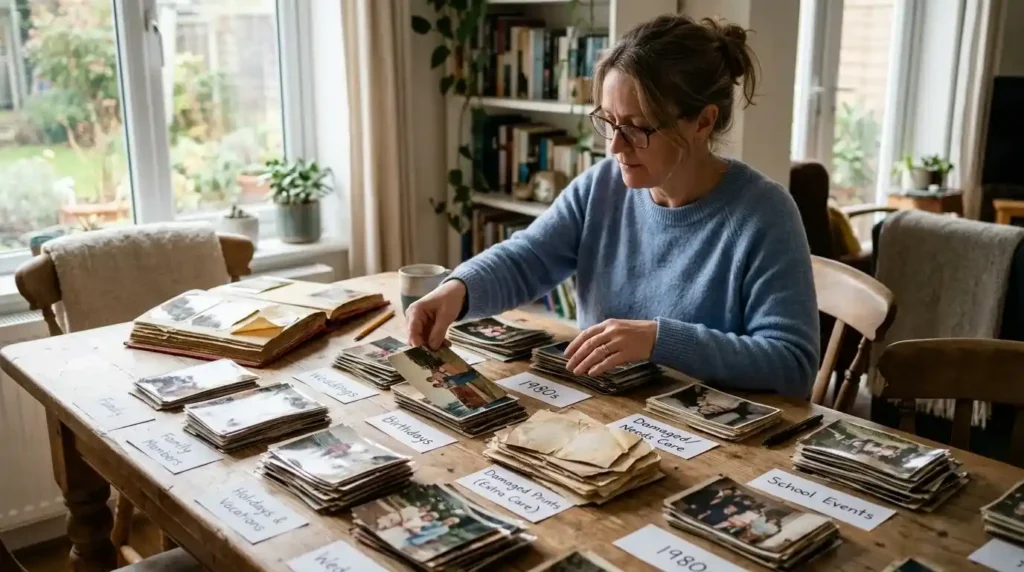
Before you scan anything, organise your photographs into small batches. This makes the entire process faster and helps you avoid mixing files later.
A simple way to organise them is by:
- Family members
- Holidays and vacations
- Weddings
- Birthdays
- School events
- Year or decade
If some prints are damaged, place them in a separate pile. Fragile photographs often require extra care during old photo digitization, especially if they are torn, curled, or fading.
Expert Tip: Remove photos from old magnetic albums carefully. The adhesive can damage aging prints if they are pulled too quickly.
Step 2: Clean Every Photo Before Scanning
One of the biggest mistakes beginners make is scanning dusty photographs.
Dust, fingerprints, and lint become much more visible after scanning than they appear to the naked eye. Spending a few seconds cleaning each print can save hours of editing later.
Use:
- A clean microfiber cloth
- An air blower
- A soft anti static brush
Never clean prints with liquids, glass sprays, paper towels, or household wipes, as these rough materials and harsh chemicals can easily scratch or strip delicate vintage photo emulsion.
If a photograph is bent, don’t force it flat. Scan it gently or place it under a heavy book for several hours before scanning.
Step 3: Choose the Right Digitizing Method
There isn’t one perfect solution for everyone.
The best way to digitize old photos depends on three things:
- How many photos you have
- The quality you want
- Your available budget
If your priority is… | Best choice |
Maximum image quality | Flatbed scanner |
Fast home scanning | Smartphone scanning app |
Hundreds of photos | Sheet feed scanner |
Damaged or valuable prints | Professional digitisation service |
Instead of choosing the most expensive option, choose the method that matches your collection.
For example, many people scan family portraits using a flatbed scanner while using a phone app for everyday snapshots.
Step 4: Scan Your Photos Using the Correct Settings
Once everything is prepared, you can begin scanning.
This is where many people accidentally reduce image quality by using incorrect settings.
For the best results:
- Scan at 600 DPI for most printed photographs.
- Use 1200 DPI only if you plan to enlarge or restore very small images.
- Save master copies as TIFF whenever possible.
- Save everyday copies as high quality JPEG files for easier sharing.
Higher resolution doesn’t always produce better results. Extremely high DPI settings simply create larger files without adding useful detail for standard prints.
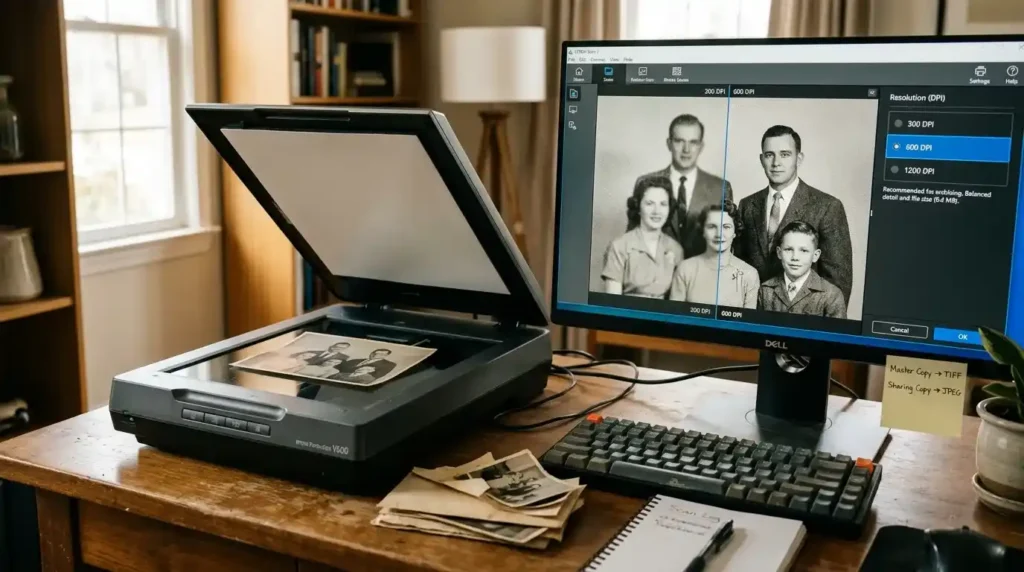
If you’re using the best scanner to digitize old photos, disable unnecessary sharpening filters and automatic colour effects during scanning. It’s usually better to edit the image later than permanently alter it during the scan.
Step 5: Edit and Restore Your Digital Photos
Scanning preserves a photograph, but simple editing can make it look significantly better.
Most photo editing embroidery software allows you to:
- Correct faded colours
- Improve brightness and contrast
- Remove small dust spots
- Straighten tilted images
- Crop unwanted borders
Avoid making heavy edits to your original scan.
Instead, keep one untouched master copy and create another version for editing. This ensures you always have the original file if you want to restore it differently in the future.
Modern editing software can dramatically improve old family photographs, but it cannot recreate details that were never captured during scanning. That’s why using good scanning settings is far more important than relying on editing afterward.
Step 6: Organise and Name Your Digital Files
Once you’ve scanned your photos, don’t leave them with names like IMG001 or Scan00045. A few minutes spent organising your files now will save hours of searching later.
Create folders based on whatever makes the most sense for your collection, such as:
- Years or decades
- Family members
- Holidays and special occasions
- Weddings
- School memories
- Travel
Use clear, consistent file names instead of random numbers.
For example:
- 1998 Family Vacation London
- Grandparents Wedding 1965
- Sarah Birthday 2008
If you’re working through a large collection, organising files as you scan them makes the entire photo digitization process much easier to manage later.

Expert Tip: Add simple keywords or descriptions to your photo metadata whenever possible. It makes searching thousands of photos much faster in the future.
Step 7: Back Up Your Photos Before Anything Happens
Many people finish scanning their pictures only to keep every file on one computer. If that device fails, years of work can disappear instantly.
A simple backup strategy protects your memories from hardware failure, accidental deletion, or theft.
For the best protection, keep your digital collection in at least three places:
- Your computer
- An external hard drive
- A trusted cloud storage service
This approach ensures your memories remain safe even if one copy is lost.
If you’ve spent weeks digitizing old photos, creating multiple backups is just as important as scanning them.
Can AI Improve Old Photos?
Modern AI tools can significantly improve scanned photographs by repairing scratches, sharpening faces, restoring faded colours, and removing small imperfections.
However, AI should enhance a digital copy rather than replace proper scanning. Even the smartest restoration software cannot recover details that were never captured during the original scan.
That’s why learning how to digitize old photos correctly is far more important than relying on editing software later.
Common Mistakes to Avoid When Digitizing Old Photos
Even good equipment can’t fix poor scanning habits. Most quality problems happen because of small mistakes during preparation rather than the scanner itself.
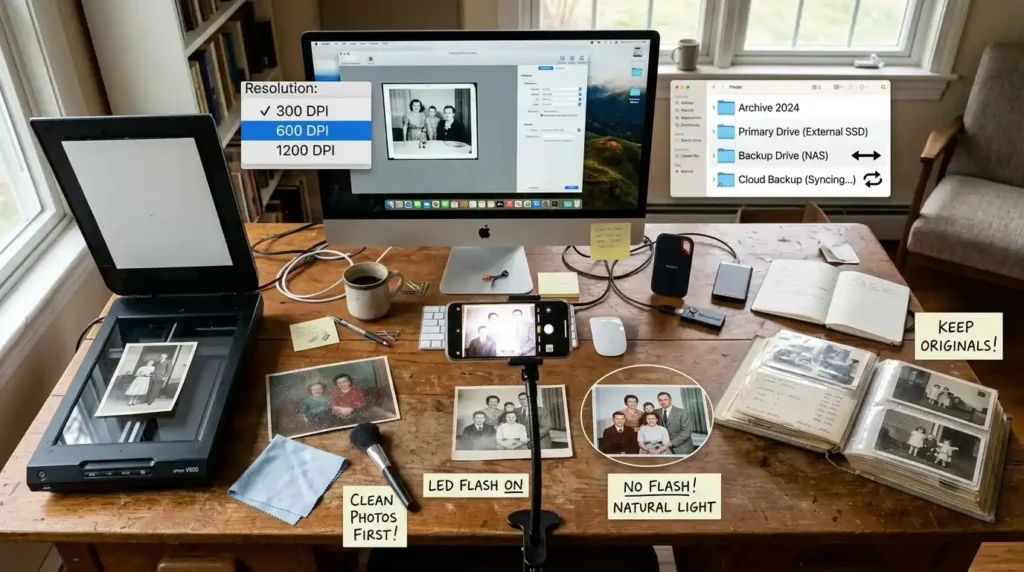
Here are some of the most common issues to avoid.
Scanning at the Wrong Resolution
Many people scan everything at either very low or extremely high DPI.
Around 600 DPI is ideal for most printed photographs. Going much higher usually creates much larger files without adding meaningful detail.
Ignoring Dust Before Scanning
Tiny dust particles often become much more noticeable after scanning.
Always clean each photo gently before placing it on the scanner.
Using Flash When Scanning With a Phone
If you’re using the best app to digitize old photos, avoid using your phone’s flash.
Flash creates reflections that reduce image quality and hide important details.
Naturally, even lighting produces much better results.
Saving Only One Copy
Keeping your entire collection in one location leaves your memories vulnerable to drive failure or accidental deletion. Use the 3-2-1 Backup Strategy:
- 3 Copies: Keep three total versions of your digital archive.
- 2 Storage Formats: Save on two different media types (e.g., your primary SSD + an external USB hard drive or NAS).
- 1 Offsite Location: Encrypt and upload one copy to secure cloud storage (e.g., Google Drive, Backblaze, or OneDrive).
Throwing Away the Original Prints
Even after creating excellent digital copies, keep your original photographs whenever possible.
Future restoration technology may recover details that today’s software cannot.
Can You Restore Old Photos After Digitising Them?
Yes. In fact, restoring a digital copy is much safer than attempting to repair the original print.
Once you’ve learned how to digitize old photos, you can improve many common problems using photo editing software without risking further damage to the original.
Depending on the condition of the photograph, restoration may include:
- Correcting faded colours
- Improving brightness and contrast
- Removing dust spots and scratches
- Repairing minor tears or creases
- Sharpening slightly blurred images
Always keep an untouched master scan before making any edits. This gives you the freedom to experiment while preserving the original digital copy.
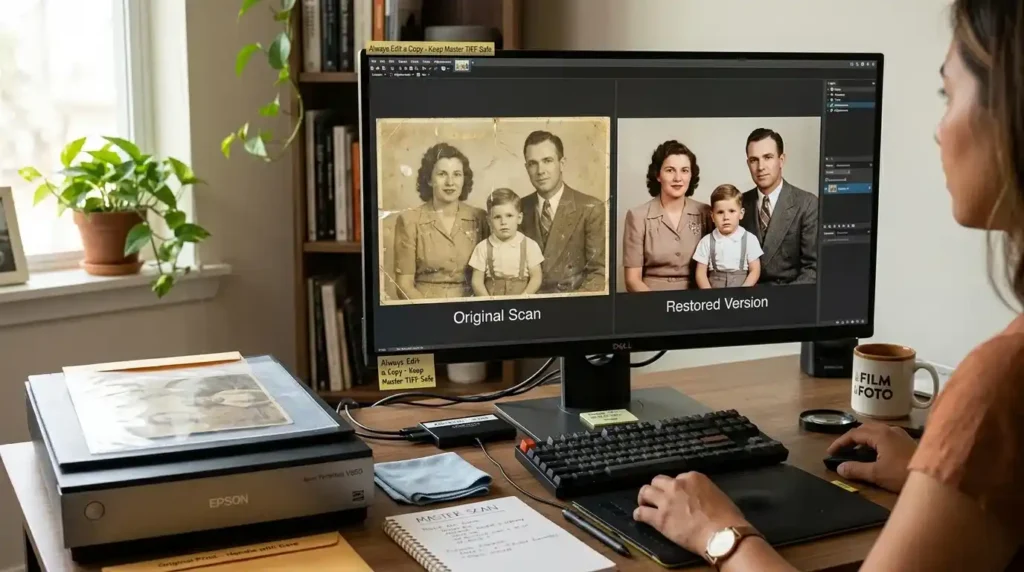
For heavily damaged family photographs, professional restoration may produce better results than automatic editing tools.
Modern AI-assisted tools (such as Photoshop Neural Filters, Remini, or MyHeritage In Color) can speed up facial sharpening and scratch removal, but always apply AI enhancements to working copies—never your master TIFF scan.
Where Can You Digitize Old Photos?
When deciding where to digitize old photos, many people searching how to digitize old photos eventually choose professional services as the safer option, especially for large family archives or delicate photographs.
There are several places where you can digitize old photos, including:
- Local photography and print shops
- Camera and imaging stores
- Photo restoration studios
- Mail in digitisation companies
- Archive and preservation specialists
These services often use professional scanners that capture far more optical detail than standard consumer equipment. Many labs also offer custom color correction, image restoration, and manual digitizing techniques to carefully adjust scan settings and salvage details from severely faded or damaged prints before final digital file delivery.
Before choosing companies that digitize old photos, compare more than just pricing. Ask about:
- Maximum scanning resolution
- Supported file formats
- Handling procedures for fragile prints
- Restoration services
- Return shipping protection
- Delivery options such as cloud storage or external drives
For irreplaceable family photographs, paying a little more for experienced handling is often worth the investment.
How to Preserve Your Original Photos After Digitising
Creating digital copies is only half of the job. Once you’ve learned how to digitize old photos, it’s equally important to protect the original prints. Even after scanning, those photographs remain your primary source and may contain details that future restoration technology can recover.
Store printed photos in a cool, dry place away from direct sunlight, humidity, and extreme temperatures. Use acid free photo boxes or archival quality albums instead of ordinary cardboard containers, which can cause photographs to yellow over time.
Avoid writing directly on the back of prints with regular pens. If you need to label them, use a soft pencil or archival safe pen only on the border or storage sleeve.
With proper storage, your physical collection and digital archive can preserve family memories for generations.
Need Professional Digitizing Services?
While preserving physical memories safeguards your past, creating production-ready design files requires specialized precision. At ZDigitizing, we offer best embroidery digitizing solutions, from custom logos to raised embroidery 3d puff designs and fast embroidery digitizing services in USA and worldwide.
Get 50% OFF on your 1st order and turn your artwork into machine-ready stitch files with guaranteed quality.

Final Thoughts
Learning how to digitize old photos isn’t just about creating digital copies. It’s about protecting memories that may never be replaceable.
Whether you choose the best scanner to digitize old photos, a reliable smartphone app, or one of the trusted companies that digitize old photos, the most important step is to start before your photographs fade further.
The best way to digitize old photos is the method that matches your collection, budget, and preservation goals. By following the techniques in this guide and creating multiple backups, you’ll preserve your family history for future generations while making every memory easier to organise, restore, and share.
Frequently Asked Questions
For most people, using a smartphone with a reliable scanning app is the easiest way to digitize old photos. These apps automatically crop images, reduce glare, and improve perspective, making them ideal for small collections. If long term preservation is your priority, however, a flatbed scanner remains the better choice.
The fastest way to digitize old photos is by using a sheet feed scanner, which can scan multiple photographs automatically. If you only have a handful of pictures, a smartphone scanning app can also produce quick results with very little setup.
Yes. If you don’t own a scanner, using the best app to digitize old photos is a practical alternative. Smartphone apps can automatically crop images, reduce glare, and improve perspective, making them ideal for everyday family photographs. However, if long term preservation is your goal, a dedicated scanner still delivers noticeably better image quality.
For long term preservation, save a master copy as TIFF because it retains the highest image quality. For sharing through email, messaging apps, or social media, high quality JPEG files are usually the most convenient option.
Most printed photographs should be scanned at 600 DPI. If you’re planning to enlarge very small prints or perform detailed restoration work, scanning at 1200 DPI can preserve additional detail.