Are you interested in learning how to embroider headwear products, or perhaps you’re aiming to enhance your existing skills with more complex techniques?
Whether you’re just starting out or you already know the basics and want to do even more, this guide is perfect for you.
We’ll cover everything from basics headwear embroidery techniques to more detailed and fancy embroidery techniques. This will help you make your headwear stand out and look professional.
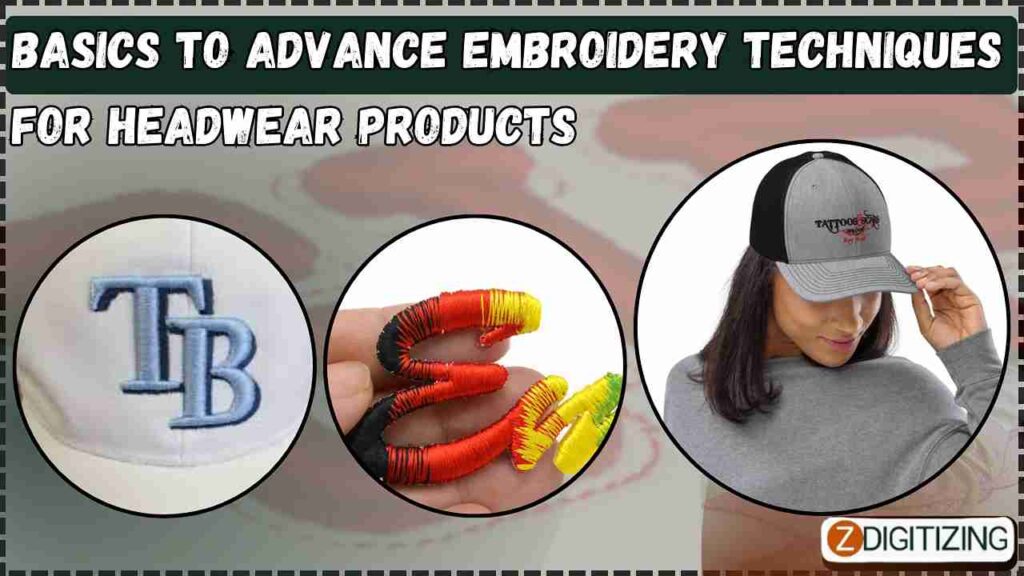
Table of Contents
Types of Headwear Suitable for Embroidery
When you want to add embroidery to headwear products using a machine, it’s important to pick the right types of hats or caps. Here’s a simple guide to help you choose the best headwear for machine embroidery:
- Baseball Caps: These are very popular for embroidery. They have a nice, smooth front panel that’s perfect for detailed designs.
- Beanies: Soft and stretchy, beanies are great for embroidery, especially with simple, bold designs because of their knit fabric.
- Bucket Hats: These hats have a wide, downward-sloping brim which provides a good surface for embroidery on the crown or the brim itself.
- Trucker Hats: Trucker hats have a large front panel like baseball caps, but with mesh back panels. They’re great for vibrant, noticeable embroidered designs on the front.
- Visors: Visors are open at the top, which makes them easy to place in an embroidery machine. They offer a good front area for logos or names.
- Snapbacks: Similar to baseball caps, snapbacks have a flat or curved brim and a structured design that holds up well under the embroidery machine.
Choosing the right type of headwear for your embroidery project can make a big difference in how well your designs turn out. Make sure to consider the material and structure of the hat to ensure the best results!
Basic Embroidery Techniques for Headwear Products
Understanding these basic techniques is crucial for anyone starting with machine embroidery, especially on headwear like caps and hats. Basics techniques are:
- Flat Embroidery
- Applique
- Lettering
Flat Embroidery
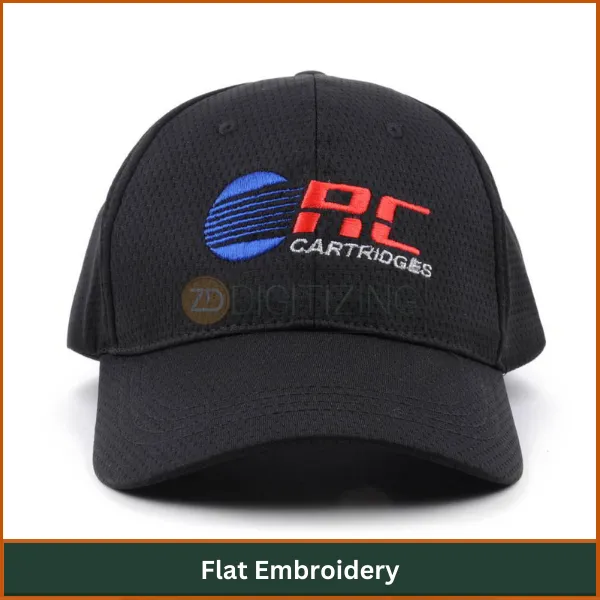
Flat embroidery is a basic but versatile machine embroidery technique that stitches designs directly onto a fabric. This method suits logos, text, and basic graphics, ensuring a sharp and professional finish.
Key Features:
- Stitch Types: Common stitches used in flat embroidery include:
- Satin Stitches: Smooth and shiny, ideal for borders and lettering.
- Fill Stitches: Used to fill larger areas with color.
- Running Stitches: Simple lines that can be used for outlines or details.
- Design Simplicity: Ideal for less complex designs with minimal colors. More intricate patterns may require advanced embroidery techniques.
- Fabric Suitability: Compatible with a variety of textiles such as cotton, polyester, and fabric blends.
Success Tips:
- Digitization: Accurate digitization is crucial to prevent issues like thread breaking or fabric puckering. Utilize software that accurately simulates the final stitch appearance on the fabric.
- Stabilization: Select the right stabilizer—tear-away for light fabrics and cut-away for heavier ones—to support the fabric during the embroidery process.
Applique
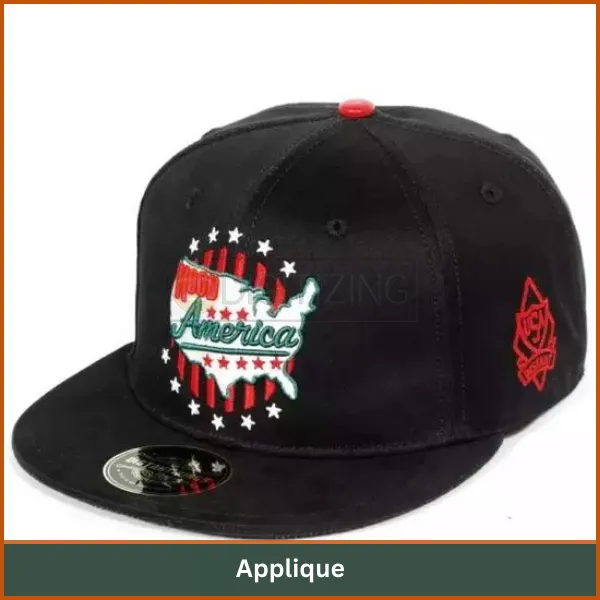
Applique involves sewing a piece of fabric onto a larger base fabric to create designs, adding texture and depth. This technique is favored for larger, colorful designs or for adding contrasting fabric textures.
Key Features:
- Layering: Combines different fabric layers, such as cotton, felt, or leather, to achieve a dynamic visual effect.
- Versatility: Suitable for a variety of shapes, letters, or detailed images, with embroidery stitching enhancing the edges.
- Color Exploration: Encourages the use of vibrant and contrasting fabrics for eye-catching embroidered designs.
Success Tips:
- Fabric Choices: Select complementary fabrics that contrast well both in texture and color to highlight the design elements.
- Edge Finishing: Employ zigzag or satin stitches to secure the applique edges, adjusting stitch density according to fabric weight.
Lettering
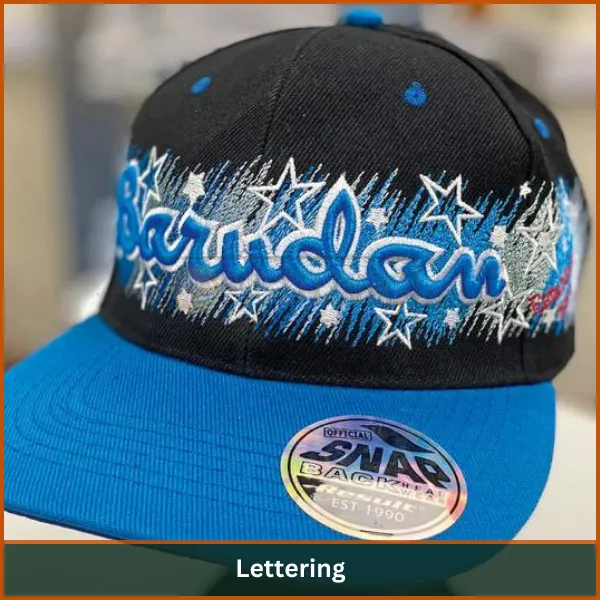
Lettering involves embroidering text using various font styles on headwear products, perfect for personalizing items with names, slogans, or logos.
Key Features:
- Font Variety: Offers a wide selection of fonts. Choose readable fonts that fit the available space without distorting.
- Size Adjustments: Ensure the text size is suitable for the headwear’s surface to prevent alteration during embroidery.
- Alignment Accuracy: Crucial for aesthetic appeal; use guidelines to align text properly.
Success Tips:
- Font Testing: Experiment with different fonts to find the best fit for your design, as some may not render well in stitches.
- Spacing Considerations: Maintain adequate spacing between letters to avoid merging or thread issues.
Intermediate Embroidery Techniques for Headwear
When you’re ready to take your headwear embroidery to the next level, intermediate techniques can add unique styles and intricate details to your projects. These methods are perfect for creating more complex designs that stand out.
Some intermediate embroidery techniques for headwear products:
- 3D Puff Embroidery
- Monogramming
- Freestanding Lace
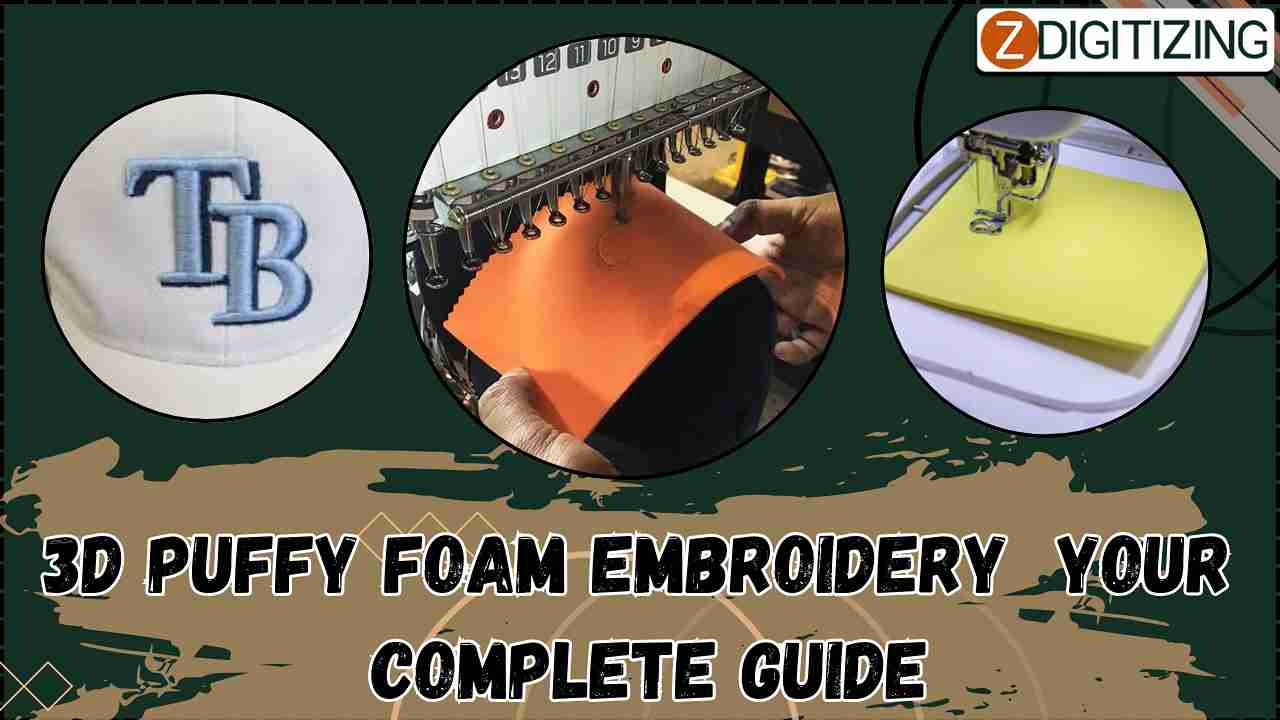
3D Puff Embroidery
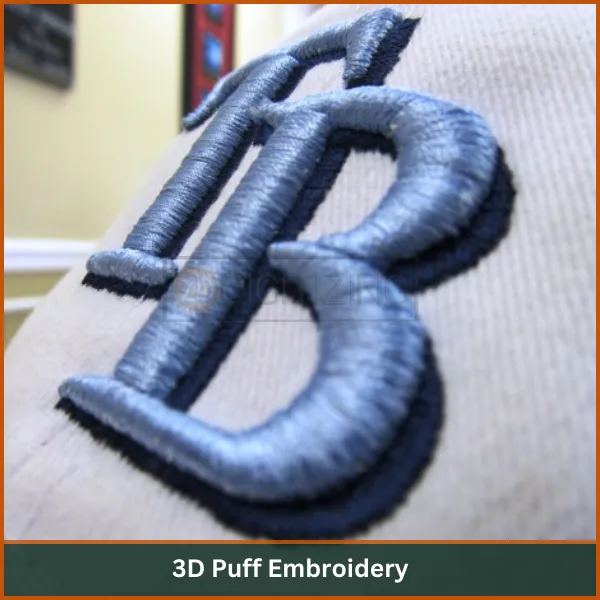
3D puff embroidery, achieved by placing foam under the stitches, adds significant depth to designs, commonly used on sports caps and promotional items.
Key Features:
- Foam Usage: A foam base under the stitching expands upon embroidery, offering a bold, raised appearance.
- Visual Impact: Provides a standout look ideal for prominent logos or text.
Success Tips:
- Foam Selection: Choose the thickness that matches the desired elevation of the design.
- Stitch Adjustments: Modify stitch density to cover the foam adequately without flattening it excessively.
Monogramming
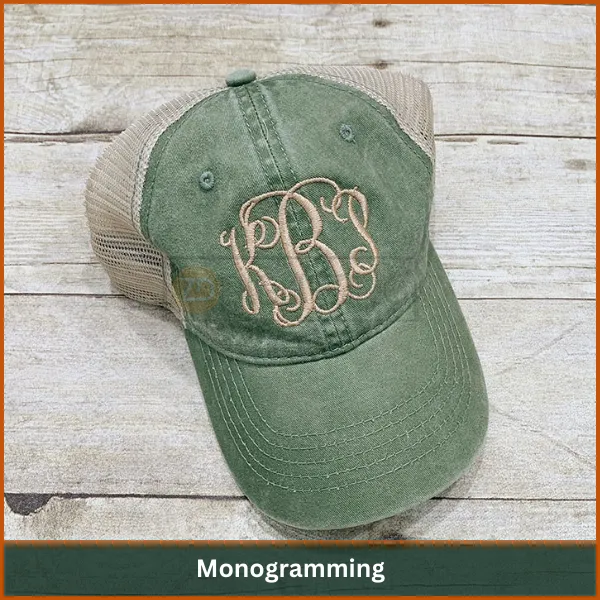
Monogramming, often used for personalizing headwear, involves embroidering initials or names in decorative fonts.
Key Features:
- Customization: Perfect for personalizing with names, initials, or symbols in various styles, from elegant scripts to contemporary blocks.
- Design Flexibility: Allows for the inclusion of ornate elements like swirls or decorative borders.
Success Tips:
- Font Selection: Opt for fonts that reflect the wearer’s style—script for formal and block for casual.
Placement Considerations: Thoughtfully place monograms on the cap, ensuring they complement other design elements.
Freestanding Lace
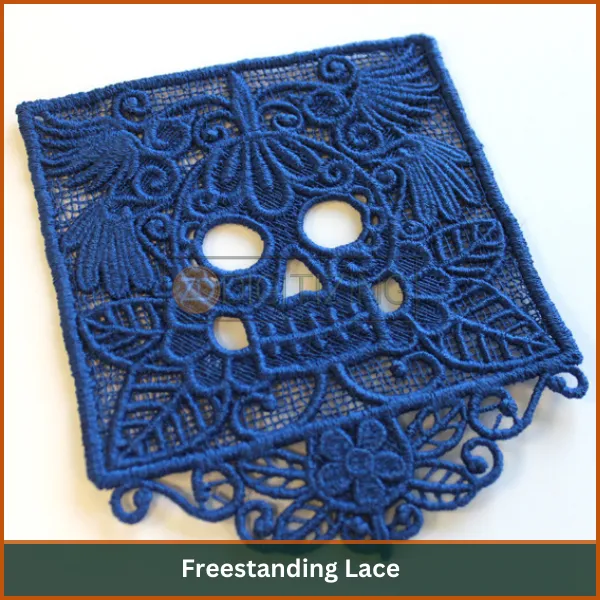
This technique creates stand-alone lace designs without a fabric base, ideal for adding sophisticated patterns to headwear.
Key Features:
- Independent Structure: Requires no fabric underneath, allowing the lace to stand alone as a decorative element.
- Complex Patterns: Best suited for ornate floral or decorative designs that enhance the product’s aesthetics.
Success Tips:
- Stabilizer Use: Employ water-soluble stabilizers that leave no residue, dissolving away to reveal the lace.
Testing: Always test your lace patterns on similar material before final application to ensure quality and design integrity.
Advanced Embroidery Techniques for Headwear Products
If you want to get really good at making embroidered hats, learning advanced techniques is important. These skills help you make very detailed and fancy embroidered designs that look professional.
The advance techniques are:
- In-the-Hoop Projects
- Photo Stitch
- Cross Stitch
In-the-Hoop Projects
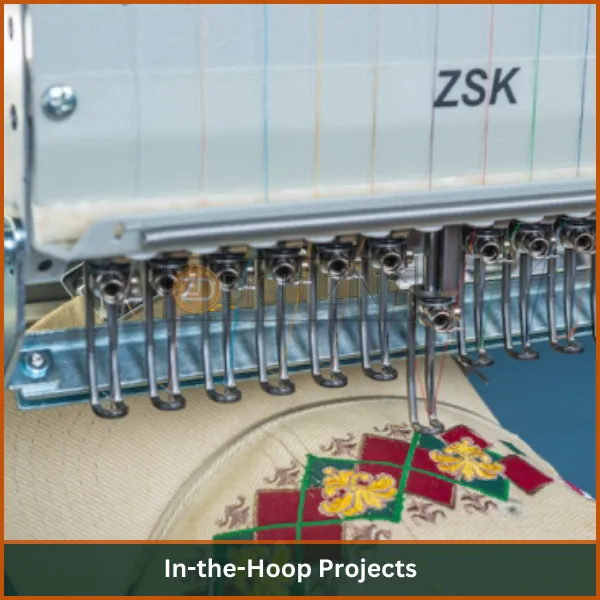
In-the-hoop embroidery projects are completed entirely within the embroidery hoop, combining various techniques for intricate designs.
Key Features:
- Comprehensive Process: Often includes multiple steps, such as adding functional elements like zippers.
- Controlled Embroidery: Reduces fabric movement, ensuring precise stitching.
Success Tips:
- Detailed Planning: Sketch and plan every element of your design before starting.
- Quality Hoops: Use well-matched hoops that securely hold the fabric, compatible with your embroidery machine.
Photo Stitch

Photo stitch transforms high-resolution images into detailed stitch patterns on fabric, ideal for creating photorealistic designs on headwear products.
Key Features:
- Detailed Reproduction: Captures intricate details and color gradients, suitable for complex images and logos.
- Skill Requirement: Demands proficiency in digitizing and operating embroidery machines due to its complexity.
Success Tips:
- Image Quality: Start with high-resolution images for clarity.
- Test Runs: Perform several trials on similar fabrics to fine-tune the stitch output based on the fabric’s behavior.
Cross Stitch
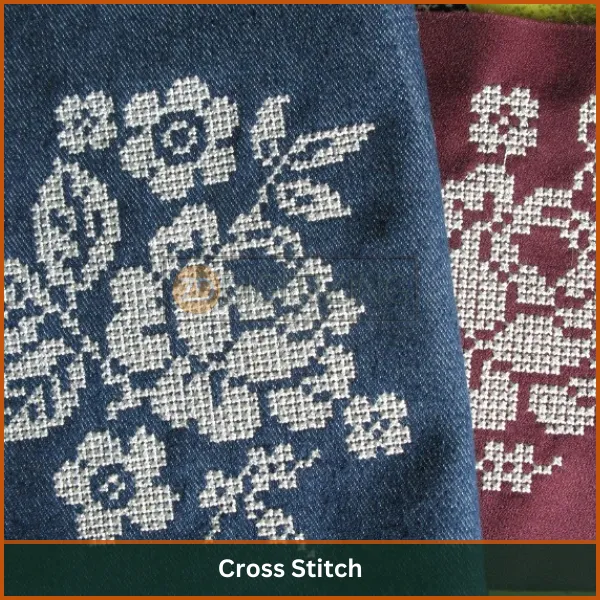
Adapted for machine use, cross stitch on hats brings a hand-stitched look with unique textures.
Key Features:
- Textured Look: Achieves a distinctive appearance with its cross-shaped stitches, suitable for varied design patterns.
- Design Versatility: Applicable to both simple and complex patterns.
Success Tips:
- Digitizing Accuracy: Ensure precise spacing between stitches to avoid irregular patterns.
- Color Coordination: Choose colors that contrast well and complement the overall design theme
Best Practices for Professional Headwear Embroidery
Here are some important tips to help you do a great job when embroidering hats and other headwear.
- Choose the Right Materials: Use high-quality threads, needles, and stabilizers suitable for the specific fabric of the headwear products.
- Digitize Carefully: Proper digitization is crucial for achieving clean stitches and avoiding thread breaks or puckering.
- Test Designs: Always conduct test runs on similar fabrics before final production to ensure design placement and stitch quality.
- Maintain Equipment: Regular maintenance of your embroidery machine will ensure consistent performance and high-quality output.
- Follow Design Guidelines: Adhere to size limitations and design specifications appropriate for headwear to avoid distortion during stitching.
- Utilize Cap Hoops: Using cap hoops specifically designed for hats will help secure the fabric properly during embroidery, preventing misalignment.
Conclusion: Perfecting Your Headwear Embroidery
We’ve covered a lot about different embroidery techniques for hats, and we hope you’re excited to try them out or get even better at them. Remember, the more you practice, the better your embroidery will get!
If you’re looking for a quick way to get professional-looking designs without buying all the gear or spending lots of time learning, check out our embroidery digitizing services at ZDigitizing.
We can turn any design you have into a file that’s ready for embroidery, especially made for hats.
We’re happy to offer a 50% discount to all our first-time customers. It’s a perfect chance to try our top-notch digitizing services for half the price. This deal is a great way to kickstart your embroidery projects with expert help.
Let ZDigitizing take your hat designs to the next level. With our help and this special offer, your next project will be super easy and look amazing. Whether it’s for fun or for your business, we’re here to help you succeed.
Start today and see the magic of professional digitizing!
FAQ
Both hats and caps fall within the category of headgear and headwear accessories. However, all hats have brims and shaped crowns, whereas a cap is less structured, and doesn’t have a brim, but is never without a peak or visor.
Headgear, headwear, or headdress is any element of clothing that is worn on one’s head, including hats, helmets, turbans, and many other types. Headgear is worn for many purposes, including protection against the elements, and decoration, or for religious or cultural reasons, including social conventions.
- Wash your hands every time you start embroidering.
- Before you begin, make sure the fringe of the canvas won’t crumble.
- Start embroidering from the center.
- Do a markup of 10/10 cells using a marker specially crafted for fabric.


