If you’ve ever stared at a shirt or jacket with embroidery you don’t like, the question is simple: can embroidery be removed safely and cleanly? In most cases, yes, machine embroidery can be taken off many fabrics, but the result depends on the fabric, stitch density, and your method. You might be dealing with an old logo, a child’s name, or an outdated design.
In this short guide, you’ll learn how to remove machine embroidery from shirts and jackets, how to take off embroidered patches, which tools work best, and when to call a pro. You’ll also see how to avoid damaging the fabric and whether you can redo it with a fresh design.
Can Embroidery be Removed and Redone?
Assessing the Damage: Can Your Embroidery Actually Be Removed?
Before asking, can you remove embroidery, check the fabric, stitch density, and design size. Some embroidery can be removed cleanly, while heavy stitching may leave marks.
Fabric Type vs. Removal Success
The “memory” of a fabric determines if it will heal after the stitches are gone. Sturdy materials like denim, heavy canvas, and thick polyester blends are excellent for restoration. They have a tight weave that can often hide previous needle penetrations.
Fabric Type vs. Removal Success
On the other hand, delicate fabrics like silk, thin performance rayon, or light knits are much riskier. Because the needles used in high-speed industrial machines are thick, they can sometimes slice the fibers of delicate fabrics, leaving permanent holes that can embroidery be removed efforts cannot fix.
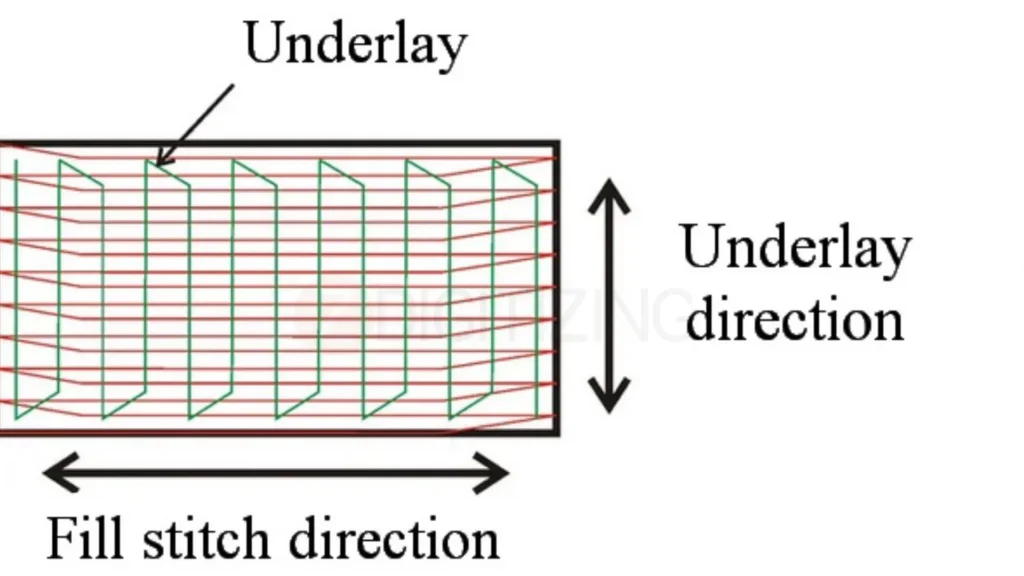
Identifying Stitch Density and Underlay
For clean embroidery removal, check the stitch density and underlay first. Embroidery has visible top stitches, but underneath, underlay stitches hold the design firmly to the fabric and stabilizer.
Identifying Stitch Density and Underlay
If you’re wondering can embroidery be removed, the answer depends on stitch density.
If a logo is very dense (lots of stitches in a small area), it acts like a perforated stamp. If you pull too hard, the entire section of fabric might rip out. Understanding that you are fighting both the top thread and the hidden foundation is key to a safe removal process.
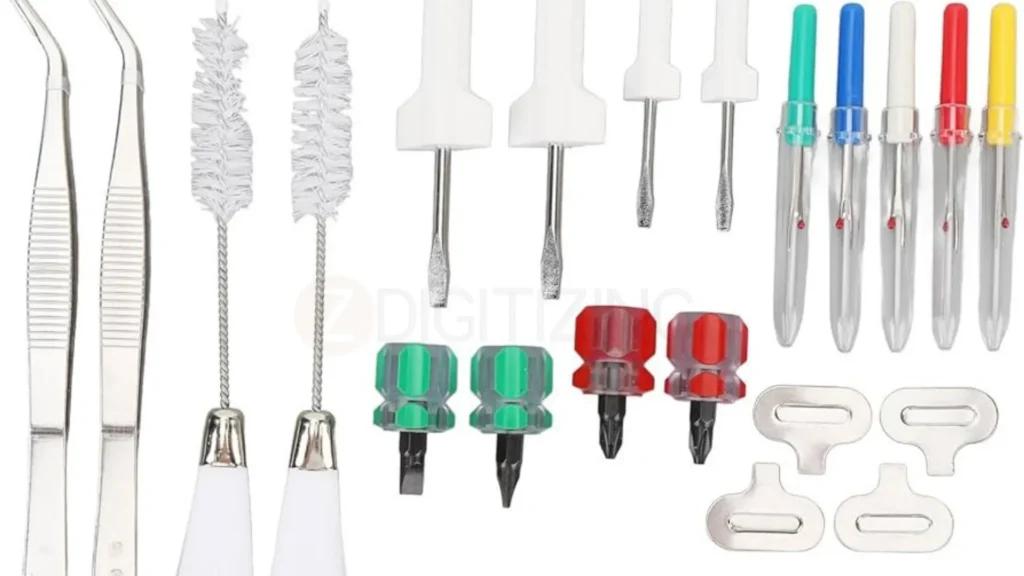
Essential Embroidery Removal Tools for a Clean Finish
The best way to remove embroidery is to use proper tools like a seam ripper, embroidery eraser, tweezers, and small scissors. Avoid pulling threads by hand, as it can damage the fabric or leave holes.
Manual Tools: Seam Rippers and Tweezers
Manual Tools Seam Rippers and Tweezers
The classic seam ripper is the most common embroidery removal tool. It has a sharp, curved blade and a small red ball on one tip to prevent snagging. High-quality tweezers are also vital. Once you cut the threads from the back, you need fine-point tweezers to pluck the tiny “whiskers” of thread from the front.
If you are careful, can embroidery be removed successfully with just these two items, though it will take more time.
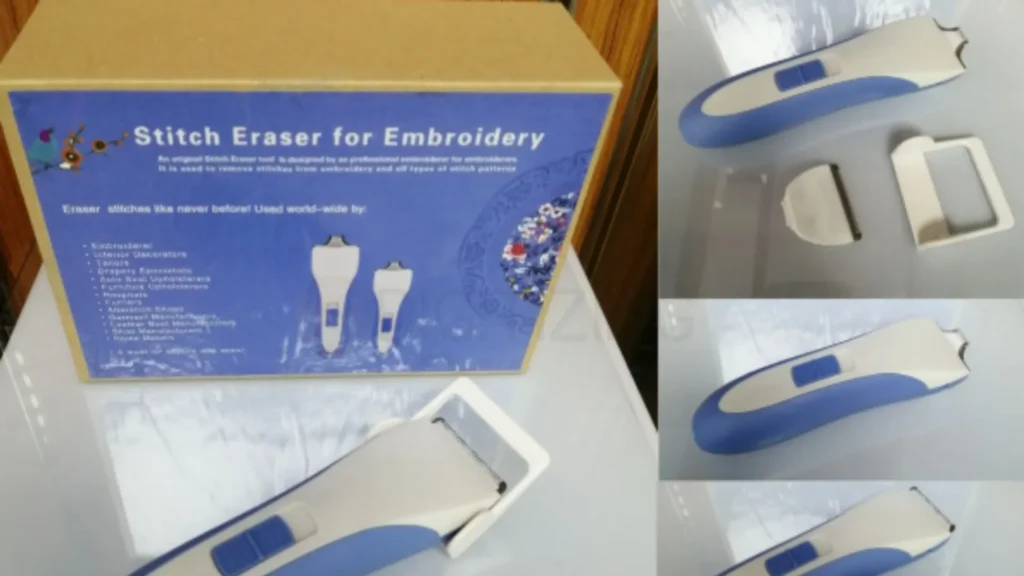
Professional Tools: Electric Stitch Erasers and Surgical Blades
Professional Tools Electric Stitch Erasers and Surgical Blades
If you ask, can embroidery be removed from large or dense designs, professional tools make it easier.
For businesses or large designs, an electric stitch eraser is a game-changer. These look like hair clippers but are engineered with a specific blade tension to shave off the bobbin thread on the back of the embroidery. Surgical blades (scalpels) are also used by pros for precision.
They are incredibly sharp and allow you to slide under a satin stitch column and slice through a hundred threads in one flick.
Role of the “Embroidery Stitch Remover” Tool
Role of the Embroidery Stitch Remover Tool
There are specialized liquids often called “stitch removers” or “adhesive removers.” If you are asking can embroidery be removed cleanly, these liquids help dissolve sticky stabilizer residue while mechanical tools cut the threads.
Using a dedicated stitch remover ensures that the fabric remains supple and isn’t stiffened by old glue.
How to Remove Embroidery from Different Garments (Step-by-Step)?
To find the easiest way to remove embroidery, you should always start from the back of the garment. While every piece of clothing is unique, following these specific steps for common items will help you avoid damage and get the cleanest results possible.
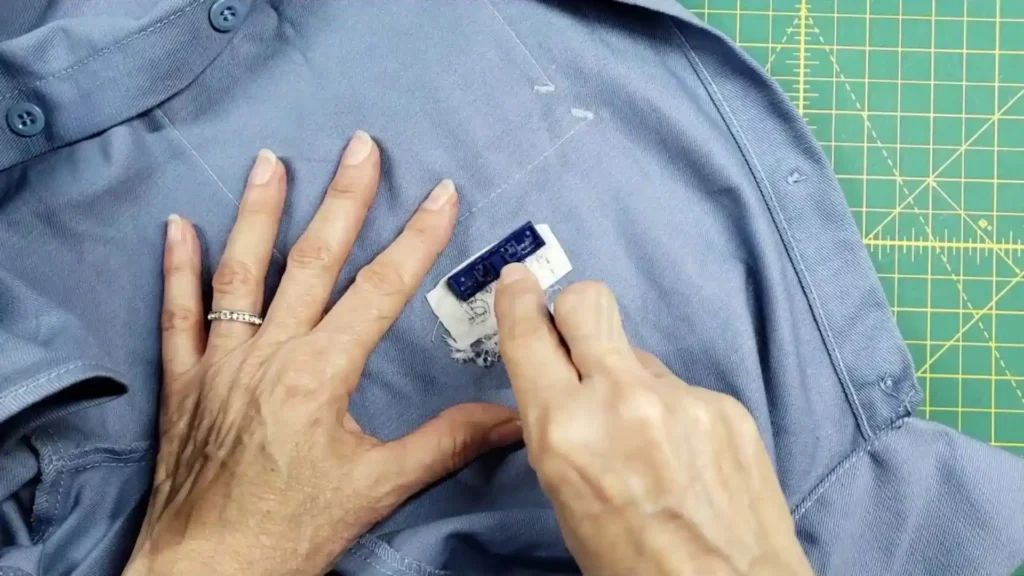
How to Remove Embroidery from a Shirt (Thin Fabrics)
Before starting the steps, remember to work slowly, using light pressure, and protecting the thin fabric from cuts.
How to Remove Embroidery from a Shirt (Thin Fabrics)
Turn the shirt inside out. Always start from the back side to keep the front of the fabric safe.
Slide your seam ripper under the white bobbin threads.
Cut in small sections. Do not try to cut the whole logo at once.
Flip to the front and use tweezers to pull the colored top thread away.
Check for “ghosting” frequently to ensure the fabric isn’t stretching.
Knowing can embroidery be removed from a thin polo is a relief for many, but remember to use a light touch to avoid pilling the cotton.
Move the eraser in a “scrubbing” motion across the bobbin stitches.
Once the back is shaved, the front threads should brush off with a stiff lint brush.
If the jacket has a lining, you may need to open a small seam in the lining to reach the back of the embroidery.
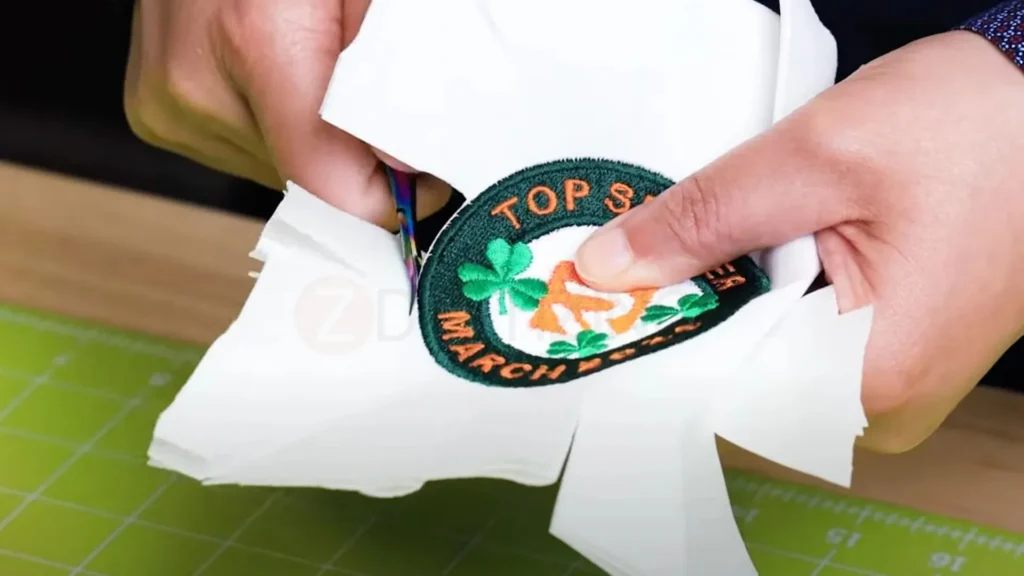
Safe Way to Remove an Embroidery Patch
Safe Way to Remove an Embroidery Patch
To learn how to remove embroidery patch, first check if it is stitched or iron-on.
Use a hair dryer or heat press to soften the glue if it was ironed on.
Slowly peel the edge while using a seam ripper to cut the tack-down stitches.
Be careful not to let the can embroidery be removed process turn into a “rip” that takes the top layer of fabric with it.
Dealing with “Ghosting”: What to Do After the Stitches are Gone
If you are wondering can embroidery be removed without marks, remember that “ghosting” can happen. It refers to the tiny holes or faded rectangular outline left behind after the thread is gone.
Techniques to Close Needle Holes
Once the thread is out, the fabric fibers are usually just pushed aside, not broken.
The Steam Method: Use a heavy burst of steam from an iron and then “massage” the fabric with your fingernail or a spoon. This helps the fibers slide back into their original position.
Laundering: Sometimes, a simple trip through the washing machine will cause the yarns to swell and close the gaps naturally.
Even when can embroidery be removed cleanly, the holes might remain visible until the fabric is properly “healed.”
Removing Stabilizer Residue and Thread Stains
Sometimes, the thread leaves behind a slight tint, or the stabilizer backing is stuck to the fibers. Using a soft toothbrush and a drop of mild detergent can help lift these stains.
If the stabilizer was “cut-away” style, you might have a permanent stiff patch on the back. You can trim this close to the edges, but don’t cut into the garment fibers.
Redoing the Embroidery: Tips for a Professional Result
If you ask can embroidery be removed and replaced with a new design, you must be strategic. You are not embroidering on a blank canvas anymore.
Why You Need to Re-Digitize the Logo for the Second Attempt?
Why You Need to Re-Digitize the Logo for the Second Attempt
You cannot simply run the old file again. The fabric in that area is now slightly weaker. An expert will digitize logo for embroidery specifically for a “cover-up” job.
This means adding a slightly heavier underlay to stabilize the “holey” fabric and perhaps widening the borders of the design by 1mm to ensure it covers the old ghosting lines completely.
Adjusting Stitch Density to Cover Previous “Ghosting”
A “heavy fill” or a “knock-down stitch” is your best friend here. If the previous design left visible marks, your new design should use a textured fill rather than a smooth satin stitch.
This breaks up the light and hides any imperfections underneath. When someone asks can embroidery be removed, they usually hope it can be replaced perfectly, and a clever digitizer makes that possible.
Common Methods for Different Designs
Method
Best For
Risk Level
Ease of Use
Seam Ripper
Small text, delicate items
Medium
Easy
Stitch Eraser
Large logos, jackets
Low
Fast/Pro
Surgical Blade
Dense satin stitches
High
Requires Skill
Tweezers Only
Removing loose “jump” threads
Very Low
Tedious
Common Mistakes That Ruin the Fabric Permanently
Removing stitches is a delicate surgery. Even if you have answered the question can embroidery be removed for your specific garment, one wrong move can turn a simple restoration into a permanent disaster.
Professional digitizers and embroidery experts often see garments ruined not by the original mistake, but by the attempt to fix it.
Impatience and Ripping: Forcing threads that don’t slide out easily causes “fiber stress,” leading to permanent puckering or bruising of the garment.
Fabric Blade Slips: One small slip with a seam ripper can slice the garment’s structural yarns, creating a hole that is often impossible to repair invisibly.
Heat Damage and Glazing: Using high iron temperatures to remove “ghosting” on synthetic fabrics like polyester can melt the fibers, leaving a permanent shiny burn mark.
Aggressive Scrubbing: Excessive friction with brushes to remove thread “whiskers” can fuzz the fabric grain, creating a pilled texture that stands out against the rest of the item.
Chemical Discoloration: Applying harsh adhesive removers or cleaners without a spot test can cause dyes to bleed or leave permanent chemical stains on the fabric.
Front-Side Cutting: Attempting to cut the tight satin stitches from the front increases the risk of nicking the fabric; professionals always cut the bobbin thread on the back first.
Ignoring Fabric Memory: Trying to remove dense embroidery from delicate knits or “burn-out” fabrics often leaves a “bruise” or needle-hole pattern that never closes.
Why Some Embroidery Should Never Be Removed
Some items are better left alone. If the embroidery was done on “burn-out” fabric or very thin tissue-tees, the removal will almost certainly leave a “bruise” on the fabric.
Additionally, if the garment has been washed dozens of times, the fabric around the embroidery may have faded, while the fabric under the stitches remains dark.
This creates a permanent “dark shadow” that no amount of cleaning will fix. In these cases, the can embroidery be removed question is yes, but the result will look worse than the original mistake.
Cost Analysis: Is it Cheaper to Remove or Replace?
For a $5 t-shirt, it is never worth the hour of labor to remove a logo. However, for a $150 leather jacket or a high-end tuxedo, the labor is a small price to pay. Professionals often charge by the hour for removal because it is unpredictable. If you are a business owner, consider if the labor cost of “how to remove embroidery” is higher than simply buying a new garment for the client.
Summary and Key Takeaways
The process of restoring a garment starts with the question: can embroidery be removed without leaving a trace? By using the right tools, like a stitch eraser for bulk and a seam ripper for detail—and treating the fabric after the stitches are gone, you can achieve amazing results.
Key Takeaways:
Assess first: Check fabric “memory” and stitch density.
Tools matter: Use an embroidery stitch remover for residue and sharp blades for threads.
Heal the fabric: Use steam to close needle holes.
If you need to change the logo on a valuable item, work slowly and carefully from the back side. Once you understand can embroidery be removed, you can safely give your favorite clothing a fresh new look.
Successfully removing embroidery saves money and keeps your clothes looking great. The real secret is using a pro file so that the embroidery can be removed easily later if you ever need to fix it again.
At ZDigitizing, we have over 10 years of experience in fast embroidery digitizing services in France and the USA. making expert designs that work on any fabric. Our global team works 24/7 to give you the best quality and support whenever you need help. We offer lower prices than the market and even let you see a preview before you pay.
You also get free minor edits to make sure everything is perfect. Visit ZDigitizing today to place your first order and get 50% OFF your premium embroidery quality.
Are you looking for embroidery digitizing and vector art services at low cost with superfast turnaround, guarranted quality and preview before pay? So, you are at right place. We can digitize and vectorize any type of artwork in your required file format.