How to remove embroidery from a jacket without damaging the fabric can feel scary at first, especially if the jacket is expensive or the stitching is dense. But with the right tools and a slow, safe method, you can remove the threads while keeping the fabric strong and clean. In this guide, I’ll walk with you step by step, show you what to check before you start, and help you avoid common mistakes that cause snags or holes. You’ll also learn easy aftercare tips to reduce marks and make your jacket look neat again.
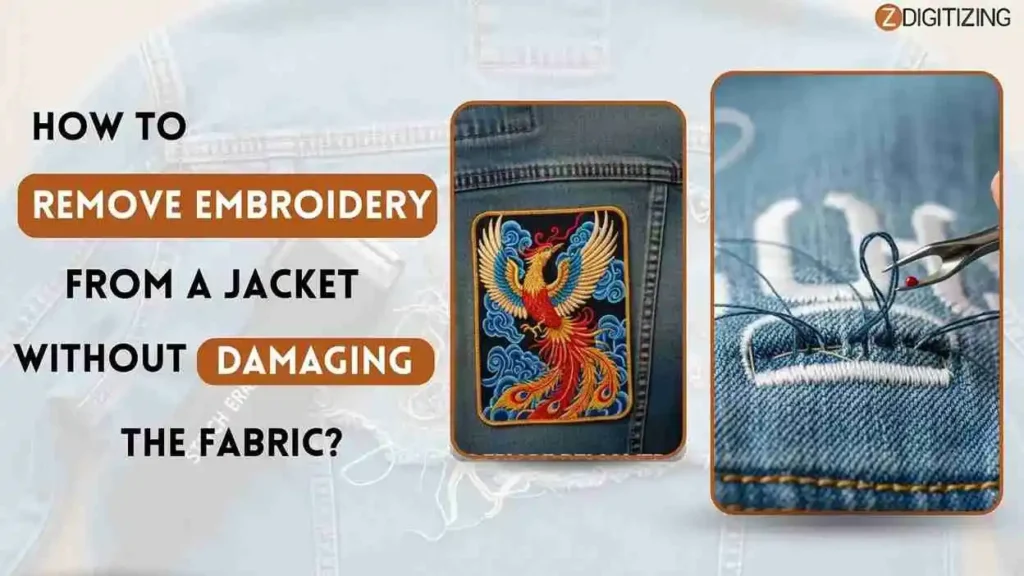
How to Remove Embroidery from a Jacket Without Damaging the Fabric?
Can Embroidery be Removed from a Jacket Without Damaging the Fabric?
Yes, how to remove embroidery from a jacket safely depends on three things: the jacket fabric, the stitch density, and what’s on the back (like stabilizer or adhesive). Some jackets are forgiving (denim, canvas), while others show marks easily (poly shells, satin, leather).
The goal is not just to remove threads, it’s to protect the weave, avoid stretching, and restore the surface so the jacket still looks clean.
When Embroidery Removal Works (And When It Doesn’t)?
If stitches are light or medium density and the fabric is stable, how to undo embroidery is usually successful with minimal traces. If the stitching is very dense, old, or done on delicate fabric, you can still remove threads, but you may see needle holes or a faint outline afterward.
What “Damage” Really Means: Holes, Ghost Marks, Fuzz, Shine, Stretching?
Most “damage” is avoidable when you don’t pull aggressively. The common issues are:
- Needle holes that don’t relax back
- A shadow/outline where threads sat
- Fuzzy or shiny spots from friction
- Stretched fabric around the logo area
Before You Start: Identify What You’re Removing
Before you begin how to remove embroidery from a jacket, take 2 minutes to assess the embroidery type and jacket construction. This single step prevents most mistakes.
Look at the front (stitch style and density) and the back (stabilizer, backing, adhesive). Your method changes based on what you find.
Hand Embroidery vs How to Remove Machine Embroidery
Hand embroidery usually has looser tension and fewer layers. Machine embroidery is tighter, often includes underlay stitches, and may use stronger bobbin thread, so you need smaller cuts and more patience.
Direct Embroidery vs Patch Embroidery (Stitched-on Patch)
Direct embroidery is stitched into the jacket fabric. A patch is stitched around the edge (sometimes with a zigzag/satin border). If it’s a patch, remove the border stitches and lift the patch first, then deal with leftover holes or glue separately.
Check the Back: Stabilizer Types (Tear-Away, Cut-Away) and Why It Matters
Tear-away stabilizer rips away cleanly, making thread access easier. Cut-away stabilizer stays and must be trimmed. If there’s a fused or sticky backing, thread removal becomes slower because the stitches “lock” tighter.
Jacket Risk Check (Lining, Fused Layers, Waterproof Shells, Leather/Suede)
Some jackets have lining, interfacing, or bonded layers. Don’t cut blindly. If you can’t access the back easily, open the lining seam only if you’re comfortable sewing it back. For leather/suede, removal can leave permanent holes; cover-up options may look better.
How to Remove Embroidery From a Jacket | Different Methods
It depends on what you’re removing (name, logo, or patch), how dense the stitches are, and what backing is underneath. Names are often satin or fill stitches, so they hold tight and need patience.
Can You Remove Embroidery from a Jacket without damage? Yes, if you work from the back side, cut in small sections, and stabilize the fabric first. Use this guide for removing embroidery with step-by-step methods, tools, risks, and name-specific tips.
1) Seam Ripper Method (Classic Manual Technique)

This is the safest starter method for how to remove embroidery from a jacket when the stitches are light to medium and you want maximum control.
Tools needed: Sharp seam ripper ($5–$10), tweezers, magnifier light (optional), lint roller/tape.
Step-by-step (best for names + small logos):
- Turn the jacket inside-out and flatten it on a soft surface.
- Stabilize the area with hooping or painter’s tape so the fabric doesn’t shift.
- Insert the seam ripper tip under the bobbin (back) threads at a 45° angle. Cut every 2nd or 3rd loop only, never cut everything at once.
- Flip the jacket right-side out and use tweezers to gently lift the top threads. For names, start from the letter ends where stitches loosen faster.
- Repeat in 1-inch sections and check both sides often to avoid snags.
- Clean fuzz with a lint roller, then lightly steam through a damp cloth to relax needle holes.
Best for: Names under 4 inches on cotton/poly blends (30–90 minutes).
Risks: Medium if rushed (small nicks happen when you dig too deep).
Tip: Satin-stitched names often release faster if you cut a few stitches down the “middle column” first, threads start cascading out.
2) Stitch Eraser (Electric Shaver) Method

This is ideal for dense, machine-embroidered names on structured jackets (like bombers). It speeds up how to remove embroidery from a jacket without pulling hard.
Tools needed: Stitch eraser ($40–$100), small vacuum/brush, stabilizer sheet/cardboard.
Step-by-step (best for dense stitching):
- Turn the jacket inside-out and place cardboard under the area for safety.
- Keep the fabric flat and slightly taut with hooping or tape (don’t overstretch).
- Run the stitch eraser against the stitch direction (outer to inner). Use light pressure and short passes (5–10 seconds).
- Vacuum debris and flip to the front to tweeze out loose top threads. For names, move around letters to avoid catching corners.
- Do multiple light passes instead of one long pass.
- Brush the surface gently and let the area cool before washing.
Best for: Fill-stitched block names on canvas/nylon (15–45 minutes).
Risks: Low-medium (overheating or thinning thin fabric if you press too hard).
Tip: Great for sports/team names and thick stitching, clean the blade often, especially if threads are multiple colors.
3) Safety Razor / Blade Shaving Method (High-Skill)

Use this when backing threads or stubborn stabilizer won’t release. It’s fast, but higher risk. This is a valid option for how to remove embroidery from jacket only if you have steady control.
Tools needed: Single-edge safety razor, fresh blade, cutting mat, painter’s tape, tweezers.
Step-by-step (advanced control method):
- Turn inside-out and stretch the back flat over a mat; protect the front side with painter’s tape.
- Hold the razor nearly flat (10–20° angle). Use short 1/4-inch strokes across threads only, no digging.
- Flip and tweeze loose bits. For names, shave outlines first, then fills.
- Wipe away residue and repeat lightly if threads remain.
- Finish with a fabric shaver only if the jacket fabric can handle it.
Best for: Denim jacket names with heavy backing (20–60 minutes).
Risks: High (easy to cut shell fabric if rushed).
Tip: Cursive names can hide tiny marks better, but you still need practice on scrap fabric first.
4) Steam Iron Method (For Adhesive-Backed Names/Patches)

If the “embroidery” is actually an iron-on name patch or glued badge, steam can loosen adhesive with less cutting. This method helps how to take off embroidery when there’s glue involved.
Tools needed: Low-heat iron, pressing cloth, tweezers, plastic scraper, mild adhesive remover (optional).
Step-by-step (adhesive-focused):
- Place a damp pressing cloth over the name/patch area.
- Hover the iron slightly above it for 10–20 seconds to generate steam (avoid direct high heat on synthetics).
- Lift one edge with tweezers as glue softens, roll and peel slowly, don’t rip.
- Repeat section by section; scrape residue with a plastic scraper.
- If needed, dab a fabric-safe remover on a hidden test area first, then clean gently.
- Air-dry and press lightly through cloth to smooth.
Best for: Corporate name tags / heat-press labels on poly jackets (10–30 minutes).
Risks: Medium (shine or melting if the heat is too high).
Tip: Start steaming at the edges first. Once you get a clean peel start, the rest becomes easier.
5) Freezer Method (Brittle Peel for Patches/Names)
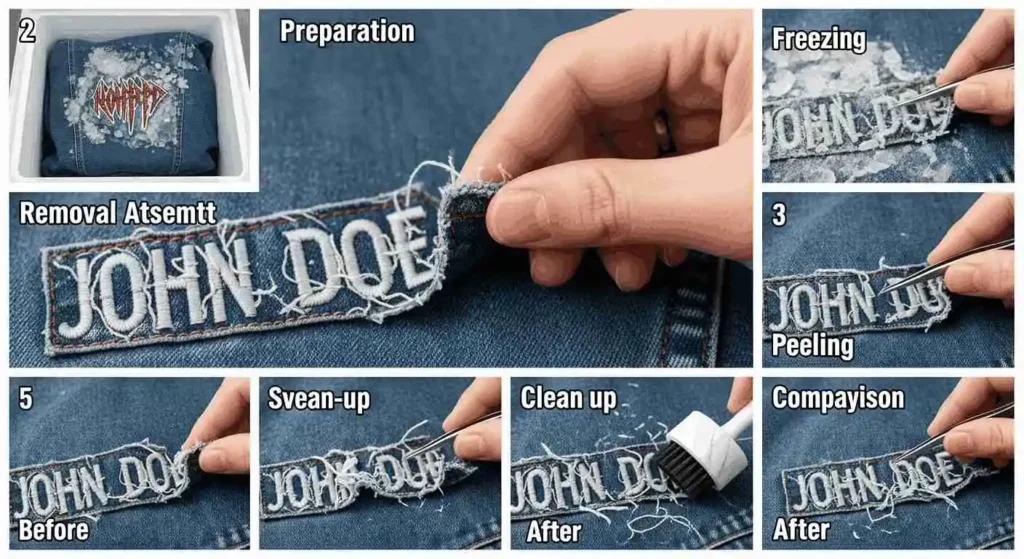
This is a no-heat method for adhesive patches. It’s best when you want how to take out embroidery or how to remove embroidery from a jacket style results for patch names without risking melting fabric.
Tools needed: Freezer bag, dull knife/plastic scraper, tweezers.
Step-by-step (no-heat option):
- Put the jacket section into a freezer bag and freeze it for 2–4 hours.
- Remove it and tap lightly so cracks form in the adhesive.
- Scrape/peel chunks with a dull tool; tweeze leftover threads.
- If glue stays soft, combine with light steam afterward (only if fabric allows).
- Clean the area and wash if safe for the jacket.
Best for: Patch-style name badges on sturdy jackets (15 minutes active + freezing time).
Risks: Low (may not work if there’s no adhesive).
Tip: School/scout style patches often pop off cleanly with freezing; stubborn ones improve with a little steam afterward.
Quick “Stop Rule” (Important): If the fabric starts stretching, snagging, or thinning, pause immediately. That’s when you switch tools or switch to a cover-up option instead of forcing it.
Comparison Table: Methods by Name Type & Jacket Fabric
If you’re unsure how to remove embroidery from a jacket safely, this table makes the choice simple. Match your name/logo stitch type with your jacket fabric first, then pick the method with the lowest risk for your material. This quick comparison saves time and helps you avoid holes, snags, or fabric shine.
Method | Best Name Stitch Type | Ideal Jacket Fabrics | Time | Difficulty | Damage Risk |
Seam Ripper | Satin/Outline | Denim, Wool | 30–90 min | Beginner | Low–Medium |
Stitch Eraser | Fill/Block Letters | Canvas, Nylon | 15–45 min | Intermediate | Low |
Razor Shaving | Dense Stabilized | Denim Only | 20–60 min | Advanced | High |
Steam Iron | Adhesive/Vinyl | Poly Blends | 10–30 min | Beginner | Medium |
Freezer | Patch-Style | All Sturdy | 15 min + Freeze | Beginner | Low |
Method Selector: Choose the Best Way to Remove Embroidery
The smartest how to remove embroidery from a jacket method is the one that matches your jacket and stitch type. Use this quick selector instead of guessing.
- If the logo is small + light density: Use a seam ripper from the back, then tweezers from the front. This is the cleanest route.
- If the logo is dense (satin fill, heavy stitches): Plan more time. Cut bobbin stitches every few millimeters, then lift top threads gently. Consider a stitch eraser only if the fabric is thick and stable.
- If the fabric is delicate (silk-like lining, thin polyester): Skip electric tools. Use small cuts, support the fabric from underneath, and avoid pulling.
- If the jacket is thick (denim, canvas, varsity wool): You can work faster, but still cut in sections. Thick fabrics hide holes better, but friction can still create shine.
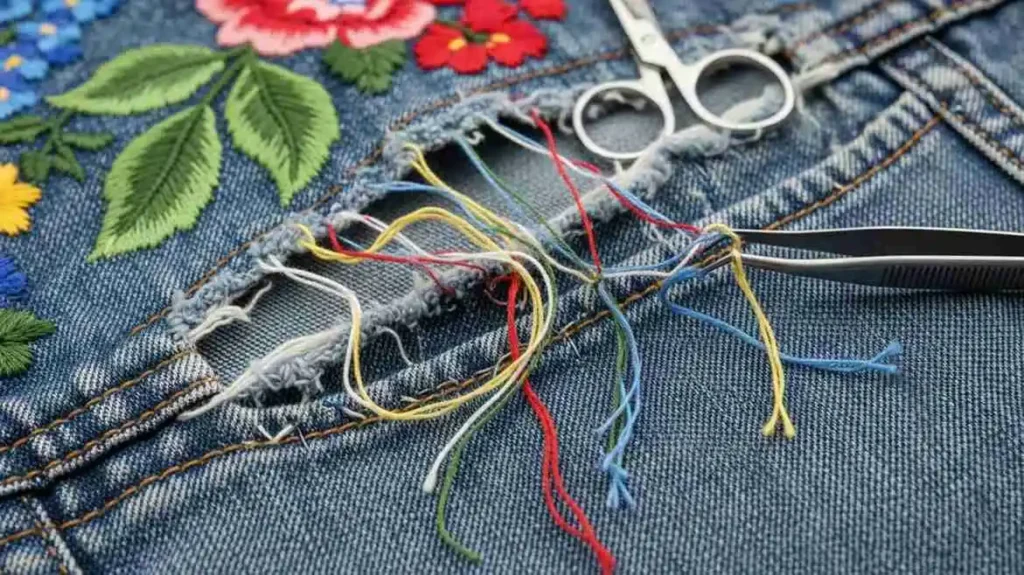
After Removal: Fix Holes, Ghost Marks, and “Outline Shadows”
A clean finish is the final step in how to remove embroidery from a jacket. The threads may be gone, but the fabric can still show signs. This section is what most guides skip. Yet it’s what makes your jacket look “not touched.”
How to Relax Needle Holes (Steam Vs Wash Vs Brush, What’s Safe)
Start gently. Often, a light steam from a distance helps fibers relax. On washable jackets, a wash and air-dry can reduce holes. Avoid high heat on synthetics.
Removing Fuzz and Thread Ends Cleanly
Use tape lifts and tweezers. If fuzz appears, don’t shave it aggressively. Light brushing may help on sturdier fabrics.
Dealing With Adhesive Residue / Stuck Backing
If the backing is sticky, don’t scrape hard. Use a mild adhesive remover only if the fabric allows it (test a hidden area first). Sometimes, leaving a thin layer is safer than damaging the fabric.
How to Re-Stabilize the Fabric So It Lays Flat?
If the area puckers, press gently with a pressing cloth (when safe for the fabric). You can also apply a light interfacing patch on the inside for structure, especially on thin materials.
If You Can’t Fully Remove It: Best Cover-Up Options (Often Looks Better)
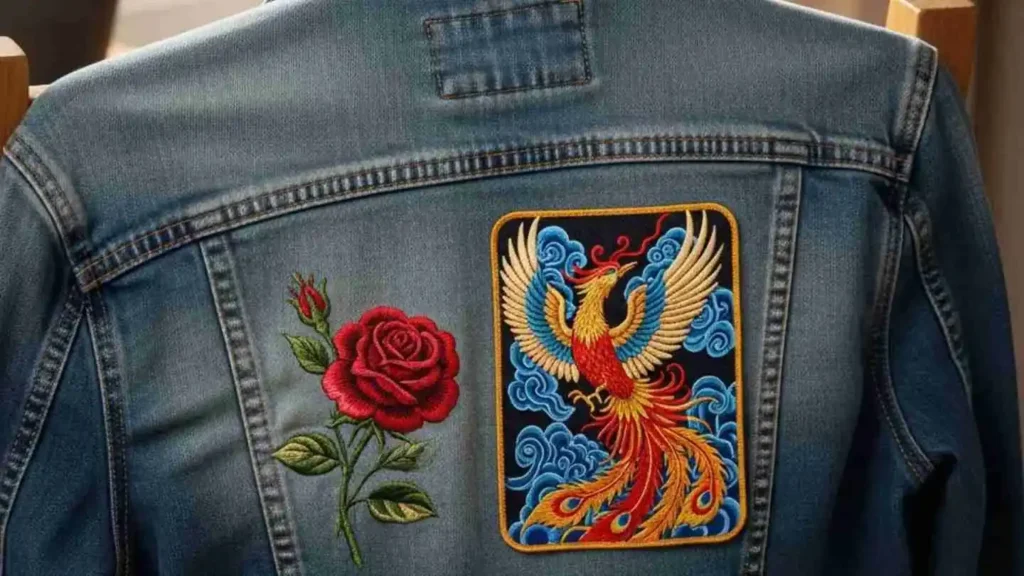
Sometimes the “best” result is not full removal. If how to remove embroidery from a jacket will leave a visible outline, a cover-up can look cleaner and more intentional.
Patch Overlay (Why Many People Recommend It)
A patch covers needle holes and outlines immediately. It’s also reversible later if you change your mind.
Applique Cover, Fabric Panel, or Re-Embroider a New Design
A fabric panel can look stylish on workwear jackets. Re-embroidering a new design over the area can also hide marks.
When a Tailor/Alteration Shop is the Smarter Choice
If the jacket is expensive, leather, satin, or heavily structured, a tailor can reduce risk and improve the finish. This is often cheaper than replacing the jacket.
Note: If you’re rebranding the jacket after removal, professional logo digitizing helps you stitch the new design cleanly with correct density, underlay, and direction. You can place your order with ZDigitizing for premium results.
Common Mistakes That Damage Jackets (Do This Instead)
If you want how to remove embroidery from a jacket to look clean, avoid these mistakes. Most fabric damage comes from rushing, not the tools.
Cutting from the Front Side
Cutting from the front increases the chance of slicing fabric. Always start from the inside/back.
Pulling Threads Too Hard (Stretch + Puckering)
If it doesn’t pull easily, it’s not ready. Cut more stitches first.
Using Razors on Delicate Fabrics
Razors can shave fibers and create permanent shiny patches.
Skipping Stabilization
Without cardboard or support, you can cut into the jacket or stretch the area while pulling threads.

Conclusion
If you followed this guide, you now know how to remove embroidery from a jacket safely: check the fabric first, pick the right tool, cut stitches in small sections, and finish with gentle cleanup so the jacket looks neat again. The best results come from patience, because the goal isn’t just to remove threads, it’s to protect the fabric and keep the jacket wearable and clean-looking.
Now let’s make the next step easier: when a logo is digitized correctly (proper density, underlay, and direction), it stitches clean and lasts longer, so you’re less likely to remove it later. That’s why professional digitizing matters, especially if you’re adding a new logo after removal.
At ZDigitizing, we provide professional embroidery digitizing services with 10+ years of experience and an expert digitizing team. We have a 24/7 working team and 24/7 customer support, so help is always available.
Quality is guaranteed, a preview is provided before payment, minor edits are free, and our prices are already lower than the market, plus you get 50% OFF on first order. If you want best embroidery digitizing services UK, USA, and worldwide level quality with fast, production-ready results, we’re ready to help.
Visit ZDigitizing, place your first order, get 50% OFF, and experience premium embroidery digitizing quality, so your next design stitches right the first time.


