Choosing the right embroidery needle sizes is one of the easiest ways to improve your stitching. For most hand embroidery projects, a crewel needle in size 7 is an excellent starting point, while sizes 3–5 work better for thicker threads and sizes 9–10 are ideal for delicate detail. The best choice always depends on your thread, fabric, and stitch, not the needle size alone. Using the wrong needle size is the primary cause of shredded floss, oversized fabric holes, skipped stitches, and hand fatigue.

This guide breaks down exact needle dimensions, comparisons by fabric and thread strand, and clear reference charts so you get perfect tension and clean stitches every time.
What Embroidery Needle Sizes Should You Really Use
Understanding Embroidery Needle Sizes
One of the biggest misconceptions in embroidery is assuming that a higher needle number means a larger needle. In reality, embroidery needle sizes work in the opposite direction for most hand embroidery needles.
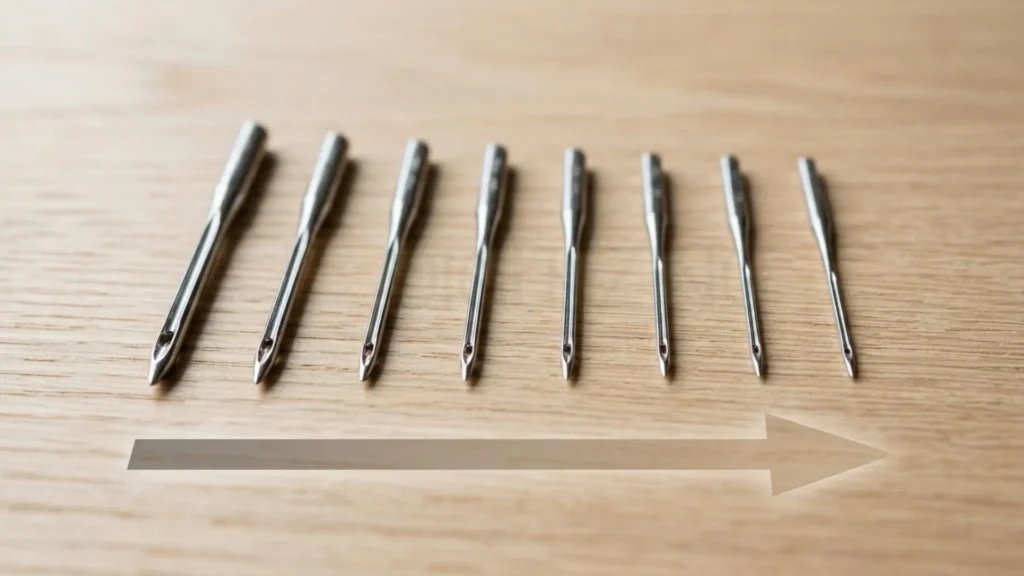
A size 3 embroidery needle is noticeably thicker, longer, and has a larger eye than a size 9. As the size number increases, the needle becomes finer and shorter. Matching this system to your project is critical: a larger needle easily fits multiple strands of floss but can punch visible holes in fine linen, while a needle that is too small will shred thread during stitching.
Master Embroidery Needle Size Reference Chart
Use this quick reference chart to match your thread count, stitch style, and fabric to the right crewel embroidery needle size.
Embroidery Needle Size | Relative Thickness | Recommended Thread Strands | Typical Use & Fabric |
Size 1–3 | Heavy / Thick | 6 Strands / Crewel Wool | Heavy coverage, bold lines, denim & felt |
Size 5 | Medium-Thick | 4–6 Strands | Satin stitch, dense embroidery, medium cotton |
Size 7 | Standard / Medium | 2–4 Strands | General surface embroidery, everyday cotton & linen |
Size 9 | Fine | 1–2 Strands | Fine outlines, lettering, delicate details |
Size 10 | Very Fine | 1 Strand / Single Thread | Intricate needle painting, micro-details, silk |
This embroidery needle size chart is intended as a practical starting guide rather than a fixed rule. If you notice thread drag or tightness in the needle eye, transition to a lower size number for a roomier fit. If the finished stitches leave obvious holes around the thread, choose a finer size instead.
For most beginners building a small collection of embroidery needles, sizes 5, 7, and 9 cover the majority of everyday hand embroidery projects.
Rule of Thumb: If thread feels tight in the eye or resists pulling through the fabric, step up to a larger needle size (lower number). If your stitches leave visible holes in the fabric, downsize to a finer needle (higher number).
How to Choose the Right Embroidery Needle
There’s no single embroidery needle that works for every project. The right choice depends on four factors: the thread you’re using, the fabric you’re stitching on, the type of stitch you plan to create, and the level of detail in your design.

Professional embroiderers rarely choose a needle by size alone. They first decide what thread will be used, then consider the fabric, followed by the stitch type. This simple approach helps prevent thread shredding, oversized holes, skipped stitches, and uneven tension.
Instead of asking, “Which needle size should I buy?” ask these four questions:
1. What Thread Are You Using?
The thickness of your thread determines how large the needle eye should be. The thread should slide through the eye smoothly without being squeezed or scraped.
If the eye is too small, the floss frays and shreds; if it is too large, the needle punches visible holes that remain in the fabric. As detailed in our master chart above, standard crewel sizes range from Size 9–10 for single strands down to Size 3–5 for full six-strand floss or heavy perle cotton.
2. What Fabric Are You Stitching On?
Even the perfect thread can perform poorly if paired with the wrong needle for the fabric.
Lightweight cotton and linen require finer hand embroidery needles, while thicker materials such as felt or denim often need stronger needles with larger eyes that pass through dense fibers more easily.
A good needle should create only enough space for the thread to pass. If you notice large holes around your stitches, the needle is probably too large for the fabric.
3. Which Stitch Will You Be Using?
Different stitches place different demands on the needle.
Long wrapped stitches such as bullion knots work best with long, evenly shaped needles, while satin stitch and backstitch are easier to control using standard crewel needles.
Choosing the correct needle shape often improves stitch quality more than changing the needle size.
4. How Detailed Is Your Design?
Large floral patterns and bold lettering usually benefit from thicker threads and larger needles.
Fine lettering, miniature motifs, and realistic thread painting require finer needles that provide greater control and leave almost invisible entry holes.
When working on intricate details, always choose the smallest needle that allows your thread to move comfortably through the eye.
Expert Tip: Before starting your final project, stitch a small test sample on leftover fabric. If the thread glides smoothly without shredding and the fabric doesn’t pucker or show oversized holes, you’ve likely found the right combination.
Choosing a needle for embroidery becomes much easier when these factors are considered together rather than selecting a size by number alone.
Different Types of Embroidery Needles
Not all stitching needles are designed for the same purpose. While needle size affects stitch quality, a needle’s shape, point, eye, and length determine how it performs across various fabrics and techniques.
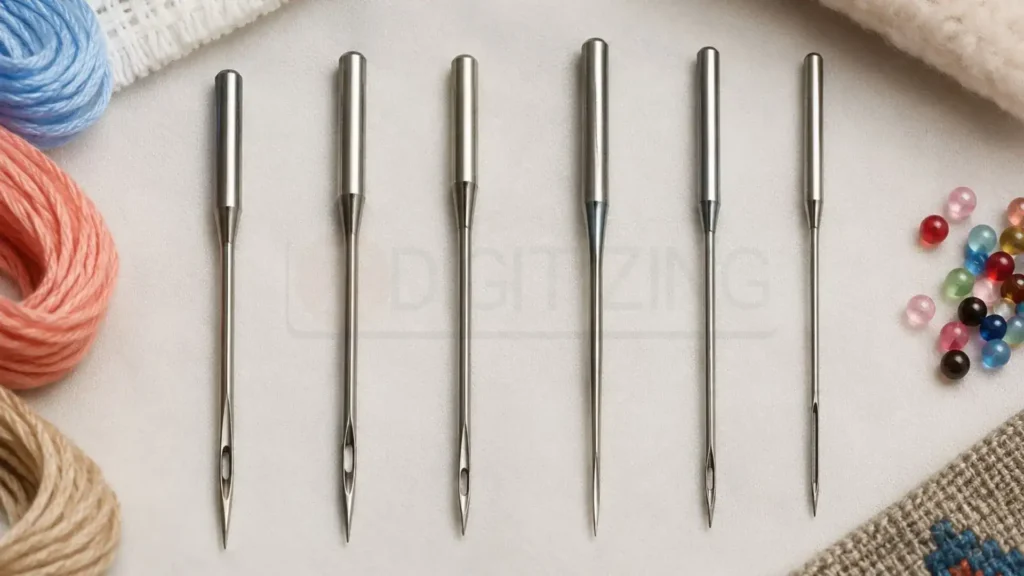
Understanding the main types of stitching needles helps you choose the right tool for every project instead of relying on a single needle for everything.
Crewel (Embroidery) Needle
The crewel needle is the most versatile needle for hand embroidery and the one most stitchers use for everyday surface embroidery.
It has a sharp point for piercing tightly woven fabrics and a medium-length eye that’s large enough for stranded cotton floss without making threading difficult.
For most embroidery projects, sizes 5, 7, and 9 are the most useful, with size 7 serving as an excellent all-purpose option.
Best for:
- Surface embroidery
- Cotton and linen
- Floral embroidery
- Lettering
- Satin stitch
- Backstitch
Chenille Needle
A chenille needle has a sharp point like a crewel needle but features a much larger eye, making it ideal for thicker threads that won’t comfortably fit through a standard embroidery needle.
It’s commonly used for crewel wool, ribbon embroidery, metallic thread, denim, and felt.
Because of its stronger shaft, it also passes through heavier fabrics more easily than a regular crewel needle.
Best for:
- Wool embroidery
- Ribbon embroidery
- Metallic threads
- Felt
- Denim
- Heavy fabrics
Tapestry Needle
Unlike a crewel needle, a tapestry needle has a blunt tip and a large eye. Instead of piercing the fabric, it slides between the woven threads, making it the preferred choice for counted-thread techniques such as cross stitch and needlepoint.
Because the rounded tip doesn’t split the fabric fibers, it’s considered one of the best needles for cross stitch, especially when working on Aida cloth or evenweave fabric.
Using a sharp needle on counted fabric often damages the weave and creates uneven stitches, which is why switching to a tapestry needle makes such a noticeable difference.
Best for:
- Cross stitch
- Aida cloth
- Evenweave
- Needlepoint
- Counted-thread embroidery
Milliner (Straw) Needle
A milliner needle looks similar to a crewel needle but has one important difference, its shaft remains the same thickness from the eye to the point.
This consistent shaft width, where the eye is no wider than the body, allows wrapped stitches to slide off effortlessly, making it the preferred choice for bullion knots, cast-on stitches, drizzle stitches, and heavily textured techniques.
If you’ve ever struggled to pull wrapped stitches over the eye of a standard needle, a milliner needle usually solves the problem.
Best for:
- Bullion knots
- Cast-on stitch
- Drizzle & woven stitches
- Heavy wrapped stitches
- Brazilian embroidery
Beading Needle
Beading needles are extremely fine with a narrow eye that fits through tiny beads and sequins.
Although they aren’t designed for everyday embroidery, they’re useful when your project includes decorative embellishments that standard embroidery needles simply can’t pass through.
Because these needles are delicate, avoid using them on heavy fabrics or for stitches that require significant pressure.
Best for:
- Seed beads
- Sequins
- Fine embellishments
- Decorative embroidery
Sharps Needle
A hand sewing needle, often called a sharp, is primarily designed for general sewing rather than embroidery.
It has a small round eye and a sharp point that works well for construction stitches, hemming, appliqué, and basic hand sewing. While it can occasionally be used for simple embroidery, its smaller eye makes threading multiple strands of embroidery floss more difficult than a crewel needle.
If your project focuses on decorative stitching, dedicated hand stitch needles designed for embroidery usually provide better control and reduce thread wear.
Best for:
- Hand sewing
- Repairs
- Appliqué
- Lightweight decorative stitching
Embroidery Needle Types at a Glance
Choosing the correct needle becomes much easier when you understand what each one is designed to do.
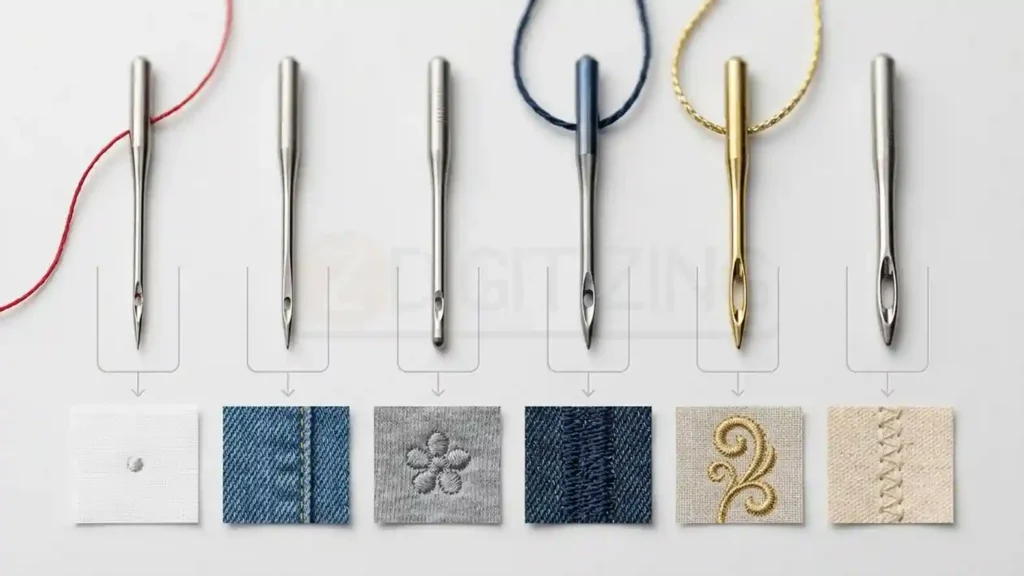
Needle Type | Point | Eye Size | Best For |
Crewel | Sharp | Medium | General surface embroidery |
Chenille | Sharp | Large | Wool, ribbon, denim, felt |
Tapestry | Blunt | Large | Cross stitch, Aida, evenweave |
Milliner | Sharp | Small, uniform | Bullion knots, French knots |
Beading | Sharp | Very small | Beads and sequins |
Sharp | Sharp | Small | Hand sewing and appliqué |
Expert Tip: If you’re building your first embroidery kit, you don’t need every needle type. A small collection of crewel needles (sizes 5, 7, and 9), one chenille needle, one tapestry needle, and one milliner needle will handle the vast majority of hand embroidery projects.
Embroidery Needle Size Chart for Embroidery Floss
One of the most common questions beginners ask is, “What embroidery needle size should I use for my thread?” While there isn’t a single answer for every project, the number of floss strands provides an excellent starting point.

The goal is simple: the thread should glide smoothly through the needle eye without fraying, while the needle should pass through the fabric without leaving noticeable holes. If either of these problems occurs, it’s usually a sign that you need to adjust your needle size.
The chart below shows the most practical starting recommendations for stranded cotton embroidery floss.
Embroidery Floss | Recommended Crewel Needle Size | Best Used For |
1 strand | 9–10 | Fine lettering, needle painting, delicate outlines |
2 strands | 7–9 | Small motifs, detailed floral work, outlines |
3 strands | 5–7 | Everyday hand embroidery |
4 strands | 5–6 | Medium coverage, decorative stitching |
6 strands | 3–5 | Bold designs, satin stitch, French knots |
These recommendations work well for most cotton and linen fabrics. If you’re stitching on dense fabric like denim, you may need a slightly larger needle. On lightweight fabric, a finer needle often produces cleaner results.
DMC Embroidery Needles Size Recommendations
If you use DMC supplies, you’ll notice that DMC embroidery needle size follows the same numbering system used by most crewel needles, smaller numbers indicate larger needles.
Because DMC crewel needles are packaged in standard multi-packs (such as sizes 3–9 or 5–10), keeping a single variety pack in your stash covers almost every project:
- DMC Size 3–5: Best for 6 full strands of floss, heavy coverage, and thick accent stitches.
- DMC Size 7: The primary choice for 2 to 4 strands on standard cotton or linen.
- DMC Size 9–10: Ideal for 1 to 2 strands, fine lettering, and delicate thread painting.
Instead of buying every available size, most stitchers can comfortably complete the majority of projects with sizes 5, 7, and 9, adding larger or smaller needles only when the fabric or thread requires it.
Expert Tip: If your embroidery floss feels tight while pulling through the eye, switch to a larger needle (a lower size number). If the finished stitch leaves a visible hole around the thread, switch to a smaller needle (a higher size number).
Best Embroidery Needle Sizes for Different Fabrics
The same thread can require different embroidery needle sizes depending on the fabric you’re stitching. A needle that works perfectly on cotton may struggle to pass through denim, while one that’s ideal for felt could leave oversized holes in lightweight linen.
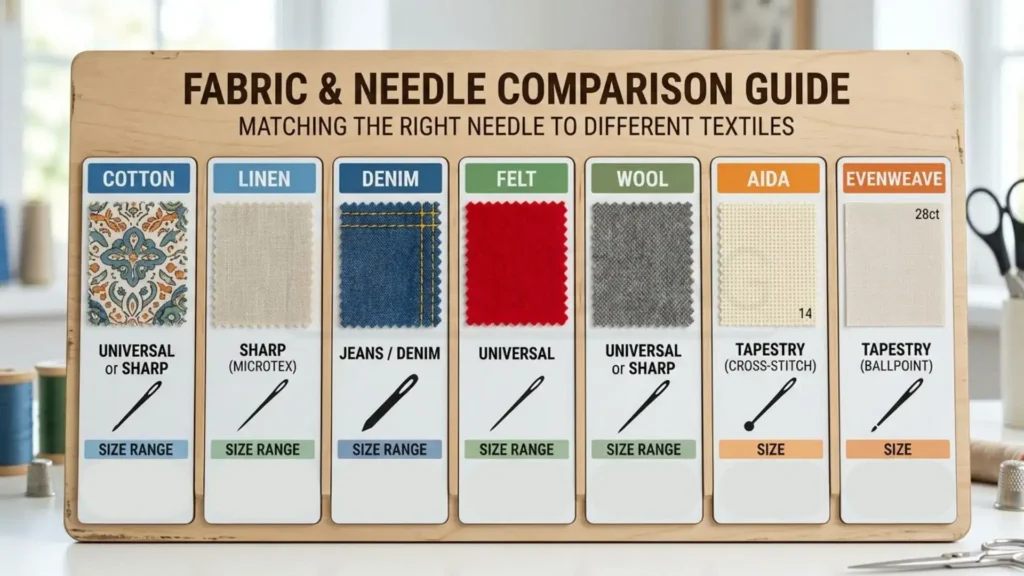
Rather than choosing your needle by thread alone, always consider the fabric first. The correct needle for hand embroidery should pass through the material smoothly without damaging the weave or stretching the fabric.
Fabric | Recommended Needle | Suggested Size |
Cotton | Crewel | 5–9 |
Linen | Crewel | 7–10 |
Denim | Chenille | 18–20 |
Felt | Chenille or Crewel | 3–5 |
Wool | Chenille | 18–22 |
Silk | Crewel | 8–10 |
Aida (14-count) | Tapestry | 24 |
Evenweave (28–32 count) | Tapestry | 26–28 |
Cotton
Cotton is one of the easiest fabrics to embroider because of its balanced weave. A crewel needle in sizes 5–9 works well for most projects, depending on the number of floss strands you’re using.
Linen
Linen often has a higher thread count and uneven slubs compared to quilting cotton. Finer crewel needles (sizes 8–10) part the weave cleanly without snagging individual linen threads or leaving permanent holes.
Denim
Denim is much denser than traditional embroidery fabric, so a standard crewel needle may bend or become difficult to push through multiple layers.
A chenille needle with its stronger shaft and larger eye handles denim more comfortably, especially when working with thicker embroidery threads.
Felt and Wool
Soft fabrics like felt and wool compress rather than weave, making larger-eyed chenille needles particularly effective. They allow thicker threads to pass through smoothly while reducing unnecessary friction.
Aida and Evenweave
For counted-thread embroidery and cross stitch, always choose a tapestry needle rather than a sharp crewel needle.
The blunt tip slides between the fabric threads instead of piercing them, helping preserve the fabric structure while producing neater stitches.
Expert Tip: Before starting a large project, make three or four sample stitches on a fabric scrap. If the thread glides smoothly, the fabric doesn’t distort, and the stitch sits neatly without visible holes, you’ve found the right needle and fabric combination.
Manual digitizing allows stitch direction, density, underlay, pull compensation, trims, and small details to be adjusted specifically for the fabric and finished design.
Which Embroidery Needle Is Best for Different Stitches?
Choosing the correct embroidery needle isn’t just about the thread or fabric—your stitch matters too. Some stitches require a long needle to wrap thread smoothly, while others need a sharp point for precise placement or a blunt tip to avoid splitting fabric threads.
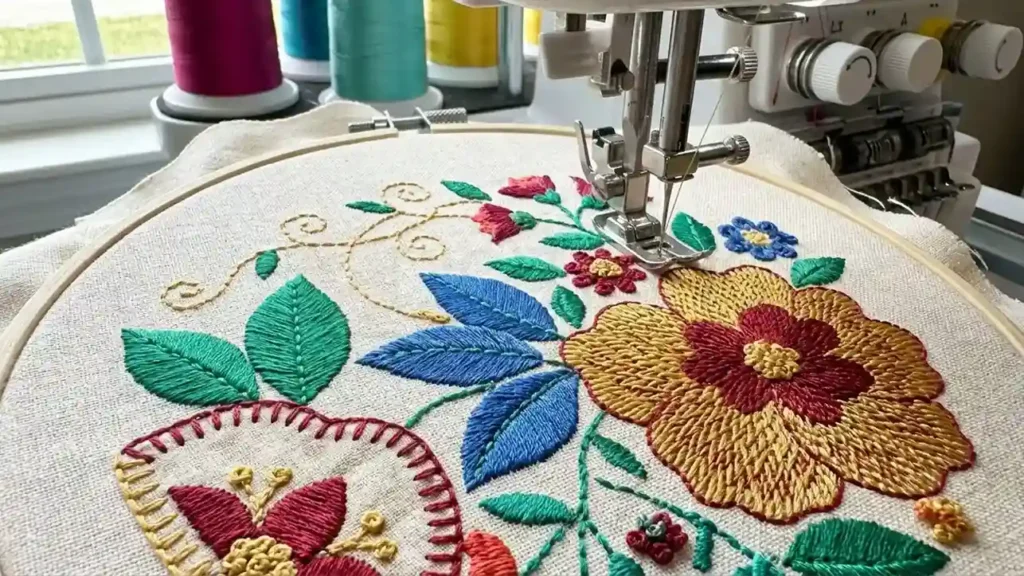
Matching the needle to the stitch produces cleaner results, reduces thread wear, and makes stitching noticeably easier.
Embroidery Stitch | Recommended Needle | Suggested Size | Why It Works |
Running Stitch | Crewel | 7–9 | Smooth fabric penetration and excellent control |
Backstitch | Crewel | 7–9 | Creates clean, consistent outlines |
Stem Stitch | Crewel | 5–7 | Ideal for curves and lettering |
Satin Stitch | Crewel | 5–7 | Supports fuller thread coverage |
French Knots | Milliner | 3–9 | Uniform shaft helps wrapped thread slide off easily |
Bullion Knots | Milliner | 3–7 | Long shaft keeps wrapped stitches even |
Long & Short Stitch | Crewel | 7–10 | Perfect for realistic shading and thread painting |
Cross Stitch | Tapestry | 22–28 | Blunt tip protects the fabric weave |
Ribbon Embroidery | Chenille | 18-22 | Large eye and sharp point glide ribbons through fabric smoothly |
Whipped or Laced Stitches | Tapestry | 24–26 | Slides beneath existing stitches without piercing fabric |
The right stitch paired with the correct needle creates smoother thread flow and more consistent stitch tension. Even experienced embroiderers often switch needles several times during the same project as they move between decorative techniques.
Best Needle for French Knots
French knots are one of the first stitches beginners struggle with, but the problem is often the needle rather than the technique.
A milliner needle is usually the best choice because its shaft remains the same thickness from the eye to the point. As the wrapped thread slides down the needle, it doesn’t catch on a wider eye, making the knot much easier to form.
For most projects, choose a milliner needle between sizes 3 and 9, adjusting the size according to your thread thickness.
Best Needle for Bullion Knots
Bullion knots require multiple thread wraps to slide completely off the needle before tightening.
Because of this, a milliner needle performs far better than a standard crewel needle. Its uniform shaft prevents the wraps from snagging near the eye, producing smoother and more consistent bullion stitches.
If you regularly create roses, textured flowers, or Brazilian embroidery, a dedicated milliner needle is well worth adding to your embroidery kit.
Best Needle for Cross Stitch
Cross stitch is different from surface embroidery because the needle should pass between the fabric threads rather than pierce them.
That’s why a tapestry needle with a blunt tip is considered one of the best needles for cross stitch. It protects Aida and evenweave fabric while helping each stitch sit neatly within the fabric grid.
As a general guide:
- 11-count Aida: Tapestry size 22
- 14–16-count Aida: Tapestry size 24
- 28–32-count Evenweave: Tapestry size 26–28
Using a sharp crewel needle on counted fabric often splits the woven threads and can make finished stitches look uneven.
Expert Tip: If a stitch feels unusually difficult to pull through the fabric, don’t force it. The resistance often indicates that the needle type, not just the size, is incorrect for the technique you’re using.
Hand Embroidery Needles vs. Machine Embroidery Needles
One of the most common beginner mistakes is assuming that hand embroidery needles and machine embroidery needles use the same sizing system. They don’t.
Although both are designed for embroidery, their sizing logic is opposite: hand needles use an inverse system (where higher numbers mean finer needles), while machine needles use a direct measurement system (where higher numbers indicate thicker needles). Consequently, a size 7 hand crewel needle is completely unrelated to a 75/11 machine needle.
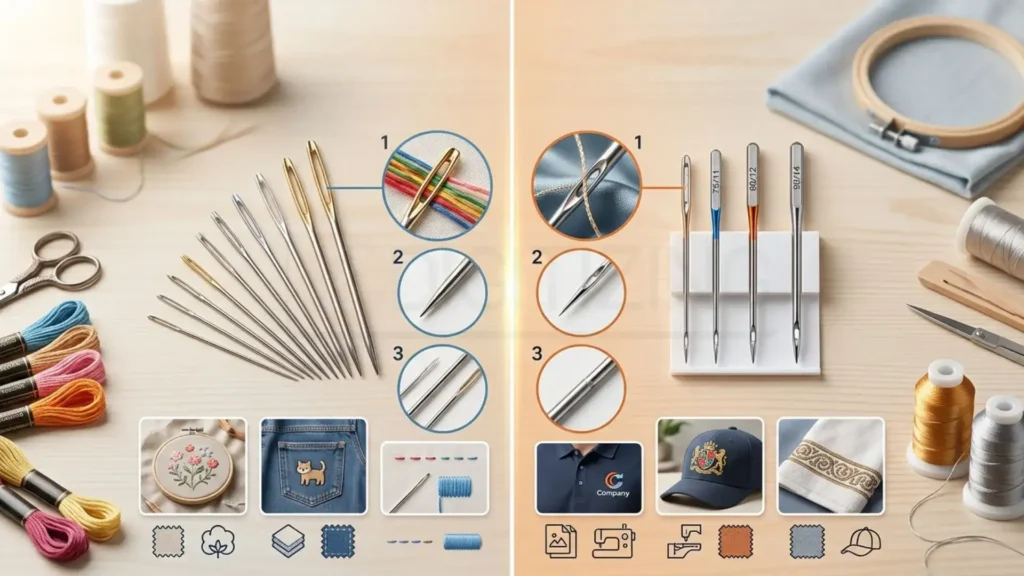
Understanding this distinction prevents confusion when following tutorials or purchasing supplies.
Feature | Hand Embroidery Needles | Machine Embroidery Needles |
Size System | Sizes 1–12 (lower number = larger needle) | Sizes 65/9, 75/11, 80/12, 90/14 |
Used For | Hand stitching | Embroidery machines |
Movement | Controlled by hand | Controlled by the machine |
Needle Eye | Designed for embroidery floss | Designed for machine embroidery thread |
Replacement | As needed when dull or damaged | More frequent due to machine speed |
For most home embroidery machines:
- 75/11 (Finer): Best for lightweight cottons, linen, and delicate fabrics.
- 80/12 (Standard): The most versatile choice for medium-weight fabrics and everyday machine embroidery.
- 90/14 (Thicker): Engineered for dense materials like denim, canvas, and structured jackets.
For specialized work such as embroidery 3d puff, needle selection also needs to account for the garment thickness, foam, thread weight, and stitch density used in the design.
Never substitute a hand embroidery needle in an embroidery machine, or vice versa. Each is engineered for a completely different stitching method and operating speed.
When a hand-drawn embroidery concept needs to become a machine-ready design, working with the best embroidery digitizing service provider in USA can help translate the artwork into appropriate stitch density, direction, underlay, and machine settings.
Signs You’re Using the Wrong Embroidery Needle
Even when the needle appears to be the right size, small warning signs can reveal that it isn’t a good match for your thread or fabric. Recognizing these problems early can prevent damaged fabric and save you from redoing an entire section of embroidery.

What You Notice | Likely Cause | What to Try |
Thread keeps shredding | Needle is too small, rough, or damaged | Move to a larger needle or replace it |
Thread is difficult to pull | Eye or shaft is too small for the thread | Choose a larger size with a suitable eye |
Large holes remain | Needle is too large for the fabric | Move to a finer needle |
Fabric feels unusually resistant | Needle is too small or wrong type | Try a larger or sharper needle |
Thread slips out of the eye | Eye is too large or thread is too fine | Choose a smaller needle |
Needle bends while stitching | Fabric is too dense for the needle | Use a stronger, larger needle |
Stitches look uneven | Needle and thread combination is poorly matched | Test another size on a fabric scrap |
The most important test is how the needle behaves while you’re stitching. A suitable needle should pass through the fabric with controlled resistance and allow the thread to move freely without excessive friction.
How to Tell If Your Needle Is Too Small
A needle is probably too small when the thread feels cramped inside the eye, takes noticeable effort to pull through, or begins showing signs of abrasion.
This is particularly common when squeezing multiple strands of floss into a fine needle. Instead of forcing the thread through, switch to a larger needle size (a lower size number) and test again.
How to Tell If Your Needle Is Too Large
A needle that is too large punches oversized holes in your fabric that remain visible around the thread.
If you remove a test stitch and notice enlarged entry points on lightweight cotton, linen, or silk, step down to a finer needle size (a higher size number).
What If the Needle Is the Right Size but Still Feels Wrong?
Sometimes the problem isn’t the size at all. The needle may have the wrong point or eye for the technique.
For example, a tapestry needle may be the correct size for counted work but unsuitable for piercing tightly woven cotton. Likewise, a crewel needle may be excellent for surface embroidery but frustrating when you need to pass a ribbon through the eye.
Expert Tip: Let the fabric and thread tell you when to change needles. If you hear excessive friction, feel unusual resistance, or see fabric distortion, stop and test a different needle before continuing.
Common Needle Mistakes Beginners Make
Choosing the correct embroidery needle sizes becomes much easier once you know which mistakes to avoid. Most problems come from treating needle selection as a fixed formula rather than adjusting it to the actual fabric, thread, and technique.

Using One Needle for Everything
A single needle might handle your basic floral project, but it won’t necessarily work well for cross stitch, ribbon embroidery, bullion knots, or heavy wool.
Keeping a few different needle types and sizes available gives you much more control.
Choosing by Number Alone
A size 7 isn’t automatically better than a size 9. The number only tells you where that needle falls within its particular sizing system.
Always consider the needle’s type, eye, point, length, and intended technique as well.
Ignoring the Needle Eye
The eye needs to accommodate the thread comfortably. When multiple strands are squeezed through a tiny eye, friction increases and the floss can become fuzzy or break.
This is one reason beginners sometimes struggle with how to thread embroidery needle correctly. Separate your floss strands first, bring them together again, and use a needle with an eye that allows the bundle to pass without force.
Pulling a Needle Through Dense Fabric
If you have to grip the needle with excessive force to pull it through denim, canvas, or heavily woven fabric, don’t simply push harder. Choose a needle with a stronger shaft and an appropriate point.
Forcing a fine needle through dense material can bend the shaft or damage the fabric.
Continuing With a Damaged Needle
A needle can look perfectly usable while developing tiny rough areas around its eye or point. These imperfections can catch and shred embroidery floss.
If your thread suddenly starts behaving differently during a project, inspect the needle before changing the thread or stitch technique.
How Often Should You Change an Embroidery Needle?
There isn’t a universal number of hours after which every needle must be discarded. Needle life depends on the fabric, thread, stitching frequency, and the condition of the needle itself.
Replace an embroidery needle when it becomes:
- Dull
- Bent
- Rough around the eye
- Rusty or discolored
- Difficult to push through fabric
- Likely to catch or shred the thread
Metallic threads, wool, denim, canvas, and other abrasive materials can wear a needle faster than lightweight cotton and ordinary stranded floss.
Rather than waiting for a needle to bend or break, replace it at the first sign of drag, thread fraying, or squeaking friction as it passes through the fabric.
How to Store Embroidery Needles
Good storage protects both the needle and your fingers. Keep different sizes and types separated in a labeled needle book, case, or organizer rather than leaving them mixed together on a pincushion.

Store needles in a dry environment and check them periodically for rust or discoloration.
A simple organization system can separate:
- Crewel needles
- Chenille needles
- Tapestry needles
- Milliner needles
- Beading needles
- Machine needles
This makes it much easier to find the correct needle when starting a new project.
How to Thread an Embroidery Needle Without Fraying the Floss
Even the best embroidery needle can become frustrating if the floss will not pass cleanly through the eye. When working with multiple strands, the goal is to get the thread through without compressing, twisting, or repeatedly dragging it against the metal.

How to Thread an Embroidery Needle
- Cut a manageable length of floss.
Avoid using an excessively long strand, which is more likely to tangle and wear during stitching. - Separate the strands you need.
If you’re using six-strand embroidery floss, gently divide it before threading rather than forcing all six strands through a small eye. - Flatten the thread end.
Pinch and flatten the thread end. Pinching the cut end tightly between your thumb and index finger creates a flat, solid ribbon of floss that glides through the eye without fraying. - Pass the thread through the eye.
Hold the needle steady and guide the floss through rather than repeatedly pushing the thread against the eye. - Adjust the working length.
Leave enough thread on the needle to stitch comfortably without creating unnecessary tangles.
If threading remains difficult, the problem may not be your technique. A needle with a larger eye can make a noticeable difference when you’re working with several strands, wool, metallics, or specialty threads.
What Is the Difference Between a Sharp and Blunt Embroidery Needle?
The point of the needle determines how it interacts with the fabric.
A sharp needle pierces the fabric. Crewel, chenille, milliner, and beading needles are designed for applications where the needle needs to enter the fabric directly.
A blunt needle slips between existing openings in the fabric. Tapestry needles are therefore particularly useful for cross stitch, counted work, Aida, and evenweave.
For most counted work, the best needles for cross stitch are blunt tapestry needles selected according to the fabric count.
Choosing the wrong point can create unnecessary problems. A sharp needle used on counted fabric can split threads, while a blunt needle used on tightly woven cotton may struggle to penetrate cleanly.
Why Is My Embroidery Needle Leaving Large Holes?
A visible hole around each stitch usually means the needle shaft is too large for the fabric, thread, or both.
This is particularly noticeable when using a large needle with fine floss on lightweight cotton or tightly woven linen.
Try moving to a finer needle and compare the next few stitches. If the fabric still shows a noticeable opening, reduce the needle size again.
However, don’t automatically choose the smallest possible needle. If the needle becomes difficult to push through the fabric, the eye compresses the floss, or the thread begins shredding, you’ve gone too far in the opposite direction.
The goal is a needle that creates enough space for the thread to pass without visibly distorting the fabric.
For businesses producing machine embroidery regularly, choosing the best embroidery digitizing workflow can therefore have as much impact on the finished result as choosing the correct machine needle.
Final Thoughts
Choosing the right embroidery needle sizes becomes much simpler when you stop treating the needle number as the only deciding factor. Match the needle to your thread, fabric, and stitch, then adjust when you notice excessive resistance, thread shredding, or visible holes. For most surface embroidery, a crewel size 7 is a dependable starting point, while finer or heavier work may call for a different size or needle type.
The right needle should make stitching feel controlled, smooth, and predictable. Once that foundation is right, your stitches have a much better chance of looking as clean as the design deserves.
If you’re ready to turn your next embroidery project into a professionally prepared design, enjoy 50% off your first order as a new customer.