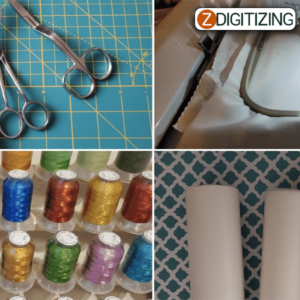
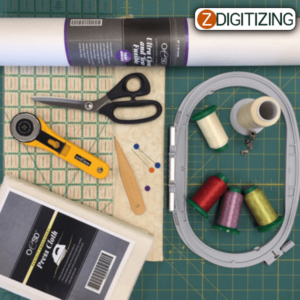
Making your own fingerless mittens using in-the hoop embroidery techniques adds a touch of personalization and creativity to your winter wardrobe. In this article, we will guide you through the step-by-step process of creating unique warm in-the-hoop embroidering fingerless mittens.
Fingerless mittens serve as practical accessories that provide warmth to your hands while allowing your fingers to remain uncovered for tasks that require dexterity.
How To Easily Make Unique Warm In-The-Hoop Embroidery Fingerless Mittens
Materials Needed:

- Sturdy fabric for the outer layer (such as fleece or wool)
- Soft fabric for the inner layer (such as flannel or cotton)
- Fusible stabilizer
- Embroidery machine and embroidery thread
- Scissors
- Pins
- Sewing machine or needle and thread
- Snaps, buttons, or hook-and-loop fasteners (optional)
Step-by-Step Instructions:
- Choose embroidery designs that suits your style and preferences. You can select from various options available in embroidery design libraries or create your own custom design using embroidery software.
- Cut two rectangles of the outer fabric and two rectangles of the inner fabric, each measuring the desired size for your mittens. Ensure the outer fabric is sturdy enough to provide warmth and support.

- Apply fusible stabilizer to the back of the outer fabric rectangles. This will provide stability during the embroidery process and prevent puckering or distortion.
- Hoop the stabilized outer fabric tightly in the embroidery hoop, ensuring it is centered and taut. Secure the hoop to the embroidery machine.
- Select the desired embroidery thread colors and load them into the machine. Start the embroidery process, following the instructions provided by the machine. The design will be stitched directly onto the outer fabric.
- After the embroidery is complete, carefully remove the fabric from the hoop. Trim the excess stabilizer from the back of the embroidered fabric, ensuring not to cut through any stitches.
- Place one embroidered outer fabric rectangle right-side down on top of one inner fabric rectangle, aligning the edges. Pin them together, securing the layers.
- Using a sewing machine or needle and thread, sew along the side seams, leaving the top and bottom open. This will form the shape of the mitten. Repeat this step for the other set of fabric rectangles.
- Fold the bottom edge of each mitten up by approximately ½ inch (1.27 cm) and sew along the edge to create a clean hem.
- Add Fasteners: If desired, you can attach snaps, buttons, or hook-and-loop fasteners to the side seam or top edge of the mittens. This will allow you to secure the mittens in place or adjust the fit according to your preference.
- Trim any loose threads and ensure all seams are secure. Press the fingerless mittens with an iron on a low heat setting to remove any wrinkles.
Embroidery Digitizing
&
Vector Art Services
Are you looking for embroidery digitizing and vector art services at low cost with superfast turnaround, guaranteed quality and preview before pay? So, you are at right place. We can digitize and vectorize any type of artwork in your required file format.
Tips To Help You Make Unique Warm In-The-Hoop Embroidery Fingerless Mittens:
Here are some additional tips to help you make unique warm in-the-hoop embroidery fingerless mittens:
- Select fabrics that are suitable for winter wear and provide warmth, such as fleece or wool for the outer layer and soft flannel or cotton for the inner layer. Consider the weight and texture of the fabric to ensure comfort and insulation.
- Take accurate measurements of your hand and fingers to determine the appropriate size for the mittens. Ensure they fit comfortably without being too loose or too tight. Adjust the pattern or template accordingly before cutting the fabric.
- Use a fusible stabilizer that is appropriate for the fabric and embroidery design. Consider the thickness and weight of the fabric to determine the right stabilizer to prevent puckering and maintain stability during embroidery.
- Choose embroidery threads that complement the design and fabric colors. Consider using contrasting or coordinating threads to make the embroidery design stand out.
- Before embroidering on the actual fabric, do a test run on a scrap piece of fabric to ensure the design, thread tension, and stitch density are to your liking. This allows you to make any necessary adjustments before embroidering on the mittens.
- When hooping the fabric, ensure it is tightly secured to prevent shifting or wrinkles during the embroidery process. This will help maintain the integrity of the design and ensure clean stitching.
- Consider the placement of the embroidery design on the mittens. Opt for a location that will be visible when worn, such as the back or the cuff area. Take into account the size of the design and how it will appear on the finished mittens.
- Get creative with additional embellishments like buttons, ribbons, or appliqués to further personalize your fingerless mittens. These details can add uniqueness and enhance the overall aesthetic of the mittens.
- To ensure durability and longevity, reinforce the seams by backstitching or sewing additional stitches at stress points. This will prevent the mittens from unraveling or coming apart with regular wear.
- Consider the care instructions for the fabrics and embroidery threads used. Provide guidelines on washing and ironing the mittens to maintain their quality and appearance.
- Ensure you have the appropriate needles for your embroidery machine and fabric. Use embroidery needles designed for your machine to ensure smooth stitching and prevent any fabric damage.
- Explore different placement options for the embroidery design on the mittens. You can experiment with centered designs, off-center placements, or even asymmetrical designs to add visual interest and uniqueness to your mittens.
- Consider adding monograms or initials to your fingerless mittens to make them even more personalized. Embroidering your own initials or those of the recipient adds a special touch and makes the mittens truly one-of-a-kind.
- Don’t be afraid to experiment with different thread variations for your embroidery design. You can use metallic threads, variegated threads, or even add some shimmer with metallic or sparkly thread to create eye-catching effects on your mittens.
- If you have a larger hoop size on your embroidery machine, consider embroidering multiple designs on each mitten. This allows you to create a cohesive and coordinated look with complementary or matching designs.
- Before embroidering on the actual mitten fabric, it’s always a good idea to test stitch the design on a scrap piece of fabric with similar characteristics. This helps you verify the thread tension, stitch density, and overall appearance of the design before committing to the mittens.
- If you want added warmth and comfort, consider lining the fingerless mittens with a soft and cozy fabric. This can be done by cutting an additional layer of fabric, slightly smaller than the outer layer, and attaching it to the inside of the mittens during the sewing process.
- In addition to the main embroidery design, you can further enhance the uniqueness of your mittens by adding smaller embroidered accents, such as flowers, leaves, or other decorative elements. These accents can be strategically placed around the main design or scattered throughout the mitten surface.
- Explore different embroidery styles and techniques, such as satin stitches, fill stitches, or even appliqué, to add texture and dimension to your fingerless mittens. Combining different embroidery techniques can result in stunning and intricate designs.
- Once you’ve completed your unique warm in-the-hoop embroidery fingerless mittens, don’t forget to share your creations with others. Whether through social media or in-person, sharing your work can inspire others and showcase your talent and creativity.
Remember to have fun and experiment with different embroidery designs and fabric combinations. The beauty of in-the-hoop embroidery fingerless mittens is that you can create countless variations, making each pair truly unique. Enjoy the process, embrace your creativity, and stay warm with your handmade fingerless mittens!
Frequently Asked Questions:
An embroidery hoop consists of a pair of concentric circular or elliptical rings. The bigger ring has a tightening device, generally in the form of a metal screw.
Hoop embroidery fingerless mittens are fingerless mittens that are made using the technique of in-the-hoop embroidery. The embroidery design is stitched directly onto the fabric while it is secured in an embroidery hoop, resulting in a decorative and personalized element on the mittens.
A hoop is used in embroidery as a tool to hold the fabric taut and in place while stitching. It ensures that the fabric remains stable and prevents puckering or distortion during the embroidery process, allowing for precise and accurate stitching. The hoop keeps the fabric and embroidery design aligned and provides a controlled working area for embroidery machines or hand stitching.
Embroidery hoops stretch the material tight and could help preserve the structure and weave of the embroidery material, which in turn would help keep your stitches neat and clean.


