Ever tried stitching a cool design on a cozy sweatshirt only to end up with puckered fabric or crooked threads? If you’re wondering how to embroider a sweatshirt without the frustration, you’re in the right place. This guide gives you everything from supplies to fixes, whether you pick hand embroidery on a sweatshirt or machine methods. You’ll learn simple steps that work at home, even as a beginner.
By the end, you’ll create custom sweatshirts that look pro, perfect for gifts, logos, or fun projects. Let’s dive in!
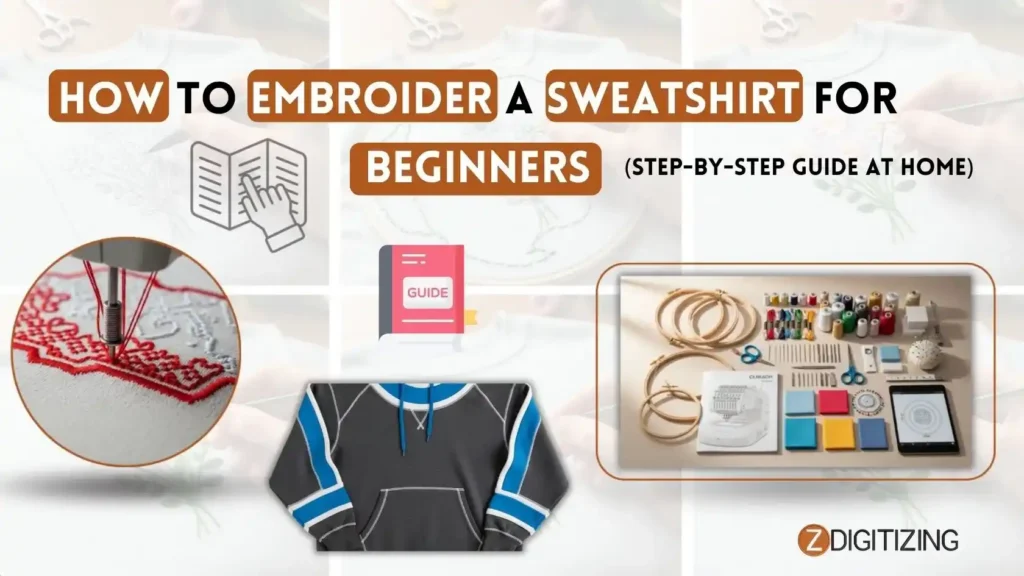
How to Embroider a Sweatshirt for Beginners (Step-by-Step Guide at Home)
What You'll Need to Embroider a Sweatshirt?
Before you start, grab the right tools for how to embroider a sweatshirt. Sweatshirts have thick, stretchy fleece, so standard supplies won’t cut it. Here we list the basics for both hand and machine embroidery on a sweatshirt. Pick what fits your setup.
Focus on quality items to avoid messes like thread breaks or fabric shifts. Beginners can start cheaply, while pros add stabilizers for flawless results.
Hand Embroidery Supplies
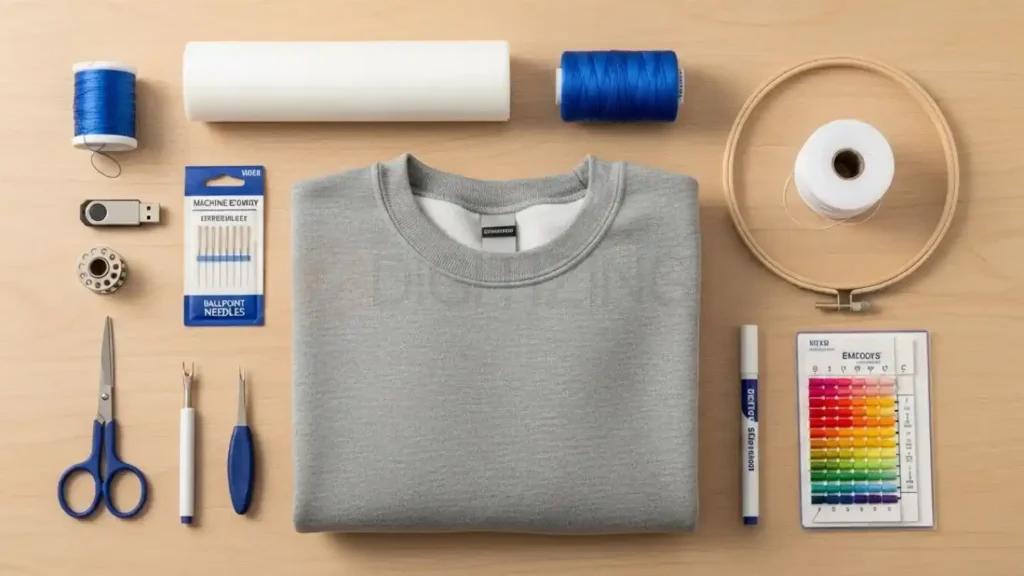
- Embroidery floss (cotton or polyester; 6-strand for bold designs).
- Needles (crewel size 3-9 for thick fabric).
- Embroidery hoop (6-8 inch plastic or wood).
- Fabric marker (water-soluble, like FriXion pens).
- Scissors (sharp embroidery shears).
- A thimble for pushing needles through fleece.
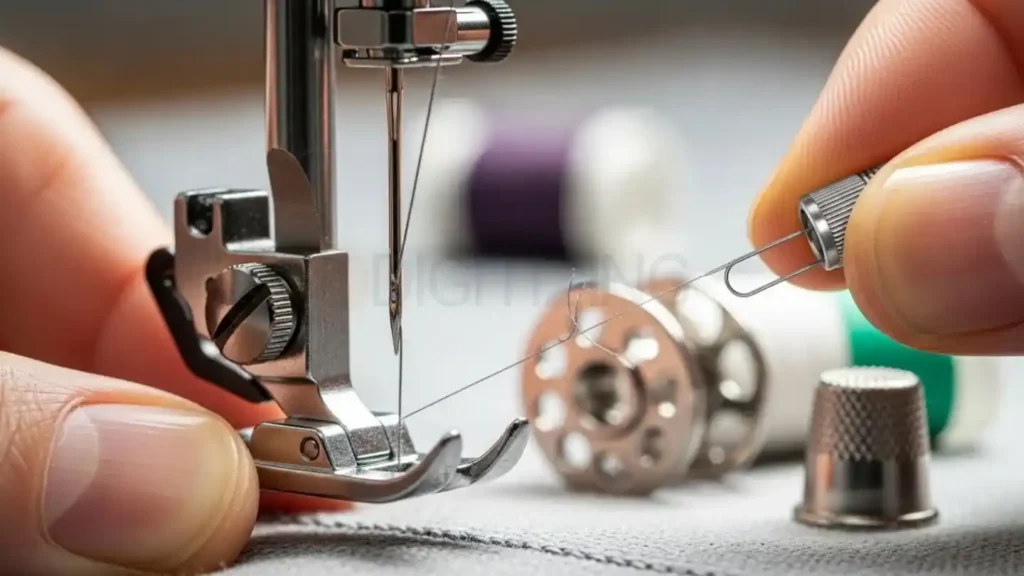
Machine Embroidery Supplies
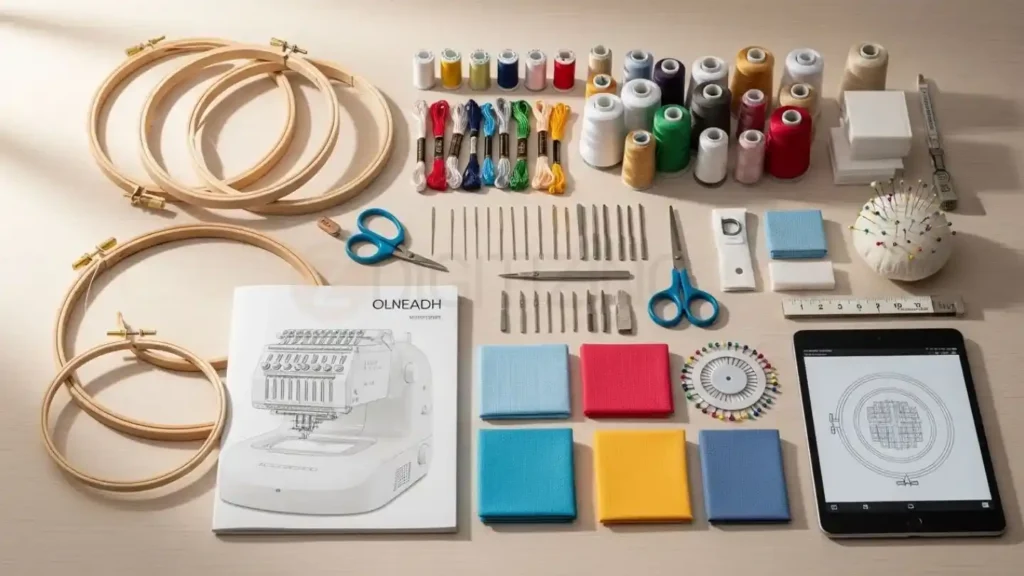
- Embroidery machine (Brother or Janome for starters).
- Hoops (4×4 inch minimum; magnetic for sweatshirts).
- Stabilizers (tearaway or cutaway; medium weight).
- Embroidery thread (polyester 40wt).
- Bobbin thread (pre-wound).
- Design file (DST or PES format).
Here’s a quick table to compare costs and where to get them:
Item | Hand Cost | Machine Cost | Best Buy |
Hoop | $5 | $20 (magnetic) | Amazon |
Stabilizer | $10/pack | $15/pack | Joann |
Thread | $2/skein | $5/spool | Etsy |
Needles | $3/pack | $8/pack | Walmart |
Total starter kit: $30 for the hand, $150 for the machine. These prevent common fails like loose stitches. Stock up, and you’re set for how to embroider hoodies and sweatshirts too.
Hand Embroidery on Sweatshirt vs. Machine: Which to Choose?
New to this? Before learning how to embroider a sweatshirt, decide whether to use hand embroidery or a machine. Each option has its own benefits.
Hand embroidery is simple and can be done anywhere without power, while a machine is faster and better for larger designs like logos on sweatshirts.
This choice affects your time and appearance. Businesses love the machine for bulk custom embroidered sweatshirt orders. Hobbyists pick hand for personal touches.
Pros and Cons Table
Method | Pros | Cons | Best For |
Hand | Cheap, portable, creative freedom | Slow, tiring on thick fabric | Small designs, beginners |
Machine | Fast, even stitches, pro finish | Needs machine, learning curve | Logos, hoodies, volume |
Embroidery vs printing? Embroidery lasts longer on sweatshirts, no cracks like screen printing. Embroidery vs heat transfer vinyl (HTV) wins for texture and wash durability. Applique vs embroidery? Applique patches, fabric shapes, and embroidery stitches directly for finer details.
Hand vs machine embroidery tips: Start with hand to learn stitches, then upgrade. For pros, the machine handles machine embroidery on sweatshirt bulk.
Best Stitches for Hand Embroidery on Sweatshirts
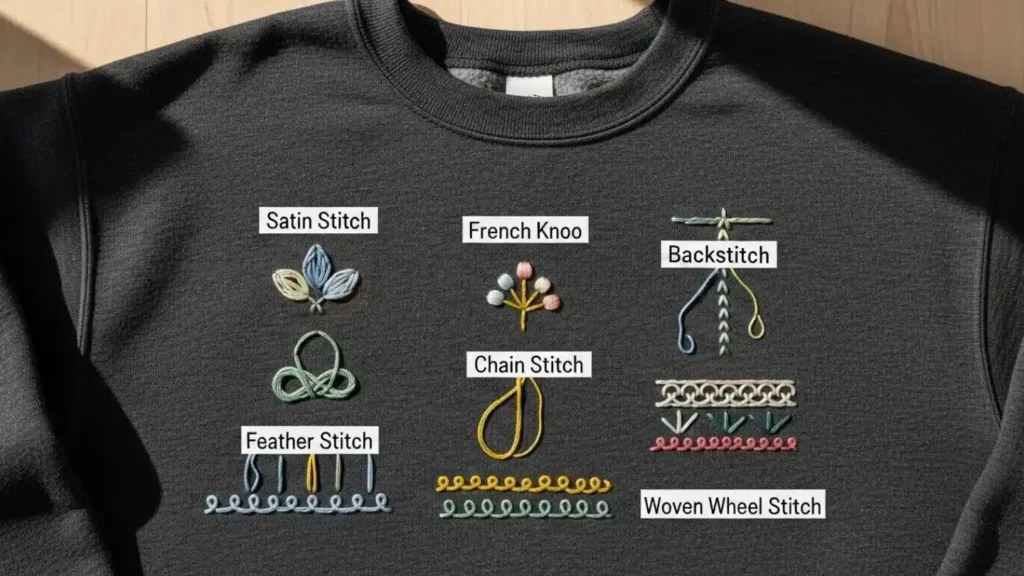
When learning how to embroider a sweatshirt, choose stitches that hold well on fleece without causing pulling or distortion.
- Running stitch: Quick outline; base for all designs.
- Back stitch: Strong lines for logos.
- Satin stitch: Smooth fills; pad under for puffiness.
- French knots: Dots or texture; great for snowflakes.
Practice on scrap fleece first.
Machine Embroidery Basics for Sweatshirts

If you’re learning how to embroider a sweatshirt, machine embroidery uses digitized files with stitch types like:
- Satin (shiny lines).
- Fill (solid areas).
- Zigzag (edges).
Software like Hatch turns logos into these.
How to Prep Your Sweatshirt for Perfect Embroidery?
Prep stops 80% of problems in how to embroider a sweatshirt. Fleece stretches and pills, so treat it right.
- Wash and dry sweatshirt (cold water, no fabric softener).
- Iron flat if needed.
- Place cardboard inside to block bleed-through.
- Mark the design spot with chalk (center chest: 8 inches down, 4 from the side).
For how to embroider on a sweatshirt sleeve, fold and pin. Stabilize all areas. This sets you up for success.
Step-by-Step: Machine Embroidery on a Sweatshirt
Achieving a professional finish when performing machine embroidery on sweatshirt projects requires precision and the right equipment.
Whether you are using a Brother PE800 or similar home machines, follow these steps to master how to embroider a sweatshirt and get clean, flawless results.
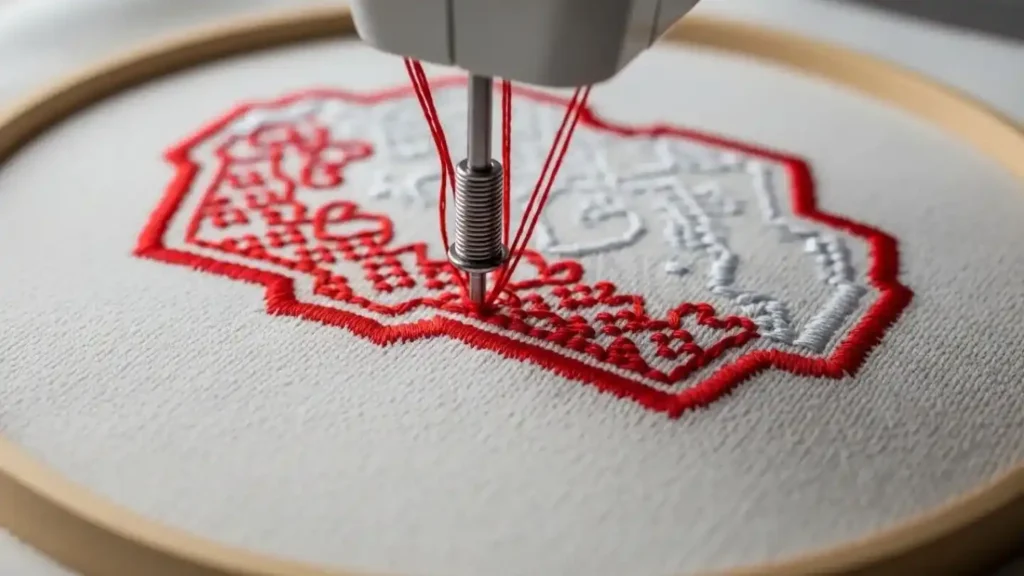
Step 1: Stabilize the Fabric
Always use a cut-away stabilizer rather than tear-away to prevent distortion on stretchy knits. Cut the stabilizer larger than your hoop and use temporary adhesive spray on the wrong side of the sweatshirt to secure it.
Step 2: Hoop the Fabric
Slide the hoop carefully under the fabric. If possible, use magnetic hoops, as they grip thick fleece securely without causing the fabric to shift or wrinkle during the process.
Step 3: Load Your Design
Select your embroidery file or digitize your own logo using software like Wilcom. Ensure the stitch density is set appropriately for knit fabrics to avoid excessive bulk.
Step 4: Position the Design
Use your machine’s LCD screen to align the design precisely. For a standard look, center the logo on the chest area.
Step 5: Stitch an Outline
Before committing to the full design, run a “basting” stitch around the perimeter. This helps verify that the fabric remains flat and the placement is accurate.
Step 6: Embroider the Full Design
Begin stitching at a moderate speed, around 600 stitches per minute (SPM). Monitor the machine closely to watch for any puckering or thread breaks.
Step 7: Remove the Hoop
Once finished, carefully take the fabric out of the hoop. If you used a cut-away stabilizer, trim the excess carefully around the design.
Step 8: Final Pressing
Trim any loose threads and press the garment from the wrong side using a steam iron to restore the fleece texture.
This process typically takes between 20 and 45 minutes, depending on design complexity. It is always a good idea to practice on a scrap piece of fabric to master how to embroider a sweatshirt perfectly before working on your final garment.
Hooping Sweatshirt Sleeves and Hoods
Sleeves tricky? Roll fabric, use sleeve hoop arm. For hoods:
- Stuff with a towel.
- Hoop small section.
- Use cap hoop frame.
Pro tip: Multiple hoopings for large backs.
Digitizing Your Logo for Sweatshirt Embroidery
When learning how to embroider a sweatshirt, you’ll need digitizing software to prepare your design. If you don’t have one, you can use free tools like Ink/Stitch.
- Trace logo in vector.
- Add satin columns for edges.
- Fill centers.
- Adjust density (0.4mm for fleece).
Step-by-Step: Hand Embroidery on a Sweatshirt
If you prefer to work without expensive equipment, hand embroidery is a wonderful way to personalize your apparel.
Many beginners find that learning how to embroider a sweatshirt by hand is a relaxing process that allows for total creative control over the final look of the design.
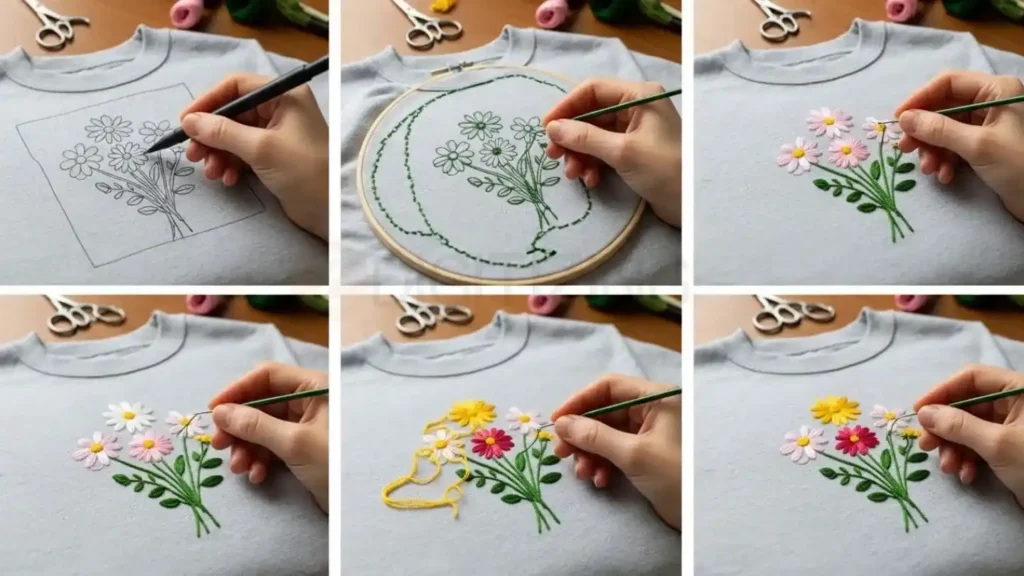
1. Transfer Your Design
Begin by transferring your chosen pattern onto the fabric. You can use a water-soluble fabric pen to trace the design or use iron-on transfer paper for more complex shapes.
2. Prepare the Fabric Hoop
Place your sweatshirt into a wooden or plastic embroidery hoop. Ensure the fabric is pulled taut but not stretched, as this is vital when you learn how to embroider a sweatshirt to ensure the design does not distort once the hoop is removed.
3. Thread Your Needle
Select your embroidery floss and separate it into 2 or 3 strands. Using fewer strands creates a more delicate, professional look, while using all 6 strands will create a bolder, thicker texture.
4. Start Your Stitches
Begin by outlining your design with a simple running stitch. Once the outline is set, you can fill in the shapes using a satin stitch to create a smooth, solid appearance.
5. Build Your Layers
As you work, make sure to knot your thread securely on the back of the fabric. This prevents your work from unraveling after a few wears or washes.
6. Finishing Touches
When your design is complete, weave the loose ends of the thread into the back of the stitches to hide them. You may choose to gently hand-wash the item to help the stitches “settle” into the fabric.
Mastering these manual techniques is a great way to understand how to embroider a sweatshirt before eventually moving on to machine-based projects.
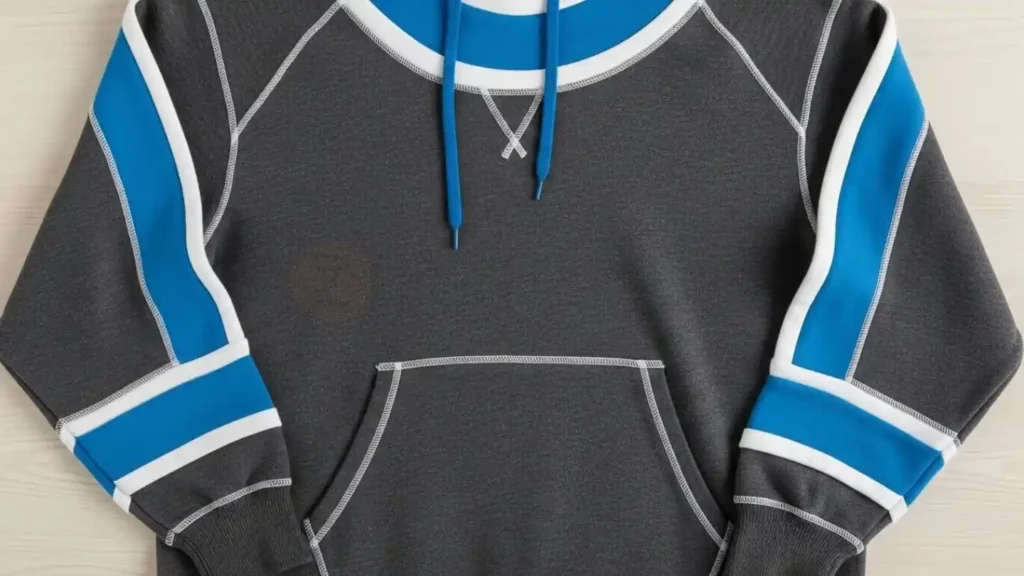
Custom Logo Embroidery on Sweatshirts: Ideas and Tips
Make a custom embroidered sweatshirt stand out. Logos pop on the chest or sleeves.
Ideas:
- Business name in script font.
- Sports team icons with fill stitches.
- Holiday motifs (hearts, stars).
- Name tags arched on hood.
- Minimalist lines for modern look.
Tips: Scale 3-5 inches wide. Use metallic thread for shine. For businesses, match Pantone colors. This beats printing for a premium feel.
Common Mistakes and How to Fix Sweatshirt Embroidery Issues
Even pros run into problems when working on knit fabrics. Learning how to embroider a sweatshirt takes practice, but most issues are easy to fix with these simple adjustments.
1. Fixing Design Puckering
Puckering happens if your hoop is too tight or your stabilizer is too thin. To fix this, loosen your machine tension and use a heavier cut-away stabilizer. This gives the support your custom embroidered sweatshirt needs to stay flat while the needle moves.
2. Preventing Thread Breaks
If your thread keeps snapping, your needle is likely dull. Change your needle every 8 hours of use. Always use a sharp, high-quality ballpoint needle to keep your machine running smoothly.
3. Avoiding Shifting Designs
If your logo looks crooked, the fabric likely shifted during stitching. This happens if the garment isn’t secured well. Use temporary adhesive spray to keep the fabric locked in place.
If you need help with alignment, professional hat digitizing services or design software can ensure your files are perfectly centered.
4. Correcting Uneven Stitches
Skipped or uneven stitches usually mean the fabric wasn’t hooped correctly. If the material isn’t perfectly flat, the machine can’t place the thread right. Simply remove the hoop, smooth the fabric, and re-hoop carefully.
5. Managing Fleece Pilling
If the fleece looks damaged, you might be using the wrong stabilizer. Tear-away can be too harsh for soft fleece. Try using a softer cut-away or a water-soluble topping to protect the fabric surface.
By slowing down your machine and doing a quick test on a scrap piece of fabric, you can avoid these errors. These simple steps make learning how to embroider a sweatshirt much easier and help you get professional results every time.

Conclusion
Embroidery is a fun and creative way to turn a simple sweatshirt into something unique. Whether you use a machine or stitch by hand, the key is to stay patient, choose the right stabilizer, and prepare your design properly.
If you avoid common mistakes and follow each step carefully, you can easily learn how to embroider a sweatshirt and get clean, professional-looking results.
But when it comes to detailed logos or complex designs, it’s not always easy to do everything perfectly at home. In such cases, working with an expert like an online embroidery digitizing service provider in Germany or anywhere else can make a big difference. They ensure your design stitches smoothly without puckering or thread issues.
If you want perfect results without the stress, ZDigitizing is here to help. With 10+ years of experience, we create high-quality embroidery files that are ready for production. Our team works 24/7, offers free minor edits, and provides a design preview before payment so you know exactly what you’ll get.
Ready to upgrade your embroidery projects? Try ZDigitizing today and get 50% OFF on your first order. Once you understand how to embroider a sweatshirt, the next step is making your designs look truly professional, and that’s where we come in.