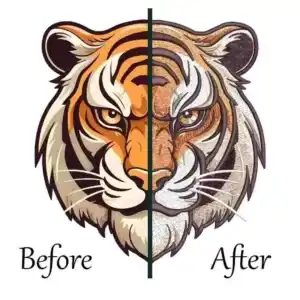
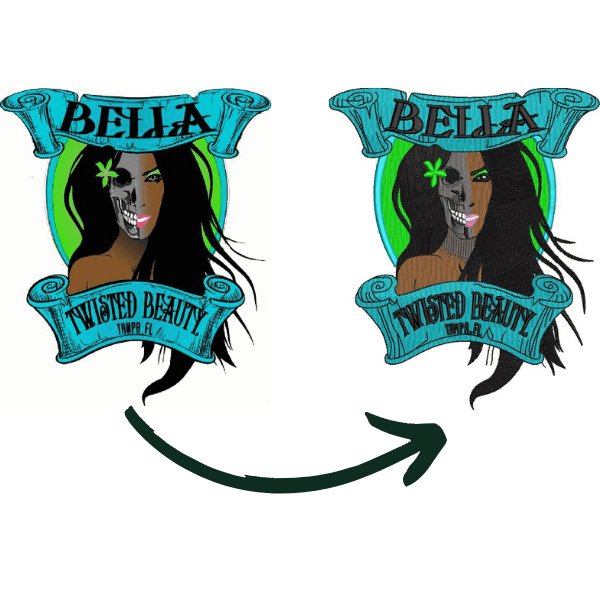
Learning how to make an applique patch using a home or commercial embroidery machine comes down to a precise five-step sequence: stitch a placement outline onto hooped stabilizer, lay down your patch fabric, run a tack-down stitch, trim the excess fabric close to the line, and seal the raw edges with a dense satin border.
How to Make an Applique Patch: Easy Machine Embroidery Tutorial
What You Need to Make an Appliqué Patch
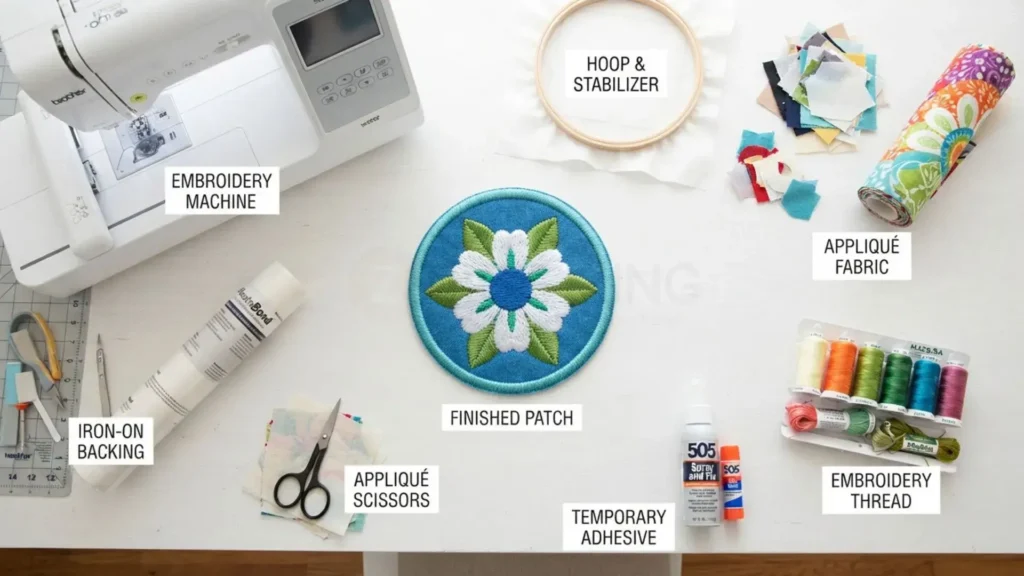
Making a patch with an embroidery machine does not require a large collection of specialized tools. The important part is matching the fabric, stabilizer, thread, and design file to the patch you want to produce.
Essential Machine Embroidery Supplies
Supply | Purpose & Selection Guidance |
Embroidery Machine | Any machine compatible with your design format and hoop size. |
Appliqué Design File | Must include discrete placement, tack-down, trim pause, and border stops. |
Stabilizer | Tear-away for heavy patch twill/canvas; cut-away for stretch fabrics; adhesive stabilizer for patch blanks. |
Appliqué Fabric | Poly-patch twill, cotton canvas, denim, or felt. Avoid loose knits and slippery polyesters. |
Embroidery Thread | 40 wt polyester thread for durable outer borders; standard matching bobbin thread. |
Trimming Scissors | Curved duckbill scissors or fine-tip appliqué scissors for tight edge control. |
Temporary Adhesive | Temporary fabric spray adhesive or painter’s tape to hold fabric prior to tacking down. |
Permanent Patch Backing | Heat-seal adhesive film (for iron-on conversion) applied after all stitching is complete. |
A useful distinction is that temporary adhesive used during embroidery is not the same as permanent patch backing. One holds the fabric in position while the design stitches; the other is applied after embroidery to attach the completed patch.
How Machine Appliqué Patches Work
An appliqué patch combines a piece of fabric with embroidery stitches rather than building the entire patch from thread. The machine first marks where the fabric should go, secures it, and then covers the raw edge with the finishing stitch.

Understanding this sequence is what separates a structural embroidered applique patch from standard direct-to-garment stitching. The digitized file controls physical machine stops, enabling you to layer materials without losing registration.
Step-by-Step: How to Make an Appliqué Patch
Executing an appliqué patch requires precise timing during machine pauses to ensure crisp edge registration.
Step 1: Prepare the Appliqué Design
Verify that your applique patch digitizing file includes programmed color stops or explicit machine pause commands between the placement, tack-down, and satin border layers.
When practicing how to make an applique patch for the first time, select bold shapes with minimal internal detail. If your software file lacks distinct machine stops, the machine will run through the entire design without allowing you time to lay down or trim your fabric.
Step 2: Hoop the Stabilizer
Place the appropriate stabilizer in the embroidery hoop and make sure it is secure without stretching it excessively.
For a stable woven patch base, tear-away may be sufficient. Stretchy or less stable materials may require cut-away or another stabilizing method. If you are creating a separate patch rather than stitching directly onto a garment, an adhesive or sticky stabilizer can also help hold the patch material in position.
The correct stabilizer depends on the patch material, stitch density, and finishing method, so test the combination before producing multiple patches.
Step 3: Stitch the Placement Line
Load the design and begin stitching. The first outline should create a clear placement boundary for the appliqué fabric.
When the machine stops at the placement stage, do not remove the hoop unless the specific design instructions require it. Keeping the project registered in the hoop prevents the next stitch sequence from shifting away from the original outline.
Understanding this placement line is essential when learning how to make an applique patch accurately, so make sure the appliqué material will cover the entire marked area before continuing.
Step 4: Place the Appliqué Fabric
When the machine stops after the placement stitch, lay the appliqué fabric over the marked area with the intended right side facing up. Make sure the fabric extends beyond the entire placement outline so there is enough material to trim after the tack-down stitch.
Smooth out wrinkles and check that the fabric is sitting flat. If needed, use a small amount of temporary adhesive or tape outside the stitching area to prevent movement. Avoid applying excessive adhesive directly under the needle.
Do not trim the fabric to its final shape at this stage unless the design specifically calls for a pre-cut appliqué piece. Leaving extra fabric around the placement area gives you room to correct minor positioning issues before trimming.
Step 5: Stitch the Tack-Down
Resume the machine and let the tack-down sequence stitch over the appliqué fabric. This stage holds the fabric securely against the patch base before you remove the excess.
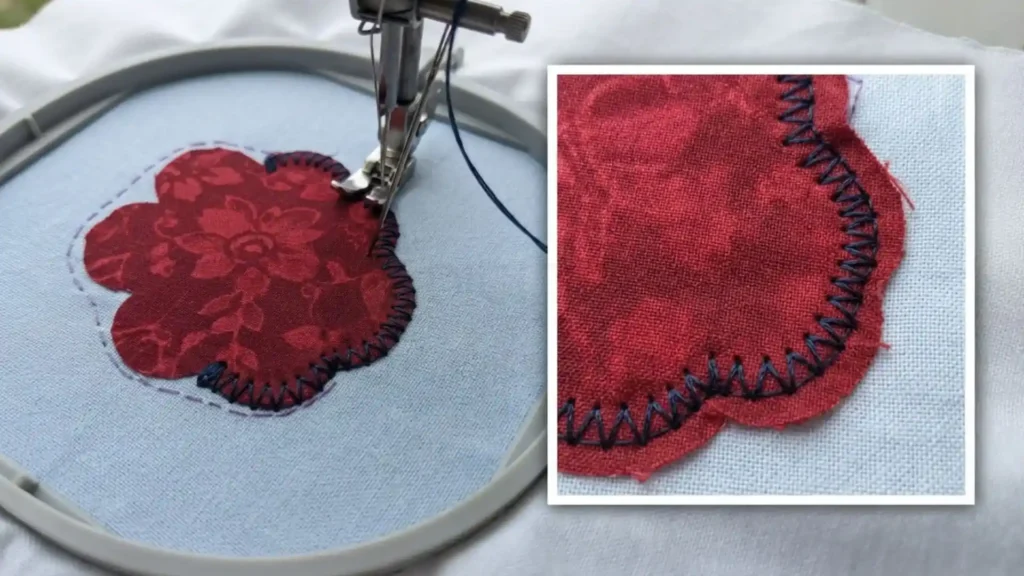
Watch the first few stitches to make sure the fabric is not lifting, folding, or shifting. If the fabric moves significantly, stop the machine and correct the setup rather than continuing with an incorrectly positioned piece.
The tack-down does not need to create the finished decorative edge. Its job is to keep the appliqué fabric stable while the excess material is removed.
Step 6: Trim the Excess Appliqué Fabric
Without unhooping the stabilizer, remove the hoop from the machine arm and place it on a flat desk. A crucial step in how to make an applique patch is carefully trimming the excess fabric outside the tack-down seam using duckbill scissors.
Position the duckbill paddle flat against the fabric, this shield prevents the blade tips from slicing the hooped stabilizer underneath. Trim within 1 to 1.5mm of the tack-down stitches. Cutting too far leaves raw threads poking through the satin border, while trimming into the stitches causes edge fraying during final wash cycles.
For designs with several separate appliqué areas, complete each trim stage according to the machine’s stop sequence rather than removing everything at once.
Step 7: Stitch the Final Edge
Once the excess fabric has been removed, continue the design so the machine covers the raw appliqué edge.
A satin stitch is commonly used for the outer border because it provides a clean, dense edge. Depending on the design, fabric, and desired appearance, a zigzag, blanket, or decorative motif stitch may also be appropriate.
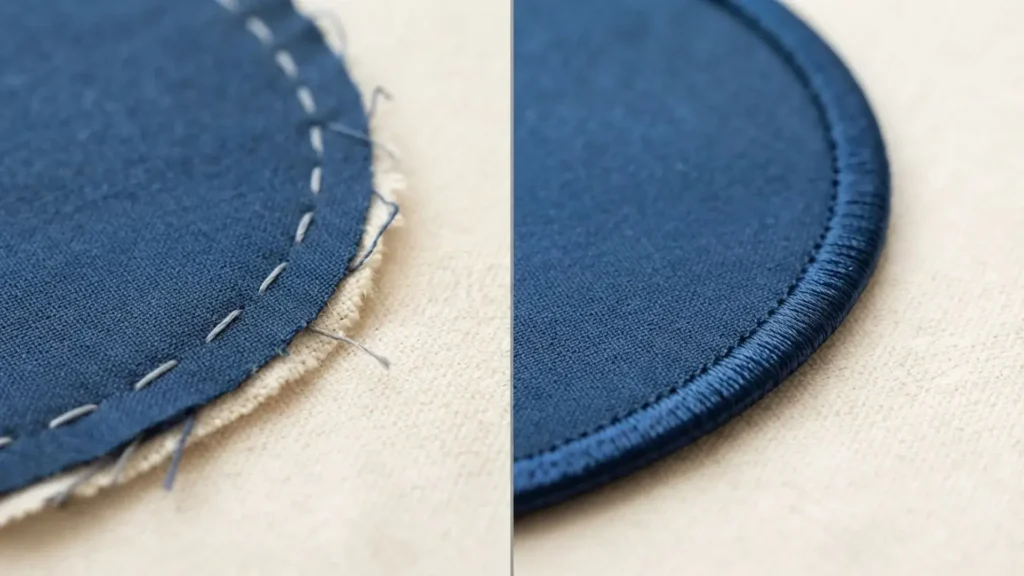
Watch the border as it stitches. The fabric should remain underneath the covering stitches without pulling away from the edge. If you see gaps, exposed fabric, or excessive thread buildup, stop and assess the design rather than assuming the problem will disappear in later stitching.
Step 8: Add Any Additional Embroidery
Some patches are finished as soon as the outer border is stitched. Others include lettering, outlines, small motifs, or other embroidery details over the appliqué fabric.
These details should be sequenced after the main appliqué area when the design requires them. Their size and stitch density need to suit the finished patch dimensions; tiny details that work on a large embroidered design may lose clarity when reduced for a patch.
This is also where you can see the benefit of a properly digitized file. The machine should move through the design in a controlled sequence rather than repeatedly stitching over the same areas without purpose.
How to Trim Appliqué Fabric Cleanly
Trimming is one of the stages that has the biggest visual effect on the finished patch. A clean tack-down line makes the edge easier to follow, but the fabric still needs to be cut carefully so the final border can cover it.
For how to make an applique patch at home, use small, sharp scissors rather than large general-purpose scissors. Keep the blades close to the fabric edge without cutting into the stitches.
Trim-in-Place vs. Pre-Cut Appliqué
There are two common workflows.
Trim-in-place: The machine first stitches the placement and tack-down lines, and you cut away the excess fabric while it remains secured in the hoop. This is a practical approach for beginners because the stitched outline gives you a clear trimming boundary.
Pre-cut appliqué: The fabric is cut to the required shape before it is placed in the hoop. This can work well when the shape is predictable or when multiple identical pieces are being produced, but the cutting needs to be accurate enough to align with the embroidery design.
For a first project, trim-in-place appliqué is generally easier because the machine establishes the placement and securing points before you make the final cut.
How to Finish an Iron-On Appliqué Patch
An iron-on applique patch needs a separate adhesive backing after the embroidery is finished. The backing should not be confused with the temporary adhesive used to hold appliqué fabric during stitching.
First, clean the back of the completed patch and remove loose stabilizer according to the stabilizer manufacturer’s instructions. Cut the heat-seal adhesive slightly smaller than the patch so it does not extend beyond the embroidered edge.
Place the adhesive on the back according to its manufacturer’s instructions, cover it with the recommended protective sheet or pressing cloth, and apply the specified heat and pressure.
Heat settings and pressing times vary between adhesive products and fabrics, so follow the backing manufacturer’s instructions rather than using one temperature as a universal setting.
Allow the patch to cool before checking the bond. For items that will receive frequent washing, stretching, or heavy use, sewing around the patch perimeter can provide additional security.
How to Finish a Sew-On Appliqué Patch
A sew-on applique patch does not need permanent heat-seal adhesive. Once the embroidery is complete, trim and clean the patch, then position it where you want it on the garment, bag, hat, or other item.
Secure the patch temporarily with pins, basting, or a suitable temporary adhesive. Then sew around the outer edge with a straight stitch, zigzag, whipstitch, or blanket stitch, depending on the patch construction and the look you want.
Use a strong thread that suits the application and secure the beginning and ending stitches properly. For workwear, backpacks, or items that receive frequent washing and flexing, stitching around the perimeter provides a mechanical attachment rather than relying on adhesive alone.
How to Digitize an Appliqué Patch Design
The embroidery file controls much more than the shape of the finished artwork. A properly prepared file tells the machine when to place the fabric, when to stop for trimming, and how to cover the raw edge.

A basic appliqué file should contain these stages:
- Placement run: A light running stitch marks the exact area where the fabric should be placed.
- Stop or color change: The machine pauses so the operator can position the appliqué fabric.
- Tack-down: A second outline secures the fabric before trimming.
- Trim pause: The machine stops again when the excess fabric needs to be removed.
- Cover stitch: A satin, zigzag, blanket, or another suitable edge stitch covers the raw fabric.
- Additional embroidery: Lettering, outlines, or decorative details are added if the design requires them.
When you digitize embroidery files for appliqué, the software builds distinct placement and tack-down paths, leaving precise margins for trimming.
What to Check During Appliqué Digitizing
Proper applique patch digitizing requires structural planning inside embroidery software to control physical machine stops and compensate for fabric distortion.
- Stitch Sequencing & Stops: Program explicit color changes or stop codes between the placement run, tack-down, and satin border so the machine pauses automatically for trimming.
- Pull Compensation: Increase outer border pull compensation by +0.3mm to +0.4 mm relative to standard fills to account for fabric tugging.
- Border Width & Density: Set outer satin border width to at least 3.5 mm with a density of 0.4 mm to fully seal raw fabric edges.
- Edge-Walk Underlay: Place a single edge-walk underlay beneath the satin column to pin down loose threads before the primary satin stitches execute.
Embroidery applique digitizing is therefore more than converting an image into stitches. The file has to provide a practical production sequence that someone can follow at the machine without guessing when to place, trim, or reposition the fabric.
Professional cap logo digitizing services account for curved surface tension, ensuring placement lines and satin borders align without losing registration.
For designs that will be produced repeatedly, testing the actual patch material is especially important. A border that looks correct in the software may need adjustment once the fabric, stabilizer, thread, and stitch density interact during embroidery.
Common Appliqué Patch Problems and Fixes
Even when following proper steps on how to make an applique patch, small setup or digitizing issues can affect your results. Most problems can be traced to fabric movement, stabilization, trimming, or stitch settings.
Problem | Likely Cause | Practical Fix |
Fabric shifts | Weak stabilization, slippery fabric, insufficient temporary adhesive, or moving the hoop | Use the appropriate stabilizer, secure the fabric before tack-down, and keep the hoop registered throughout the sequence |
Appliqué edge frays | Loose-weave fabric, excessive trimming, or insufficient edge coverage | Choose a more stable fabric, trim carefully, and make sure the final border covers the raw edge |
Uneven trimming | Dull scissors, poor visibility, or trimming before tack-down | Use sharp appliqué scissors and trim only after the fabric has been securely tacked down |
Puckering | Too little stabilization, excessive density, tension problems, or fabric movement | Increase or change stabilization, review density and tension, and test on the same fabric |
Gaps around the border | Fabric was cut too far inside the tack-down or the covering stitch does not provide enough coverage | Leave a safe trimming margin and review the final border width and registration |
Poor registration | Hoop movement, unstable fabric, inadequate underlay, or inaccurate digitizing | Check hooping and stabilization, keep the project registered, and test the digitized file |
Heavy or stiff patch | Excessive stitch density or overlapping embroidery | Remove unnecessary stitches and reduce buildup where the fabric itself already provides coverage |
Details disappear | Design is too small or contains details that cannot reproduce clearly at patch size | Simplify the artwork and test the actual finished size before production |
How ZDigitizing helps: Working with an established embroidery digitizing company ensures your file precisely controls placement, tack-down, trim pauses, and border density for seamless production runs. The digitizing can also be adjusted for the intended patch size and fabric instead of relying on generic stitch settings.
Appliqué Patch vs. Embroidered, Woven, and Other Patches
Different patch methods create noticeably different surfaces and handle artwork differently. The right method depends on the design, material, amount of detail, and finish you want.
Patch Type | Works Well For | Main Characteristic |
Appliqué patch | Large shapes, bold color blocks, fabric textures | Uses fabric for major areas and embroidery for securing and detailing |
Fully embroidered patch | Logos, lettering, outlines, thread-built artwork | The design is created primarily with embroidery thread |
Woven patch | Fine lettering and small detailed artwork | Uses woven threads for a flatter, detailed surface |
Sublimation patch | Gradients, photographic artwork, detailed printed imagery | Uses printed color rather than stitched fabric areas |
Chenille patch | Varsity-style lettering and bold graphics | Has a thick, raised, textured yarn surface |
Appliqué Patch vs. Embroidered Patch
An applique patch vs embroidered patch comparison mainly comes down to how the artwork is constructed.
An appliqué patch uses a separate piece of fabric to cover substantial areas, with embroidery securing the fabric and finishing its edges. A fully embroidered patch builds those areas with thread.
Appliqué works particularly well when the design has large, simple color blocks or when you want the texture and appearance of a specific fabric. Full embroidery gives you more control over thread-built outlines, small details, and lettering.
Appliqué Patch vs. Woven Patch
An applique patch vs woven patch comparison is useful when the design contains small text or fine details.
Woven patches can reproduce small lettering and fine lines cleanly because the design is constructed from woven threads rather than thick embroidery stitches. Appliqué creates a more dimensional fabric-inlay effect, with an embroidered edge around the appliqué material.
Appliqué vs. Sublimation Patch
An applique vs sublimation patch choice is largely a question of surface and artwork style.
Sublimation is useful for printed artwork with gradients, photographic elements, or very detailed color transitions on suitable polyester-based materials. Appliqué instead combines fabric pieces with embroidery, giving the finished patch a stitched edge and a different tactile appearance.
Appliqué Patch vs. Chenille Patch
An applique patch vs chenille patch comparison is mostly about texture.
Chenille has a thick, fuzzy, raised surface commonly associated with varsity-style lettering and graphics. Appliqué is generally flatter and combines fabric shapes with an embroidered edge, making it useful when the fabric itself is part of the visual design.
Can Beginners Make Appliqué Patches at Home?
Yes. Learning how to make an applique patch at home is realistic if you have an embroidery machine, a suitable design file, stable fabric, the right stabilizer, and sharp trimming scissors.
The easiest first project is a simple, bold shape with one appliqué fabric and a clear outer border. Avoid starting with tiny lettering, multiple overlapping fabric pieces, stretchy material, or highly detailed artwork.
A home-made patch may require a few test attempts before the trimming, registration, and border look consistent. That is normal. The goal of the first project should be learning how the fabric, stabilizer, stitches, and machine interact rather than producing a complicated design immediately.
A Simple First Project
For your first applique patches, choose:
- One stable fabric
- One main appliqué shape
- A simple outline
- A reasonably wide finishing border
- Minimal small lettering
- A stabilizer suited to the patch material
- Scrap fabric for testing
Test the complete sequence before using your final fabric. This gives you an opportunity to adjust placement, trimming, border coverage, or density without wasting the finished material.
When Professional Appliqué Digitizing Makes Sense
Creating a patch at home is useful for personal projects and simple designs, but professional digitizing becomes more valuable when the design needs to be reproduced consistently.
A complex logo may require multiple appliqué sections, small lettering, detailed embroidery, or different stitch types. Designs intended for several sizes can also require separate adjustments rather than simply scaling one file up or down.
If you are producing patches regularly, bulk embroidery digitizing services in USA can be useful when you need multiple production-ready files without handling every digitizing adjustment yourself.
The goal is not simply to make the artwork look correct on screen. The finished file should be practical to run on the intended machine, fabric, hoop, and patch size.
Quick Checklist Before Stitching Your Patch
Before starting the final patch, check:
- Design fits the available hoop
- Machine supports the exported file format
- Appliqué fabric is stable and large enough
- Stabilizer matches the fabric and stitch density
- Placement line is clearly defined
- Tack-down sequence is included
- Trim pause occurs at the correct point
- Final border covers the raw fabric edge
- Small details are suitable for the finished size
- Thread and bobbin tension have been tested
- Patch has been test-stitched before production
- Iron-on backing or sew-on finishing method is ready
A few minutes spent checking these points can prevent much more time being lost on a poorly registered or badly trimmed patch.

Conclusion
Learning how to make an applique patch starts with a simple sequence: prepare the design, stabilize the patch material, stitch the placement line, secure the fabric, trim the excess, and cover the edge with the final embroidery. From there, the finished patch can be prepared as an iron-on or sew-on patch depending on how it will be used.
Simple shapes are a good starting point, while detailed production patches often need more careful digitizing, testing, and fabric-specific adjustments. When the stitch sequence is built correctly and the patch is tested before production, an embroidery machine can turn fabric pieces into clean, durable appliqué patches.
Ready to create flawless, high-density appliqué designs without the trial and error? Partner with ZDigitizing to get your custom artwork digitized with exact stop markers, perfect pull compensation, and production-ready stitch sequences. New customers receive 50% off their first order to help you get started on your next patch project.