How to Make Embroidered Patches with Your Machine?
If you want to learn how to make embroidered patches on an embroidery machine, you need a precise mix of correct stabilizing, clean digitizing, and the right fabric. Many beginners struggle with problems like fabric puckering, ugly gaps, or loose, frayed borders. This simple guide fixes those issues by showing you exactly how to create smooth, durable patches that look like they came straight from a professional factory.
How to Make Embroidered Patches with Your Machine?
Choosing Your Patch Style: Woven vs. Embroidered Patches
When planning how to make embroidered patches, choosing between a woven patch vs embroidered patch is one of the first design decisions you must make. Both styles serve different purposes, look different, and require completely distinct manufacturing processes.
An embroidered patch uses thick polyester or rayon threads stitched onto a solid base fabric like twill. Because the threads are thick, they create a distinct 3D raised texture that feels classic and heavy. This makes embroidery perfect for traditional uniforms, biker jackets, and sports teams.
Choosing Your Patch Style Woven vs. Embroidered Patches
On the flip side, a woven patch uses much thinner threads that are woven together on a loom to create both the background and the artwork simultaneously. This flat, smooth style is ideal for incredibly detailed artwork, tiny text, or lightweight garments.
If your logo has small, intricate lettering, a woven vs embroidered patch comparison will show that weaving handles tiny details much better than a sewing needle can.
For home creators and small businesses using an embroidery machine, learning how to make embroidered patches is the most accessible path. Weaving requires industrial looms, while embroidery allows you to create textured, premium designs right from your desktop or commercial multi-needle machine.
Essential Materials and Tools for Machine Patches
Gathering the right materials before you tap the start button saves you from wasted thread and ruined fabric. If you want to learn how to make embroidered patches, you cannot treat patch-making exactly like standard shirt embroidery. It requires stiffer bases and unique stabilizing techniques to handle the high stitch density.
Base Fabric: Polyester twill (often called Twilly fabric) is the industry standard. Stiff felt and marine vinyl also work beautifully for heavy-duty applications.
Stabilizer: Heavy-weight tear-away stabilizer or heavy water-soluble stabilizer (like Vilene) are your best options.
Machine Thread: 40-weight polyester thread is highly recommended due to its high tensile strength and rich sheen.
Applique Scissors: Curved duckbill scissors are essential for trimming close to the stitch lines without cutting your stabilizer.
Adhesives and Backings: Heat-seal film (for iron-on patches) or hook-and-loop sheets.
Finishing Tools: A handheld heat gun, wood-burning tool, or a simple lighter to clean up fine thread tails.
When learning how to embroider patches, your choice of stabilizer determines your success. If your stabilizer is too weak, the dense border stitches will pull the fabric inward, causing the center of your patch to pucker and warp out of shape.
Foundation: Digitizing and Stitch Selection
Before your machine can stitch a single line, you must prepare the digital file. This process is called embroidery logo digitizing, and it converts your digital artwork into specific directional commands that your machine can read. If you skip proper digitizing rules, your patch will lack structural integrity.
When learning how to make embroidered patches, your digital file must feature a precise three-step outline framework: a placement line, a tack-down line, and a final border. Without these three components, your machine will not know when to pause for trimming, resulting in raw, unraveled edges.
Running Stitches for Outlining
Running Stitches for Outlining
A running stitch is a simple, single line of straight stitches that guides your placement. When you load your file, the machine runs this step directly onto the bare stabilizer first. This shows you exactly where to place your patch fabric when learning how to make embroidered patches.
The machine then runs a second running stitch, known as the tack-down line, right over your fabric to pin it flat against the stabilizer before any heavy design stitching begins.
Fill Stitches for Solid Backgrounds
Once your fabric is secured, the machine builds the background texture using fill stitches. The Tatami stitch is the most common fill pattern used in modern digitizing software when learning how to make your own embroidery patches.
Fill Stitches for Solid Backgrounds
It lays down rows of parallel stitches that interlock to form a smooth, solid surface. This type of stitch is excellent for covering large open areas or creating a solid color floor beneath your primary logo or text elements.
Satin Stitches for a Clean Border
The final and most important element of any patch is the thick, wrapping satin stitch border. This stitch consists of dense, closely spaced lines that wrap around the raw, cut edge of your fabric.
Satin Stitches for a Clean Border
The satin border seals the thread ends, prevents fraying, and gives your project its classic, raised edge. Getting this step right is the secret to making a homemade patch look like a retail-ready product.
How to Make Embroidered Patches with an Embroidery Machine (Step-by-Step)
Now that you understand the digital framework, let us look at the physical production process to create your own embroidered patch. Follow these steps carefully to ensure clean edges and sharp, puckering-free designs on every single run.
Step 1: Digitize and prepare the design file
Open your digitizing software and import your artwork. Create your inner design elements first, then add your three-step outer border system.
Digitize and prepare the design file
Ensure that your final satin border has a width of at least 4mm to 5mm to completely cover the raw fabric edges later. Set a machine pause or color change command right after the tack-down line so your machine stops automatically when it is time to trim.
Step 2: Hoop the stabilizer and base fabric
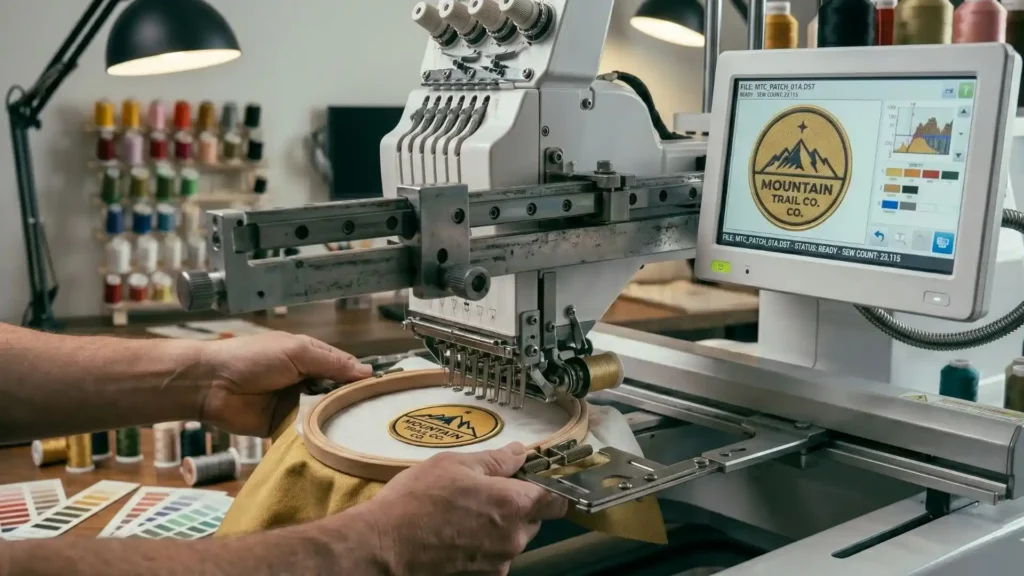
Take your embroidery hoop and tightly secure your chosen stabilizer. If you are using the cut-away or tear-away method, layer your polyester twill fabric directly over the stabilizer and hoop them together like a drum.
Hoop the stabilizer and base fabric
If you are learning how to create embroidery patches using the badge-cut method, hoop the heavy water-soluble stabilizer completely bare, ensuring there are no wrinkles or slack spots in the material.
Step 3: Run the placement and background stitching
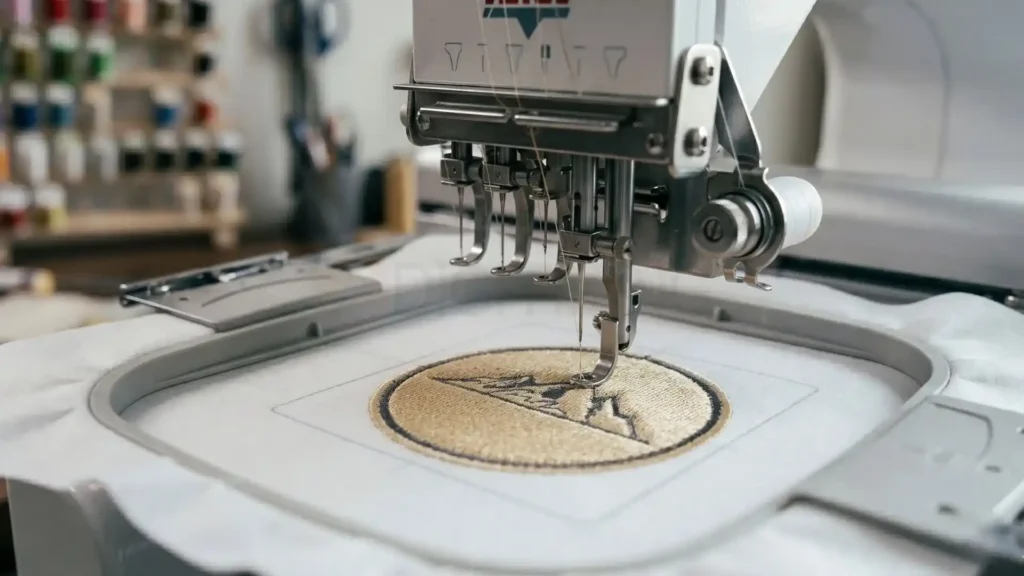
Slide your hoop into the machine and load your file. Run the initial placement and tack-down lines to lock your materials into position.
Run the placement and background stitching
Once the fabric is secure, allow the machine to run the main interior artwork, including all fill stitches, lettering, and detail work. Keep an eye on your thread tension during this stage to prevent puckering.
Step 4: Trim the excess patch fabric close to the border
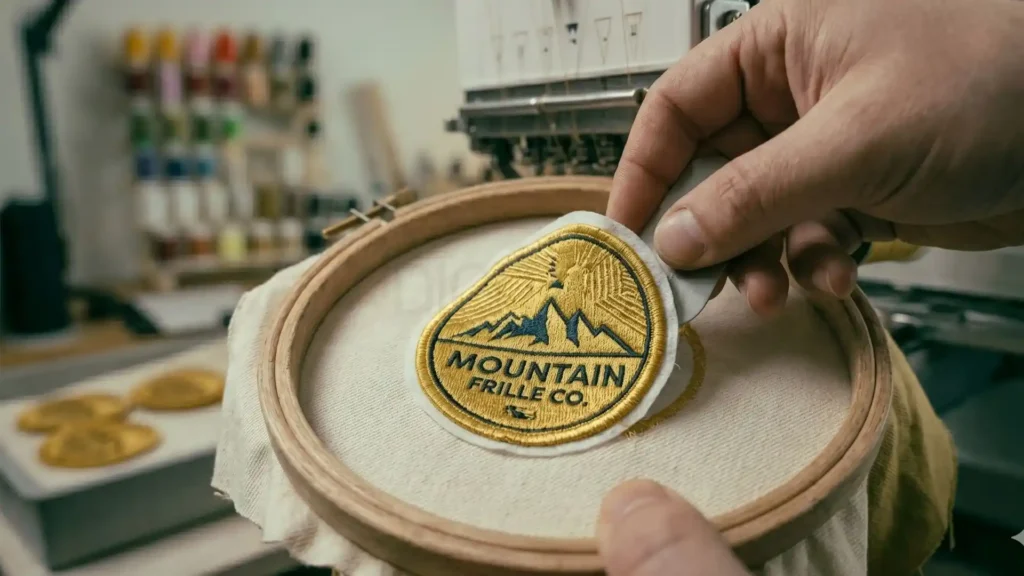
When your machine reaches the pre-programmed pause, carefully remove the hoop from the machine, but do not take the fabric out of the hoop. Place the hoop flat on a hard surface.
Trim the excess patch fabric close to the border
As part of how to make embroidered patches, use your duckbill applique scissors to cut away the excess base fabric around the outside of your design, getting as close to the tack-down stitch as possible without nicking the stabilizer beneath it.
Step 5: Stitch the final satin border
Snap the hoop back into your machine and hit start. The machine will now execute the dense satin border directly over the raw, trimmed edge of your fabric.
Stitch the final satin border
Because you trimmed closely in the previous step, the satin stitches will completely wrap around the raw edge, capturing the fabric fibers and locking them flat against the stabilizer.
Step 6: Clean the edges and apply backing
Remove the finished project from the hoop and tear or dissolve away the remaining stabilizer. As you complete how to make embroidered patches, use a handheld heat gun or a lighter to quickly singe any tiny fabric fibers or micro-threads protruding from the satin border.
Clean the edges and apply backing
To finish your DIY embroidered patches, cut a piece of heat-seal film to size, place it on the back of the patch, and press it with a heat press to create an iron-on backing.
Creating Large Scale and Bulk Embroidered Patches
If you want to step up production to create custom embroidered patches or fulfill a bulk order for a local company, modifying your single-patch workflow will save you hours of work. Running patches one by one is inefficient for large volumes.
To create multiple patches efficiently, you need to use a multi-position hooping strategy in your software. If you are learning how to make embroidery patches by hand for production, tile multiple copies of your design across a single large hoop area instead of digitizing a single design.
Group your color changes together so that your machine stitches all the placement lines at once, all the interior fills at once, and all the final borders at once.
When making big embroidered patches, fabric shifting becomes your biggest enemy. To combat this, always utilize a strong water-soluble topping or a light mist of temporary fabric adhesive spray between your stabilizer and your base twill.
This keeps the large surface area perfectly flat across long stitch cycles, ensuring that your final satin borders line up precisely with your initial placement cuts.
Troubleshooting Common Machine Patch Mistakes
Even experienced creators run into hiccups when learning how to make embroidered patches with embroidery machine setups. Understanding how to read your stitch errors will help you adjust your machine settings before ruining an expensive piece of twill.
How to Fix Gaps Between the Border and the Design?
How to Fix Gaps Between the Border and the Design
If you notice a thin gap of raw fabric between your interior design and your outer satin border, your pull compensation settings are too low.
As a machine stitches a heavy fill, it naturally pulls the fabric inward. To fix this, increase the pull compensation in your digitizing software by 0.3mm to 0.5mm so the stitches overlap slightly, or add a firmer underlay stitch to lock the fabric down.
Preventing Fabric Puckering and Bunching
Puckering happens when thread tension is too tight or your stabilization is too weak. If your patch looks wrinkled like a raisin after you remove it from the hoop, try loosening your upper thread tension slightly.
Additionally, avoid using stretchy fabrics like jersey or thin cotton; instead, stick to heavy fabrics specifically rated for making embroidered patches to ensure your designs stay perfectly flat.
How to Make Embroidered Patches | Application Matrix
To deliver a truly professional product, you must choose the right attachment method for your target audience. Use this reference matrix to match your backing style to your project’s specific wear-and-tear requirements.
Attachment Method
Best For
Durability
Tools Needed
Iron-On Backing
Embroidered patches for clothes, bags, and casual wear.
Medium (Withstands ~20-30 washes)
Heat press or household iron
Velcro (Hook & Loop)
Tactical gear, military uniforms, modular branding.
High (Removable before washing)
Sewing machine to attach loop sheet
Sew-On Method
Heavy denim, leather jackets, professional workwear.
Permanent / Maximum durability
Standard sewing needle and thread
Can You Make Patches with a Regular Sewing Machine?
A very common question among beginners is whether you can figure out how to make embroidered patches without owning a dedicated embroidery machine. The answer is yes, but the manual process requires a steady hand, patience, and a specific hardware modification.
Can You Make Patches with a Regular Sewing Machine
To learn how to embroider a patch using a standard home sewing machine, you must install a free-motion embroidery foot and manually drop your machine’s feed dogs. The feed dogs are the metal teeth that automatically pull your fabric forward; dropping them gives you full control over the movement of your hoop.
You must draw your design onto fabric, hoop it with tear-away stabilizer, and manually guide the hoop under the needle. This basic method helps you learn how to make embroidered patches without an embroidery machine.
While this DIY method is fantastic for unique crafting projects, it cannot match the speed, precision, and identical consistency that a dedicated digital embroidery machine provides for commercial orders.
Choosing the Right Base Fabric for DIY Embroidered Patches
When learning how to make your own embroidered patches, selecting your base material changes everything. If you pick a fabric that is too flimsy, your needle will shred the fibers, and your patch will lose its shape after a single trip through the washing machine.
Polyester tackle twill stands out as the absolute best material for creating custom embroidered patches because it features a tight, diagonal weave that resists needle splitting. It does not stretch under heavy stitch counts, and it holds its color exceptionally well over years of laundering.
If you want a more rustic or modern look, high-density wool felt or marine vinyl are brilliant alternatives. Marine vinyl is particularly popular for modern gear because it does not fray at all, allowing you to cut your finished designs with absolute razor-sharp precision right up to the outer edge of your satin border.
Final Words
Learning how to make embroidered patches on your machine is a great skill, but getting clean borders and zero fabric wrinkles always requires professional file setup. That is where ZDigitizing can help you save time and money.
We provide premium embroidery digitizing services in Spain and across the globe, backed by over 10+ years of experience in the industry. Our expert digitizing team works around the clock with a 24/7 working team and 24/7 customer support to deliver perfect stitch files whenever you need them.
Quality is always guaranteed with us, which is why a clear design preview is provided before payment, and all minor edits are completely free. Our prices are already lower than the market standard, and we are giving a massive 50% OFF on your first order.
If you want to know how to make embroidered patches that look perfectly retail-ready on your very first run, let our professionals handle the technical software work for you. Visit ZDigitizing today, place your first order, and claim your 50% discount right now!
Are you looking for embroidery digitizing and vector art services at low cost with superfast turnaround, guarranted quality and preview before pay? So, you are at right place. We can digitize and vectorize any type of artwork in your required file format.