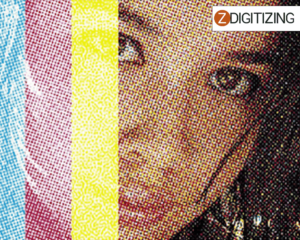
In this article, we will provide you with quick secret tips on how to create stunning halftone screen prints. Halftone screen printing is a technique used in printing to simulate continuous tone images using dots. These halftone dots are arranged in a specific pattern to create the illusion of shading and depth in a print.
Quick Secret Tips To Create High-Quality Halftone Screen Prints
Halftone printing is commonly used in printing newspapers, magazines, and other publications, as well as for creating unique artwork. Whether you are a beginner or an experienced printer, these tips will help you to create high-quality halftone prints. So, let’s dive into the tips!
Quick Secret Tips To Create High-Quality Halftone Screen Printing
Halftone screen printing is a printing technique that involves breaking an image into small dots, arranged in a specific pattern, to simulate continuous tone images. Half tone printing is used in many applications, including newspapers, magazines, and other publications, as well as for creating unique artwork. Here are some quick secret tips to create high-quality halftone screen prints.
Understanding Halftone Printing
Before diving into the tips, it is essential to understand the basics of halftone printing and what is a halftone.
What is Halfone?
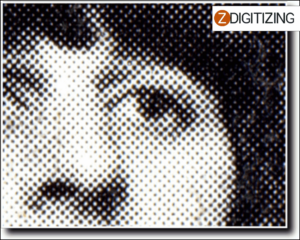
Halftone printing involves creating dots of varying sizes, spacing, and orientation to simulate different shades of gray or color. The larger the dots, the darker the area, and the smaller the dots, the lighter the area. The dots are arranged in a specific pattern, such as a grid, to create the illusion of a continuous image.
Tip 1: Choosing the Right Image

The first step in creating a high-quality halftone screen print is choosing the right image. Not all images are suitable for halftone screen printing. For example, images with complex patterns or gradients may not translate well into halftone prints. Images with simple shapes, strong contrast, and sharp edges work best for halftone printing. It is also essential to ensure that the image is high resolution and has good contrast.
Embroidery Digitizing
&
Vector Art Services
Are you looking for embroidery digitizing and vector art services at low cost with superfast turnaround, guaranteed quality and preview before pay? So, you are at right place. We can digitize and vectorize any type of artwork in your required file format.
Tip 2: Preparing the Image
Once you have selected the image, the next step is to prepare it for halftone screen printing. This involves converting the image into a halftone pattern. You can use specialized software such as Adobe Photoshop or Illustrator to create the halftone pattern.
In Photoshop, you can convert an image to a halftone pattern by selecting “Image > Mode > Bitmap” and choosing the halftone method. In Illustrator, you can create a halftone pattern by selecting “Effect > Pixelate > Color Halftone.”
Tip 3: Choosing the Right Halftone Pattern
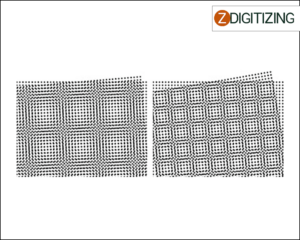
Choosing the right halftone pattern is essential in creating high-quality halftone prints. There are several halftone patterns to choose from, including dot, line, and diamond patterns. Dot patterns are the most common, and they work well for most applications. Line patterns are best for creating the illusion of depth, while diamond patterns are ideal for creating a vintage or retro look.
Tip 4: Choosing the Right Screen Frequency
Screen frequency refers to the number of dots per inch (dpi) in a halftone pattern. The screen frequency determines the quality of the halftone print. A higher screen frequency means more dots per inch and a finer halftone pattern, resulting in a higher quality print. However, a higher screen frequency also means a longer printing time and a higher cost.
When choosing the screen frequency, consider the type of printer and the substrate you will be printing on. Generally, a screen frequency of 55-65 dpi works well for most applications. However, for fine art prints or high-quality publications, a screen frequency of 85-110 dpi may be required.
Tip 5: Choosing the Right Ink
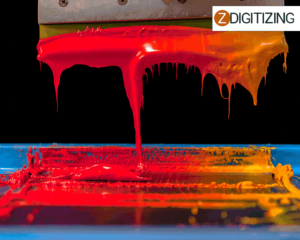
Choosing the right ink is crucial in creating high-quality halftone prints. The ink should be compatible with the substrate and the printing method. It should also be able to adhere to the substrate and resist fading and smudging.
Tip 6: Adjusting the Exposure Time
When printing halftone patterns, it is essential to adjust the exposure time to achieve the desired print quality. Exposure time refers to the amount of time the screen is exposed to light during the printing process. A longer exposure time results in darker and larger dots, while a shorter exposure time results in lighter and smaller dots.
To achieve the desired print quality, you may need to experiment with different exposure times. Start with a shorter exposure time and gradually increase it until you achieve the desired level of detail and contrast. It is also essential to consider the type of substrate and the ink you are using when adjusting the exposure time.
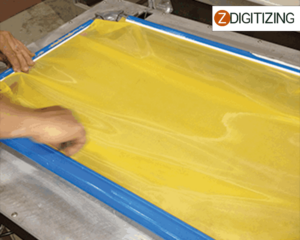
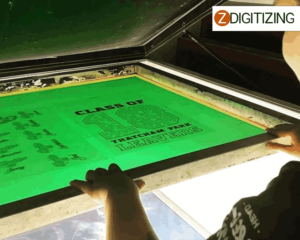
Tip 7: Using Proper Printing Techniques
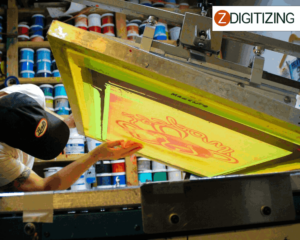
Using proper printing techniques is essential in creating high-quality halftone prints. The printing process should be consistent and precise to ensure that each print is uniform and accurate. This involves using the right pressure, ink viscosity, and squeegee speed. It is also essential to use the proper mesh count, which refers to the number of threads per inch in the screen.
Tip 8: Performing Quality Control
Performing quality control is crucial in ensuring high-quality halftone prints. This involves inspecting each print for consistency, accuracy, and overall quality. If any issues are identified, adjustments can be made to the printing process to ensure that the next prints are of the highest quality.
Tip 9: Using the Right Underbase
If you’re printing halftones on a dark substrate, it’s essential to use an underbase to ensure that the colors are vibrant and accurate. The underbase is a layer of white ink that is printed first and acts as a base layer for the other colors. It’s important to use the right underbase ink and ensure that it’s fully cured before printing the halftone colors on top.
Tip 10: Testing Before Printing
Before printing a large run of halftone prints, it’s always a good idea to test the image and settings on a small scale. This allows you to identify any issues or adjustments that need to be made before printing a large number of prints. You can print a small test image on a scrap piece of the same substrate and adjust the halftone pattern, screen frequency, and other settings until you get the desired result.
Conclusion:
Halftone screen printing is a versatile and popular printing technique used in many applications, including newspapers, magazines, and unique artwork. By following these quick secret tips, you can create high-quality halftone images prints that are accurate, consistent, and visually stunning. Remember to choose the right image, prepare it correctly, choose the right halftone pattern and screen frequency, use the right ink, adjust the exposure time, use proper printing techniques, and perform quality control. With these tips, you can achieve outstanding halftone prints that will impress and delight your clients and customers.
If you’re looking to digitize your embroidery designs or convert them into vector art, it’s best to rely on professionals like ZDigitizing. Digitizing and vector art conversion are complex processes that require expertise and experience. ZDigitizing is a trusted company that offers comprehensive digitizing and vector art services worldwide. With over 20 years of experience, we provide high-quality and durable custom digitizing embroidery and vector art services at reasonable prices. Our quick turnaround time and excellent quality make us the ideal choice for your digitizing and vector art needs.
So, if you need a digitizing or vector art service for your embroidery machine, with a super-fast turnaround and excellent quality, ZD will be your best choice. Just click the link below and get a free quote in less than 5 minutes. We offer 50% off on all our services to our potential customers.
Frequently Asked Questions
Halftone process in screen printing involves breaking down an image into small dots of varying sizes and densities to create a gradient or tonal effect. The image is transferred onto a screen with a mesh and then printed onto the substrate using ink.
The best halftone for screen printing depends on the desired effect and substrate. A dot pattern is commonly used for a smooth gradient, while a line pattern is used for a more visible texture. The screen frequency should also be considered, with a higher frequency producing more detail.
To make a halftone for printing, an image is first converted to grayscale and then separated into different tones or values. The halftone pattern is then applied to each tone, creating dots of varying size and density. The halftone image can then be printed onto a substrate using a screen and ink.
The benefits of using halftone printing include the ability to reproduce images with a wide range of tones and gradients, as well as the ability to print on a variety of substrates, including paper, fabric, and plastic.
The different types of halftones include dot patterns, line patterns, and stochastic patterns. Dot patterns are the most commonly used and create a smooth gradient effect, while line patterns create a more visible texture. Stochastic patterns use randomly placed dots of varying size and density to create a more natural and subtle effect.


