When comparing embroidery vs sewing, the biggest difference is their purpose. Sewing is mainly used to join, construct, repair, or shape fabric, while embroidery adds decorative designs such as logos, names, monograms, and patterns to an existing fabric surface. Both use needles, thread, and fabric, but their techniques, equipment, materials, and final results are different. For beginners, sewing is usually the better starting point for making garments, bags, quilts, or repairs.

Embroidery is more suitable when the goal is to personalize or decorate those items. However, the two crafts often work together: you can sew a garment first and then add embroidery to it.
Embroidery Vs Sewing: What's the Difference
Core Distinctions Between Embroidery and Sewing
The practical difference between embroidery and sewing becomes clearer when you look at what each process is trying to achieve.

Sewing creates structure. It joins fabric pieces together, finishes edges, creates seams, attaches components, and makes an item functional. Common examples include making a shirt, shortening trousers, attaching a zipper, or repairing a torn seam.
Embroidery works primarily on the surface of fabric. It creates decorative patterns, lettering, logos, and other visual elements without being responsible for joining the main fabric pieces.
Feature | Sewing | Embroidery |
Main Purpose | Construct, join, or repair fabric items | Decorate, personalize, or brand fabric surfaces |
Common Output | Garments, bags, quilts, home decor, alterations | Logos, monograms, patches, artwork, emblems |
Primary Focus | Seam strength, garment fit, and structural durability | Visual appeal, stitch coverage, and surface texture |
Core Stitches | Straight stitch, zigzag, overlock, buttonhole | Satin stitch, fill stitch, running stitch, chain stitch |
Main Tools | Standard sewing machine, hand-sewing needles, fabric shears | Embroidery machine, hoops, hand-embroidery needles |
Key Accessory | Patterns, seam guides, presser feet | Stabilizer backings, embroidery hoops, digitizing software |
The hand sewing vs embroidery decision therefore depends less on which craft is “better” and more on what you want to make.
If you need to construct or repair something, sewing is the practical choice. If you already have a finished item and want to add a name, logo, pattern, or other decoration, embroidery is usually the better option.
Embroidery vs Sewing: Workflow & Mechanical Comparison
When evaluating embroidery vs sewing for beginners, looking at the practical workflow and machine mechanics highlights how differently fabric is handled in each discipline
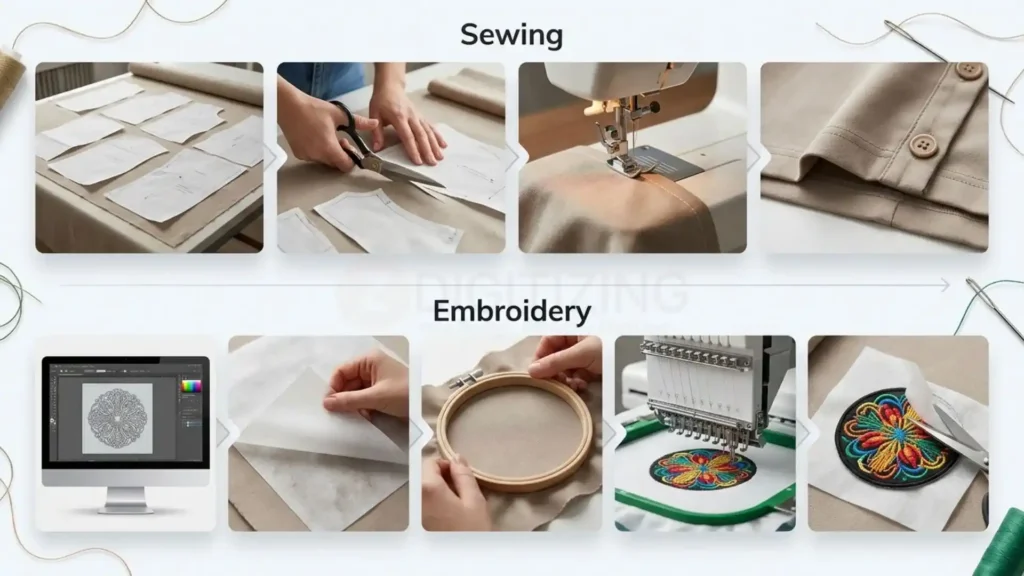
Workflow Factor | Sewing Execution | Embroidery Execution |
Fabric Feeding | Feed dogs move fabric unidirectionally under a presser foot | Fabric is taut in a hoop; an automated X/Y arm moves the hoop |
Design Preparation | Governed by paper patterns, measurements, and seam allowances | Governed by vector artwork and digitized stitch files |
Fabric Stabilization | Minimal; relies on fabric weight, interfacing, and pin placement | Mandatory; uses tear-away, cut-away, or water-soluble stabilizers |
Stitch Purpose | Low visibility; hidden within internal structural seams | High visibility; fully exposed surface stitch density |
Machine Operation | Hands manually guide fabric line-by-line under the needle | Machine automatically executes digitized coordinates once hooped |
Skill Focus | Controlling seam allowances, tension, edge alignment, and fit | Hooping tension, stabilizer matching, digitizing, and thread management |
There is also an important overlap. A business producing branded uniforms, for example, may use sewing to manufacture the garment and embroidery to add the company’s logo. Understanding both processes can therefore be useful even if you eventually specialize in only one.
Embroidery Techniques vs Sewing Techniques
Once the basic difference is clear, the next distinction is how each craft uses stitches. Embroidery techniques are generally selected to create visual texture, lines, fills, lettering, or decorative effects. Sewing techniques are chosen to join, shape, strengthen, or finish fabric.
Image Guide: Show a split close-up of common stitches. On the embroidery side, show satin stitch, fill stitch, running stitch, chain stitch, and French knots. On the sewing side, show straight stitch, zigzag, backstitch, overcasting, hemming, and a buttonhole. Label each stitch directly and keep the fabric backgrounds simple.
Common Embroidery Techniques
Machine and hand embroidery can use different methods depending on the design and fabric. Common examples include:
- Satin stitch: Creates smooth, closely packed areas and is often used for lettering and borders.
- Fill stitch: Covers larger areas with rows of stitches.
- Running stitch: Creates fine outlines and lightweight details.
- Chain stitch: Uses looped thread sequences to form textured lines, popular in decorative handwork.
- French knots: Adds small raised details and texture.
- Appliqué: Combines fabric pieces with stitching to create larger decorative shapes.
- 3D puff embroidery: Uses foam beneath the stitches to create raised lettering or logos.
Machine embroidery also depends on how artwork is converted into stitches. Stitch direction, density, underlay, and sequence can significantly affect how the finished design looks.
Common Sewing Techniques
Sewing focuses more on construction and finishing. Common techniques include:
- Straight stitching for joining fabric pieces
- Zigzag stitching for stretch, reinforcement, or edge finishing
- Backstitching for secure seams, particularly in hand sewing
- Overcasting or overlocking for preventing raw edges from fraying
- Hemming for finishing garment edges
- Buttonholes for creating functional closures
- Darts for shaping garments around the body
- Seam finishing for improving durability and appearance
This is why sewing vs embroidery is not simply a difference in stitch names. The same needle and thread concept is being used for very different purposes.
Embroidery Machine vs Sewing Machine
The equipment is one of the clearest practical differences between the two crafts. A sewing machine is engineered primarily to construct fabric, while an embroidery machine is designed to place decorative stitches according to a prepared design.

Feature | Sewing Machine | Embroidery Machine |
Primary purpose | Fabric construction | Decorative stitching |
Fabric setup | Usually placed directly under the presser foot | Usually secured in an embroidery hoop |
Movement | Fabric feeds through the machine | Hoop moves according to the programmed design |
Design control | Mainly controlled through stitches and operator movement | Controlled by a digitized embroidery file |
Typical projects | Garments, seams, repairs, alterations | Logos, lettering, motifs, patches |
Multi-color designs | Manual thread changes | Often automated color sequencing |
Repeatability | Depends heavily on operator control | High when the design and setup remain consistent |
The embroidery machine vs sewing machine choice therefore depends on the type of work you expect to do.
A sewing machine is the better choice if your main goal is garment construction, alterations, repairs, or general fabric work. An embroidery machine makes more sense when your primary work involves logos, personalization, lettering, or repeated decorative designs.
What About Combination Machines?
Some machines combine sewing and embroidery functions. These can be useful for hobbyists who want both capabilities without purchasing two separate machines.
However, check the machine’s actual embroidery specifications before buying. A machine marketed as computerized may provide decorative stitches without supporting true file-based embroidery. If embroidery is an important part of your work, check the available embroidery field, supported file formats, hoop sizes, stitch speed, and whether the embroidery unit is included.
Embroidery Needles vs Sewing Needles
Needles may look similar, but choosing the right type matters because thread, fabric, and stitch density all affect how smoothly the needle passes through the material.
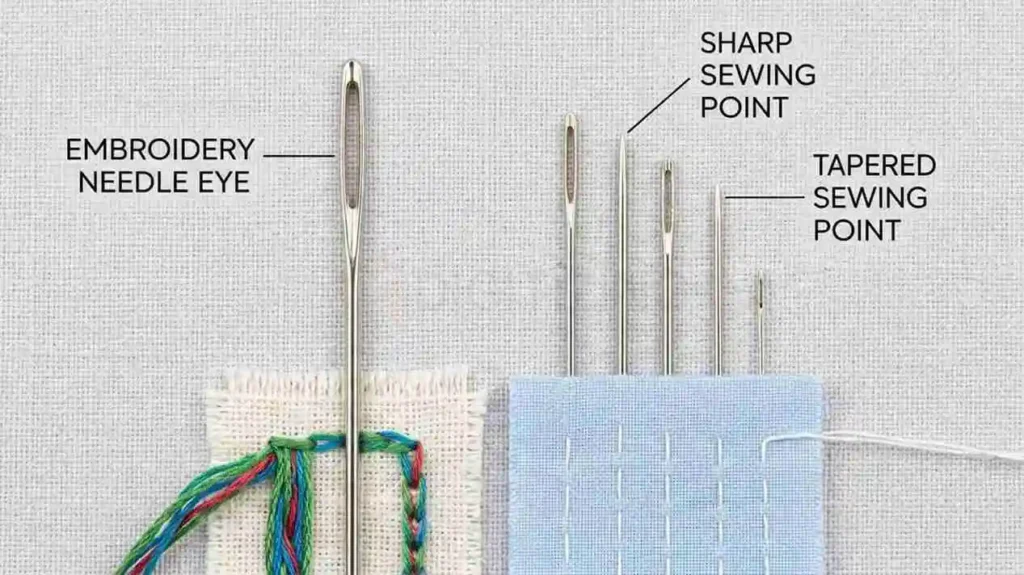
The main difference in embroidery needles vs sewing needles is how they are designed to work with particular threads and decorative stitching conditions.
Embroidery needles commonly have a larger eye to accommodate embroidery thread and are available in sizes suited to different fabric and thread combinations. Sewing needles are selected more broadly according to fabric type and construction requirements, such as universal, denim, leather, or stretch applications.
Using the wrong needle can contribute to:
- Thread breaks
- Skipped stitches
- Damaged fabric
- Enlarged needle holes
- Poor stitch formation
There is no single “best” needle for every project. A lightweight fabric with fine thread needs a different setup from heavy denim with a thicker thread.
Embroidery Thread vs Sewing Thread
Thread selection is another area where embroidery thread vs sewing thread should not be treated as an interchangeable choice.
Embroidery thread is developed primarily for decorative stitching. Polyester and rayon are common choices, with polyester offering durability and rayon providing a particularly smooth, lustrous appearance.
Sewing thread is designed primarily for construction. It needs to withstand the tension, movement, abrasion, and washing associated with seams and other structural applications.
Feature | Embroidery Thread | Sewing Thread |
Primary purpose | Decorative stitching | Construction and seams |
Common materials | Polyester, rayon, cotton | Polyester, cotton, blends |
Typical appearance | Often smooth and lustrous | Usually lower sheen |
Common embroidery weight | 40 wt | Often 40–50 wt for general sewing |
Main priority | Appearance and stitch performance | Strength and durability |
Common applications | Logos, lettering, motifs | Seams, hems, repairs |
Can You Use an Embroidery Thread for Sewing?
Sometimes, but it depends on the job.
Decorative embroidery thread can work for certain visible stitching applications, but it should not automatically replace construction thread in structural seams. The thread must be strong enough for the load and movement that the finished item will experience.
Likewise, regular sewing thread can sometimes be used for simple decorative stitching, but it may not provide the appearance or performance expected from purpose-made embroidery thread.
The safest approach is to select the thread according to the function of the stitch rather than simply choosing whichever thread is available.
Embroidery vs Sewing for Beginners: Which Is Easier?
For beginners, embroidery vs sewing for beginners usually comes down to how quickly you want to create something useful and how much detail you enjoy controlling. Sewing generally has a gentler starting point because basic projects can be completed with a few straightforward stitches, while embroidery introduces additional considerations such as hooping, stabilizer, stitch density, and design placement.
Image Guide: Show two beginner workstations side by side. One should contain a basic sewing machine, fabric pieces, scissors, pins, and a simple sewing project. The other should contain an embroidery machine, hoop, stabilizer, embroidery thread, and a small monogram project. Keep both setups realistic and uncluttered.
Why Sewing May Be Easier to Start
A beginner can learn a straight stitch and quickly apply it to practical projects such as:
- Simple hems
- Pillow covers
- Tote bags
- Basic repairs
- Straight seams
The feedback is also relatively easy to understand. If two pieces of fabric are joined correctly and the seam is secure, the basic objective has been achieved.
Embroidery can require more visual precision. A design may be technically stitched but still look uneven because of poor hooping, unsuitable stabilization, inconsistent density, or incorrect design placement.
Why Embroidery Can Still Be Beginner-Friendly
Embroidery is not necessarily difficult if you start with a small, uncomplicated design. A simple name, monogram, flower, or geometric motif can provide a manageable introduction to decorative stitching.
The learning curve becomes steeper when you move into detailed machine embroidery, especially when designs require digitizing, multiple colors, small lettering, or precise registration.
So, if your goal is to learn how to construct fabric items, start with sewing. If your main interest is personalizing finished products, basic embroidery may be the more relevant skill to learn first.
Embroidery vs Sewing Cost in the USA
The cost difference becomes more important when comparing the two crafts as long-term hobbies or potential businesses. Embroidery vs sewing cost depends heavily on the equipment you already own, project complexity, and whether you make designs yourself or purchase professional files.

Typical Starting Costs
Expense | Sewing | Embroidery |
Basic machine | About 100–200 | Entry-level embroidery machines often start around $500+ |
Computerized machine | About 300–800 | Dedicated units can cost $1,300+ |
Thread | Generally lower-cost construction thread | Embroidery thread can cost more per spool |
Stabilizer | Usually minimal for basic projects | Commonly required |
Hoops | Not normally required for machine sewing | Required for most machine embroidery |
Software/digitizing | Usually optional | Can become a significant additional cost |
Per-project cost | Often lower | Usually higher for detailed designs |
These are broad USA market ranges rather than fixed prices. Machine brands, features, sales, and project requirements can change the actual cost considerably.
Which Is Cheaper to Start?
Sewing is generally less expensive if you only want to make or repair fabric items. A basic sewing machine can handle a wide range of construction tasks without requiring specialized files or stabilizers.
Embroidery has a higher entry cost because a dedicated machine, hoops, stabilizers, embroidery thread, and design files may all be necessary.
However, embroidery can also have stronger commercial potential for personalized products. Names, logos, uniforms, caps, patches, and branded apparel can command higher prices than many basic sewing services.
Which Is Faster: Sewing or Embroidery?
Speed depends on the project rather than the craft alone. A simple sewing task such as repairing a seam can take only a few minutes, while an embroidery design may require preparation, hooping, stitching, trimming, and finishing.

Project | Usually Faster |
Simple hem | Sewing |
Basic seam | Sewing |
Garment alteration | Sewing |
Small monogram | Embroidery |
Detailed logo | Embroidery takes longer |
Repeated branded logos | Embroidery becomes more efficient with dedicated equipment |
Patch production | Embroidery, when properly digitized and set up for repetition |
A sewing machine can complete many construction tasks quickly because it is designed to continuously join fabric.
Embroidery takes longer when designs contain thousands of stitches. The machine must place those stitches accurately, and the operator may also need to prepare the hoop, change thread colors, trim jumps, and finish the item.
For commercial embroidery, machine speed matters, but digitizing quality matters too. A poorly prepared design can increase unnecessary stitches, thread changes, trims, and production problems.
Can You Use a Sewing Machine for Embroidery?
Yes, but the result depends on the sewing machine and the type of embroidery you want to create.
Some sewing machines can produce decorative embroidery through built-in stitches, while others can be used for free-motion embroidery with a darning foot and appropriate feed-dog control.

For simple decorative work, a regular machine may be enough. You can manually guide fabric to create outlines, lettering, and uncomplicated motifs.
The limitations become obvious when you need detailed, repeatable designs. A standard sewing machine generally does not provide the automated hoop movement, stitch sequencing, and design-file workflow of a dedicated embroidery machine.
Can a Sewing Machine Embroider a Logo or Cap?
A simple logo can sometimes be produced manually, particularly if it has large shapes and limited detail. Small lettering, multiple colors, curved text, and dense areas are much harder to reproduce consistently.
Caps present another challenge because their curved construction makes proper hooping and stitch placement more difficult. For professional cap work, specialized equipment and properly prepared designs are usually more reliable than manually guiding a logo on a standard machine.
This is where cap logo digitizing services can become useful. A design prepared specifically for cap embroidery can account for the curvature, stitch direction, density, and other production considerations.
Which Should You Choose for Different Projects?
The best choice depends on what you want the final product to accomplish. Rather than asking whether embroidery or sewing is better overall, match the technique to the project.
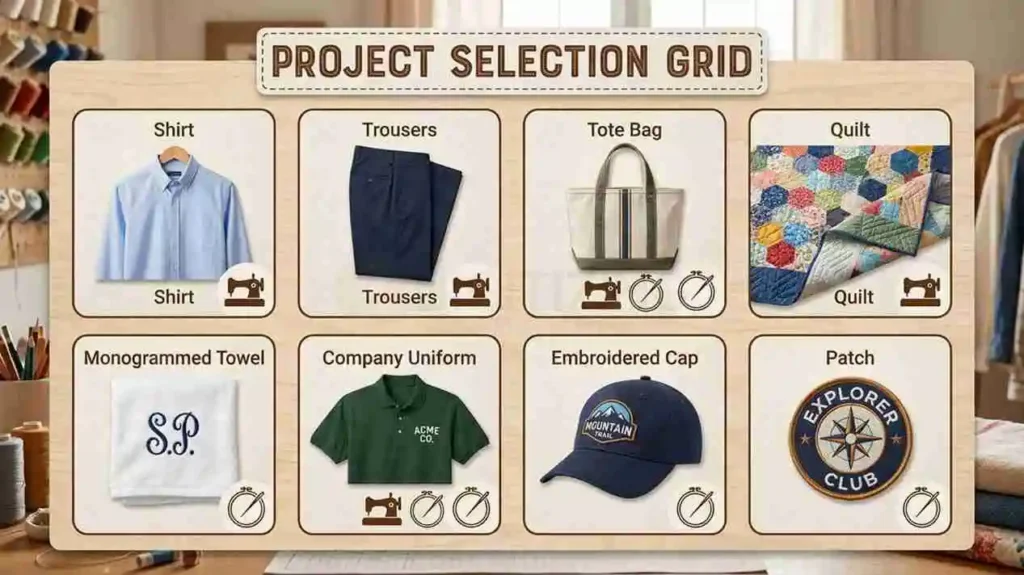
Project | Best Choice | Why |
Making a shirt | Sewing | Requires fabric construction |
Altering trousers | Sewing | Focuses on fit and seams |
Repairing a torn seam | Sewing | Requires structural stitching |
Making a tote bag | Sewing | Fabric pieces must be joined |
Adding a name to a towel | Embroidery | Decorative personalization |
Adding a company logo to a uniform | Embroidery | Creates durable branding |
Making an embroidered cap | Embroidery | Designed for decorative branding |
Creating a patch | Embroidery | Produces the decorative stitched design |
Making a quilt | Sewing | Primarily involves fabric construction |
Creating a decorative quilt label | Both | Sewing constructs it; embroidery personalizes it |
For many real-world projects, the answer is actually both. Sewing can create the product, while embroidery adds the personalization that makes it suitable for a customer, brand, event, or organization.
When Embroidery Digitizing Becomes Important
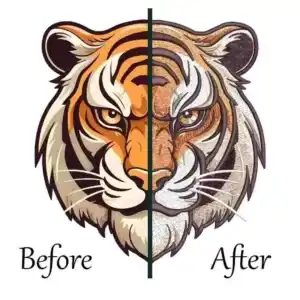
For simple personal projects, you can create embroidery without understanding the entire digitizing process. But once you move toward logos, branded apparel, caps, patches, or repeated customer orders, embroidery digitizing becomes an important part of getting consistent results.

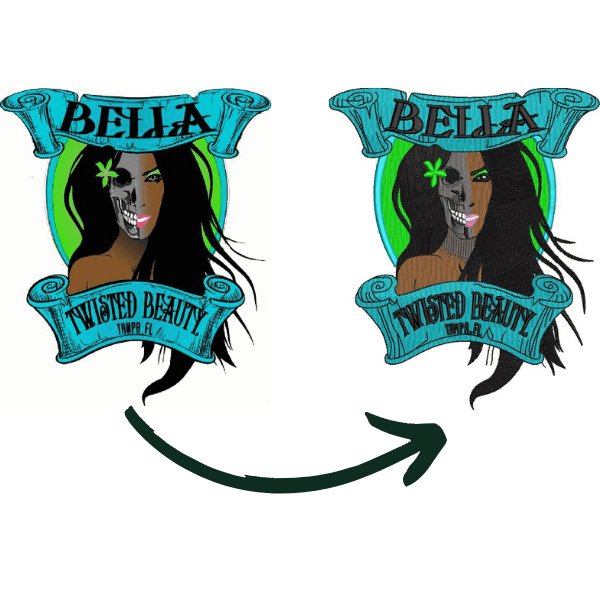
An embroidery machine does not simply read a JPG or PNG and automatically know how to stitch it. The artwork needs to be converted into a machine-readable embroidery file containing instructions for stitch placement and sequencing.
A digitized design can control details such as:
- Stitch type
- Stitch direction
- Stitch density
- Underlay
- Stitch sequence
- Pull compensation
- Color changes
- Object overlaps
- Trim points
This is why two embroidery files made from the same logo can produce very different results.
Why Poor Digitizing Causes Problems
A design may look perfect on a computer screen but perform poorly on fabric if the stitch settings are not appropriate.
Common problems include:
- Excessive thread density
- Fabric puckering
- Poor registration
- Tiny lettering becoming unreadable
- Unnecessary thread trims
- Thread breaks
- Uneven coverage
The problem is especially noticeable with small logos and detailed artwork. A digitizer has to make decisions based on the actual embroidery application rather than simply tracing the original artwork.
When Should You Use Professional Digitizing?
Professional digitizing is worth considering when:
- You need a business logo converted for embroidery.
- The design contains small lettering or detailed shapes.
- You need a logo for caps or curved surfaces.
- The same design will be produced repeatedly.
- You need several machine formats.
- Your test sew-outs have registration or density problems.
- You want consistent production without learning digitizing software yourself.
For businesses looking for fast embroidery digitizing services in USA, turnaround time and the quality of the final sew-out are usually more important than simply receiving a file quickly.
How ZDigitizing Can Help With Production Embroidery
Once sewing or embroidery becomes part of a business workflow, the challenge is no longer simply choosing between the two crafts. The design also has to be prepared correctly for the intended machine, fabric, and placement.

With ZDigitizing, the focus is on converting artwork into production-ready embroidery files rather than simply changing an image into a file extension.
The digitizing process can account for stitch direction, density, underlay, pull compensation, sequencing, and the fabric where the design will be embroidered.
For example, a small left-chest company logo may require different treatment from a large jacket-back design. A cap logo may also need different stitch planning because of the curved surface.
For businesses that regularly produce uniforms, branded apparel, caps, or patches, professionally prepared files can reduce repeated trial and error and make the embroidery workflow more predictable.
Conclusion
When comparing embroidery vs sewing, neither is universally better. Sewing is the practical choice for constructing, altering, repairing, and finishing fabric items, while embroidery is better suited to adding logos, names, patterns, and other decorative details.
For beginners, sewing can provide a broader foundation for working with fabric, while embroidery is an attractive option when personalization and decoration are the main goals. Many projects benefit from both: sewing creates the product, and embroidery gives it a customized finish.
As embroidery becomes more detailed or commercial, the quality of the embroidery file becomes increasingly important. Proper embroidery digitizing can help turn artwork into stitches that are appropriate for the machine, fabric, size, and intended application. New customers will receive 50% off on first order when submitting their artwork for professional digitizing.