When stitching tubular items, a free arm embroidery machine uses a narrow, exposed arm so sleeves, cuffs, and bags slide over the needle area without catching or sewing the garment shut. Unlike flatbeds that require laying fabric completely flat, this design isolates a single layer of fabric to provide easier access to narrow, curved, and enclosed areas that are difficult to position on a flatbed.

Free Arm Embroidery Machine: A Complete Guide to Features & Models
What Is a Free Arm Embroidery Machine?
A free arm embroidery machine has an exposed, narrow arm that allows a tubular section of fabric to fit around the machine instead of lying completely flat. This design is particularly useful when the area you want to embroider is already sewn into a finished garment or item.

The main advantage is access. With a standard flatbed, a finished sleeve or narrow bag opening can be difficult to position without catching another layer of fabric. A free arm embroidery machine creates space underneath the needle so you can isolate the section being decorated.
In simple terms, it is useful when the shape and construction of the item make normal flatbed hooping difficult.
How Does a Free-Arm Mechanism Work?
The mechanism is simple: the machine exposes a narrow arm around which the tubular section of the item can sit. Depending on the model, this may happen by removing or swinging away the front bed, or through a dedicated tubular-arm design.

Once the arm is exposed, the tubular part of the item is positioned around it. The fabric is then secured using the appropriate hoop or frame, with stabilizer supporting the area underneath the design.
This keeps the opposite side of the garment away from the needle while giving the hoop enough clearance to move around the arm.
That is the key difference between an embroidery machine free arm setup and simply placing a garment on a flat embroidery bed. The free-arm design gives you physical access to areas that are otherwise awkward to reach.
Why Is Free-Arm Access Useful?
Free-arm access matters most when the item is already finished and opening it would mean undoing seams or changing its shape.
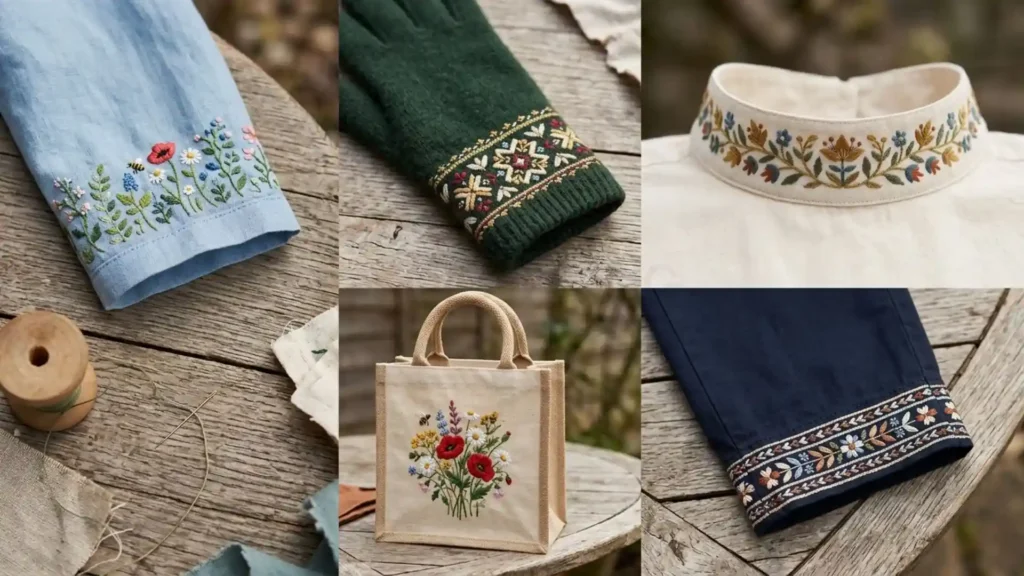
For example, you may want to add a monogram to a finished tote bag, a logo to a shirt sleeve, or lettering around a narrow collar band. With a conventional flatbed, these jobs can require awkward positioning or partial disassembly.
The item can stay intact during embroidery, as long as its opening fits the arm and the machine has a suitable hoop or frame.
Key Features to Compare Before Buying
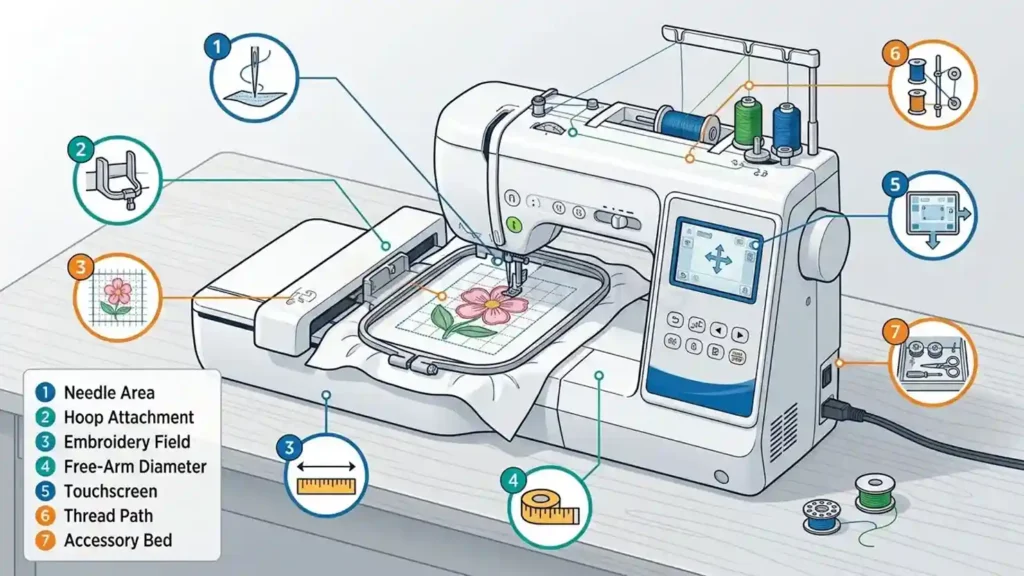
Not every machine marketed as a free-arm model offers the same capabilities. This free arm embroidery machine guide focuses on the features that have the biggest effect on tubular embroidery. Before choosing one, look beyond the name and check how the arm, hoops, embroidery field, and accessories actually work together.
Free-Arm Size and Tubular Access
The physical size of the arm matters more than many buyers expect. A narrow arm may work beautifully for small garment openings but become difficult to use with thicker or wider tubular items.
Check the arm’s length and diameter, along with the manufacturer’s recommended hoop and frame sizes. A machine advertised as an embroidery machine with free arm capability should also have a practical way to secure fabric around that arm. These are among the most important free arm embroidery machine features to compare before buying.
Hoop Size Matters
A large embroidery field is useful for broad designs, but it does not automatically make a machine better for tubular work.
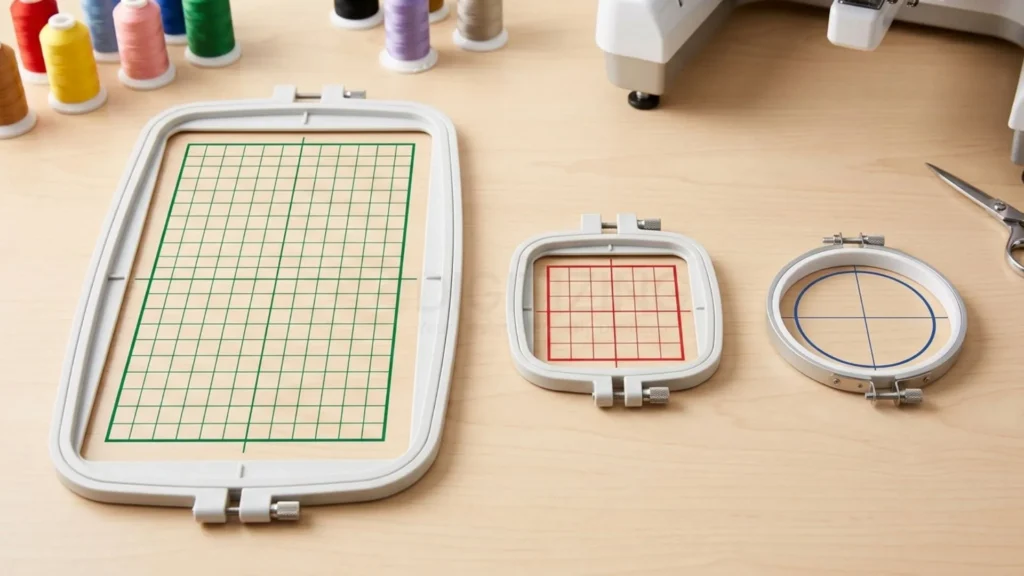
For narrow projects, smaller hoops can actually be more useful because they fit into restricted spaces. Look for compatible mini hoops, tubular frames, or specialty frames rather than judging the machine only by its maximum hoop size.
Needle Count, Speed, and Color Changes
A single needle free arm embroidery machine requires you to change thread colors manually. That can be perfectly manageable when you’re making monograms, small logos, or occasional personalized pieces.
A multi-needle embroidery machine keeps several thread colors loaded at once. The machine can switch between them automatically, making it much more practical for repeated logos and multi-color production.
Speed also matters, but stitches per minute should not be the only buying criterion. A machine that handles hooping, thread trimming, positioning, and color changes efficiently can save more time in real production than a machine with a slightly higher advertised stitch speed.
Computerized Controls and Connectivity
A modern computerized embroidery machine may include touchscreen editing, design positioning, USB connectivity, wireless transfer, automatic thread trimming, thread-break detection, and on-screen previews.
These features become especially useful when positioning designs on curved or narrow areas. A positioning marker or crosshair can help you place a design more accurately before stitching begins.
If you already have a digital embroidery workflow, also check which file formats the machine accepts. Compatibility with formats such as PES, DST, or JEF makes it easier to transfer files from professional embroidery digitizing directly to your machine screen.
Machine Types: Which One Fits Your Work?
The term “free arm” does not describe the entire machine category. It describes a physical design feature. The machine can still be single-needle, multi-needle, computerized, or professional depending on its construction and intended use.

Single-Needle Machines
A single needle embroidery machine is often suitable for home users, hobbyists, and small businesses that do not need continuous multi-color production. This setup works well for personalized apparel, small logos, bags, and other projects where color changes are manageable.
The trade-off is color changing. If a design uses six thread colors, you may need to stop and change colors during production.
Multi-Needle Machines
Multi-needle machines are designed around production efficiency. Multiple colors remain threaded, so the machine can change between them automatically.
For a business producing repeated logos or personalized garments, this can significantly reduce setup time. However, don’t assume that every multi-needle machine has a true free-arm chassis. Some provide tubular embroidery through specialized frames while retaining a different machine-bed design.
Professional and Industrial Machines
A professional embroidery machine is generally aimed at users who need greater production capability, larger embroidery areas, better positioning systems, or more advanced accessories.
An industrial embroidery machine goes further into high-volume production. These systems can be considerably larger and more expensive, and their priorities are usually throughput, durability, and production efficiency rather than compact free-arm access.
For most home users, buying an industrial system simply because it is faster would be unnecessary if their main requirement is embroidery on small tubular areas.
Brother, Janome, and Baby Lock Free-Arm Models
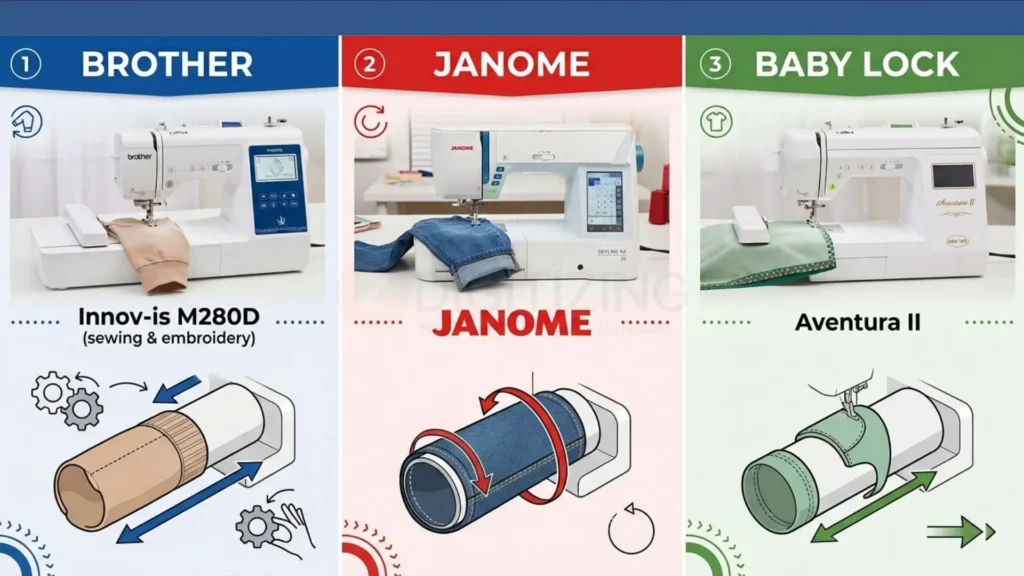
Brand names can make this category confusing because manufacturers do not always use “free arm” in exactly the same way. Some machines have a genuinely open tubular arm, while others support tubular embroidery through special frames or accessories.
Brother Free-Arm Options
The brother free arm embroidery machine category includes models designed specifically for tubular embroidery, including the Brother Persona PRS100 and PR1X.
The Persona PRS100 is a single-needle machine built around tubular embroidery access and is suited to items such as sleeves, bags, and other difficult-to-hoop areas.
The PR1X provides a larger embroidery field and additional positioning features, making it more appropriate for users who want professional-level control while still working with tubular items.
Brother also offers multi-needle professional machines, but buyers should check the exact frame and tubular capabilities of each model rather than assuming every model has the same free-arm construction.
Janome Free-Arm Options
A Janome free arm embroidery machine can refer to machines that use Janome’s free-arm embroidery hoops and swing-out or convertible configurations.
The Janome MC100E is an embroidery-only option with a swing-out arm and compatible free-arm hoops. The MC1000 combines sewing and embroidery and can be converted for free-arm work.
The important point is to check the actual hoop and arm specifications for the model you are considering. The phrase “free arm” by itself does not tell you the usable embroidery area.
Baby Lock Free-Arm Options
The Baby Lock free arm embroidery machine range includes models such as the Capella, while other Baby Lock professional machines may provide tubular embroidery through compatible frames.
This is where careful model verification matters. A machine can support tubular embroidery without having the same physical free-arm construction as a dedicated tubular machine.
What Does “Free Arm” Actually Mean?
This distinction is one of the most important points when comparing free arm embroidery machine models.
A true free-arm design physically exposes a narrow arm around which the tubular material can be positioned. A flatbed machine with a tubular frame may still embroider sleeves, bags, or other items, but the underlying machine construction is different.
Always check the manufacturer’s specifications, compatible frames, and actual product photographs before purchasing.
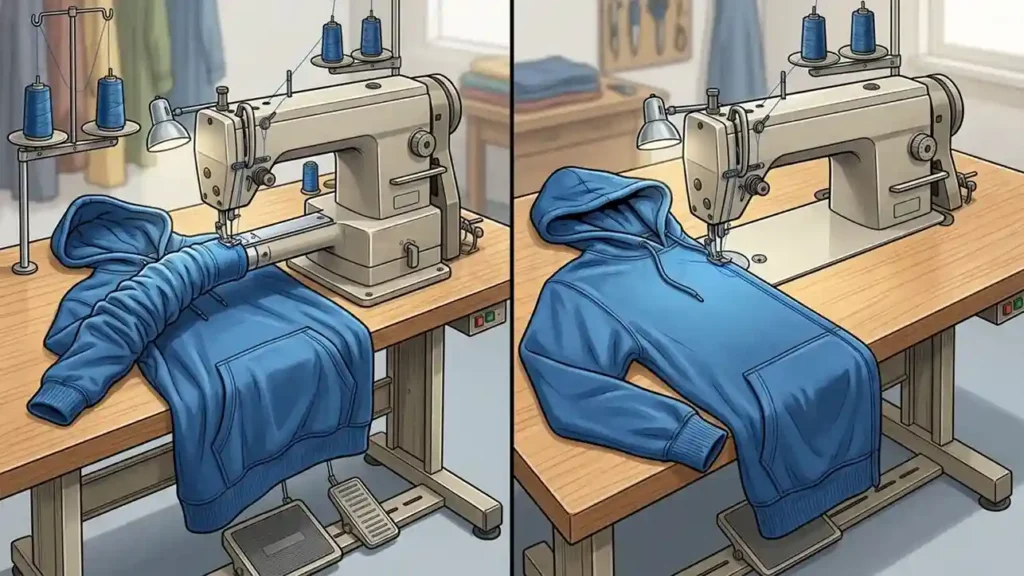
Free Arm vs Standard Embroidery Machine
The choice between these two designs depends mainly on the type of items you plan to embroider.
Feature | Free-arm machine | Standard flatbed |
Fabric access | Designed for tubular and narrow areas | Best for flat fabric |
Small finished items | Easier to position | Can be awkward |
Large designs | Often more limited | Usually better suited |
Sleeves and narrow openings | Strong advantage | More difficult |
Large quilt panels | Not the main strength | Better choice |
Hooping | Often uses specialty hoops | Usually uses standard hoops |
Production | Excellent for selected tubular work | Better for broad flat work |
Main limitation | Restricted space and field size | Limited access to closed areas |
A free arm vs standard embroidery machine comparison therefore should not be reduced to which machine is “better.” Each one solves a different positioning problem.
If most of your work involves large chest designs, quilt blocks, or flat fabric panels, a standard machine may be more practical. If finished garments and narrow openings make up a large part of your workload, a free arm embroidery machine can save considerable setup frustration.
Benefits and Limitations of Free-Arm Embroidery
The main advantage is access: you can reach areas that become difficult to hoop once the item has been sewn together.

Benefits
The main benefits of free arm embroidery include:
- Easier access to narrow tubular sections
- Less risk of stitching through the opposite side
- Better positioning for curved or enclosed areas
- Useful for finished bags and small accessories
- More practical embroidery on sleeves and narrow garment sections
Limitations
There are trade-offs as well.
The embroidery field may be smaller than that of a large flatbed machine. Thick seams can still create clearance problems, and specialty hoops or cap frames may cost extra.
A free-arm design also does not eliminate the need for correct stabilizer selection and hooping. Poor stabilization can still cause puckering, shifting, or distorted lettering.
Common Projects That Benefit From a Free Arm
A free arm embroidery machine becomes most valuable when opening the item or laying it completely flat would be inconvenient.
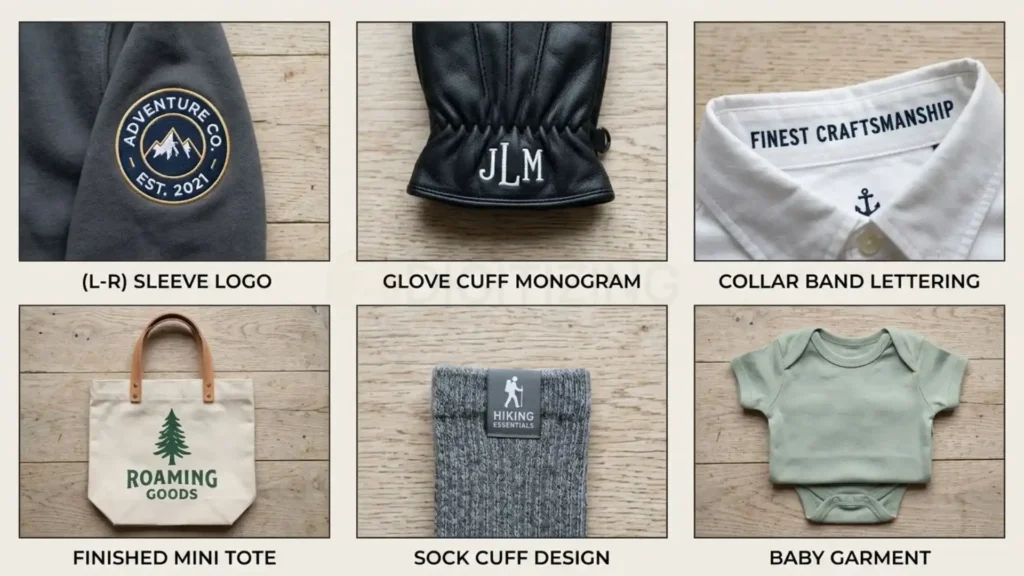
Good examples include:
- Finished shirt sleeves
- Sock cuffs
- Glove cuffs
- Collar bands
- Narrow pant sections
- Small finished totes
- Pouches with closed seams
- Baby garments
- Pocket areas
- Cap embroidery when the machine supports an appropriate cap frame
The important question is not whether a machine can embroider these items. It is whether the machine lets you position them without fighting the construction of the finished product.
That is where a free arm embroidery machine can make a noticeable difference.
How to Choose the Right Free-Arm Embroidery Machine
Start with the projects you actually produce, then match the machine to them. Before buying a free arm embroidery machine, identify the items you expect to stitch and then match the machine’s arm, hoops, needle count, and embroidery field to that workload.

1. Start With Your Typical Projects
If you mainly personalize shirts, baby clothes, small bags, or narrow garment sections, tubular access should be one of your highest priorities.
For large names, jacket fronts, quilt blocks, or broad decorative panels, a larger embroidery field may be more valuable than a compact free arm.
If you regularly handle both types of work, look for a convertible machine or a setup that offers both standard and specialty hoop options.
2. Decide Between Single-Needle and Multi-Needle
A single needle free arm embroidery machine makes sense when your order volume is modest and you don’t mind changing thread colors manually.
For repeated customer logos, team apparel, uniforms, and multi-color designs, a multi-needle embroidery machine can reduce production time because several colors remain loaded.
A useful rule is simple: choose single-needle for flexibility and lower production demands; choose multi-needle when reducing color-change and setup time matters more.
3. Check the Actual Hoop and Frame Options
Don’t buy a machine based only on its maximum hoop size.
Check whether it supports the small hoops needed for your projects, along with tubular frames, cap frames, magnetic hoops, or other specialty attachments. These accessories can determine whether a machine is genuinely useful for your intended work.
4. Check Stabilizer Compatibility
Stretchy fabrics need different support from stable woven fabrics. A machine may have excellent tubular access, but the final result can still suffer if the stabilizer does not match the material.
For knit sleeves or similar stretchy areas, cut-away or adhesive-backed stabilizers can provide better support. Always test the combination of fabric, stabilizer, thread, needle, and design before running a customer order.
5. Don’t Ignore Design Positioning
Curved and narrow surfaces leave less room for correcting placement after stitching starts.
A computerized embroidery machine with positioning guides, design previews, automatic trimming, and precise on-screen adjustments can make setup easier, particularly when working with names or logos that must sit in a specific location.
Free-Arm Embroidery Machine Buying Mistakes to Avoid
The biggest mistakes usually happen when “free arm” and “tubular” are treated as if they mean the same thing. A careful buyer should verify the actual embroidery system before spending money.

Mistake 1: Assuming Every Free-Arm Sewing Machine Can Embroider
A free-arm sewing machine and a free-arm embroidery machine are not automatically the same thing.
A sewing machine may expose a narrow arm for sewing cuffs and hems but have no embroidery module, embroidery hoop system, or computerized design capability.
Mistake 2: Confusing Tubular Frames With a True Free Arm
Some machines can embroider tubular products using specialty frames without having a narrow cylindrical chassis.
That setup can still be useful, but it is different from a true free-arm construction. Check the manufacturer’s specifications rather than relying only on the product title.
Mistake 3: Buying the Largest Hoop Instead of the Right Hoop
A huge embroidery field sounds attractive, but it won’t help much if your main projects are narrow openings.
For tubular work, the availability of smaller compatible hoops may be more important than the machine’s maximum embroidery area.
Mistake 4: Forgetting Accessory Costs
The advertised machine price may not include every frame you need.
Cap frames, specialty hoops, magnetic frames, additional hoops, and stabilizers can increase the actual setup cost. Include these items when comparing different free arm embroidery machine models.
How Much Does a Free-Arm Embroidery Machine Cost?
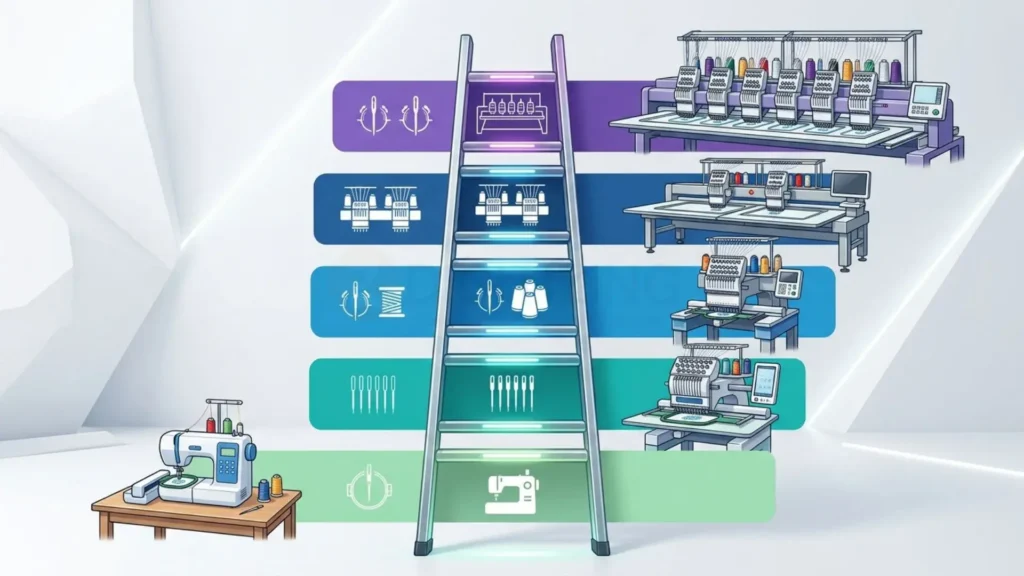
Prices vary widely because this category includes compact embroidery-only machines, professional single-needle systems, multi-needle equipment, and commercial machines. In the US, a realistic budget can range from around $1,000 for an entry-level setup to well over $10,000 for professional production equipment.
Entry-Level and Hobby Use
Some free-arm-capable machines sit around the $1,000–$1,500 range, depending on the model, dealer, accessories, and current promotion.
The Janome MC100E and comparable setups fall into the more accessible end of the category. These machines can make sense for someone who wants embroidery capability without immediately investing in production equipment.
Single-Needle Professional Machines
Machines such as the Brother Persona PRS100, Brother PR1X, and Baby Lock Capella move into the professional single-needle range.
Depending on dealer pricing and included accessories, these machines can cost several thousand dollars. Their appeal is stronger tubular access, larger capabilities, and features designed for users who are producing customer work rather than occasional personal projects.
Multi-Needle and Business Machines
Once you move into professional multi-needle equipment, the investment can reach $8,000–$15,000 or more.
A professional embroidery machine in this range is more appropriate when production volume, automatic color changes, repeatability, and business efficiency justify the additional cost.
Industrial Equipment
An industrial embroidery machine can cost considerably more, especially when multiple heads, specialized frames, and high-volume production systems are involved.
For most small embroidery businesses, this level of equipment is unnecessary unless order volume consistently requires industrial production capacity.
Important: Machine prices change frequently based on dealers, bundles, promotions, and included accessories. Treat these ranges as budgeting guidance rather than fixed prices.
Is a Free-Arm Machine Worth It?
A free arm embroidery machine is worth considering when a meaningful portion of your work involves finished, narrow, curved, or enclosed items.
If you mostly embroider flat fabric, large designs, or quilt panels, the extra free-arm capability may not justify choosing a smaller machine with a more restricted embroidery field.
For a business focused on personalized apparel, caps, and narrow garment work, easy positioning saves time and cuts setup errors. Pairing your machine setup with the best embroidery digitizing service provider in USA ensures your designs are fully optimized for curved and hard-to-hoop surfaces before you hit start.
The right question is therefore not “Is free-arm better?” but “Will I use the free-arm capability often enough to justify it?”
Why Quality Digitizing Matters for Free-Arm Work
The machine is only one part of the embroidery process. A poorly prepared design can cause thread breaks, puckering, or alignment errors, even on a high-end setup.

Curved and narrow surfaces often need specific file adjustments. Jacket back and sleeve digitizing, for example, may require different stitch directions, underlay, and pull compensation depending on the fabric and design.
Proper file preparation supports your free-arm setup by ensuring clean, crisp results without forcing the machine to compensate for bad stitch angles.
Conclusion
A free arm embroidery machine solves the physical challenge of embroidering finished, narrow, and tubular garments without opening constructed seams. Its primary advantage lies in isolated fabric access, protecting the opposite side of a sleeve or pocket from being stitched shut.
Choosing the right setup comes down to your production focus. Compact single-needle models suit custom items and smaller workloads, while multi-needle systems provide the speed and efficiency needed for continuous commercial orders.
Pairing your machine with properly prepared digital files ensures seamless production from setup to final inspection. New customers can take advantage of 50% off their first order to test out custom file preparation tailored to their specific garment needs.
Frequently Asked Questions
No. True free-arm functionality relies on a dedicated cylindrical chassis built directly into the machine frame. While some flatbed machines accept specialized tubular hoops, they cannot be modified into a true open-arm configuration.
Because fabric wraps around a cylindrical arm rather than laying flat, tension pulls tighter across the curve. Digitizers must adjust pull compensation and stitch angles to prevent registration gaps along the seam line.
It depends on the clearance of the arm and frame system. Most professional single-needle units handle items with an opening as small as 3 to 4 inches, such as sock cuffs, sleeve ends, and small tote pockets.
Puckering on curved knits usually happens when using auto-digitized files with heavy stitch density or using only tear-away backing. Switching to a stable cut-away stabilizer and reducing fill density resolves the issue.