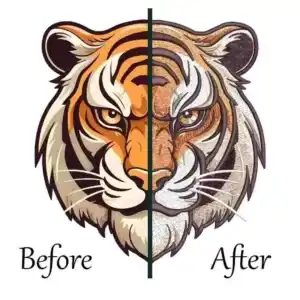
Convert to DST embroidery file free sounds simple, but when you start looking for tools, it quickly gets confusing with so many converters and half-working solutions out there. That’s why I’ve put together this complete guide for 2025, to show you the right free software, the exact steps to follow, and the fixes if something goes wrong.

If you’re serious about embroidery, this is the kind of guide that saves time, avoids frustration, and helps you get perfect results on your machine.
Convert to DST Embroidery File Free: Free Software, Steps & Solutions (2025)
Biggest Challenges When Converting Images into DST Files
Converting designs into DST format looks easy from the outside, but once you try it with free tools, you’ll realize why it’s not that simple. Let’s talk about the biggest challenges you’ll face:
1. Free Tools Can’t Handle Complex Designs
When you try to convert image to DST embroidery file online free, the software doesn’t really “understand” the design. A picture like PNG or JPEG is flat, but embroidery is three-dimensional. It involves stitch angles, directions, and layering. Free converters usually ignore these details and simply trace the outline of the image.
For simple logos with bold shapes, this might work okay, but for detailed graphics, gradients, or fine text, the results are poor.
Outlines break, details disappear, and what looks clean on screen often turns into a messy stitch-out on fabric. This is the first and biggest challenge that makes free tools unreliable for professional work.
2. Digitizing is More Than Just File Conversion
Here’s the key point: DST conversion is not about “changing file formats,” it’s about digitizing. Digitizing means manually mapping stitches so that your design not only looks right but also sews perfectly.
For example, when you try to convert PNG to DST embroidery file online free, the tool might generate a DST file, but it doesn’t include technical settings like underlay, pull compensation, or stitch density.
These are the things that decide whether your design will stitch flat, pucker, or even tear the fabric. Without digitizing, your embroidery machine has no roadmap, it only has a rough sketch.
3. Lack of Control in Automatic Converters
Free converters are fully automatic, which means you don’t get to decide how stitches are placed. There’s no control over direction, sequencing, or density. This leads to major issues when you try to convert to DST embroidery file free, such as:
- Stitches overlapping or leaving gaps
- Wrong color order that confuses your embroidery machine
- Uneven thread tension causing thread breaks
In short, even if the converter gives you a DST file, you can’t trust it to run smoothly on your machine. This lack of control is exactly why professional digitizing exists, it ensures quality, consistency, and machine-friendly results.
Convert to DST Embroidery File Free: 3 Best Tools (2025)
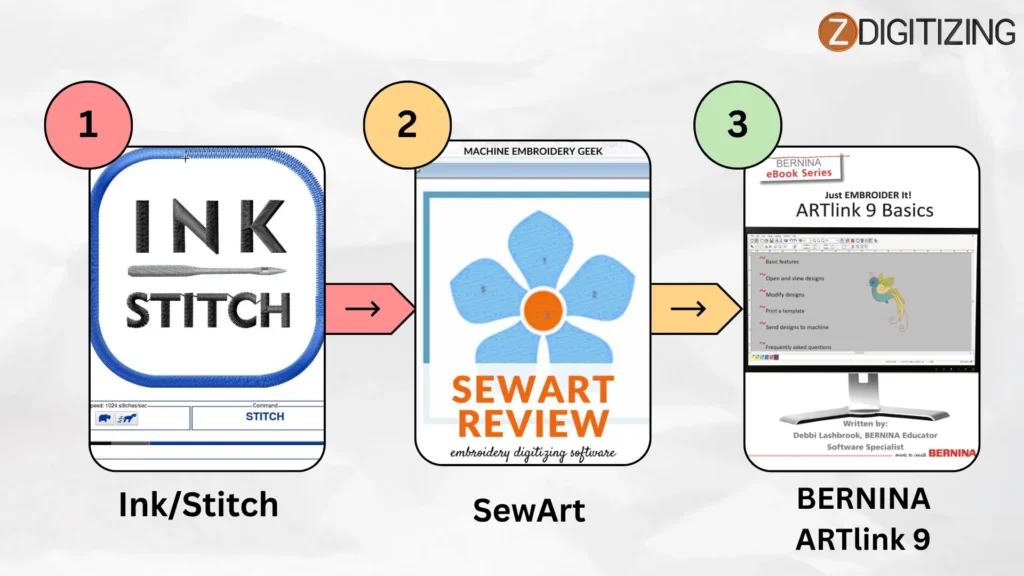
These programs act as a DST file converter, letting you open designs and save them in DST format without paying anything. They are easy to use, lightweight, and perfect for learning the basics of file conversion.
Here are three of the best free tools:
- Ink/Stitch
- SewArt (Free Trial)
- BERNINA ARTlink 9
1. Ink/Stitch: Step-by-Step Guide to Convert DST Free

Ink/Stitch is one of the most reliable free tools that works perfectly as a JPG to DST converter. It’s an open-source extension for Inkscape, designed for beginners who want to create embroidery designs without paid software.
Let’s go through the complete process of how to convert to DST embroidery file free using Ink/Stitch.
Step 1: Install Inkscape and Ink/Stitch
Download and install Inkscape, a free vector design program. Then, get the Ink/Stitch extension from its official site and add it to Inkscape to start working with embroidery features.
Step 2: Open or Import Your Artwork
Launch Inkscape and open your design file or import an image like PNG or JPEG that you want to convert JPG to DST. The software supports both bitmap and vector images, making it easy to start.
Step 3: Prepare Your Design
Clean up your artwork before conversion. If you’re using a bitmap image, use the “Trace Bitmap” feature to turn it into vector paths so Ink/Stitch can identify stitch outlines correctly.
Step 4: Access the Ink/Stitch Extension
From the top menu, go to Extensions > Ink/Stitch to open embroidery options and start adjusting stitch details.
Step 5: Set Embroidery Parameters
In the “Params” section, choose stitch type, density, pull compensation, and underlay options according to your design and fabric type.
Step 6: Apply Stitch Types
Select the shapes and apply stitch styles such as satin, fill, or running stitches using the Create Embroidery feature.
Step 7: Simulate and Preview Your Design
Click Visualize > Simulator to preview the stitching pattern and adjust parameters if needed before final export.
Step 8: Export Your DST File
Once your design looks perfect, go to Extensions > Ink/Stitch > Export and save it as a DST file ready for embroidery machines.
Step 9: Transfer and Test Stitch
Transfer the DST file to your embroidery machine and do a test stitch. This ensures the output looks neat and professional on fabric.
2. SewArt (Free Trial): Step-by-Step DST Embroidery File Conversion

SewArt is a simple and beginner-friendly software that lets you convert to DST file easily through its free trial version.
Before using it, understand what is a DST file: it’s a stitch-based format your embroidery machine reads to sew designs. The tool works as a quick image to DST converter, giving you control over stitch quality and preview options.
Though not a fully free DST file converter, the trial version is great to practice and learn how to convert to DST embroidery file free using basic tools.
Step 1: Download and Install SewArt
Go to the official website and download the SewArt free trial version. Install it on your computer and open the program once setup is complete.
Step 2: Launch SewArt and Open an Image
Click on “Open” and select your artwork or logo in PNG or JPEG format. The software supports multiple image types, so you can start with almost any design you have.
Step 3: Edit and Clean Image
Use SewArt’s basic editing tools to clean the image, reduce colors, or simplify details. This helps make your design more suitable for embroidery conversion.
Step 4: Auto-Digitize the Image
Use the “Auto-Digitize” option to let the software automatically convert colors and shapes into stitches. It’s a quick way to see how your artwork will look as embroidery.
Step 5: Adjust Stitch Properties
If needed, manually adjust the stitch density, underlay, and other properties. A few tweaks here can make a huge difference in how smooth and accurate the final design looks.
Step 6: Preview the Stitching
Open the preview window to simulate the stitching. This helps you visualize how your embroidery will appear on the fabric before exporting.
Step 7: Save and Export as DST
Once satisfied with the design, click on “Save As” and export your design as a .DST file. The file will be ready to use with your embroidery machine.
Step 8: Transfer and Test
Transfer the exported file to your embroidery machine and run a small test stitch. This ensures the design is aligned, clean, and ready for production.
3. Bernina ArtLink: Step-by-Step DST File Conversion
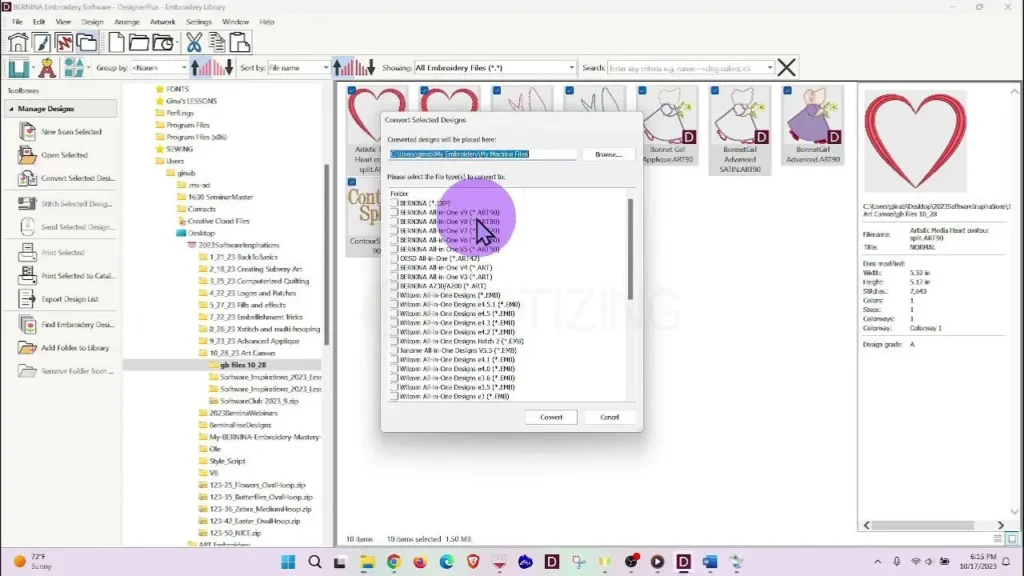
Bernina ArtLink is a trusted free DST file converter that comes from the well-known embroidery brand BERNINA.
It’s lightweight, beginner-friendly, and perfect if you just want to make quick file adjustments or learn how to convert to DST file without complicated settings. The interface is simple enough that even first-time users can easily follow along.
Step 1: Download and Install ArtLink
Visit BERNINA’s official website, download the ArtLink software, and complete the installation on your computer. It’s free and safe to use.
Step 2: Launch ArtLink and Import Design
Open the software and go to “File” → “Open” to import your embroidery design. You can even bring in other file types if you’re figuring out how to change a JPG into a DST embroidery format.
Step 3: Edit and Position the Design
Use ArtLink’s tools to resize, rotate, or adjust the placement of your design. It helps ensure your artwork fits neatly within the selected hoop area.
Step 4: Select the Appropriate Hoop
From the “Hoop Selection” menu, choose the correct hoop size that matches your embroidery machine and fabric area.
Step 5: Convert and Save as DST
Once everything looks good, go to “File” → “Save As” or “Export.” Select Tajima DST (.dst) as your output format. This step will convert to DST embroidery file free without any paid upgrade.
Step 6: Transfer to Embroidery Machine
Save the DST file, copy it to a USB drive, or connect your embroidery machine directly to start stitching your design.
Free Online DST Conversion Tools: Pros and Cons
Free online tools make it quick and simple to convert to DST embroidery file without downloading any software.
These browser-based platforms are handy for basic conversions and quick tasks. However, like most shortcuts, they also have a few limitations you should know before relying on them.
Pros | Cons |
|
|
If you just need quick conversions, these tools are fine. But for detailed embroidery work or business use, it’s always better to go with a desktop solution that gives you more control, precision, and consistency.
Convert to DST Embroidery File Free: Comparison of Best Free Tools
We’ve already covered how each tool works and what makes them different. But if you’re wondering which one to choose, this quick table will help you decide.
Each of these programs acts as a reliable DST format converter with its own strengths. Whether you want advanced control or just a simple JPG to DST file converter, check the comparison below to find the best option for your workflow and embroidery needs.
Feature | Ink/Stitch | SewArt (Free Trial) | Bernina ARTlink 9 |
Type | Open-source Inkscape extension | Paid software with free trial | Free embroidery software by Bernina |
Ease of Use | Moderate, needs a bit of learning | Very easy, beginner-friendly | Simple and clean interface |
Conversion Method | Manual digitizing with stitch control | Auto-digitizing from images | Basic file format conversion |
Editing Options | Detailed stitch editing and customization | Basic image editing and color merge | Limited resizing and rotation |
Export Formats | DST, PES, EXP | DST, PES, JEF | DST, ART, PES, EXP |
Best For | Users who want creative control | Beginners learning embroidery conversion | Hobbyists needing quick export |
Cost | Free | Free trial available | Free |
Preview Feature | Stitch preview and simulator | Stitch preview | Simple preview window |
Troubleshooting DST Conversion Errors
Sometimes, even when everything looks perfect on screen, your final embroidery doesn’t turn out as expected. Don’t worry, it happens to everyone.
When you convert image to DST file, a few common issues can appear, like missing stitches, uneven density, or colors sewing out of order. Let’s go through what usually causes these problems and how you can fix them easily.
1. Missing or Distorted Stitches

If parts of your design disappear or look broken, it’s usually because the image you started with wasn’t clean enough. Try using a high-quality image and simplify it before converting. This helps the software read your design more accurately and place stitches correctly.
2. Uneven Stitch Density
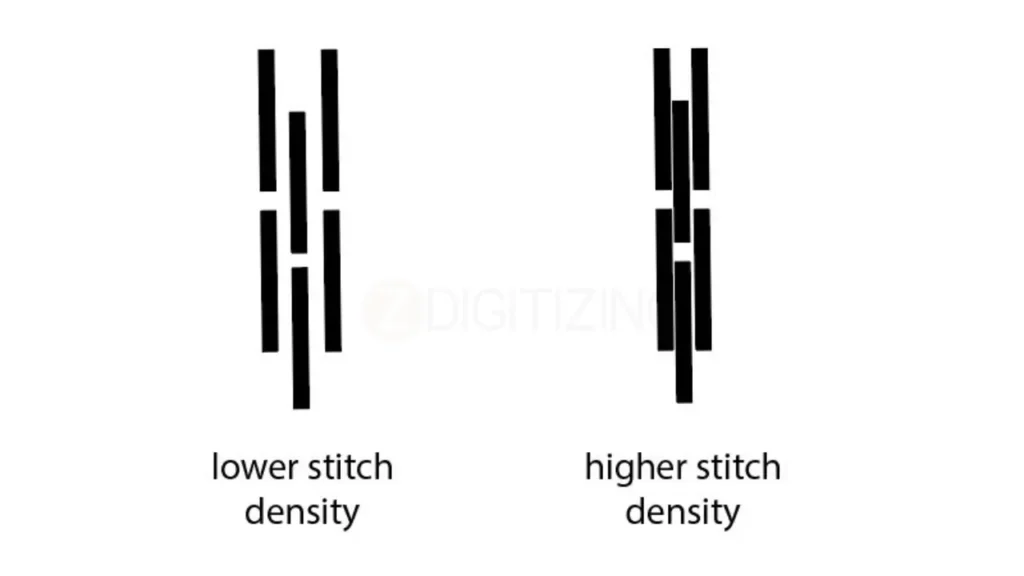
When you see thick, stiff areas or very light stitching, that means the stitch density isn’t balanced. After you convert image to DST embroidery file, always review your design’s density settings. Reduce it slightly for thin fabrics and increase it for thicker ones to keep the embroidery smooth and even.
3. Wrong Color Order or Misalignment
Sometimes colors stitch in the wrong sequence or outlines don’t match perfectly. That’s a sequencing issue, not a design problem. Simply open the stitch simulator in your software and reorder the colors before saving your final DST file.
4. Fabric Puckering or Thread Breaks

If your fabric wrinkles or threads keep breaking, the settings might not match your fabric type. Add a bit of pull compensation and underlay. For soft fabrics, use lighter density; for heavy ones, add more reinforcement stitches.
5. Low-Quality Output from Free Tools
Free tools are handy when you want to convert to DST embroidery file free, but they don’t always give precise control. Always preview your design before stitching and test it on a small fabric piece. This helps you catch small issues before wasting thread or time.
Quick Tip: Always save multiple copies of your design as you make changes. That way, if something goes wrong, you can easily go back to a previous version without starting over.
Overcoming Auto-Digitizing Limits for Better DST Conversions
Auto-digitizing tools are fast, but they still can’t fully replace manual precision. Many embroiderers try to convert PNG to DST using automatic software and get disappointed with the results.
While automation helps create a base layout, it often misses small text, gradients, and fine design details that truly define professional embroidery.
Where Auto-Digitizing Falls Short?
Automatic embroidery converters rely on algorithms that can’t interpret fabric texture, color blending, or stitch direction like a human can.
Complex artwork, thin lines, and multi-layered gradients are often misread, causing misplaced stitches, broken outlines, or uneven density.
On top of that, every fabric behaves differently, light materials pucker easily, while heavy fabrics need more density and underlay. Auto tools treat all fabrics the same, which leads to inconsistent stitch quality and bulky embroidery.
Quick Fix Table: Common Auto-Digitizing Problems and Manual Solutions
Problem | Why It Happens | Manual Fix |
Uneven stitching or broken outlines | Incorrect stitch angles or direction | Manually adjust stitch direction to follow artwork flow |
Fabric puckering | Density too high for thin fabrics | Reduce stitch density and add pull compensation |
Missing small text or details | Auto tool ignored fine elements | Digitize small areas manually with short stitches |
Stiff embroidery (“bulletproof” look) | Too many dense fill stitches | Lower density and reduce underlay |
Unclear color transitions | Poor handling of gradients | Break areas into smaller sections and assign manual fills |
How to Improve Results Manually?
After exporting your DST file, open it in your editing software and fine-tune critical settings. Adjust the stitch density for different fabric types, change angles for smoother fills, and always run a small test on scrap fabric. By doing this, you ensure clean outlines, balanced tension, and accurate color flow.
Pro Tip: Use automation for the basic layout but refine it manually for best results. This hybrid method combines speed with craftsmanship, turning your auto-generated design into a polished, professional stitch-out.
Conclusion
We’ve already shared some of the best free tools you can use to convert to DST embroidery file free, and they work fine for simple projects. But like every free tool, they have limitations, many reduce stitch quality, miss fine details, or take too much time to learn. Even if you try to convert file to DST by yourself, getting professional results isn’t always easy.
That’s why it’s smarter to let experts handle it for you. ZDigitizing can help you get perfect, machine-ready embroidery files without the stress. We’ve been providing high-quality embroidery digitizing services for almost 10 years with fast turnaround, 24/7 support, flat rates, and quality guaranteed.
Get 50% OFF on your first order and experience smooth, accurate, and professional embroidery results with ZDigitizing. Order Now from ZDigitizing — fast, easy, and quality you can trust!
FAQs
A DST file is a special embroidery format used by machines to read stitch data. It tells the machine exactly where to place each stitch, what direction to sew, and how to form the design accurately.
Yes, you can convert images to DST format using free tools like Ink/Stitch or SewArt (trial). However, free tools often have limits and may not produce perfect stitch quality.
Ink/Stitch is one of the best free DST converters because it gives you manual control over stitches and design details, unlike many online auto converters.
Yes, several websites allow you to upload and convert designs online. But online converters usually give basic results and less control compared to desktop software.
You can preview a DST file using free embroidery viewers like Bernina ARTlink or My Editor. But for editing or creating designs, you’ll need proper embroidery software.
DST is mainly used by industrial embroidery machines, while PES is for Brother and Babylock home machines. Both store stitch data but use different formats.
This usually happens if the file wasn’t saved properly or is corrupted. Try re-exporting the design and make sure it matches your machine’s format and hoop size.
The easiest way is to use beginner-friendly tools like Ink/Stitch or SewArt, which let you convert and preview designs step-by-step before saving the final DST file.


