Screen printing on fabric has become a popular method for achieving vibrant and durable designs on clothing, accessories, and various textile products. However, there may come a time when you want to remove a screen-printed design from fabric, either to update the look or correct a mistake.
This article will guide you through the process of effortlessly removing screen printing from fabric. We will explore different methods, including chemical-based, heat and steam-based, and mechanical techniques, providing step-by-step instructions and essential tips to help you achieve successful results.
Whether you are a DIY enthusiast or a professional, this article will equip you with the knowledge and techniques needed to effectively remove screen printing from fabric while minimizing any potential damage.
How To Remove Screen Printing From Fabric?
Different Methods for Removing Screen Printing
Screen printing, a popular method for applying designs to fabrics, sometimes requires removal due to errors or design changes.
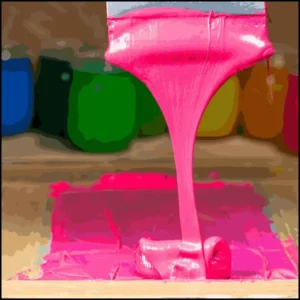
Chemical-Based Methods
Chemical-based methods involve using solvents or specialized screen printing ink removers to dissolve the ink and remove it from the fabric.
Heat and Steam-Based Methods
Heat and steam-based methods utilize heat and moisture to soften the ink, making it easier to lift off the fabric. These methods often involve the use of an iron or steamer.
Mechanical Methods
Mechanical methods involve physically scraping or rubbing the ink off the fabric using tools like scrapers, brushes, or abrasive materials. These methods require careful handling to avoid damaging the fabric.
Pros and Cons of Each Method
Chemical-based methods offer effective results but require caution due to the use of potentially harsh chemicals.
Heat and steam-based methods are gentler on the fabric but may not be as effective for stubborn or older prints.
Mechanical methods offer control but may pose a risk of fabric damage if not done correctly.
Preparing the Fabric for Screen Printing Removal
Preparing the fabric for screen printing removal is a crucial step in ensuring the process is effective and the material remains undamaged.
Assessing the Fabric Type and Print Quality
Before attempting to remove screen printing, assess the fabric type and the quality and age of the print. This will help determine the most suitable method and minimize any potential damage.
Gathering Necessary Tools and Materials
To remove screen printing, gather the appropriate tools such as solvents, heat sources, scrapers, brushes, or abrasive materials, depending on the chosen method.
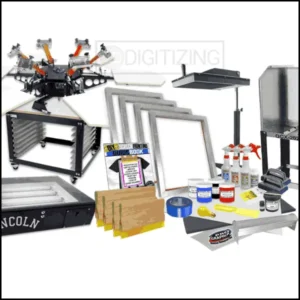
Additionally, ensure you have protective gear like gloves and goggles if using chemicals.
Pre-Treating the Fabric Before Removal
Pre-treating the fabric can help loosen the ink and make the removal process easier. This can be done by lightly scrubbing the print with a soft brush or applying a pre-treatment solution according to the manufacturer’s instructions.
Method 1: Using Solvents and Chemicals to Remove Screen Printing
Using solvents and chemicals to remove screen printing ink is a common and effective method, especially for stubborn or professional-grade inks.
Choosing the Right Solvent for Your Fabric Type
Different fabrics require specific solvents for effective ink removal. Research and choose a solvent that is compatible with your fabric type, ensuring it won’t cause damage or discoloration.
Step-by-Step Instructions for Solvent-Based Removal
- Start by applying a small amount of the chosen solvent directly onto the screen printed area.
- Gently scrub the ink using a soft brush or cloth in circular motions.
- Allow the solvent to penetrate the fabric for a few minutes.
- Rinse the fabric thoroughly with water to remove any remaining ink and solvent.
- Repeat the process if necessary until the screen print is fully removed.
- Wash the fabric as recommended to remove any remaining residue.
Safety Precautions and Considerations
When using solvents and chemicals, always follow the safety guidelines provided by the manufacturer. Ensure proper ventilation and wear protective gear, such as gloves and goggles, to prevent skin and eye irritation.
Keep solvents away from open flames or heat sources. Dispose of solvents properly according to local regulations methods.
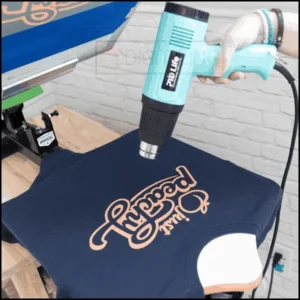
Method 2: Applying Heat and Steam to Remove Screen Printing
If you’re looking for a method that requires minimal effort and maximum effectiveness, heat and steam might just be your superheroes.
This technique is perfect for fabrics that can handle a bit of heat without getting too fussy.
Selecting Appropriate Heat Sources
Before you start embracing the heat, make sure you choose the right tools for the job. An iron or a heat press can work wonders in this situation.
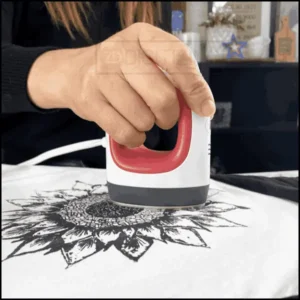
Just make sure you set them to the appropriate temperature for your fabric. No one wants to end up with a crispy shirt unless you’re into that sort of thing.
Step-by-Step Instructions for Heat and Steam-Based Removal
Here’s how it goes:
- Lay your fabric on an ironing board or a heat-resistant surface. Avoid using your grandma’s antique dining table unless you want to risk her wrath.
- Place a clean cloth or parchment paper over the screen-printed area. This step will protect your iron and prevent any unwanted transfer of ink.
- Set your iron or heat press to the recommended temperature for your fabric. A low to medium heat should do the trick for most materials.
- Gently press the iron over the cloth/parchment paper in a circular motion. Be careful not to apply too much pressure, or you might end up with a weirdly shaped shirt.
- Continue pressing and moving the iron for around 10 to 15 seconds. This will allow the heat to penetrate and loosen the ink.
- Lift the iron and check if the screen printing has started to lift. If not, repeat steps 4 and 5 until you see some progress. It’s all about patience, my friend.
- Once the screen printing starts to loosen, take a deep breath and peel it off. If there are any stubborn bits left, you can use a gentle rubbing motion with your fingers to coax them away.
Tips for Effective and Safe Application of Heat
- Always check the care instructions of your fabric before applying heat. Some materials, like polyester and nylon, can be a bit picky and might not react well to heat.
- If you’re using an iron, make sure to turn off the steam function. Steam might not play well with the ink, and we don’t want any accidents happening.
- Be cautious with delicate fabrics. If you’re dealing with something ultra-sensitive like silk or lace, it’s best to leave the heat and steam for another day. We wouldn’t want your favorite blouse to turn into a sad, melted mess.
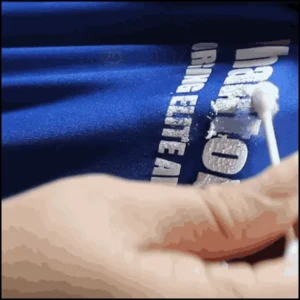
Method 3: Mechanical Methods for Removing Screen Printing
Sometimes, you just need to get physical with your fabric. Mechanical methods are great for those stubborn screen prints that refuse to budge with just a little heat and steam.
Introduction to Mechanical Removal Techniques
Mechanical methods involve using physical friction and abrasion to break down the ink and remove it from the fabric. It’s like giving your shirt a nice massage, but with a bit more determination.
Step-by-Step Instructions for Mechanical Removal
Ready to flex those muscles?
Here’s what you need to do:
- Lay your fabric on a flat and sturdy surface. Avoid doing this on your flimsy Ikea coffee table unless you have a backup plan for your morning coffee.
- Take a clean cloth or sponge and soak it in warm water. Make sure it’s not dripping wet, or you might end up creating a mini swimming pool on your fabric.
- Gently rub the wet cloth/sponge over the screen-printed area. Apply some pressure, but don’t go all Hulk on it. We’re aiming for controlled power, not a shredded mess.
- Keep rubbing in circular motions for a few minutes. The friction and moisture will work together to break down the ink and lift it from the fabric. It’s like a little arm workout for your shirt.
- Once you start to see the screen printing fading away, give yourself a mini celebration dance. You earned it! Repeat the rubbing process if needed, until you’ve successfully removed the print.
Using Tools and Equipment for Optimal Results
While some folks might enjoy the good ol’ hand-rubbing technique, others prefer the help of some nifty tools and equipment.
Here are a few options to consider:
Magic Erasers
These little wonders can work like a charm when it comes to removing screen printing. Just moisten them with a bit of water and gently scrub them away.

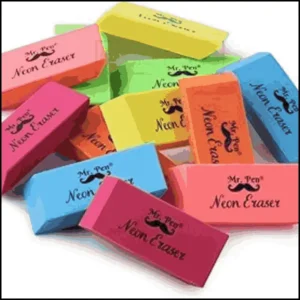
Rubber Erasers
No, not the ones you used in elementary school. Get yourself some soft, non-abrasive rubber erasers and rub away the screen printing gently. It’s like art class all over again, minus the macaroni necklaces.
Sandpaper
This one requires a bit more caution. If you’re dealing with a seriously stubborn screen print, you can use fine-grit sandpaper to gently scrub away the ink.
But be warned, sandpaper can be quite abrasive, so make sure to test it on a small, hidden area of the fabric first.
Remember, the key to success with mechanical methods is finding the right balance between pressure and gentleness. Go easy on your fabric, and it’ll reward you with a fresh, ink-free canvas.
Tips and Precautions for Successful Screen Printing Removal
Removing screen printing can sometimes feel like going through a breakup. It takes time, effort, and a touch of patience. But fear not!
These tips and precautions will help make the process go a little smoother.
Testing the Chosen Method on a Small Area First
Before you dive headfirst into screen printing removal, it’s always a good idea to test your chosen method on a small, inconspicuous area of the fabric.
This will help you determine how the fabric reacts and if there are any unexpected surprises waiting for you.
Being Patient and Persistent During the Removal Process
Screen printing removal can be a bit stubborn at times, but don’t let that discourage you. Be patient, persistent, and keep at it. Rome wasn’t screen-printed in a day, after all.
Properly Caring for the Fabric After Screen Printing Removal
Once you’ve successfully banished the screen printing from your fabric, give it some extra TLC. Wash it gently with mild detergent and cold water, then let it air dry. Avoid using harsh chemicals or hot water, unless you want your fabric to throw a tantrum.
Conclusion and Final Considerations
Removing screen printing from fabric may seem like a daunting task, but with the right methods and techniques, it can be accomplished effortlessly.
Whether you opt for chemical-based solutions, heat and steam application, or mechanical removal, proper preparation and patience are key. Always remember to test any method on a small area first and follow safety precautions.
With the information and guidelines provided in this article, you can confidently tackle screen printing removal projects and achieve clean, pristine fabric surfaces.
So go ahead and unleash your creativity without the worry of being stuck with unwanted designs – with these techniques, screen printing removal can be a breeze!
ZDigitizing: #1 Vector Art Service Provider
Looking for great vector designs?
ZDigitizing has got you covered with amazing vector services perfect for your printing projects.
Plus, grab a 50% discount on your first order! Chat with us, get a free quote in just 5 minutes, and enjoy our quick and easy service.
Found this info useful? Tell your friends and let them in on our awesome deals and quality digitizing work.
Thanks for stopping by, and we’re excited to assist with your embroidery designs!
Frequently Asked Questions:
To remove a brand logo from clothing, you can use techniques such as applying heat and steam to loosen the print, using solvent-based removers for screen-printed designs, or gently scraping off the design after softening. The method depends on the logo’s material and the fabric type.
Yes, screen printing can be removed from clothing, but the ease and effectiveness of removal depend on the fabric type and the ink used. Techniques include using chemical solvents, applying heat and steam, or using specialized products designed for ink removal.
To remove screen printing adhesive from clothing, you can use a solvent specifically designed to dissolve adhesive residues without damaging the fabric. Apply the solvent according to the manufacturer’s instructions, and then wash the garment to remove any remaining adhesive.
Screen printing is considered permanent under normal conditions; however, with wear and laundering, it can fade over time. Although it’s designed to be durable, certain removal techniques involving chemicals, heat, or abrasion can effectively remove screen printing from fabric, with varying degrees of success depending on the ink and fabric type.