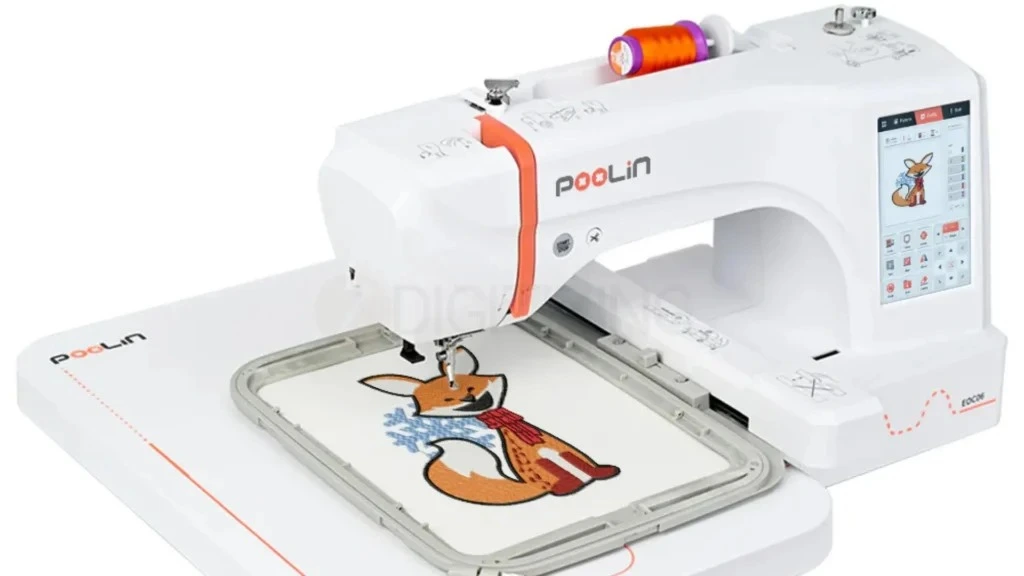
If you are looking for a reliable machine, the Poolin EOC05 machine offers a large embroidery area, touchscreen controls, automatic thread trimming, and solid stability at an affordable price. It is a good option for beginners, hobbyists, and small businesses that want larger embroidery capability without spending thousands on a commercial machine.

This guide covers setup, threading, troubleshooting, and practical tips to help you understand whether this machine is the right choice for your embroidery needs.
Beginner-Friendly & Budget-Savvy: The PooLin EOC05 Embroidery Advantage
Key Features of Poolin EOC05 That Actually Matter
Knowing the specs of the EOC05 is one thing; understanding how those features affect your daily work is another. The EOC05 has several features that matter most when you are stitching real projects, not just printing marketing materials.
Let’s break down what actually matters in practice.
1. 7-Inch Touchscreen Makes Design Setup Easier
The Poolin EOC05 comes with a large 7-inch touchscreen that helps users preview embroidery designs before stitching starts. The screen allows you to zoom in, trace the design area, and verify proper placement inside the hoop.
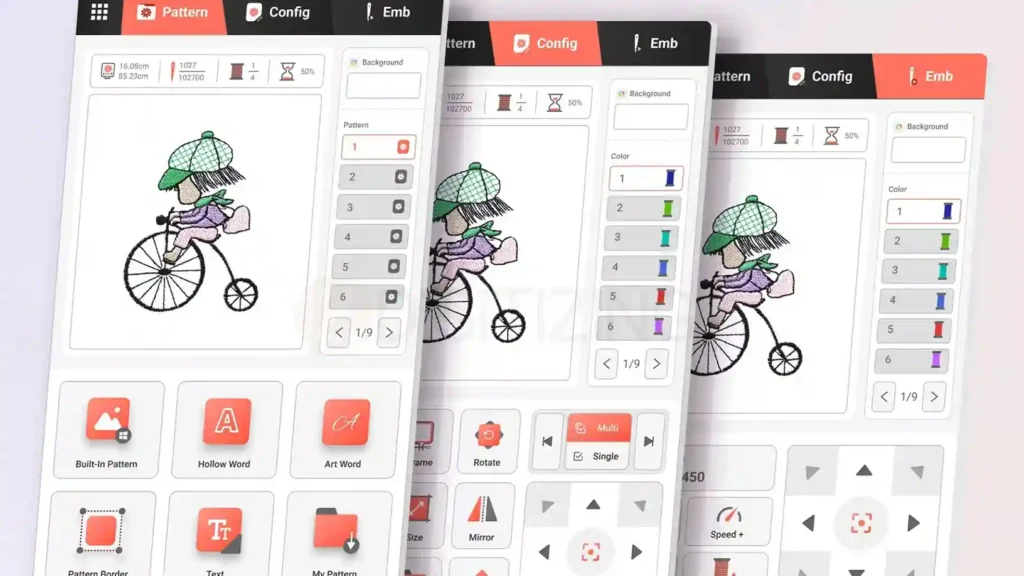
With the Poolin embroidery machine EOC05, users can rotate, resize, and reposition embroidery designs directly from the touchscreen. This makes logo placement and monogram alignment much easier during production work.
What You Can Do on the Screen
- Preview stitch paths
- Check color sequence order
- Resize or rotate designs
- Move embroidery placement
- Trace the embroidery area before stitching
The screen also makes navigation easier for beginners who are learning embroidery machine controls for the first time.
Important Note About DST Colors
DST embroidery files do not store actual thread color information. The colors shown on the machine screen may not match the real production colors. Always follow your embroidery worksheet or thread chart instead of relying on the display colors.
2. 4×9.25-Inch Hoop Helps With Larger Designs
One of the biggest advantages of the Poolin EOC05 computerized embroidery machine is its true 4×9.25-inch embroidery field.
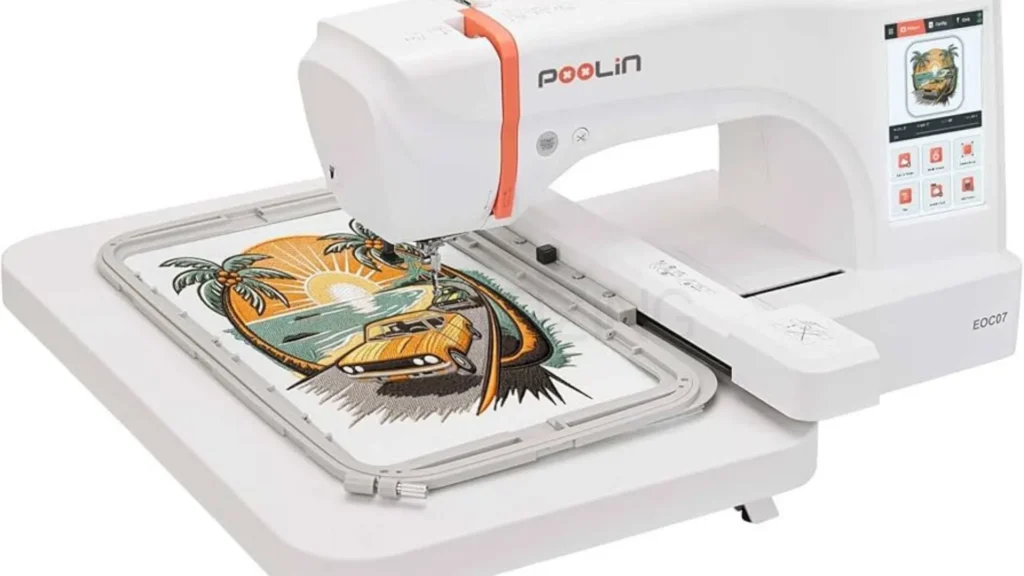
Unlike multi-position hoops that require re-hooping during stitching, the EOC05 allows users to embroider larger designs in one setup. This reduces alignment mistakes and improves production speed.
Why the Larger Hoop Matters?
The larger hoop helps users stitch:
- Long chest logos
- Large tote bag designs
- Decorative pillow borders
- Bigger embroidery layouts
This feature is especially useful for small embroidery businesses handling larger custom orders.
Tips for Better Registration
To improve embroidery accuracy:
- Hoop the fabric tightly
- Use the trace function before stitching
- Check needle clearance carefully
- Leave a slight space from the hoop edges
These steps help prevent hoop strikes and alignment problems.
3. Auto Jump Stitch Trimming Saves Time
Among the most useful Poolin EOC05 embroidery machine features is automatic jump-stitch trimming. The machine trims jump threads automatically between design sections and color changes. This reduces manual thread cutting and speeds up production work.
How the Trimming System Performs
The trimming system works well for:
- T-shirts
- Polos
- Tote bags
- Standard embroidery projects
Most designs come out nearly clean enough for retail use with only minimal hand trimming needed.
Best Speed for Reliable Trimming
For smoother trimming performance, it is better to run the machine around 600 SPM instead of maximum speed.
Running too fast may cause:
- Missed trims
- Thread buildup
- Trimming jams
Lower speeds usually produce cleaner embroidery results for beginners.
4. Metal Interior Frame Improves Stability
The internal metal frame inside the Poolin EOC05 helps reduce vibration during embroidery. Many cheaper embroidery machines use plastic internal frames, which can shift slightly during stitching. The metal frame design improves stability and embroidery accuracy.

Benefits of the Metal Frame
The metal construction provides:
- Better stitch registration
- Reduced vibration
- More stable embroidery
- Longer machine lifespan
- Improved stitching on thick fabrics
This helps maintain cleaner embroidery results across larger designs.
Easier Cleaning and Maintenance
The machine design also makes cleaning easier around the hook and bobbin area.
For smoother performance:
- Clean lint after every 8–10 hours of stitching
- Brush thread debris regularly
- Keep the hook area clean
Proper maintenance helps the EOC05 continue running smoothly over time.
Quick Recap of Features of the Embroidery Machine Poolin EOC05
Feature | Poolin Spec |
Embroidery Area | 4×9.25 inches (true hoop) |
Screen Size | 7-inch color touchscreen |
Built-in Designs | 96 designs |
Max Speed | Up to 800 SPM (stitches per minute) |
Auto Trim | Yes, down to 5mm jump threads |
Internal Frame | Metal (vibration dampening) |
File Formats | DST, DSB |
Languages | 11 languages |
Price Range | $640 – $930 (varies by seller) |
Who Should (and Shouldn’t) Buy the Poolin EOC05?
The EOC05 is a great option for users who want a larger embroidery area without spending thousands on a commercial machine.
Many Poolin EOC05 computerized embroidery machine reviews mention that it offers strong value for beginners, hobbyists, and small businesses willing to learn how to set up an embroidery properly.
Who Should Buy the EOC05 Poolin Embroidery Machine?
- Budget-focused users who want a true 4×9.25-inch embroidery field at an affordable price.
- Beginners starting a small embroidery business with T-shirts, tote bags, or monogram projects.
- DIY hobbyists who enjoy customizing jeans, hoodies, pillows, and bags at home.
- Users are comfortable with learning tension adjustment, hooping, and embroidery setup.
- Multi-machine owners need a secondary machine for larger embroidery designs.
Who Should Avoid the Poolin EOC05?
- Users want a fully plug-and-play embroidery experience without learning machine setup.
- Businesses running heavy daily production with frequent multi-color embroidery orders.
- Users are expecting perfect embroidery results without understanding stabilizers and tension settings.
- People deeply connected to Brother or Janome embroidery software ecosystems.
- Industrial-level users need a machine for nonstop commercial production.
The Poolin embroidery machine is best for users who value larger embroidery capability and affordability over maximum convenience.
Poolin EOC05 Embroidery Machine Price and Where to Buy in 2026
The Poolin is priced between $640 and $930 depending on the seller, bundle, and warranty. This is one of the most affordable ways to get a large hoop and large screen in 2026.

Price Ranges:
- Basic Unit: ~$640–$750 (machine only, no extra accessories)
- Standard Bundle: ~$750–$850 (machine + 80 embroidery spools, basic accessories)
- Premium Bundle: ~$850–$930 (machine + 2- or 3-year warranty, extra needles, bobbins, case)
Warranty Options:
- 2-Year Warranty: Covers motor, electronics, and mechanical parts
- 3-Year Warranty: Extended coverage for heavy use
- Warranty through Seller: Some sellers offer their own warranty instead of the manufacturer warranty
Purchasing Channels:
- Aliexpress: Often the lowest price, but longer shipping time
- Walmart.ca: Good for Canada, reliable shipping
- Amazon: Fast shipping, buyer protection
- Swing Design: High-quality bundle with embroidery spools
- TikTok Shop: Emerging channel, check seller ratings carefully
- Richword Official Site: Direct from the manufacturer-lineage brand
The Poolin EOC05 is the home embroidery brand of Richword, which also produces commercial Bai machines. This lineage means better quality control than generic Chinese brands. Always buy from a reputable seller with good reviews and a return policy.
Consider the warranty carefully. The EOC05 is a durable machine, but having a 2- or 3-year warranty gives peace of mind, especially for beginners who may accidentally break something while learning.
Setup Walkthrough: First 10 Minutes Without Fear
Setting up the EOC05 for the first time may feel difficult, but the process becomes simple when you follow each step carefully. The Poolin EOC05 works best when threading, hoop setup, and screen settings are checked properly before stitching starts.
Unboxing and Power-On Checklist
Start by placing the EOC05 on a strong and level table. Remove all foam, plastic wrapping, and protective tape from the machine.
Follow these basic setup steps:
- Plug the power cord directly into a grounded wall outlet.
- Turn on the side power switch.
- Wait for the screen and calibration process to start.
- Listen for a smooth calibration sound from the machine.
- Check accessories like needles, bobbins, tweezers, screwdriver, and oil bottle.
Most users mention in Poolin EOC05 embroidery machine reviews that taking time during the first setup prevents many common embroidery problems later. If the screen does not turn on or you hear grinding noises, stop immediately and check for loose parts, debris, or a bent needle.
Verify the Thread Path Carefully
Incorrect threading is the most common issue on the Poolin EOC05. The thread must pass correctly through the tension discs behind the orange cover.
To thread the machine correctly:
- Raise the presser foot first.
- Place the thread spool on the spool pin.
- Follow the threading guides exactly.
- Pull the thread behind the orange cover.
- Snap the thread properly into the tension guides.
- Thread the needle from front to back.
The Poolin EOC05 embroidery machine uses a drop-in bobbin system, so make sure the bobbin thread is also installed correctly before stitching. A simple tension test helps confirm proper threading. The thread should feel slightly tight when pulled near the needle, not completely loose.
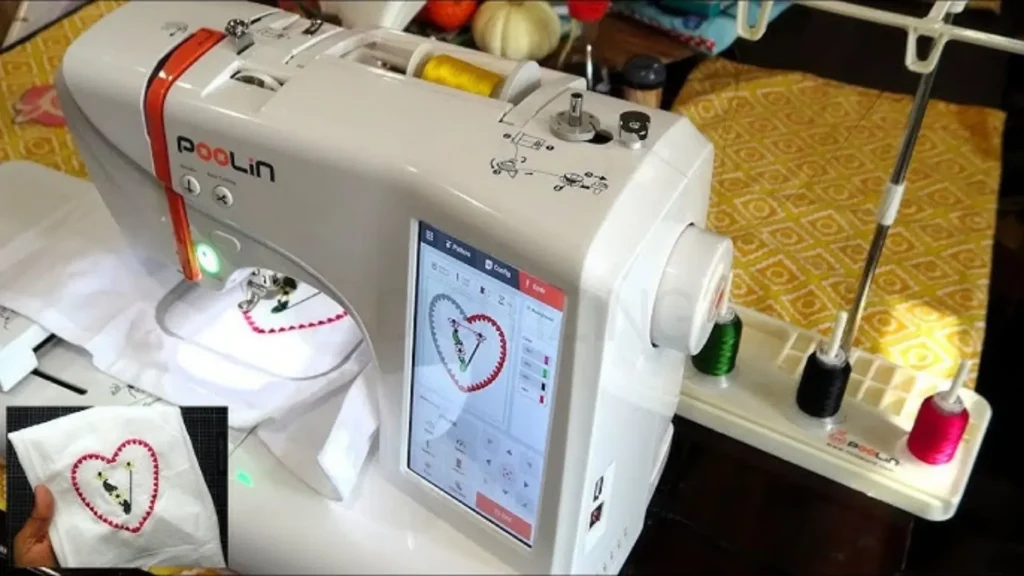
Match the Hoop Size With the Screen
The Poolin EOC05 includes both a 4×4 hoop and a 4×9.25-inch hoop. Always make sure the hoop installed on the machine matches the hoop selected on the screen.
To avoid embroidery problems:
- Install the correct hoop securely.
- Open the hoop settings on the screen.
- Select the matching hoop size.
- Double-check before starting embroidery.
If the wrong hoop setting is selected, the needle may hit the hoop frame and damage the machine. Many users appreciate this large embroidery field because it is one of the best Poolin EOC05 embroidery machine features available at this price point.
Always Use the Trace Function Before Stitching

The trace function helps users preview the embroidery area before stitching starts.
This feature allows the hoop and needle to move around the design outline without sewing. It helps prevent hoop strikes and alignment mistakes.
To use the trace function:
- Load your convert image to embroidery design.
- Position the design on the screen.
- Select the trace option.
- Watch the needle movement carefully.
- Confirm the needle stays clear of the hoop edges.
The Poolin EOC05 computerized embroidery machine makes tracing especially useful when working with larger embroidery layouts on the 4×9.25-inch hoop.
Using the trace feature before embroidery starts can save fabric, thread, needles, and production time.
Troubleshooting and Fixing Common Problems
Even with careful setup, you will run into problems with the Poolin EOC05. The key is to recognize the issue quickly and fix it without panic. Let’s cover the three most common problems and how to resolve them.
Bird Nesting on Underside
Problem: A tangled bird’s nest of thread on the underside of the fabric.
Cause: The top thread missed the tension discs behind the orange cover. This is the #1 cause of bird nesting on the Poolin EOC05.
Fix:
- Emergency Stop: Press the stop button immediately.
- Cut the Nest: Use curved snips to cut the nest from the fabric. Do not pull; it will tighten the knot.
- Raise Presser Foot: Lift the foot to open tension discs.
- Re-Thread Top: Re-thread the top thread, ensuring it goes behind the orange cover. Use the “dental floss” snap technique.
- Reset Tension: Set tension dial to baseline (usually 4).
- Tactile Check: Pull the thread near the needle; it should feel resistant, not loose.
- Test Stitch: Stitch on scrap fabric to confirm the nest is gone.
Bird nesting on the Poolin is almost always a threading error. Once you master threading behind the orange cover, bird nesting becomes rare.
Spindle Error or Lock Up Message
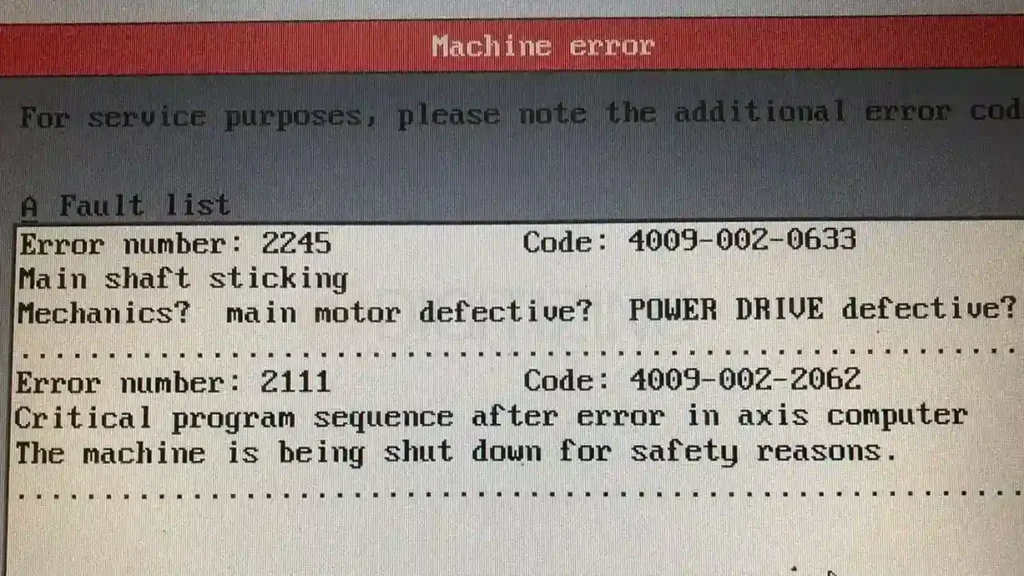
Problem: The Poolin EOC05 displays “Spindle Error” or “Lock Up” and stops.
Cause: Thread wrapped around the hook, bent needle, debris in the hook area, or timing issue.
Fix:
- Power Off: Turn off the EOC05 completely.
- Remove Bobbin Case: Open the bobbin cover and remove the bobbin case.
- Clear Thread: Use tweezers to remove any thread wrapped around the hook.
- Check Needle: Remove the needle and inspect for bends. Replace if bent.
- Clean Hook Area: Use a small brush to remove lint from the hook and feed dogs.
- Re-install Bobbin: Place the bobbin case back, thread correctly, close cover.
- Power On: Turn the EOC05 back on and test stitch.
If the spindle error persists after cleaning and replacing the needle, the timing may be off. This requires a technician. Do not continue running the Poolin EOC05 with a persistent spindle error; it can damage the motor.
DST Files Show “Wrong Colors” on Screen
Problem: The Poolin EOC05 screen shows blue for stitch 1, but your worksheet says red.
Cause: DST files contain stitch-position data, not reliable color data. The screen colors are placeholders, not instructions.
Fix:
- Ignore Screen Colors: Do not trust the colors shown on the screen for DST files.
- Follow Worksheet: Use your production worksheet (PDF or JPG) to determine which thread color to use.
- Manual Color Change: When the machine stops for color 2, 3, etc., thread the color listed on your worksheet.
- Label Threads: Pre-label your thread spools with color numbers/names to avoid confusion.
- Convert Files if Needed: If you need color data, use PES or JEF formats (if your software supports them) or digitize custom files with color info.
This is not a defect in the EOC05; it is how DST files work. Professional embroiderers expect this and always follow their worksheet, not the screen.
Poolin EOC05 vs EOC06: Which Model Fits Your Needs
The EOC05 has a sibling model called the Poolin EOC06, which is an upgraded version with a larger embroidery area. Understanding the difference helps you choose the right machine for your needs.
Feature | Poolin EOC05 | Poolin EOC06 |
Max Embroidery Area | 4×9.25 inches | 7.9×11 inches |
Motor Power | 40W | 60W |
Bobbin Replacement | Drop-in | Drop-in |
Screen Size | 7-inch touchscreen | 7-inch touchscreen |
Built-in Designs | 96 designs | 96 designs |
Auto Trim | Yes (5mm) | Yes (5mm) |
Best Use Case | Center chest, standard projects | Large back designs, full-chest |
Approx Price | $640–$930 | $800–$1,100 |
The EOC06 offers a larger 7.9×11-inch field compared to the Poolin EOC05’s 4×9.25 inches. This means the EOC06 can embroider full-back designs or large chest logos in one pass, while the EOC05 is better for center chest and standard projects.
The EOC06 also has a more powerful 60W motor compared to the EOC05’s 40W motor. This helps the EOC06 handle thicker fabrics and dense designs more easily. However, both machines use the same 7-inch touchscreen and 96 built-in designs.
Choose the EOC05 if:
- You need a large hoop at the lowest possible price
- Your projects fit within 4×9.25 inches (center chest, sleeves, bags)
- You are on a tight budget (~$650–$930)
Choose the EOC06 if:
- You need a 7.9×11 inch field for large back designs
- You work with thick fabrics regularly and need more motor power
- You can afford the extra ~$200–$300 over the EOC05
For most beginners and small businesses, the EOC05 is sufficient. The 4×9.25 inch field covers 90% of common embroidery projects. Upgrade to the EOC06 only if you regularly need the extra width for large back designs.
Real-World Project Example: Embroidered Denim Belt Bag
Let’s walk through a real project using the Poolin EOC05: embroidering a logo on a denim belt bag. This project tests thick fabric, hooping technique, and needle choice.
Prep for Heavy Fabric
- Needle Choice: Use a 90/14 Jeans/Sharp needle for denim. The EOC05 comes with 75/11 (light) and 90/14 (medium). Switch to 90/14 for denim.
- Stabilizer: Use tear-away stabilizer. Denim is stable; tear-away gives clean back side.
- Tools Ready: Curved snips for jump threads, spare bobbins, tweezers, small brush for lint.
- Thread: 40-weight polyester thread for durability. Avoid cheap 60-weight thread on denim.
- Machine Setup: Set speed to 400 SPM for thick fabric.
The Poolin EOC05 handles denim well with the right needle and stabilizer. Do not rush; thick fabric at high speed causes needle deflection.
Hooping Thick Denim Strap
- Loosen Screw Almost Fully: The outer ring screw should be almost loose before placing the fabric.
- Seat Inner Ring: Place the inner ring on the denim strap with the stabilizer underneath.
- Press Outer Ring: Press the outer ring down until it clicks. Tighten the screw just enough to hold (not over-tight).
- Chalk Line: Draw a chalk line on the strap for center alignment.
- Check Tautness: Fabric should be smooth but not stretched. Pinch test: slight resistance, no extreme tightness.
Thick denim requires careful hooping. Over-tightening causes puckering; under-tightening causes flagging. Find the middle ground on the EOC05.
Quality Check After Stitching
- Registration: Check that outlines sit on top of color fills with no gaps.
- Tension: Look at the back side. White bobbin thread should form ~1/3 of the satin stitch width (“caterpillar” effect).
- Jump Threads: Trim any long tails left by the auto-trimmer (5mm is acceptable).
- Hoop Marks: Steam press the denim to lift hoop marks. Denim responds well to steam.
- Stitch Density: If stitches are too dense, the denim may pucker. Reduce density in software next time.
The Poolin EOC05 produced clean stitches on the denim bag with proper setup. The large 4×9.25-inch hoop allowed the full logo in one pass. The metal frame kept registration tight across the thick fabric.
This project shows the EOC05 can handle heavy denim if you use the right needle, stabilizer, and hooping technique.
When to Upgrade From the EOC05
The Poolin EOC05 is a great starter machine, but you will eventually outgrow certain limitations. Here’s when to consider upgrading from the EOC05.
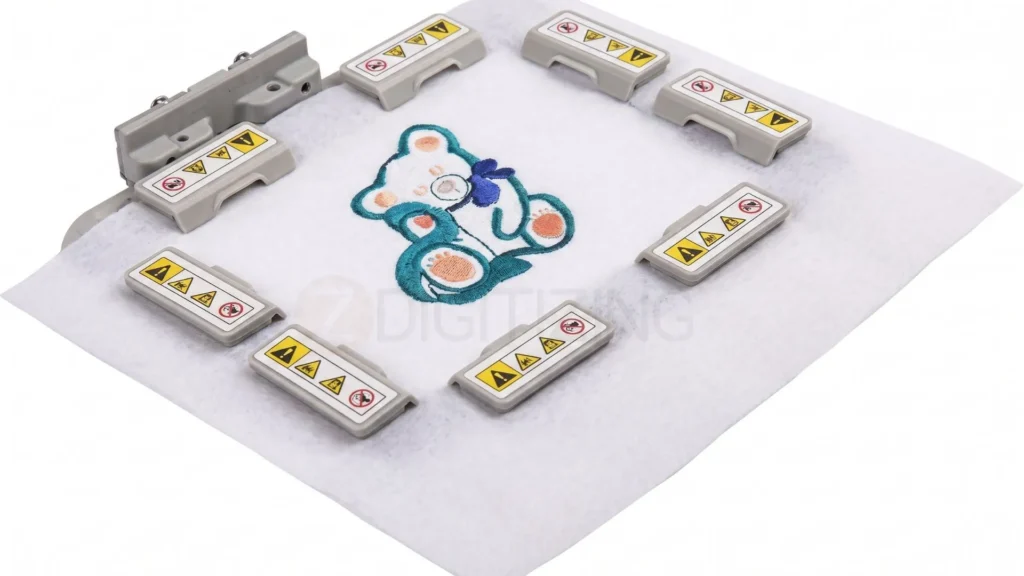
Hooping Frustration → Magnetic Hoops
Trigger: Hooping takes 5+ minutes, fabric slips, or you see hoop burn marks.
Upgrade: Magnetic hoops for the EOC05 ($50–$150).
Benefit: Faster clamping, no crush marks, better alignment. This is a cost-effective upgrade before buying a new machine.
The Poolin EOC05 standard hoops work fine for beginners, but magnetic hoops reduce frustration once you do regular embroidery.
Thread-Change Bottleneck → Multi-Needle Machine

Trigger: You are turning away 20+ multi-color items per week because thread changes take too long.
Upgrade: 6-needle or 10-needle machine (e.g., SEWTECH 10-needle for ~$1,500–$2,500).
Benefit: “Walk away efficiency”: load all 6–10 colors, machine changes automatically.
A single-needle Poolin EOC05 is fine for 1–5 multi-color items per week. If you need 20+, a multi-needle machine saves hours of labor.
Larger Projects → Poolin EOC06 or Bigger Machine
Trigger: You frequently need 7.9×11 inch field for full-back designs.
Upgrade: Poolin EOC06 (~$800–$1,100) or larger commercial machine.
Benefit: Larger hoop without repositioning, more motor power for thick fabric.
Upgrade to EOC06 if you need the extra width but want to stay in the Poolin ecosystem.
Heavy-Industrial Volume → Commercial Machine
Trigger: You run 8+ hours per day, every day.
Upgrade: Commercial Bai machine (same lineage as Poolin) or Tajima / Brother commercial unit ($5,000+).
Benefit: Built for continuous operation, faster speed, and better durability.
The EOC05 is a home-use machine, not industrial. If you need a full-time operation, move to a commercial unit.
Most users stay with the EOC05 for 2–5 years as a primary or secondary machine. It is a long-lasting choice if you maintain it well.

Summary of Key Takeaways
The Poolin EOC05 is a budget-savvy workhorse priced between $640 and $930, offering a spacious 4×9.25-inch hoop, 7-inch touchscreen, and auto-trim. It is ideal for beginners, hobbyists, and small businesses who value high capability over plug-and-play convenience and are excited to learn the mechanics of embroidery.
Success with this machine comes down to a few expert habits:
- Master the Threading Path: Ensure you correctly thread the path located behind the orange cover.
- Use Proper Stabilizers: Match the stabilizer weight directly to your fabric choice to prevent puckering.
- Watch the Start: Always monitor the first 60 seconds of every design stitch-out.
- Easy Troubleshooting: Common issues like bird-nesting, spindle errors, and .DST color confusion are completely fixable with standard machine calibration.
If you want a large hoop size under $700 and don’t mind a hands-on learning curve, the EOC05 is a powerful choice that produces retail-quality results. As your apparel business grows, you can easily upgrade to magnetic hoops to eliminate hooping friction, multi-needle setups to beat color-change bottlenecks, or full-scale commercial hardware for non-stop production.
However, even the best machine needs a flawless design file to prevent thread breaks and ruined fabric. While converting basic graphics is a fun hobby, mastering professional digitizing takes years. If you are looking for a reliable online embroidery digitizing service provider in Italy or globally, outsourcing to experts ensures retail-quality results without wasting materials.
This is where ZDigitizing can help your business thrive. We provide digitizing services backed by over 10 years of experience. Our expert 24/7 working team and 24/7 customer support ensure fast delivery worldwide.
We guarantee premium quality and provide a design preview before any payment. Plus, all minor edits are completely free, and our prices are already lower than the market rate.
Ready to experience premium embroidery digitizing quality? Visit ZDigitizing today to upload your artwork and get 50% OFF your first order!


