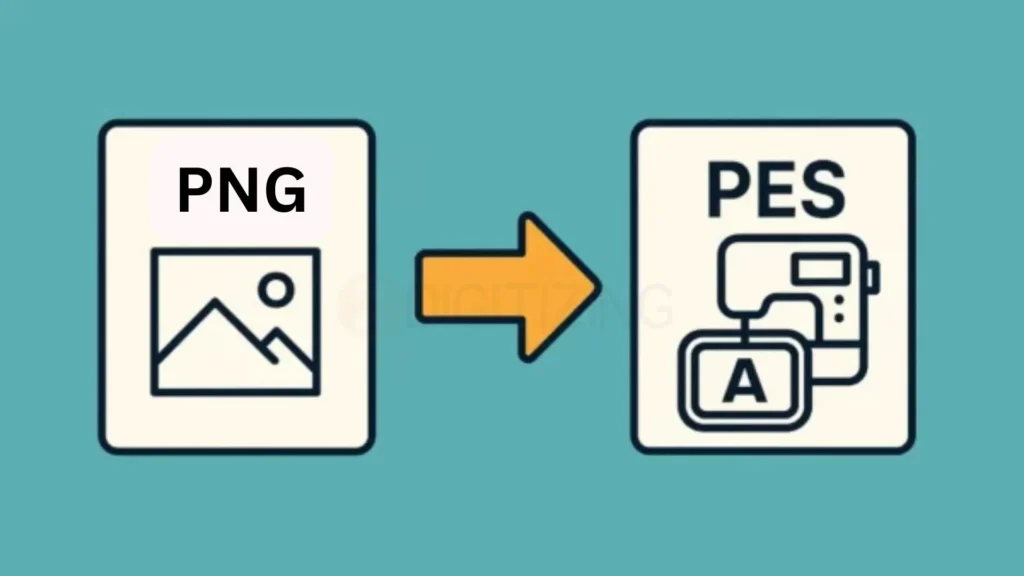
Right now, the most famous format after DST is PES because millions of people use it on Brother and Babylock machines. You need to learn how to convert PNG to PES so you can turn your digital logos, photos, or sketches into stitch-perfect files for your projects. My process is simple: clean your image, use tools like Ink/Stitch, and map your paths. I’ll show you my personal process using both free and paid tools to ensure your success.

How to Convert PNG to PES for Embroidery? Everything You Need to Know
Understanding the Basics of These Embroidery Files
When I first started in this industry, I thought I could just change the file extension on my computer. I was wrong. A PNG is a raster image made of thousands of tiny colored dots called pixels.
Your embroidery machine, like a Brother PE800, has no idea what a pixel is. It only understands commands like “move the hoop left,” “drop the needle,” or “cut the thread.”
What is a PNG File? (The “Flat” Picture)

A PNG is a “static” image. It is great for websites and printing because it supports transparent backgrounds. However, it lacks any data about depth, thread type, or stitch direction.
If you try to put a PNG on a USB drive and plug it into your machine, the machine won’t even see the file. It is essentially a flat map with no instructions on how to build the road.
What is PES File? (The “Instruction” File)

The PES format is a specialized CAD (Computer-Aided Design) file specifically for Brother, Babylock, and Bernina machines. It contains a “stitch map.” This map tells the machine exactly where every single stitch goes.
It also stores information about the “jump stitches”, those long threads the machine skips over when moving from one part of the design to another.
Why Embroidery Machines Need More Than Just Pixels?
Think of an embroidery machine like a person following a recipe. A PNG is just a photo of the finished cake. A PES file is the actual recipe that lists the ingredients and the steps to bake it. Without the instructions, the machine cannot function.
This is why you must convert PNG to PES using a process called digitizing, which maps out the path for the needle to follow.
Best Ways to Convert PNG to PES (From Free to Professional)
I have tested dozens of methods over the years, from $2,000 software suites to free websites. The “best” way usually depends on your budget and how much detail you need in your design.
If you are making a simple heart for a baby onesie, a free tool might work. If you are doing a complex corporate logo for a jacket back, you need professional help.
Using A PNG To PES Converter Online Free (Quick Way)
Online converters are the fastest option for beginners. These websites use “auto-digitizing” algorithms to guess where the stitches should go. While they are getting better, they often struggle with small text or complex gradients.
If you use a tool to convert PNG to PES free, always run a test stitch on a piece of scrap fabric first to check for errors.
Using Professional Software (High-Quality Way)
For those who want total control, software like Wilcom or Hatch is the gold standard. These programs allow you to “path” the design manually. You can decide which part of the design stitches first.
This prevents the fabric from shifting and keeps your outlines perfectly aligned. It is a steeper learning curve, but the results are world-class.
When To Hire A Professional Digitizer For Complex PNGs?
Sometimes, a design is just too hard for a computer to figure out. If your PNG has shadows, glows, or very thin lines, auto-conversion will likely fail. In these cases, outsourcing premium embroidery digitizing services in USA and worldwide is worth the $15 or $20.
They will manually create a convert PNG to PES embroidery file that is guaranteed to run smoothly on your machine without breaking needles.
Honest Truth About “Convert PNG to PES Free” Tools
We all love free things, but in the world of embroidery, “free” often comes with a hidden cost. There are many websites that claim to be a free PNG to PES converter.
While these can work for a very simple shape like a basic circle or a square, they usually fail when the design gets complicated.
Can You Really Get a Good File for $0?

In our testing, most free online converters use “auto-digitizing” scripts. These scripts don’t understand how fabric moves. They simply place stitches wherever they see a color. This often results in a design that is way too dense.
A dense design feels like a piece of cardboard on your shirt and can cause the fabric to pucker or even tear.
Danger of Automatic Conversion (Bird-Nesting and Needle Breaks)

One of the biggest headaches for any embroidery hobbyist is “bird-nesting.” This is when a huge clump of thread gets tangled under the needle plate. This often happens because a PNG to PES converter free tool didn’t include proper “jump stitches.”
The machine tries to stitch everywhere at once, and the thread has nowhere to go. We have seen many beginners get frustrated and quit the hobby simply because they used a bad automated file.
When to Use Free Tools and When to Run Away?
If you are just playing around with a simple silhouette for a scrap piece of fabric, a convert PNG to PES embroidery file free tool is fine.
However, if you are making a gift for a friend or a product for a customer, you should avoid them. If your design has text, multiple colors, or overlapping shapes, the free tools will likely create a mess that is hard to clean up.
Top 3 Software Picks for Converting PNG to PES Embroidery Files
Choosing the right software depends on your budget and how often you plan to sew. We have tested dozens of programs to see which ones make it easiest to convert PNG to PES for different skill levels.
Wilcom Hatch: Gold Standard for Professionals
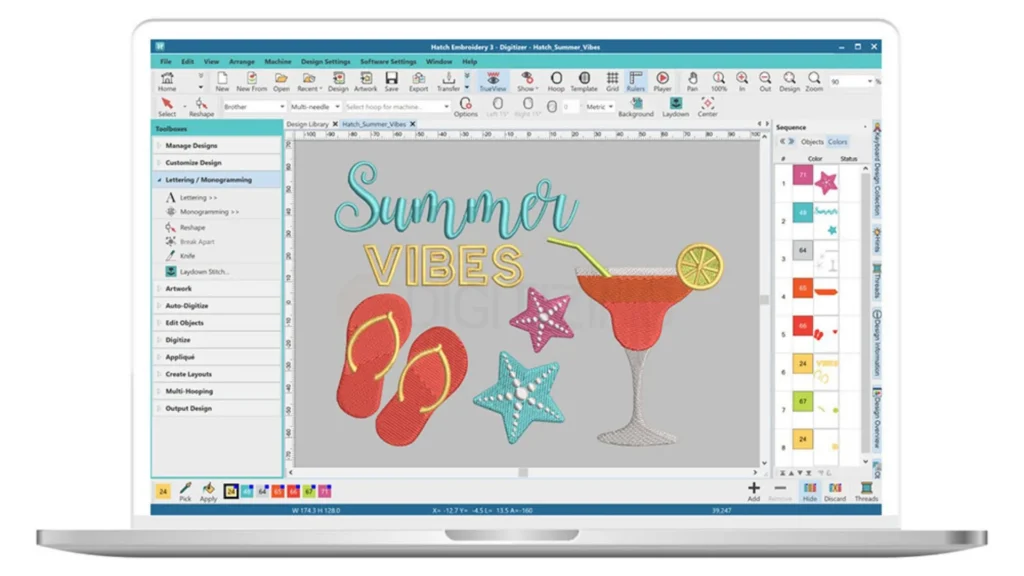
If you are serious about embroidery, Hatch is the best PNG to PES converter tool available. It is very user-friendly but has incredibly powerful features. It handles the “auto-digitizing” part much better than any other program.
It looks at the shapes and actually understands how a human would stitch them. Even though it is expensive, it saves you money by preventing wasted thread and ruined shirts.
Brother PE-Design: The Natural Choice for Brother Owners

Since Brother created the PES format, their own software is a great fit. It syncs perfectly with their machines. If you have a Brother Luminaire or Stellaire, you can even send your files wirelessly.
It makes the process to convert PNG to PES embroidery file very smooth because the color palettes in the software match the thread brands you likely buy.
Ink/Stitch: Best Free Open-Source Option for Tech-Savvy Users

If you are on a budget and don’t mind a learning curve, Ink/Stitch is amazing. It is an add-on for a free drawing program called Inkscape.
It allows you to how to convert PNG to PES without spending hundreds of dollars. However, be warned: it is not “one-click.” You have to manually tell the software what every single line is doing.
How to Convert PNG to PES Using Free Online Tools?
If you are in a rush, a free tool can be a lifesaver. I often use these for simple mockups or quick personal projects. The key is to prepare your image correctly before you upload it. If your image is messy, your embroidery will be messy too.

Step 1: Finding a Reliable Free Convert PNG to PES Tool
Not all websites are safe or effective. Look for tools that have been around for a while and have positive reviews in embroidery forums.
Avoid sites that ask for too much personal information or try to install weird plugins on your browser. A good PNG to PES converter free should be straightforward: you upload, you convert, and you download.
Step 2: Uploading Your Image for the Best Results
Before uploading, make sure your PNG has a high resolution (at least 300 DPI). If the image is blurry, the software will create jagged “staircase” stitches that look terrible.
Crop out any unnecessary white space around your design to keep the file size small and the focus on the actual artwork.
Step 3: Setting Your Colors and Stitch Types
Once the image is uploaded, the tool will usually ask how many colors you want to use. Try to limit this to 5 or 6 colors. Each color represents a thread change on your machine.
If you have too many, you will spend your whole afternoon changing spools. Choose “Satin Stitch” for narrow areas and “Tatami” or “Fill” for larger shapes.
Step 4: Downloading and Testing Your File
After the site processes the image, it is time to convert PNG to PES file and save it to your computer. Don’t go straight to your expensive garment.
Put the file on your USB, load it into your machine, and stitch it onto a piece of stabilizer or old denim. This is where you will see if the stitches are too tight or if there are gaps in the design.
How To Convert PNG To PES Using Professional Software (Wilcom, Hatch, Or Embrilliance)?
Professional software is where the real magic happens. I remember the first time I used a professional suite; it felt like I had finally gained X-ray vision into my embroidery designs.
Preparing Your PNG Image for the Best Results
Before you even open your embroidery software, look at your image. Is it blurry?
Does it have a lot of tiny details?
A clean image makes the job much easier. You should use a PNG to PES converter online tool only after you have made the background transparent and made the colors solid.
Step 1: Cleaning Up Backgrounds and High-Contrast Edges
Most software gets confused by shadows or gradients. If your PNG has a shadow, the software might think that needs to be stitched in grey thread.
Use a photo editor to remove anything you don’t want to stitch. Once the image is “flat,” it is much easier to convert PNG to PES file format without errors.
Step 2: Setting the Design Size and Stitch Directions
One of the most common mistakes is digitizing a design at the wrong size. If you digitize a small 2-inch logo and then try to stretch it to 10 inches on your machine, the stitches will stay the same size and leave huge gaps.
When you convert PNG to PES file free versions often ignore this, but professional software lets you set the exact hoop size from the start.
Step 3: Choosing the Right Underlay for Your Fabric
Think of underlay as the “primer” paint for your embroidery. It is a layer of light stitching that goes down first to attach the stabilizer to the fabric. If you are stitching on a towel, you need a heavy underlay so the top stitches don’t sink into the loops of the towel.
If you convert PNG to PES online through a basic site, you won’t get to choose your underlay, which leads to poor quality.
Step 4: Saving and Exporting Your Final PES File
Once you have set your paths, colors, and underlay, it is time to export. Always double-check your “trim” settings. This tells the machine to cut the thread between different parts of the design.
When you convert PNG to PES format properly, you will have very little “clean-up” work to do with your scissors after the machine finishes.
Essential Tips for a Perfect PNG to PES Embroidery File
After thousands of designs, I’ve realized that the preparation phase is the most important. You can have the best machine in the world, but if the file is bad, the output will be bad.
Here are the “Golden Rules” I follow every time I need to convert PNG to PES online or via software.
Why High-Resolution PNGs Make Better PES Files?
Small, pixelated images are the enemy of embroidery. When a converter tries to read a blurry edge, it sees it as a “fuzzy” area and tries to create thousands of tiny, useless stitches to mimic that fuzz. This leads to thread breaks. Always start with a crisp, clear image.
Removing The Background: Why Transparency Matters

If your PNG has a white background, the converter might think that the white box is part of the design. It will try to stitch a giant white square around your logo.
Use a photo editor to remove the background entirely before you how to convert PNG to PES for your project. This saves you thread and keeps the design flexible.
Reducing Color Counts to Save Thread and Time
Gradients (colors that fade into each other) look great on a computer screen, but they are very hard to do with thread. Most embroidery is made of “solid” blocks of color.
Simplify your design to just the essential shades. Your machine will thank you, and your design will look much “punchier” and more professional from a distance.
Troubleshooting Common Issues After You Convert PNG to PES
Sometimes issues happen even if you are using great software. Embroidery is a physical process, and physics doesn’t always cooperate. If you convert PNG and the machine struggles, don’t panic.
Most issues have a simple fix.
My Machine Doesn’t Recognize the PES File (Common Fixes)
The most common reason for this is a USB drive that is too big. Many older embroidery machines cannot read a USB drive larger than 4GB or 8GB. One more possible reason is the name of the file.
Some machines hate special characters like @ or #. If you convert PNG to PES and it won’t show up, try renaming it to something simple like “TEST1.pes.”
Design is Too Large for My Hoop

Machines have a “hard limit.” If your hoop is 4×4 inches and your design is 4.1 inches, the machine will refuse to start. You cannot just shrink the file on the machine screen because that doesn’t change the stitch count. You must go back to your computer and the correct size.
Thread Keeps Breaking in the Same Spot
If the thread breaks in the exact same place every time, it’s not the thread, it’s the file. There is likely a “knot” of stitches in that spot. This often happens when you convert PNG to PES from an image that had a tiny speck of dust on it.
The software tries to stitch that speck with 50 stitches in a 1mm area. Delete those stitches in your software and try again.

Conclusion
In this guide, we explained the real process used to convert PNG to PES for embroidery. As you saw, changing a simple image into an embroidery file is not just one click. It needs proper artwork preparation, digitizing skills, and correct stitch settings so the machine can stitch the design smoothly.
When you convert PNG to PES, things like stitch direction, density, and underlay are very important to get clean embroidery on fabric.
However, many beginners find this process difficult. Learning digitizing software and fixing stitch problems can take a lot of time. Because of this, many embroidery businesses choose to hire a professional digitizer instead of doing everything themselves.
If you need help, ZDigitizing is ready to support you. We have been working in embroidery digitizing for more than 10 years. We have a team of highly experienced digitizers who know how to prepare designs for caps, shirts, jackets, and many other embroidery projects.
We also offer 24/7 customer support, so if you have any questions or problems, our team is always available to help you. If you need a quick order or fast delivery, we can handle that as well.
Before you make any payment, we also send a PDF preview of your design. This allows you to check your design and see how it will look in embroidery before production starts. If you are looking for online logo digitizing, our team can quickly convert your artwork into a professional embroidery file ready for stitching.
To help new customers test our service, we are offering 50% OFF on your first order. This gives you the chance to check our quality at half the price.
If you want a clean and professional embroidery file without stress, contact ZDigitizing today and let our expert digitizers prepare your design perfectly for embroidery.


