To master professional sequin embroidery at home, you simply need to stitch shiny discs onto fabric using a needle or machine. This technique adds luxury and 3D texture to any garment by catching light from every angle. By choosing the right polyester thread and a sharp 90/14 needle, you can create durable, glittering designs that stay secure. Whether you are sewing by hand or using an industrial machine, this guide provides the exact steps to achieve a perfect finish.
Sequin Embroidery: Techniques, Machines & Design Ideas Explained
What Is Sequin Embroidery?
It is a special way to decorate clothes by sewing small, shiny plastic discs onto fabric. These discs, often called embroidery sequins, come in many colors and sizes to make your designs sparkle. You can sew them by hand for custom work or use a machine to finish large projects quickly.
The process involves passing a thread through the tiny hole in the center of the sequin to lock it down. Because these discs are made of plastic, they catch the light and make your clothing look bright and expensive.
It is a great skill to learn if you want to turn a plain piece of fabric into something that looks like it belongs on a fashion runway.
Types of Sequins Embroidery
In my 10 years of sewing, I tested many kinds of embroidery sequins. They are not all the same. Some shine more. Some fit better on clothes.
Knowing the sequin embroidery techniques
1. Flat Sequins
They are the easiest for new sewers. They lay down smooth on the fabric. No bumps. I use 5mm flat ones to fill big areas like backgrounds. They cover space fast without making thick spots. Great for pillows or tote bags. I buy them in 1000 packs for just a few dollars.
2. Cupped Sequins
Cupped sequins bend up a bit like a tiny bowl. This shape catches light from far away. In my tests, 7mm cupped ones make dresses shine bright at night parties. They add height and fun to designs. But you must stitch them tight, or they flip. I use them for flowers or stars.
3. Holographic Sequins
Holographic sequin embroidery change color when you move. Like magic rainbows. Kids love them on backpacks or shirts. I made a backpack with 6mm holographic ones. It looked plain in store light but exploded in colors outside. They cost extra but make people smile big.
4. Novelty Sequins
Novelty ones come in fun shapes like hearts, stars, or tiny flowers. Not round. I sewed star sequins on Christmas ornaments last year. They made simple balls look fancy. But watch out, they can catch on nails or zippers if not sewn well.
Here is a table I made from my own stock and tests. It shows what works best:
Type | Size Range | Best For | Shine Level | Cost per 1000 | My Tip |
Flat | 3-10mm | Big areas like pillows | Medium | $2-4 | Use for beginners |
Cupped | 5-8mm | Dress edges or flowers | High | $4-6 | Stitch twice for hold |
Holographic | 4-7mm | Kids clothes or bags | Very High | $6-8 | Test on scrap first |
Novelty | 5-12mm | Holidays or fun themes | Medium | $5-7 | Small sizes only |
Sequin Embroidery Tool and Supplies
No good sequin comes without the right tools. I’ve ruined projects with wrong gear, so listen up. Start with basics and build from there. My kit has saved me hours of frustration.
1. Needles for Sequin Embroidery
A sequin needle for embroidery is key. Use size 80/12 or 90/14 ballpoint needles. They glide through fabric without snags. I switched to Groz-Beckert after breaking ten generics. They last 8 hours of sewing.
2. Threads and Stabilizers
Polyester thread in matching colors holds best. For stabilizers, cut-away works under sequins. Water-soluble tears clean but puckers on stretch fabric. I pair tear-away with cotton for patches.
3. Hoops and Frames
Magnetic hoops grip tight. My 5-inch ones from Maggie Frames speed hooping by 50%. For big sequin embroidery patterns, use floor stands.
4. Sequin Embroidery Kit Essentials
A full sequin kit saves hunting. Mine has 1000 embroidery sequins, tweezers to place them, and tape to hold rolls. Brother’s kit is $25 with 10 colors, perfect start.
Add extra bobbins, small scissors, and a chalk pencil. My whole setup cost $150. It paid back in one market day.
Don’t buy junk tools. Cheap needles and jam machines lead to $200 fix bills. I test new ones on scrap fabric first. Keep kit organized in a toolbox. Clean after each use, dust kills shine. For handwork, add a thimble to push the needle safely.
Hand Sequin Embroidery Techniques
I started with hand sequin techniques before machines. It’s slow, about 100 sequins per hour. But you control every piece. Perfect for tiny spots machines miss. Great if you fear tech.
Let me walk you through my steps:
Step 1: Prep Your Fabric
Wash and iron the fabric flat. No wrinkles. Draw your design light with washable chalk. Hoop it tight with a stabilizer underneath.
My trick: tape edges to the hoop so no slip.
Step 2: Thread the Needle
Pick a thin beading needle. Wax your thread, double it for strength. The knot end is small.
Step 3: Sew Single Sequins
Push the needle up through the fabric. Slide one sequin down the thread. Push back down through the center hole. Make a tiny stitch over it. Pull snug. Space 1/8 inch apart for lines.
Step 4: Fill Big Areas
For full shapes, overlap sequins slight. Work left to right. My big flower took 2 hours but looked store-bought. Use a straight or zigzag stitch under each.
Step 5: Finish and Secure
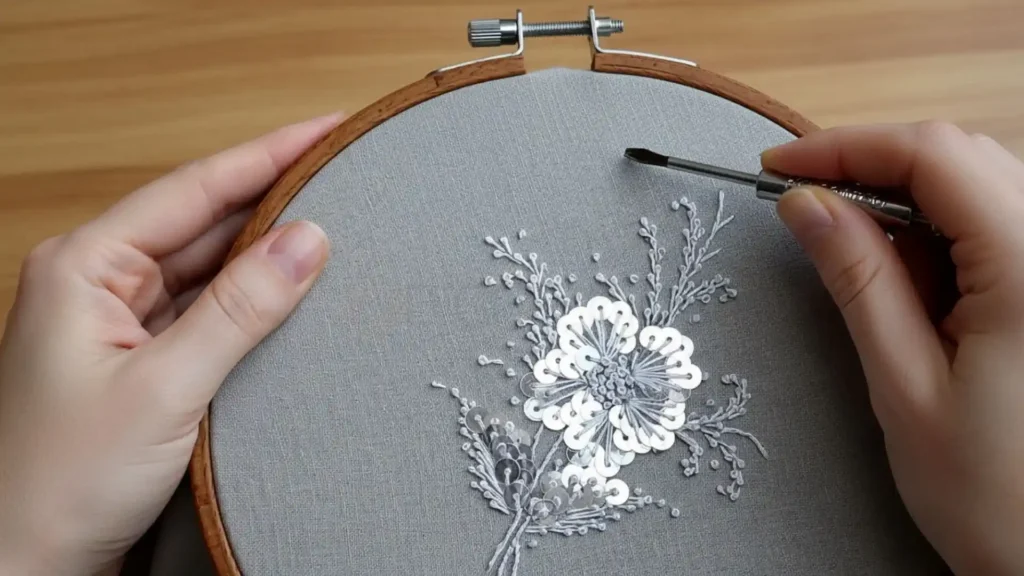
Knotted the back side many times. Trim threads close. Press flat with a cloth over the iron.
Best Sequin Embroidery Machines for Home and Business
If you want to move from hand sewing to faster production, you need to find a high-quality sequin machine.
I have looked at many models, and these are the best ones for sequin machine embroidery based on how easy they are to use and how well they last.
1. Brother SE1900 (Best for Home Hobby)
The Brother SE1900 is a great choice if you are just starting at home. While it does not have a “sequin feeder,” you can buy a special sequin embroidery tool called a beading foot for it.
This machine is very friendly for beginners and has a large screen to help you see your patterns. It is perfect for small projects like adding a name or a small flower to a shirt.
2. Ricoma EM-1010 (Best for Small Business)
If you want to start a small shop, the Ricoma EM-1010 is a powerful pick. You can add a “Sequin Device” to this machine. It is much faster than a home machine and can handle heavy work.
This is the machine I suggest if you want to make sequin embroidery patches to sell online. It is reliable and comes with good training videos.
3. Tajima TMBR-SC Series (Best for Professionals)
Tajima is the “king” of embroidery machines. This is a high-end machine used by big fashion brands. It has a very smart system that drops sequins perfectly every time.
If you have the budget and want to do custom embroidery for famous brands, this is the machine you should get. It is very fast and almost never breaks.
Sequin Embroidery Setup for Machine
A bad setup ruins sequin machine embroidery and wastes time. I once lost 5 hours because I skipped the prep!
Now, I follow this 10-minute checklist to save my work.
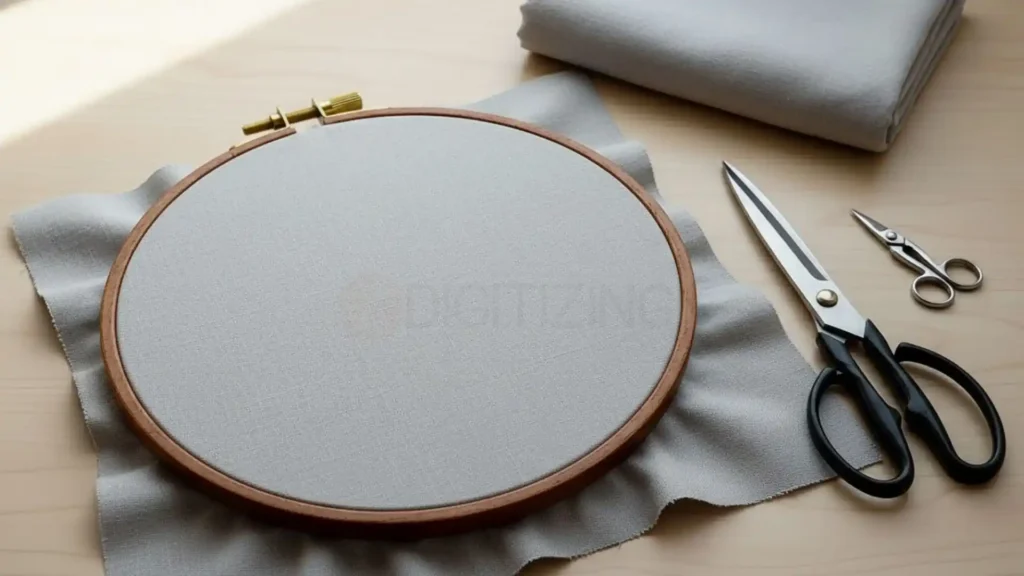
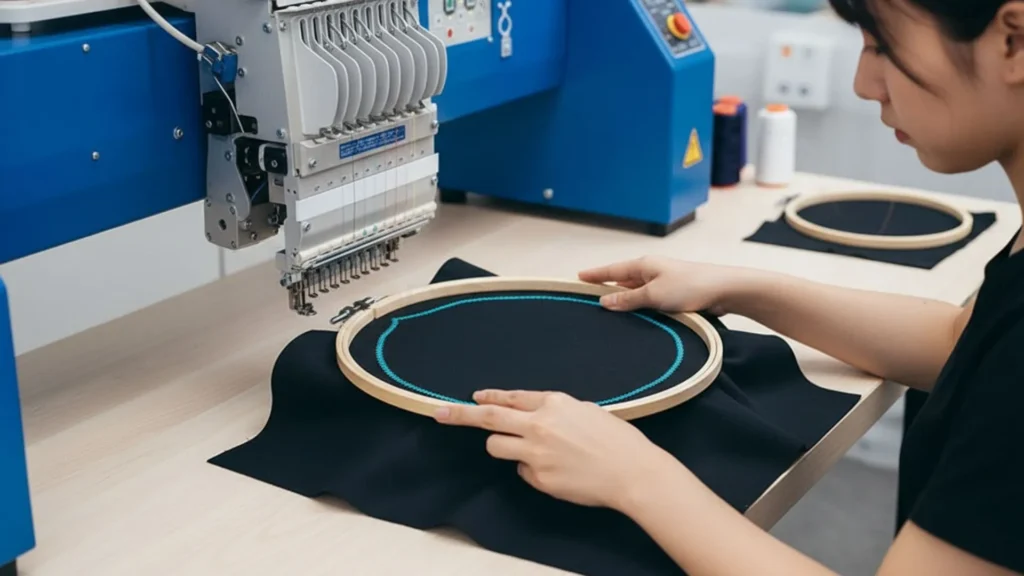
Hooping the Fabric
Lay your stabilizer down first. Use a sticky-back type for stretchy fabrics to keep them still. Smooth the fabric so there are no pulls. Before starting, tape your sequin embroidery roll securely into the feeder device so it doesn’t wobble.
Machine Attachments
The sequin feeder holds the roll and drops the discs. Tighten all screws firmly so the attachment stays steady. Check your thread path: I set the top tension at 1.2 and the bobbin at 0.4 for a clean finish.
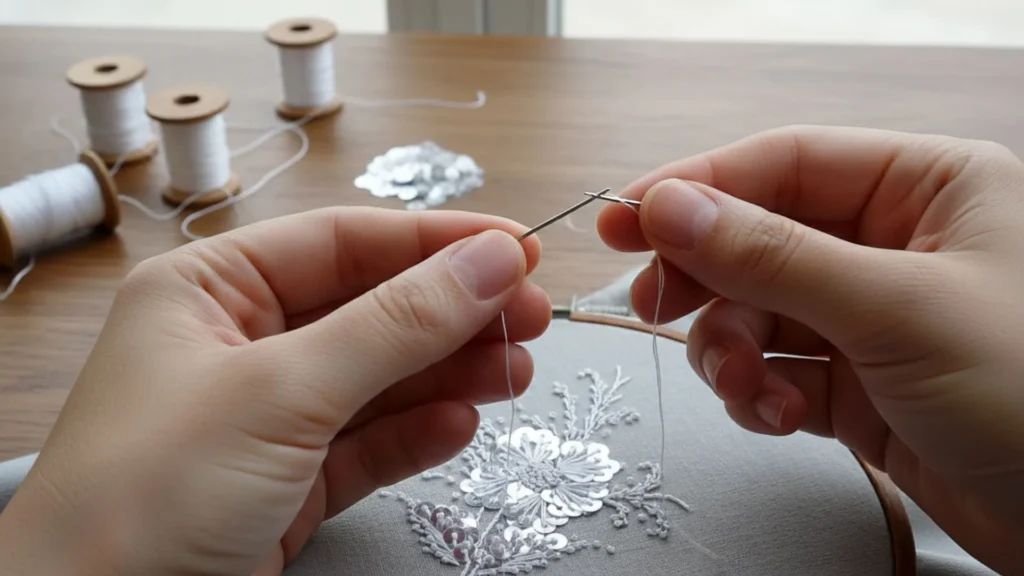
Needle and Bobbin
Always use a new needle every 4 hours. A 90/14 ballpoint is the best choice. Wind your bobbins slowly so the thread is smooth. Before you start, sew 10 test stitches on scrap cloth.
My Quick Checklist:
- Fabric: Pre-wash it so it won’t shrink later.
- Stabilizer: Use two layers for stretchy shirts.
- Size: Make sure the sequins match your design file.
- Clean: Wipe away plastic dust daily to prevent jams.
Setting up sequin machine embroidery correctly is the secret to a perfect, sparkling design.
How to Create Your Own Sequin Embroidery Designs?
I have found that having the right design is the most important part of the job. If the file is not made correctly, your sequins will not lay flat.
You have two main ways to get these files: you can learn to make them yourself using software, or you can hire an expert to do it for you.
Digitizing with Professional Software
If you want to learn how to make your own sequin designs, you will need special software. I often use programs like Wilcom, Pulse, or PE-Design. These programs have a “Sequin Input” tool that lets you click where you want each disc to drop.
When I am digitizing, I make sure to set the stitch length so it matches the size of my sequin embroidery discs perfectly.
It takes a bit of time to learn, but it gives you total control over your art. You can choose exactly how much the sequins overlap and what direction they face to catch the most light.
Using Custom Digitizing Services
I understand that mastering professional software can feel overwhelming and takes a lot of practice. If you don’t have the time to learn or if you have a very difficult logo, you should use custom sequin embroidery services. This is where we can help you at ZDigitizing.
We provide online embroidery digitizing services in USA that are fast and very affordable. Our team knows exactly how to set up a file so it doesn’t jam your machine. Instead of spending hours fighting with software, you can just send us your image. We will send back a perfect file that is ready to sew.
Using a pro service for your sequin designs is the best way to get a high-quality look without the stress of doing the technical work yourself.
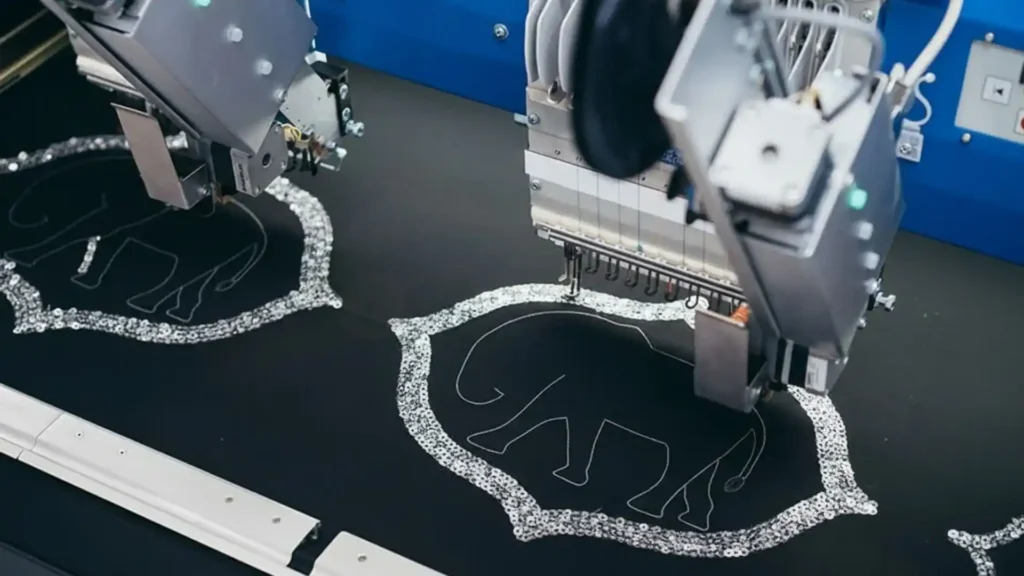
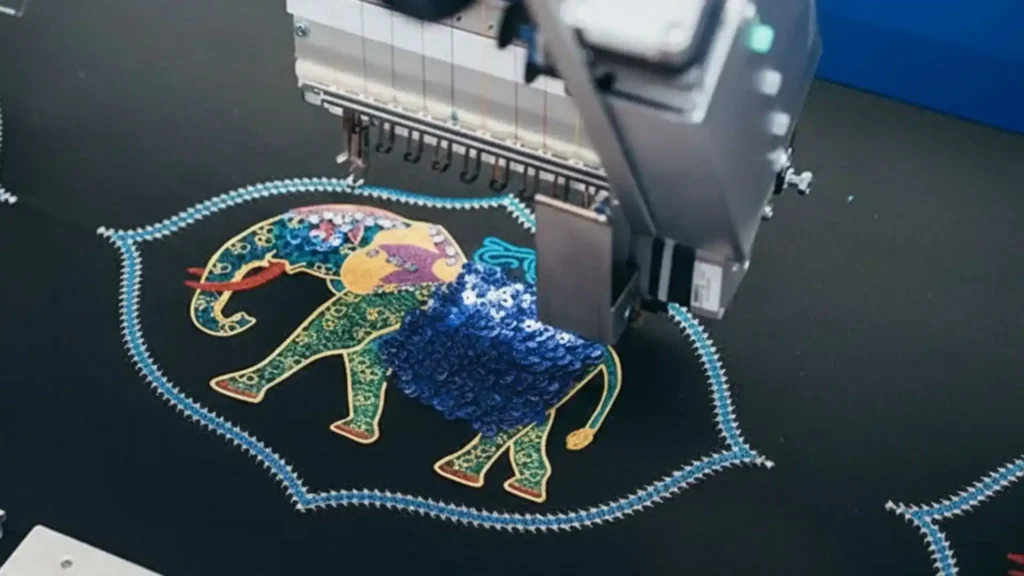
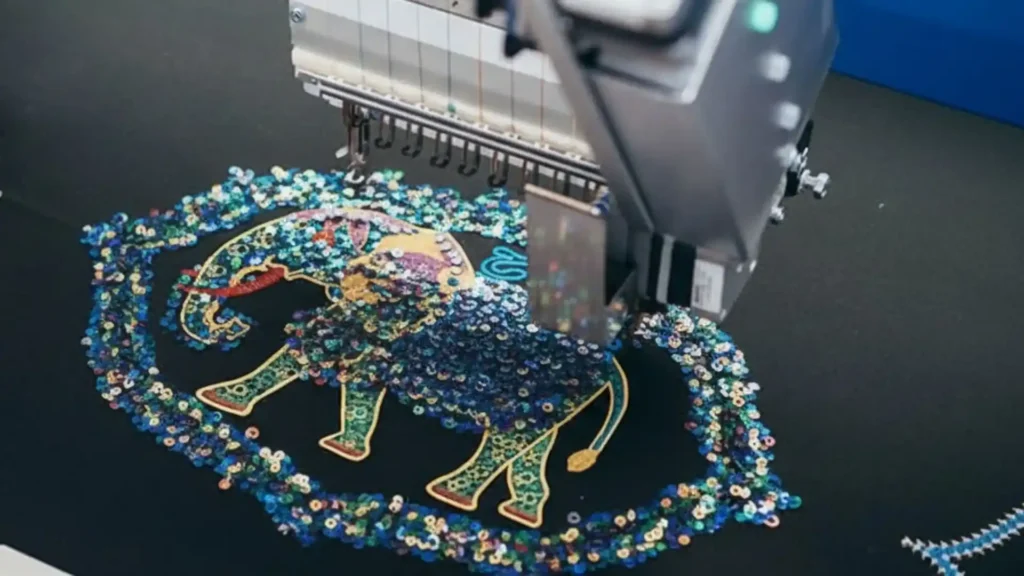
Step-by-Step Sequin Embroidery Techniques on Machines
Machine sequin makes shiny designs fast and neat. I use these steps every day in my shop. They work on home machines like Brother or big ones like Ricoma. Start slow and practice on scrap fabric first. Follow along, and you will make pro results.
Here is the full process in easy steps.
Step 1: Pick Your Design and Sequin Type
Choose a simple shape first, like a heart or a star. Match your sequin embroidery designs to your machine size. I pick flat embroidery sequins for new tries because the 5mm size slides easily.
Load the design into software like PE-Design. Set your sequin spots with single or fill mode. Print a test sheet to check spacing. This step takes 5 minutes but saves hours later.
Step 2: Gather Supplies and Prep Machine
Grab your sequin embroidery fabric, some stabilizer, and a size 90/14 sequin embroidery needle. Make sure you cut the stabilizer so it is larger than your hoop. Thread the machine with shiny polyester thread that matches your sequin color.
Install the sequin device by snapping the roll holder in place. Wind your bobbins slowly until they are full. Clean any lint from the last use. I always oil the moving parts now because it stops jams.
Step 3: Hoop Your Fabric Right
Lay sticky stabilizer down in the hoop. Smooth your fabric over it so there are no wrinkles. Pull it tight like a drum. Use tape on the edges if the fabric is stretchy.
For thick items like bags, use magnetic hoops because they grip fast. Center your design with a laser pointer if your machine has one. My trick is to finger-press the seams flat first.
Step 4: Set Machine for Sequin Mode
Turn on the sequin embroidery function until the button lights up. Set your speed to 500 SPM. Set your tension at 1.2 for the top and 0.4 for the bobbin. Pick your stitch type: use a single drop for lines and a zigzag for fills.
Test this on scrap fabric by sewing 10 sequins. If they flip over, slow down the speed. I test every project to ensure there are no skips.
Step 5: Start Single Sequin Lines (Outlines)
Hit the start button. The machine drops one sequin, and the needle stitches through the center hole. Watch it to make sure it lays flat. This is good for edges like letters or flowers.
My logo outline took 15 minutes for 4 inches. Stop if the sequins bunch up, just lift the presser foot and pull them out. Resume with a color change if you are using multiple colors.
Step 6: Fill Big Areas with Sequins
Switch the machine to fill mode. The rows will drop close together, about 0.5mm apart. Slow the machine to 400spm for cupped sequins so they stack neatly, without gaps.
I filled a 6-inch circle on a skirt in 20 minutes. Overlap them slightly for the best shine. Pause every 1,000 stitches to check the tension and adjust the knob with small turns.
Step 7: Layer Sequins for a 3D Look
Sew your base layer of sequin embroidery flat first, then put cupped sequins on top. Use a running stitch between them. This adds a “pop” that looks like real jewels.
My dress sample had 3 layers and caught the light from all sides. It takes about 10% longer to do this, but it really wows the customers!
Step 8: Finish and Check Your Work
End the project with a satin stitch border to lock the edges in place. Cut the extra threads and remove the hoop slowly. Tear the stabilizer away carefully and shake off any extra bits.
Press the back side of the fabric with a cloth, but never put a hot iron directly on the sequins. Inspect the work under a bright light and fix any loose ones by hand.
Step 9: Troubleshoot Common Issues
If the machine jams, stop it fast! Open the bobbin area and pull the thread straight out. If the shine looks dull, it might be the wrong angle, so try redoing it with the swing device.
If the fabric puckers, add another layer of stabilizer. If the machine skips stitches, put in a new sequin needle. I fix 5 to 10 of these issues a day in just 2 minutes now.
Different Sequin Embroidery Ideas You Can Try
I love using sequin to turn everyday items into sparkling art. In 2026, the best trends mix bold neon colors with classic gold. Here are 15 fresh ideas from my recent projects that you can try today!
- Jacket Back with Bold Logo: Use 10mm cupped gold sequins for a big team shape. I always use the best jacket back digitizing to make sure large logos on leather or denim stay flat and never snag.
- Wedding Dress Flowers: Add layered roses to a neckline using flat pink and cupped white sequins. This makes the dress glow in photos and looks very high-end.
- Kid’s Backpack Stars: Scatter 6mm holographic stars across a backpack. Kids love the sparkle, and it only takes 20 minutes to sew with a stretch stabilizer.
- Jeans Pocket Hearts: Put small 4mm red hearts on denim pockets. It is a perfect touch for a date night outfit and very easy to do.
- Pillow Cover Butterflies: Use rainbow butterfly sequins for living room pillows. I layer them two-deep to make the colors really pop.
- Dancewear Skirt Panels: Use neon 7mm sequins on stretchy skirts. These move with the body and are perfect for a stage performance.
- Tote Bag Monogram: Stitch big gold 8mm letters for a personal name. Use a satin edge lock to make sure the sequins stay safe during daily use.
- Holiday Ornament Trees: Make green trees with a star on top for Christmas. These are great gifts and look wonderful hanging on a tree.
- Phone Case Lips: Use tiny 3mm red cupped sequins for a “pouty lips” design. It is a very popular look for teens right now.
- Curtain Waves: Stitch blue waves across the top of your kitchen curtains. The room will light up when the sun or lamps hit the sequins.
- Sports Jersey Numbers: Use 10mm silver sequins for team numbers. They are game-proof and do not fade after washing.
- Scarf Edge Fringe: Add a dainty line of 4mm sequins along the edges of a silk scarf for an elegant winter look.
- Wall Hanging Sun: Create a giant yellow sun for your wall. A 12-inch design with gold center fill makes a beautiful “Boho” decoration.
- Hat Brim Crowns: Sew mini crowns on the brims of caps. This is a fun festival look that sells very well at local fairs.
- Table Runner Zigzags: Use neon 6mm flat sequins in a zigzag pattern down a table runner. It makes any party table look exciting.
These custom sequin embroidery ideas are a mix of easy and “wow” projects. I always test my work on scrap fabric first to adjust the spacing.
In 2026, mixing holographic sequins with flat ones is the best way to stay on trend. Whether you sell your work on Etsy or just make gifts for friends, you will love how these sparkle!
Conclusion
I truly believe that sequin embroidery is the best way to grow your fashion business or hobby. It adds a special touch that people are happy to pay more for. I know that getting the technical parts right can feel tricky at first, but once you see that first design sparkle on your fabric, you will be hooked!
You don’t have to worry about the difficult parts of digitizing by yourself. At ZDigitizing, we have over 10 years of experience helping people get perfect results. Our team of expert digitizers is here for you 24 hours a day.
This means if you have an urgent order or need a quick change to a file, we can finish it for you very fast. We also provide the best hat digitizing services if you want to add sequins to caps and hats.
We want to make it easy for you to try our services. That is why we are giving you 50% off your first order! We guarantee that our files will be high quality and super affordable. We are here to make sure your sequin embroidery designs look amazing every single time you hit the start button on your machine.
So, Let’s get started and save you 50% on your first project!