I still remember the day I sat down to digitize photos for embroidery. It started with a faded picture of my grandma’s old dog, Max. I wanted to bring it to life on a quilt. After hours of trial and error, I had a stunning stitched version that looked just like the photo. You can do this too. This guide shares my real tests and fixes from hundreds of projects, so you can skip my early mistakes. Follow along, and your first design will stitch out sharp and lasting.
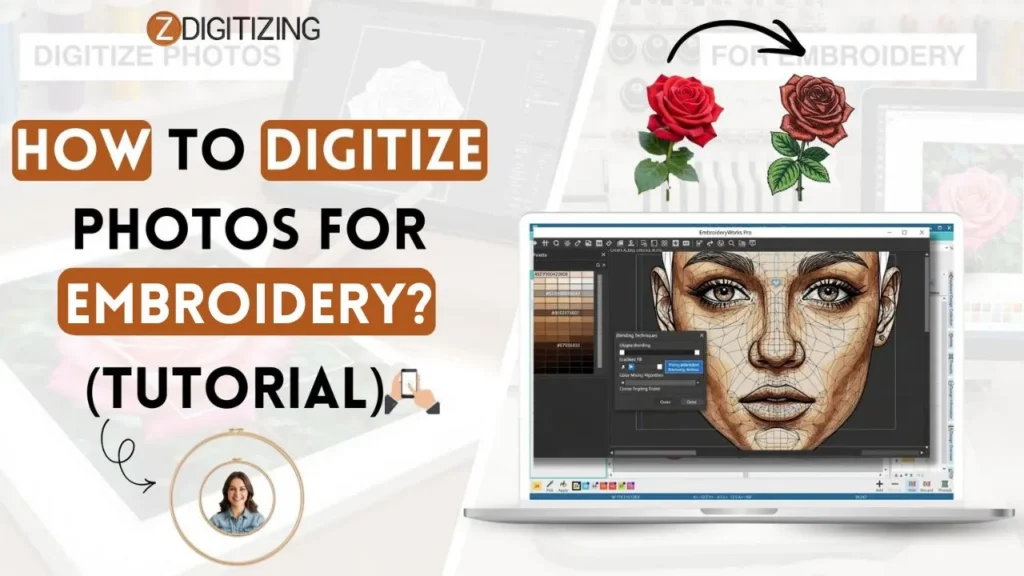
How to Digitize Photos For Embroidery? (Tutorial)
What Does It Mean to Digitize Photos for Embroidery?
Digitizing a photo for embroidery takes a flat image full of pixels and turns it into instructions for your machine’s needle. It creates paths for threads to follow, building colors and shapes with real stitches.
Difference Between a Regular Photo and an Embroidery File
A regular photo is a flat image. It has millions of colors that blend into each other. An embroidery file, however, is a set of instructions. It is more like a map.
If you look at a file on your computer, it might be a .JPG or .PNG. But an embroidery machine looks for files like .DST or .PES. These files contain “stitch data.” This data tells the machine the X and Y coordinates for every single stitch.
Why You Cannot Just “Print” a Photo Onto Fabric with a Needle?
I have seen many beginners try to use “auto-conversion” tools to digitize photos for embroidery, thinking it works like a paper printer. It does not.
A printer can lay down tiny drops of ink on top of each other. A needle cannot do that without breaking or creating a giant mess of thread known as a “bird’s nest.”
You have to plan for the thickness of the thread. If you put too many stitches in one spot, the fabric will rip. If you put too few, the image will look like a ghost.
Essential Tools You Need to Digitize Photos for Embroidery
Before you start, you need the right gear. Based on my experience with various setups, having a powerful computer is just as important as having a good embroidery machine.
Professional vs. Free Software: Which One Should You Choose?
There are many options for digitize photos for embroidery software. If you are a professional, you might use Wilcom or Hatch.

These programs have advanced “photo-stitch” engines that do a lot of the heavy lifting for you. For those on a budget, Inkstitch is a free plugin for Inkscape. However, be warned: free software often requires much more manual work and a steeper learning curve to get a photo looking realistic.
Recommended Computers and Graphic Tablets for Better Precision
Digitize photos for embroidery is a visual task. I recommend using a computer with at least 16GB of RAM and i5 processor. Processing thousands of stitches can slow down a weak laptop. A graphic tablet, like a Wacom, is also a game-changer.
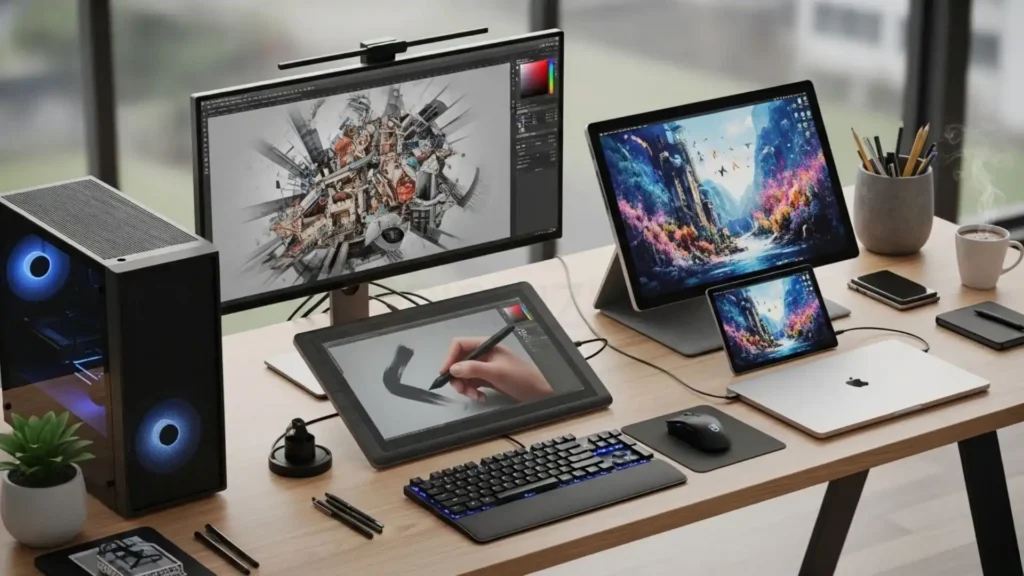
Using a pen to trace the eyes or nose of a portrait is much more natural than using a clunky mouse. It allows for the fine motor control needed for high-quality results.
Choosing the Right Embroidery Machine for High-Detail Photos
Not all machines handle digitize photos for embroidery well. You need a machine that has excellent tension control. I prefer using multi-needle machines for photos.
Why?
Because a photo might have 15 different shades of brown and tan. On a single-needle machine, you would have to stop and change the thread 15 times. On a multi-needle machine, you can set it and walk away.
Selecting the Perfect Photo for the Best Results
The quality of your finished piece depends 90% on the photo you start with. If the photo is bad, the embroidery will be bad.
Why High-Contrast Photos Are Easier to Digitize?
Contrast means how much light and dark stand out from each other. When you digitize photos for embroidery, the software uses these differences to decide where to put different thread colors.
If a person is wearing a white shirt against a white wall, the software will get confused. A person with dark hair against a light background is much easier to turn into a beautiful stitch pattern.
Photos You Should Avoid (And Why They Will Fail)
Avoid photos that are blurry or “noisy.” If a photo is grainy, the software will try to turn that grain into tiny, messy stitches.
Also, avoid photos with too much fine detail, like a crowded forest in the background. Your embroidery machine cannot recreate a leaf that is only 1 millimeter wide. Keep the focus on large, clear subjects.
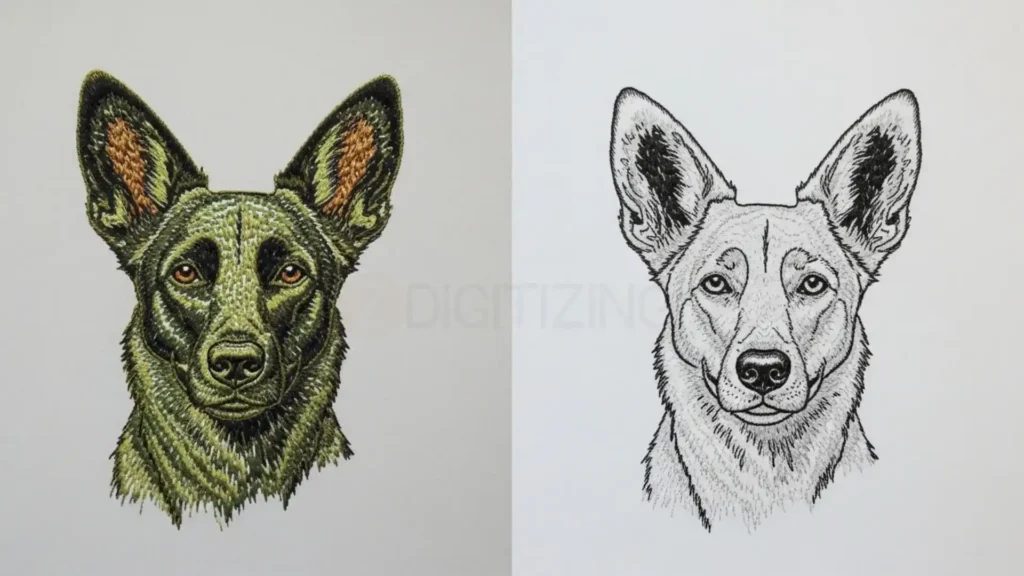
Using Portraits vs. Landscapes: What Works Best?
Portraits of people and pets are the most popular items to digitize photos for embroidery. Landscapes are much harder because they have complex gradients (like a sunset).
If you are new to this, start with a high-quality photo of a dog or a cat. Their fur provides a natural texture that hides small mistakes in your digitizing.
Step 1: Pre-Processing Your Photo (The “Secret” Step)
Most people skip this step, but it is the secret to a professional finish. You must prepare the image before you even open your embroidery software.
Using Photo Editors to Remove Distracting Backgrounds
I use a program like Photoshop or a free online background remover. If you only want to embroider a person’s face, remove the trees, cars, or buildings behind them.
This keeps the stitch count lower and makes the subject pop. When you digitize photos for embroidery, you want the machine to focus only on what matters.
How to Increase Contrast and Sharpness in the Software?
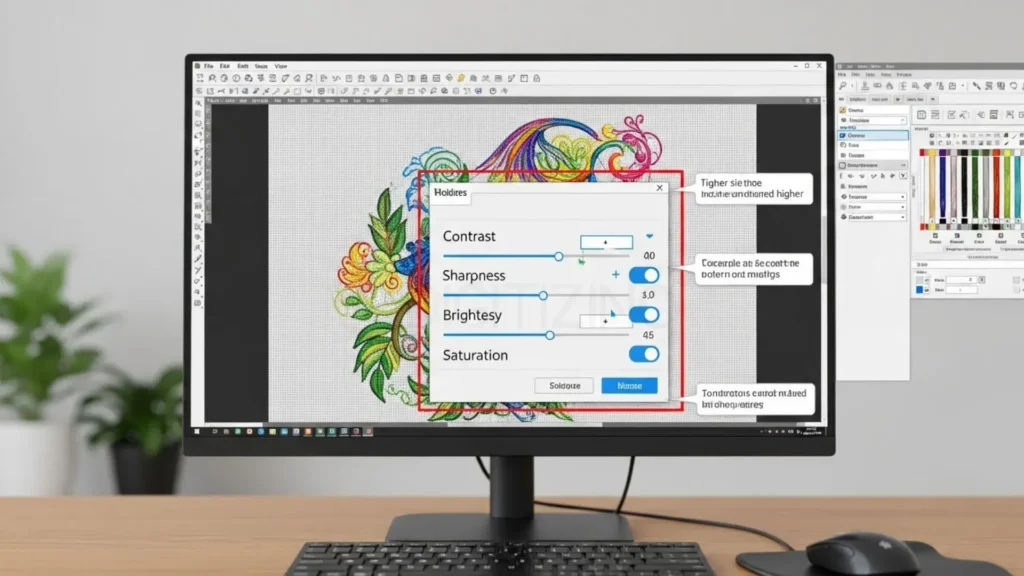
In your photo editor, turn up the “Contrast” and “Clarity.” You want the edges of the face and features to be very sharp. I often use a “Posterize” filter.
This reduces the millions of colors into just 10 or 12 solid blocks of color. This makes it much easier for the embroidery software to map out the thread paths later on.
Converting Your Image to Grayscale or Limited Colors
Unless you are an expert, do not try to use 40 colors to digitize photos for embroidery. Try converting the photo to grayscale first. Mastering a “monochrome” (one color) or “sepia” portrait is the best way to learn.
It teaches you how density and stitch direction create shadows without the distraction of matching many thread hues.
Step 2: Choosing Your Digitizing Method
There are three main ways to handle the task of digitize photos for embroidery. Your choice depends on your skill level and the software you own.
Auto-Digitizing (The Fast Way): Pros and Cons
Auto-digitizing is when you click a button, and the software creates the stitches for you.
- Pros: It is very fast and great for simple shapes.
- Cons: It often creates too many stitches. It doesn’t understand “flow.” An auto-digitized face might have stitches running horizontally across the nose, which looks very unnatural.
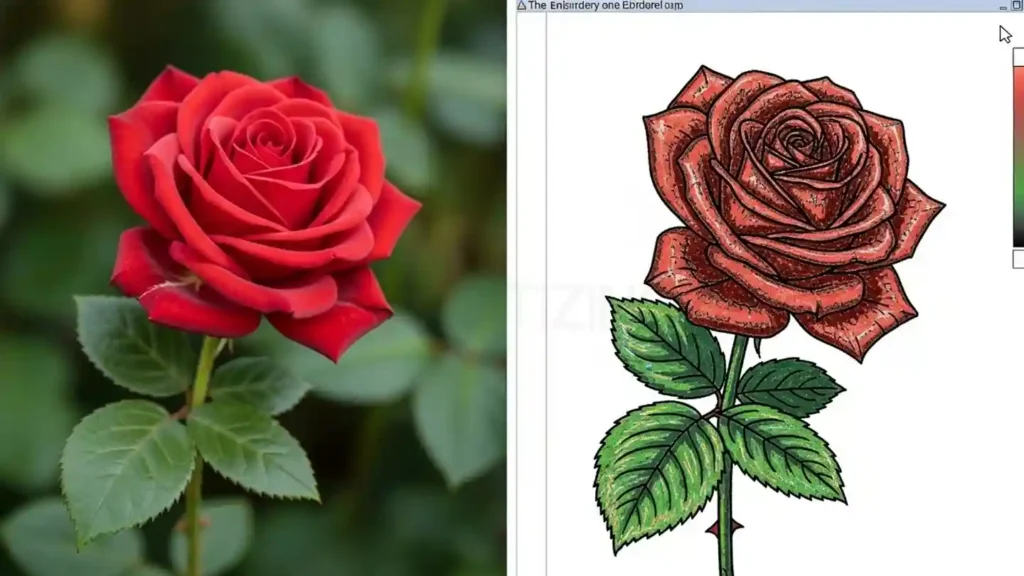
Photo-Stitch Technology: How It Creates Realistic Portraits
Many high-end programs have a specific “Photo-Stitch” mode. Instead of traditional satin or tatami stitches, it uses a complex criss-cross pattern. It varies the density of these crosses to show light and dark.
This is the most common way to digitize photos for embroidery today. It produces a result that looks almost like a vintage photograph.
Manual Digitizing: Why the Best Professionals Still Do It by Hand
Manual digitizing means you draw every single stitch path yourself. This takes hours, sometimes days. However, the result is the cleanest possible embroidery.
I can make the stitches follow the curve of a cheekbone or the direction of hair growth. This method results in a much “softer” feel on the fabric and uses the least amount of thread.
For top results, try our machine embroidery digitizing services in Germany and worldwide at ZDigitizing. We deliver precise, hand-made designs fast with expert care.
Step 3: Importing and Setting Your Scale
Once your photo is ready, I bring it into the embroidery software. This is where the technical work begins.
How to Set the Correct Hoop Size for Your Photo?

You must decide how big the embroidery will be before you start. If you digitize a photo for embroidery for a 4×4 inch hoop and then try to stretch it to 8×8 inches, the stitches will pull apart and show the fabric underneath.
Always choose a hoop that is slightly larger than your design. When you digitize photos for embroidery, size matters because stitch length has physical limits.
Why Scaling a Photo After Digitizing Ruins the Quality?
If you resize a finished stitch file, the software guesses where to add or remove stitches. This often creates gaps or lumps.
Always get your dimensions perfect at the start. In my professional experience, it is better to start over than to try to scale a complex photo-stitch file by more than 10%.
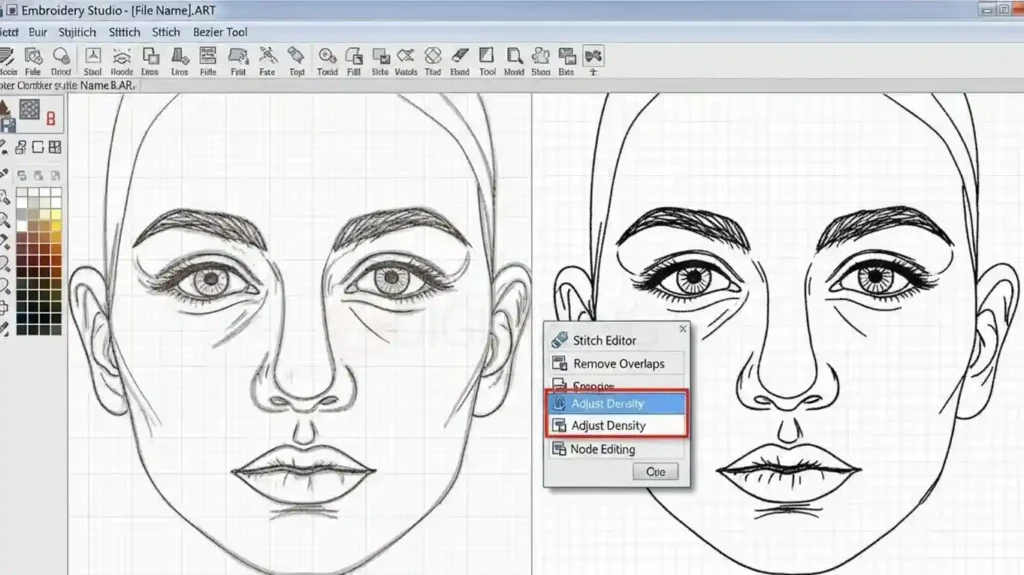
Adjusting Image Opacity to See Your Stitches Clearly
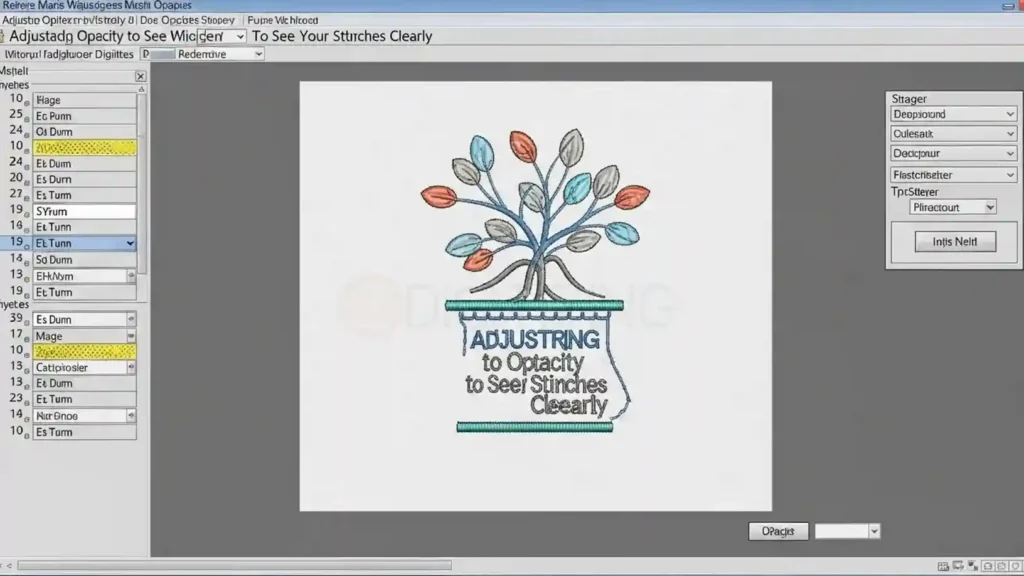
When you digitize photos for embroidery, you will have the photo on the screen with the stitches on top of it. I recommend setting the photo opacity to 50%.
This allows you to see the original image details while clearly seeing the direction and density of the stitches you are creating. It helps you stay “on track” with the facial features.
Step 4: Mapping the Colors and Layers
This is where your artistic eye comes into play. You have to simplify a complex world into a few spools of thread.
Organizing Thread Colors from Lightest to Darkest
Generally, you should stitch from the lightest colors to the darkest colors. This prevents the dark thread fibers from getting caught in the light stitches (which can make the face look “dirty”).
When I digitize photos for embroidery, planning the color sequence is vital for a clean look. Start with white or cream highlights and end with black or dark brown outlines.
How Many Colors Are Too Many for a Photo?
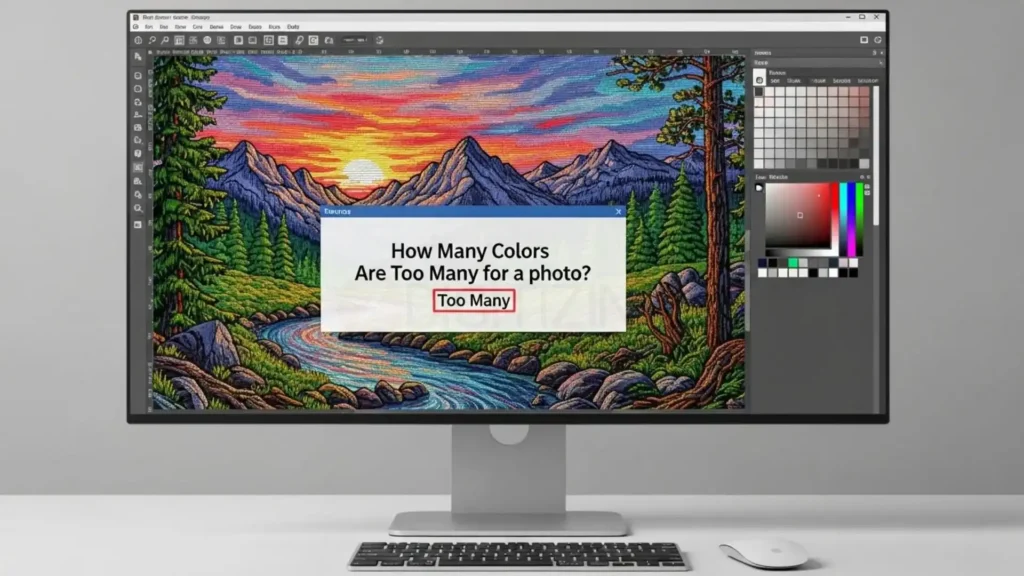
For a standard portrait, I find that 6 to 10 colors is the “sweet spot.” If you use 20 colors, the design becomes very thick and stiff. It feels like a piece of wood on the shirt.
If you use only 3 colors, you lose the detail. I try to find a thread palette that has several shades of the same color family (e.g., Light Tan, Medium Tan, Dark Tan).
Blending Techniques: Making Skin Tones Look Natural
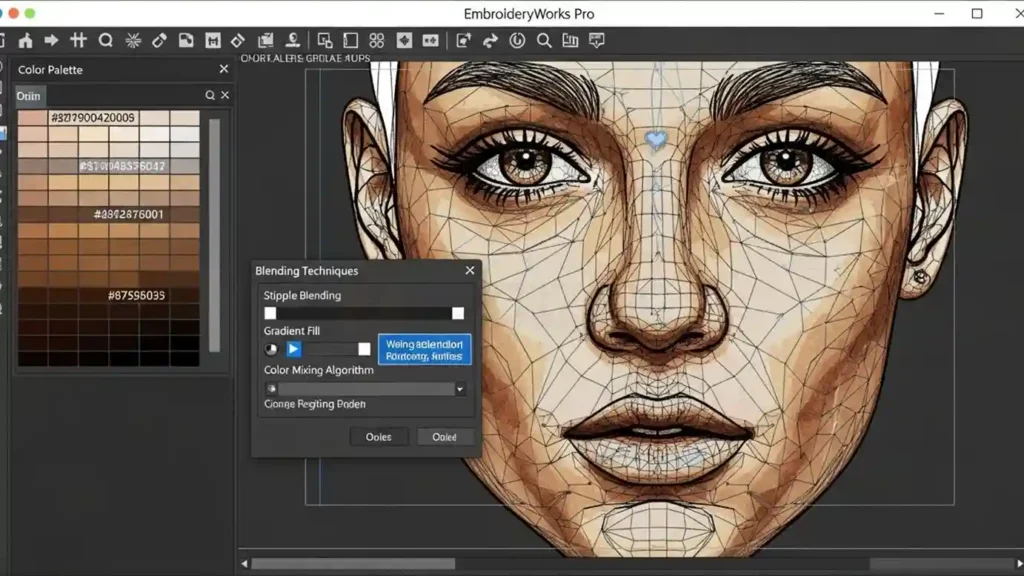
To make colors blend, I can use a “feathered” edge on the stitch blocks. Instead of a hard line where the light cheek meets the dark shadow, I let the stitches overlap slightly.
This creates a gradient effect. This is a key skill when I digitize photos for embroidery because it prevents the person from looking like a cartoon character.
Step 5: Managing Stitch Density and Underlay
This is the most technical part of the process. If you get this wrong, your machine will jam, or your fabric will pucker.
“Bulking” Problem: How to Prevent Heavy, Hard Embroidery
Because digitize photos for embroidery requires so many stitches to show detail, the design can become very heavy. To avoid this, I use a lower density for the bottom layers and a slightly higher density for the top “detail” layers.
If the total stitch count for a 5-inch photo is over 40,000, you might have a “bulking” problem. I want the embroidery to be flexible.
Choosing the Right Underlay Stitch for Stability
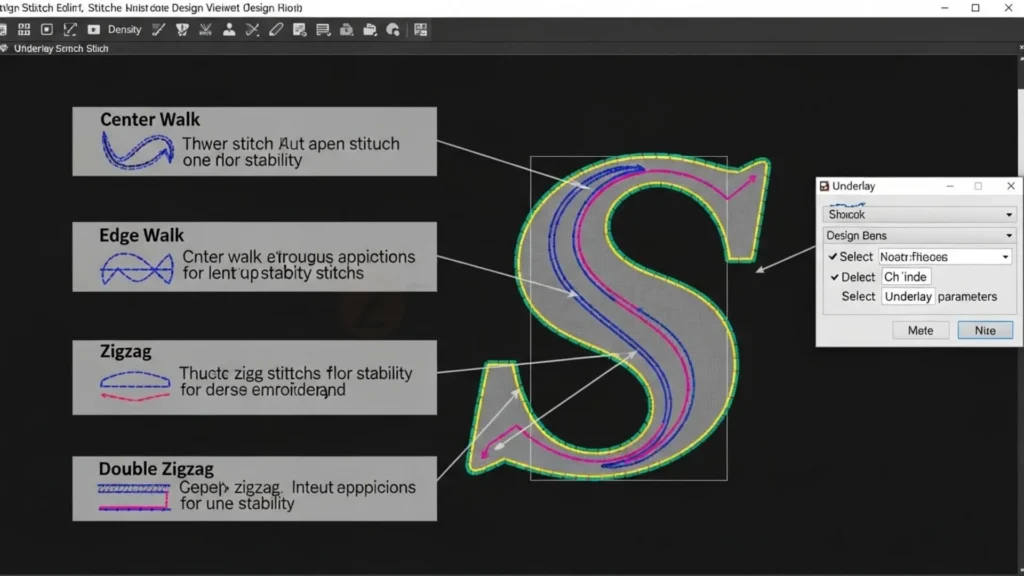
Underlay is a set of stitches that go down before the visible embroidery. It acts like a foundation for a house. For photos, I recommend a “Contour” or “Grid” underlay.
This attaches the fabric firmly to the stabilizer. When I digitize photos for embroidery, the underlay prevents the fabric from shifting as the machine adds thousands of tiny stitches on top.
Why Photo-Stitch Needs Lower Density Than Standard Logos?
A standard logo uses solid blocks of color. A photo uses layers. If I use “logo density” for every layer of a photo, the needle will eventually hit a wall of thread and break.
I have found that reducing density by 20% compared to a normal fill stitch produces much better results for photographic work.
Step 6: Setting the Pathing and Trim Points
A good digitizer thinks about how the machine moves. I want the machine to be efficient.
Reducing Jump Stitches to Save Your Machine (And Time)
A jump stitch is when the machine moves from one area to another without sewing. Too many jumps mean you have to spend an hour with scissors trimming the design.
When I digitize photos for embroidery, I try to path the colors so the needle moves logically from one nearby area to the next.
How to Plan the Sequence So the Fabric Doesn’t Shift?
If I stitch all of the left side and then move to the right side, the fabric might pull toward the left. This causes “registration errors” where the eyes might not line up with the face.
It is often best to stitch from the center outward. This pushes any fabric “push and pull” toward the edges of the hoop, where it can be managed.
Ensuring the “Center Out” Stitching Method for Large Portraits

By starting in the middle, I “lock” the fabric to the stabilizer in the center. As I move out, the fabric stays flat. This is especially important for digitizing photos for machine embroidery because of the high stitch counts involved.
It ensures that the last color I stitch (usually the dark outlines) perfectly matches the first color I stitched.
Step 7: Exporting Your File in the Right Format
My work on the software is done. Now I need to get it to the machine.
Understanding File Types
Different machines speak different languages.
- .PES: Used by Brother and Baby Lock.
- .DST: An industry standard used by Tajima, Barudan, and most commercial machines.
- .JEF: Used by Janome. When I digitize photos for embroidery, I make sure I save a “working file” (like .EMB or .JAN) so I can make edits later, and an “output file” for the machine.
Troubleshooting Common Problems in Photo Digitizing
Even as a pro, I run into trouble. Here is how I fix the most common issues.
Why Is My Fabric Puckering or Shifting?
Puckering usually happens because the tension is too tight or the stabilizer is too weak. If the fabric looks “gathered” around the edges, I try loosening the top tension.
Also, I check the hoop. The fabric should be “drum tight.” If it is loose, the needle will push the fabric around, and the digitizing photos for machine embroidery will look distorted.
Dealing with Thread Breaks During High-Stitch Count Designs
If the thread breaks every 5 minutes, the density might be too high. The needle is trying to force its way through a solid wall of thread.
Another cause is a burr on the needle. I change the needle! In a 50,000-stitch photo, a needle gets dull faster than you think. This is a common pain point when I digitize photos for embroidery.
How to Fix “Ghosting” Effects in Facial Features?
Ghosting is when I can see the fabric through the stitches. This usually happens in the “highlight” areas (like the forehead or bridge of the nose).
To fix this, I increase the density slightly in those specific areas or add a light-colored underlay. I want a solid “skin” of thread so the background fabric doesn’t ruin the illusion.
How Much Does It Cost to Digitize Photos for Embroidery?
People often ask me about the cost to digitize photo for embroidery. It is rarely cheap because of the time involved.
DIY Costs: Software Licenses and Your Time
If I do it myself, the biggest cost is the software. High-end programs can cost between $1,000 and $3,000. Then, there is my time.
A good photo takes 3 to 5 hours to digitize correctly. If I value my time at $20 an hour, that is $100 in labor before I even start the machine.
Hiring a Professional: What Is a Fair Price to Pay?
When you digitize photos for embroidery with pros, most services charge between $30 and $75 for a custom photo portrait. If a service offers to do it for $5, I am careful.
They are likely using a “one-click” auto-digitizer, and the result may look like a blob of thread. A true expert will charge more because they are manually adjusting the paths.
Is It Cheaper to Buy Software or Pay a Service?
If I only plan to do one or two photos a year, I pay a professional service. It is much cheaper than buying expensive software.
But if I want to start a business or have a deep hobby, buying the software and learning how to digitize photos for embroidery myself is a great long-term investment.
Tips for Long-Term Success in Photo Digitizing
Success comes with practice. I don’t expect the first attempt to look like a photograph.
How to Practice Without Wasting Expensive Fabric?
I use old bedsheets or scrap denim for my test runs. These fabrics are stable and cheap. I have used hundreds of scraps in my lab to perfect my settings.
The more I test, the better I understand how different thread colors interact on the fabric.
Following the “Rule of Three” for Color Blending

When picking threads, I always pick at least three shades of the main color: a light, a medium, and a dark. This “trio” allows me to create depth.
For example, I use Light Grey, Medium Grey, and Charcoal for a black-and-white photo. This is the gold standard for anyone learning how to digitize photos for embroidery.
Keeping Your Embroidery Machine Maintained for Photo Projects
Photos put a lot of wear on a machine. I clean the bobbin area after every large photo. I oil the machine according to the manual.
A tiny piece of lint can cause a tension spike that ruins a 4-hour stitch-out. A well-maintained machine is the best partner for high-quality digitizing photos for embroidery.
Common Mistakes to Avoid When Digitize Photos for Embroidery
- Ignoring the Fabric: I don’t try to embroider a heavy photo onto a thin T-shirt. It will sag. I use stable fabrics like canvas, denim, or heavy hoodies.
- Too Much Detail: I don’t try to capture every single eyelash. The thread is too thick. I focus on the “shape” of the eye instead.
- Bad Lighting: If the photo has a shadow across half the face, the embroidery will look like the person has a bruise. I use well-lit photos.
- Skipping Tests: I never skip the test stitch. Even as a pro, I find mistakes during the first run of a digitized photo for embroidery.

Conclusion: Your Journey to Photo Embroidery Mastery
You now have every step to digitize photos for embroidery like a pro. From picking the right picture to testing on your machine, you can create stunning designs at home. I started with simple pet photos and now make heirlooms for family.
You can do the same. Just grab one photo, follow these steps, and watch it come alive in thread. Practice makes it easy and fun. Your memories will last forever on fabric.
Need top quality left chest digitizing for logos or small designs? We handle that too. But for full photo work, try our services at ZDigitizing.
At ZDigitizing, we digitize photos for embroidery manually with care. Your live images turn into accurate stitches. No auto tools, just skilled hands. Our team brings more than 10 years of hands-on expertise. Expert digitizers check every detail. Faces, pets, landscapes, all perfect.
We promise quick delivery. Get files in 24 hours or less. Need help? Our 24/7 support answers fast. Questions on colors or sizes? We fix it right away.
Special offer: 50% off your first order. Upload your photo today at ZDigitizing. Start with a simple portrait. See pro results cheap.
Order now, make your photo stitch magic! Questions? Chat us anytime. Your design waits.


