Embroider beanie hats with an embroidery machine is a creative and satisfying way to add a personalized touch to your headwear collection.
Whether you’re looking to create unique designs for yourself or explore a potential business venture, this step-by-step process guide will help you get started.
From gathering the necessary materials and equipment to mastering the embroidery machine techniques, we will walk you through each stage, offering valuable tips and tricks along the way.
So, grab your beanie hats, and let’s dive into the world of embroidery!
How To Embroider Beanie Hats – Complete Guide
Gathering the necessary materials and equipment
To start the process you need to gather all the essential tools:
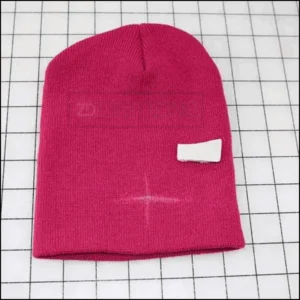
Choosing the right beanie hat
When selecting a beanie hat for embroidery, make sure it has a smooth and even surface to ensure the best embroidery results. Opt for hats made from cotton or other suitable materials that can withstand the embroidery process without losing their shape or texture.
Embroidery machine and accessories
An embroidery machine is essential for this project. Choose a machine that offers a variety of embroidery designs, good stitch quality, and user-friendly features.
Embroidery Machine and Accessories
Additionally, gather accessories such as embroidery hoops, stabilizers, and scissors to aid in the embroidery process.
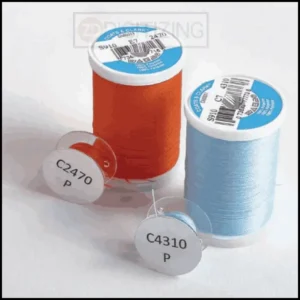
Thread and needle selection
Invest in high-quality embroidery threads that are compatible with your machine. Choose threads that complement the design you intend to embroider on your beanie hat.
Similarly, select needles appropriate for the fabric of the hat to prevent snagging or distorting the material during embroidery.
Embroider beanie hat: Step-By-Step process
Let’s take a look at how to embroider beanie hat in detail:
Step # 1: Cleaning and ironing the beanie hat
Ensure that your beanie hat is clean and free from any dirt or debris before embroidering. Hand wash or follow the manufacturer’s instructions for cleaning. Once cleaned, iron the hat to remove any wrinkles or creases, ensuring a smooth surface for embroidery.
Step # 2: Marking the embroidery placement
Before you start embroidering, it’s essential to measure and center the design on the beanie hat. Use a water-soluble fabric marker or tailor’s chalk to mark the desired placement of your embroidery design on the beanie hat.
Step 2 Marking the Embroidery Placement
Find the middle point of the hat by folding it in half and marking it with a temporary marker or a clip.
This step will ensure accurate placement and help you visualize the final result. Take your time and make sure the placement suits your design and preference.
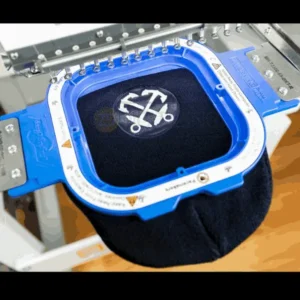
Step # 3: Hooping the beanie hat
To embroider a beanie hat, you’ll need to hoop it properly. Slip the beanie over the embroidery hoop, making sure the area you want to embroider is centered within the hoop.
Step 3 Hooping the Beanie Hat
It’s crucial to stretch the beanie gently to avoid any wrinkles or puckering during embroidery.
Step # 4: Machine setup and calibration
Now it’s time to set up your embroidery machine. Consult your machine’s user manual to adjust the settings for beanie hat embroidery.
Step 4 Machine Setup and Calibration
Generally, you’ll need to lower the machine’s speed and tension settings to accommodate the stretchiness of the fabric. Don’t forget to change the needle to a size suitable for the fabric weight.
Step # 5: Thread and bobbin preparation
Thread your embroidery machine with the chosen thread color. Make sure the tension is correctly adjusted to avoid any looped or skipped stitches.
Step 5 Thread and Bobbin Preparation
Wind a bobbin with matching thread to ensure smooth and consistent stitching on both sides of the beanie hat.
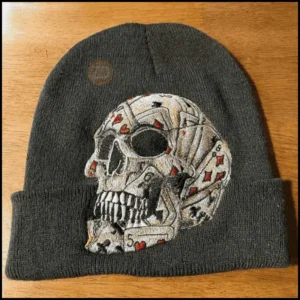
Step # 6: Design selection for beanie hat
When it comes to embroider beanie hats, the design you choose can make all the difference. Look for designs that are suitable for smaller spaces and won’t overwhelm the hat.
Step 6 Design Selection for Beanie Hat
Simple and bold designs tend to work best. Think about what would look great on a cozy beanie and reflect your personal style.
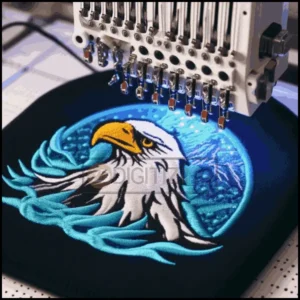
Step # 7: Embroidering the design
Once your beanie hat is hooped and the machine is ready, it’s time to embroider the design. Start the machine and keep a close eye on the process to ensure everything is going smoothly.
Step 7 Embroidering the Design
Be patient, as beanie hat embroidery may take a bit longer due to the smaller area and stretchy fabric. Enjoy watching your design come to life!
Finishing touches and quality check
After completing the embroidery process, give your hat the finishing touch:
Removing the beanie hat from the hoop
After the embroidery is complete, carefully remove the beanie hat from the hoop. Take your time and gently release the fabric from the grip of the hoop, being mindful not to damage the design or the hat.
Trimming excess threads
Give your embroidered beanie hat a clean finish by trimming any excess threads. Use small, sharp scissors to carefully snip away any loose threads around the design.
This step will make your embroidery look polished and professional.
Inspecting the embroidery quality
Before declaring your beanie hat embroidery complete, take a moment for a quality check. Examine the design closely, ensuring there are no skipped stitches or imperfections.
If you spot any issues, consider making necessary adjustments or re-embroidering the design if needed. It’s always better to be satisfied with the final result.
Tips and tricks for successful embroidery on beanie hats
Here are a few points you need to follow to ensure high-quality results:
Choosing the right stabilizer
Stabilizer plays a crucial role in ensuring that your embroidery stays in place and doesn’t distort the fabric. Opt for a stabilizer that matches the stretchiness of your beanie hat. Usually, tear-away or cut-away stabilizers work best for this type of project.
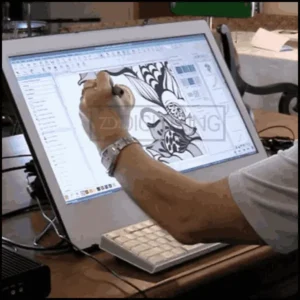
Using embroidery software for custom designs
If you want to take your beanie hat embroidery to the next level, consider using embroidery software.
Using Embroidery Software for Custom Designs
With this software, you can create custom designs or modify existing ones to suit your preferences. Let your creativity run wild and make personalized hats that truly stand out.
Preventing common embroidery machine issues
Embroidery machines can sometimes throw unexpected surprises your way. To avoid frustration, it’s essential to maintain your machine properly. Regularly clean and oil your machine as recommended by the manufacturer.
Additionally, keep spare needles, bobbins, and thread nearby to quickly handle any potential issues that may arise during the embroidery process.
Final words
Embroider beanie hats with an embroidery machine can be a fun and rewarding craft. With a few simple steps, the right design, and some handy tips, you’ll be creating stylish and personalized hats that are sure to turn heads.
So, grab your favorite beanie hat and let your creativity shine!
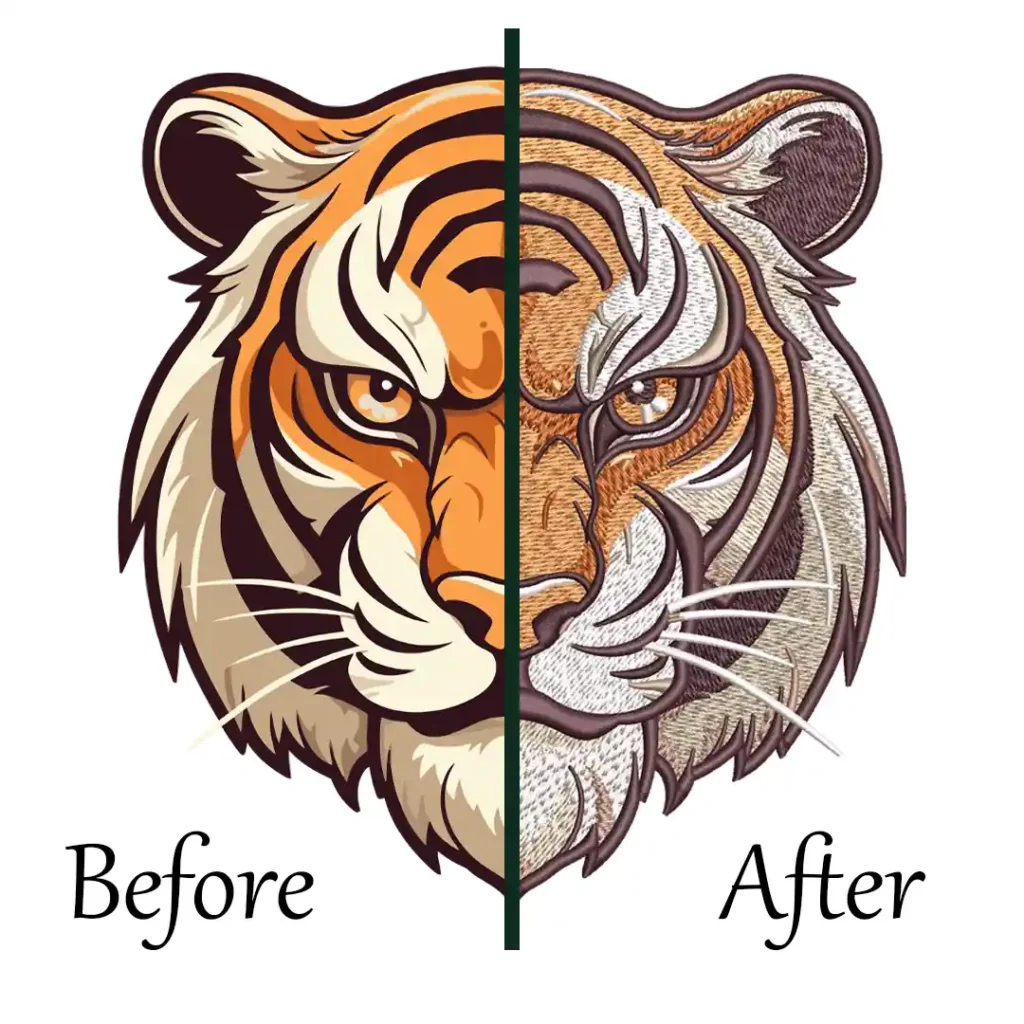
Zdigtizing: One-Stop shop for embroidery digitization
If you’re looking for a trustworthy embroidery digitizing service, ZDigitizing is the way to go. We offer high-quality digitizing services for embroidery and vector art at reasonable prices.
We are pleased to announce a 50% discount on all services for new customers. Grab this offer, tell us what you need, and we’ll give you a free quote in less than 5 minutes.
Simply leave a message if you have any questions, and our team will get back to you right away. If you find this data valuable, please share it with your friends.
Are you looking for embroidery digitizing and vector art services at low cost with superfast turnaround, guarranted quality and preview before pay? So, you are at right place. We can digitize and vectorize any type of artwork in your required file format.