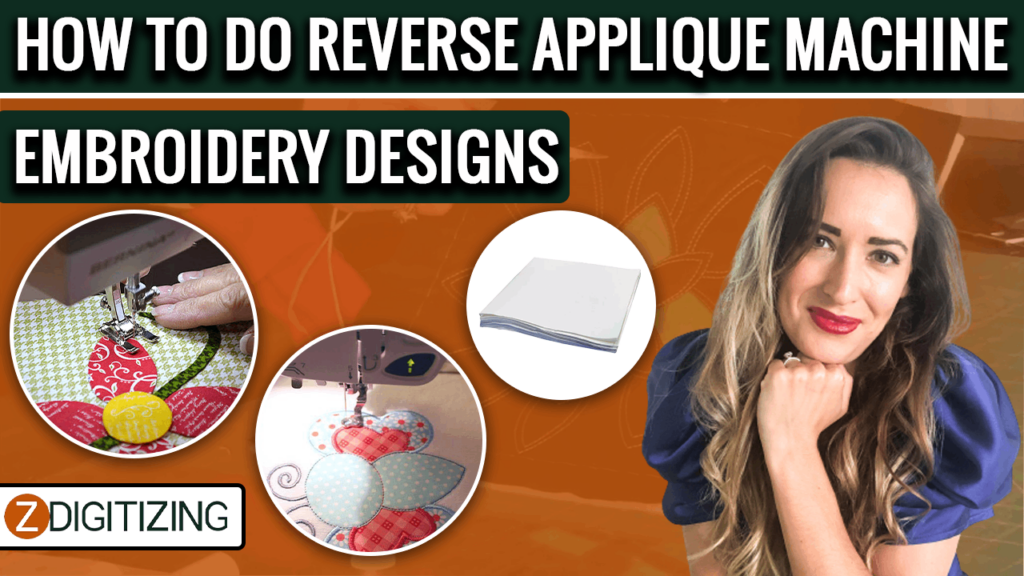
In fabric manipulation, reverse applique is a technique in which patterns are removed from the top layer of cloth, and then more layers are placed behind the cutouts. The applique is given a rough and layered appearance as a result of this. Reverse applique machine embroidery design may be used on clothes, home furnishings, and even to cover holes in jeans.
How to do Reverse Applique machine embroidery designs? | Best Methods Explained
What is Reverse Applique?
In fabric manipulation, reverse applique is a technique in which patterns are removed from the top layer of cloth, and then more layers are placed behind the cutouts. The applique is given a rough and layered appearance as a result of this. Reverse applique machine embroidery design may be used on clothes, home furnishings, and even to cover holes in jeans.
Reverse applique allows you to add variety and texture to your stitching creations. The fabric is put at the back of the pattern, and then the top of the reverse applique design is cut away to show the material beneath it. Using reverse embroidery machine applique design instead of traditional applique offers the advantage of creating a bulkier, more detailed, and more handmade looking.
Embroidery Digitizing
&
Vector Art Services
Are you looking for embroidery digitizing and vector art services at low cost with superfast turnaround, guaranteed quality and preview before pay? So, you are at right place. We can digitize and vectorize any type of artwork in your required file format.
What Sort Of Cloth Should I Use For Reverse Applique?
Velvet, sparkly fabric, other textured materials, and lace and other sheer textiles are also options. The result may be a fascinating peekaboo effect when the applique pieces are thin or translucent, such as lace, eyelet fabric, or other light fabrics.
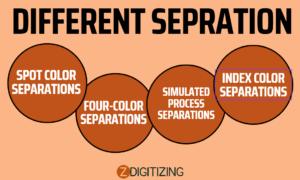
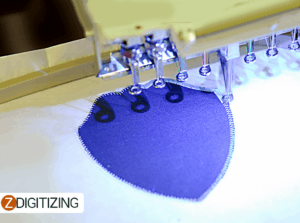
Method Of Reverse Applique Machine Embroidery Design With Water-Soluble Stabilizer:
- Hoop a water-soluble stabilizer piece.
- Float your primary material on the water-soluble stabilizer, concentrating on the dressing fabric at the centre of the array stabilizer.
- Stitch out the first stitching circle. It is the positioning point for the reverse applique design.
- Remove the hoop from the machine and place the applique material over the hoop with the applied fabric facing the back of the stabilizer on the right side.
- Stitch out the preceding stitching round.
- Remove the hoop from the machine embroidery applique and detach the upper surface of the fabric to show the applique fabric underneath.
- If you’re finishing a raw edge – you’re done. But once you complete a satin stitch, you have to move the hoop to the machine and make your last satin stitching to hide the raw edges.
Method Of Reverse Applique Machine Embroidery Design Without Water-Soluble Stabilizer:

It is a more sophisticated way since you cannot examine the location of your applique fabric.
- Inside your clothing, tap the piece of applique fabric with the right side of the applique facing the opposite side.
- Hoop a piece of backing stabilizer material.
- Float the garment on the stabilizer, focusing the applique on the clothing with the centre of the hooped stabilizer. The layers should be a top-down garment, bottom-down applique material and bottom-backed adhesive stabilizer.
- Stitch out the first stitching circle. As the applique cloth is already in place, it is for no purpose to sew.
- Sew out the subsequent stitching round.
- Remove the hoop from the machine and detach the top fabric layer to disclose the applique fabric underneath.
- If you’re finishing a raw edge – you’re done. However, as you spend a satin stitch, you have to put the hoop back into the machine and do your last satin stitching to hide the raw edges.
Reverse Applique Machine Embroidery Design- Hand Sewn Method:
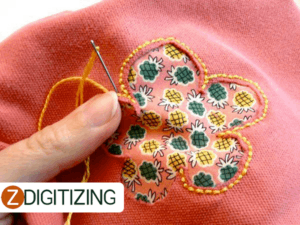
- To begin, sketch the design on the main cloth. Additionally, draw a 1/4-inch-wide line to the interior.
- Now pin every half inch or less down the second line to the design line. Cutting no further than the design line. Maintain the appliqué fabric beneath the design and clip it in place.
- Gently twist the edges underneath with a needle and finger pressing to create the pattern. Sew in place by hand.
- You may use whip stitches or tiny straight stitches to connect the folded edges and the cloth below so that no stitching is visible from the outside.
Reverse Applique Machine Embroidery Design – Machine Satin Stitch:
This approach is really simple and requires the use of a zig-zag stitch on your sewing machine.
- Sketch the pattern onto the primary cloth. Clip the appliqué piece in position beneath the design.
- Sew satin stitches all over the pattern line, keeping the appliqué fabric below.
- Cut the pattern on the inside, only on the main fabric. You may squeeze the top material together and then snip it. Of course, you are aware that you should never cut the backcloth.
- Using extremely sharp scissors, gently cut through the inside of the satin stitching line. From beneath, the appliqué will disclose itself in all its brilliance.
In a nutshell, these are some best methods explained for reverse applique machine embroidery designs as reverse applique pattern is a unique and trendy option to design the apparel.
Frequently Asked Questions
In fabric manipulation, reverse applique is a technique in which patterns are removed from the top layer of cloth, and then more layers are placed behind the cutouts.
- Hand-stitched reverse appliqué.
- Machine satin stitch reverse appliqué.
- Stitch and slash reverse applique technique
- Reverse applique method – stitch and slash.
Applique can be stitched either by hand or by machine, and methods are explained above.


