Embroidery is not only a beautiful art form but also a discipline that involves a surprising amount of mathematics. From counting stitches to calculating fabric requirements and scaling designs, math plays a crucial role in achieving precise and professional results in embroidery projects.
Understanding the math of embroidery can enhance your skills, improve accuracy, and unlock endless possibilities for creativity.

In this article, we will explore the various aspects of the math of embroidery, providing you with easy tips and tricks to help you master this intersection of art and mathematics.
Learn Math Of Embroidery With Easy Tips And Tricks
Defining the math of embroidery
Embroidery might seem like a world of beautiful threads and creative designs, but lurking beneath its surface is a sneaky little creature called math.
Yes, math!
Don’t worry, this isn’t about solving complex equations or deciphering cryptic symbols.
The math of embroidery simply refers to the basic calculations and measurements involved in creating stunning stitched masterpieces.
Importance of math in embroidery
Now, you might be thinking, “Why do I need math for embroidery? Can’t I just wing it?”
Well, dear reader, math actually plays a crucial role in the success of your embroidery projects.
Understanding the math behind embroidery ensures that your designs are properly proportioned, your thread and fabric requirements are accurately calculated, and your stitches are counted with precision.
So, it’s time to embrace the math of embroidery and unleash your inner mathematician!
Understanding the basics
Before diving into the math of embroidery, it’s essential to grasp the different types of stitches. From the classic backstitch to the intricate satin stitch, each stitch has its own unique way of adding depth, texture, and personality to your design.
So, familiarize yourself with these stitches and get ready to count!
Now comes the fun part!
Once you’ve mastered the various stitches, it’s time to count them. Counting stitches helps you keep track of your progress and ensures that you don’t veer off course.
Whether you use a trusty pen and paper or a fancy embroidery app, find a counting method that suits you and embark on your stitch-counting adventure.
Working with different embroidery threads
Threads, threads, everywhere!
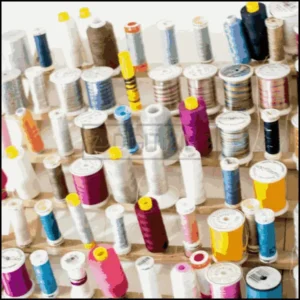
With an overwhelming array of colors, weights, and types available, it’s important to understand their impact on your embroidery project.
Calculating fabric and thread requirements
To keep your materials up to date, you need to understand these two terms:
Measuring and estimating fabric
To avoid running out of fabric halfway through your project, careful measurement and estimation are key. Take stock of your design’s dimensions and add a bit of extra fabric for borders and finishing touches.
Remember, it’s better to have a little too much fabric than not enough!
Determining thread lengths
Running out of thread can be incredibly frustrating, especially when you’re on a roll. To prevent this embroidery nightmare, calculate the required thread lengths based on your design’s stitch count and the length of each stitch.
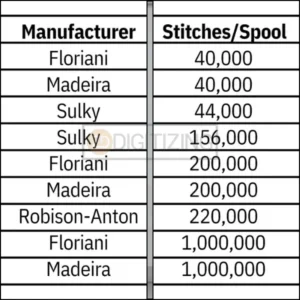
This way, you can ensure a smooth stitching experience without any unexpected interruptions.
Accounting for shrinkage and waste
Unfortunately, fabric can be a bit finicky. It shrinks, frays, and sometimes even misbehaves. Take these factors into account when calculating your fabric and thread requirements.
Add a percentage in embroidery for potential shrinkage, and don’t forget to account for any waste that might occur during the embroidery process.
It’s always better to be prepared for the unexpected!
Proportions and scaling in embroidery designs
Let’s have a look at how proportion and scaling improve your embroidery design:
Importance of proportions in design
Proportions, my friend, are the secret sauce of a visually pleasing embroidery design. Ensuring that your elements are appropriately sized and spaced creates a harmonious balance that will have others marveling at your artistic skills.
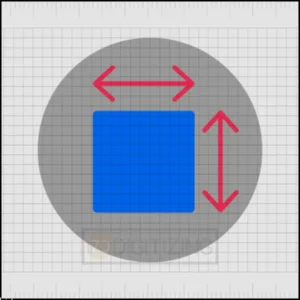
So, pay attention to the dimensions of your design and let the magic of math guide you toward embroidery greatness.
Scaling up or down designs
Sometimes, you find a design that speaks to your soul but it’s just not the right size for your project.
Fear not!
The math of embroidery comes to the rescue once again. With a few simple calculations, you can scale up or down your chosen design to fit any canvas.
So, don’t be limited by size – let your creativity soar!
Adjusting proportions for different fabrics
Different fabrics have different personalities, and they can affect the overall look of your embroidery design. Adjusting proportions to suit the fabric you’re working with ensures that your stitches sit just right, whether it’s on a sturdy denim jacket or a delicate silk scarf.
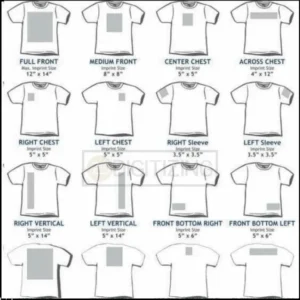
Consider the fabric’s texture, drape, and stretch, and embrace the art of adapting your design to suit the material.
Geometry and symmetry in embroidery patterns
Embroidery is not just about sewing pretty designs; it’s also an opportunity to explore the fascinating world of geometry and symmetry.
By understanding these concepts, you can create impressive and visually pleasing embroidery patterns.
Exploring geometric patterns
Geometry is all about shapes and their properties, and you can incorporate various geometric shapes into your embroidery designs. Triangles, squares, circles, and polygons can add structure and balance to your patterns.
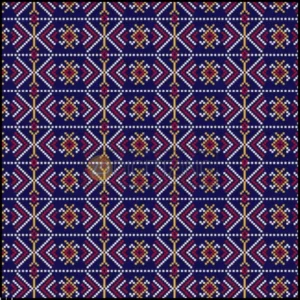
Experiment with different shapes to create unique and eye-catching designs.
Creating symmetrical designs
Symmetry is a key element in many embroidery patterns. It adds harmony and balance to your designs. You can create symmetrical designs by mirroring elements on either side of a central line or point. This technique gives your embroidery a polished and professional look.
Utilizing shapes and angles
Angles can be used to create depth and dimension in your embroidery. By incorporating different angles, you can add movement and interest to your designs. Experiment with acute angles, obtuse angles, and right angles to achieve different effects.
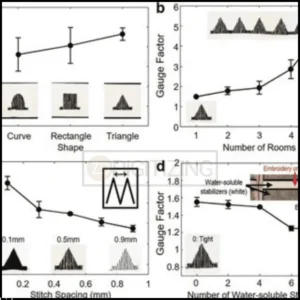
Remember, geometry is not just for math class; it’s for creating stunning embroidery!
Incorporating math in advanced embroidery techniques
Ready to take your embroidery skills to the next level?
Get ready to crunch some numbers!
Math plays a significant role in advanced embroidery techniques, and by understanding these mathematical concepts, you can create intricate and impressive designs.
Calculating stitch density and tension
Stitch density refers to the number of stitches per inch in your embroidery design. Understanding stitch density helps you achieve the desired level of detail and ensures your design looks professional.
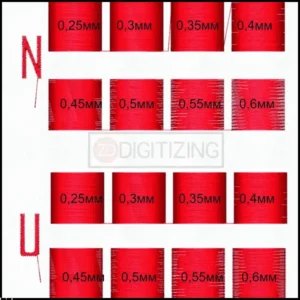
By calculating the stitch density and adjusting your thread tension accordingly, you can achieve consistent and balanced stitching.
Complex stitch techniques and formulae
Some embroidery techniques require a bit of math to execute correctly. For example, when working with advanced stitches like the French knot or the bullion stitch, understanding the formula for creating neat and uniform stitches is crucial.
Tips and tricks for efficient and accurate embroidery
Embroidery is meant to be enjoyable and satisfying, so here are some helpful tips and tricks to make your embroidery journey easier, faster, and more accurate.
- Accurate measurements and markings are essential for precise embroidery.
- Use a ruler or measuring tape to ensure your design is centered and placed exactly where you want it.
- Mark your fabric with removable fabric markers or tailor’s chalk to guide your stitches.
Time-saving math hacks for embroidery
Math can help you save time in your embroidery projects. For instance, knowing the circumference of a circle can help you create perfectly circular designs without any guesswork.
Additionally, understanding the concept of scale allows you to resize and adapt patterns to fit different fabrics or project sizes.
Troubleshooting common math-related issues
Sometimes, embroidery projects don’t go as planned, and math-related issues can arise.
If your design is too big or too small for your fabric, you may need to adjust the size or start over. If your stitch tension is off, take a moment to recalculate your stitch density and make the necessary adjustments.
Don’t be discouraged by these challenges – they are all part of the learning process!
Final thoughts
So, whether you’re embracing geometry and symmetry, utilizing patterns and grids, incorporating math in advanced techniques, or looking for efficiency and accuracy, math has a role to play in your embroidery journey.
Don’t shy away from it – embrace it and let it guide you towards creating beautiful and precise embroidery pieces. Happy stitching!
Zdigtizing: Best embroidery digitizing service provider company at your door
If you’re in search of a reliable embroidery digitizing service, ZDigitizing is your go-to option. We provide top-notch embroidery digitizing and vector art services at competitive prices.
For new customers, we’re excited to offer a 50% discount on all our services. Take advantage of this deal, talk to us about your requirements, and receive a free estimate within just 5 minutes.
If you have any inquiries, feel free to leave a comment and our team will respond promptly. If you found this information useful, please share it with your friends.
Thank you for reading, and happy stitching!
Frequently Asked Questions:
Machine embroidery uses digital designs and a specialized embroidery machine to automate the stitching process, creating intricate patterns and designs on fabric efficiently.
Machine embroidery can be relatively easy for beginners, especially with modern, user-friendly machines, but it requires practice to master intricate designs and techniques.
Stitch count in embroidery refers to the total number of stitches required to complete a design, influencing both the time and thread needed for the project.
In machine embroidery, the thread size often used is 40 weight, which provides the right thickness for most embroidery designs and is compatible with standard needles.

