Embroidering on fleece can add a touch of elegance and personalization to your garments, accessories, and home décor projects. However, this process comes with its own unique set of challenges and considerations.
In this complete guide, we will explore everything you need to know about how to embroider on fleece with an embroidery machine.
From choosing the right fleece and design to troubleshooting common issues, we will provide step-by-step instructions and expert tips to help you achieve beautiful and professional results.
Let’s dive in!
How To Embroidering On Fleece – Complete Guide
Understanding the basics of fleece fabric
So, you’ve got your fancy embroidery machine and a burning desire to embellish everything in your closet.
But hold on, because embroidering on fleece is a whole different process!
Fleece fabric is known for its softness and warmth, making it a popular choice for cozy blankets, hoodies, and even pet beds. But before you start stitching, it’s important to understand the unique characteristics of fleece.

Fleece is a synthetic fabric made from polyester fibers that are tightly woven together. It has a fuzzy texture on one side and a smooth, flat surface on the other. This fluffy texture gives fleece its signature softness and insulating properties. However, it also poses some challenges when it comes to embroidery.
Why embroidering on fleece is different?
Fleece embroidery can be trickier than on other fabrics because of its plush nature. The fluffy texture of fleece makes it more difficult for stitches to penetrate and secure properly.
If you’re not careful, your beautifully embroidered design could end up getting lost in the fuzz or turning into a furry mess.
But fear not, my friends!
With a few helpful tips and tricks, you can conquer the fleece embroidery challenge and create stunning designs that will make even the wooliest sheep jealous.
So, grab your embroidery machine, and let’s get embroidering!
Step-By-Step process of embroidering on fleece
Now it is time to look at the detailed process:
- Materials Needed
- Embroidery Machine
- Polyester Fleece Fabric
- Embroidery Thread
- Stabilizer
- Scissors
- Embroidery Design
- Knockdown Stitch (optional)
Step By Step Process
Step 1: Choose your design
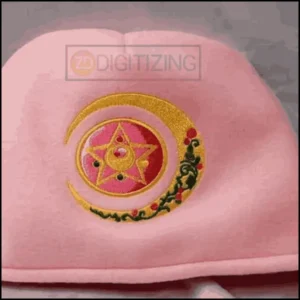
Selecting the right embroidery design is crucial. Simple, bold designs generally work best on the fleece, as intricate details can get lost in the fabric’s texture. Avoid designs with too many small details or very dense stitching, as these can cause the fleece to bunch up or the design to become distorted.
Bonus Offer: If you don’t have a design you can hire us. We convert your design into an embroidery file which you can use to do embroidery with the machine. We also make sure file doesn’t contain any errors.
Step 2: Prepare the fleece
Before embroidering, wash and dry your polyester fleece to pre-shrink it. Press it gently with a low-heat iron if necessary, being careful not to melt the fleece. Always test a small area first to ensure the iron’s heat setting is safe for your specific fleece.
Step 3: Hoop the fleece
Proper hooping is essential for embroidering on fleece. Ensure the fleece is taut in the hoop, but not overstretched.
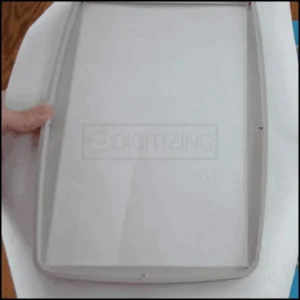
If the fleece is too loose, it will move during embroidery, leading to a distorted design. If it’s too tight, it can cause the fabric to pucker.
Step 4: Stabilize
Use a suitable stabilizer to support your embroidery. A cut-away stabilizer is often recommended for fleece due to its weight and stretch.
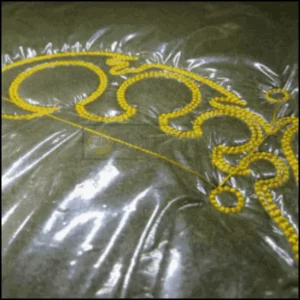
Place the stabilizer underneath the fleece in the hoop. For extra stability, especially with thicker fleece, consider using a spray adhesive to lightly bond the fleece to the stabilizer.
Step 5: Selecting the right thread and needle
Embroidery thread choice can greatly impact your project. Polyester embroidery thread is ideal for fleece due to its strength and colorfastness. The needle should be sharp and of the appropriate size for the thread and fabric thickness.
Step 6: Adjusting the embroidery machine settings
Set your embroidery machine for the specific type of fleece you are using. This may involve adjusting the tension, stitch length, and speed.
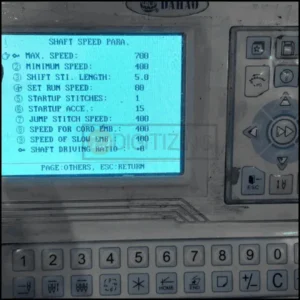
A slightly looser tension and longer stitch length can help prevent puckering and ensure the design lays flat against the fleece.
Step 7: Embroidering the design
Now, it’s time to start embroidering your design. Monitor the machine closely as it works to ensure the fleece isn’t bunching up and the stitches are forming correctly. If you notice any issues, stop the machine immediately and make the necessary adjustments.
Step 8: Using a knockdown stitch (Optional)
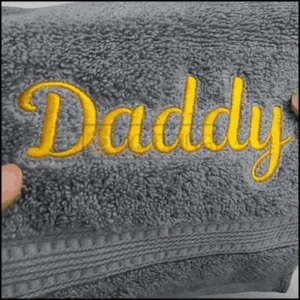
A knockdown stitch is a light layer of stitching created over the fleece’s surface before embroidering the actual design. This step is optional but can help to flatten the fleece’s nap, providing a smoother surface for your design and enhancing its visibility and clarity.
Step 9: Finishing up
Once the machine has completed the embroidery, remove the fleece from the hoop and gently trim away any excess stabilizer. Be careful not to cut the fleece or the stitching. If you’ve used a water-soluble stabilizer on top, gently remove it according to the manufacturer’s instructions.
Step 10: Post-Embroidery care
Handle your embroidered fleece gently. Wash it in cold water on a gentle cycle and air dry or use a low heat setting in the dryer. This will help preserve the integrity of the embroidery and the fabric.
Tips for embroidering on fleece
To achieve the best embroidery results on the fleece, try these tips:
- Use a lightweight, water-soluble stabilizer on top of the fabric to prevent stitches from sinking into the fleece.
- Opt for polyester embroidery threads, as they tend to have better resistance to pilling and fuzziness.
- Experiment with different stitch lengths and densities to find the perfect balance for your design and fabric.
Troubleshooting common issues during fleece embroidery
If you encounter issues like the bobbin thread showing on top or skipped stitches, here are a few troubleshooting tips:
- Check the tension settings for both the needle thread and the bobbin thread.
- Ensure that the needle is sharp and properly inserted.
- Clean your machine regularly to prevent lint buildup that can affect the stitching quality
Conclusion
Embroidering on fleece with an embroidery machine can add a unique and personal touch to any fleece item. By carefully selecting your materials, preparing your fleece, and following these steps, you can achieve beautiful results.
Remember to practice on scraps of fleece before attempting your final project to get a feel for how the fabric behaves under the needle.
Zdigtizing: #1 embroidery digitizing company at your service
If you’re looking for an embroidery digitizing company then look no further than ZDigitizing. We’re offering embroidery digitizing and vector art services that fulfill all your embroidery needs at affordable rates.
We are currently offering 50% off for our first-time clients on all our services. Grab this offer, discuss your needs, and get a free quote which is generated in just 5 minutes.
If you’ve any questions you can comment to us our team will answer your comments as soon as possible. And if find this article helpful, share it with your friends.
Finally, Thanks for reading. Happy stitching!
Frequently Asked Questions:
To embroider on the fleece, use a stabilizer to prevent fabric stretch, choose a design with open patterns, and adjust your machine for a slightly longer stitch.
Fleece can be easy to embroider on, but it requires the right techniques, such as proper stabilization and appropriate design choice, to handle its stretchy and thick nature.
The satin stitch is effective on fleece, as it covers well and complements the fabric’s texture, but avoids overly dense stitches that can cause puckering.
A larger embroidery needle, like a size 75/11 or 80/12, is best for the fleece to handle its thickness and prevent skipped stitches.
Style fleece by layering it with other garments, choosing complementary colors and textures, and considering the occasion, whether casual or more formal.


