Top 5 New Embroiders Mistakes Doing Embroidery Business
In this article, we will let you know the new embroiders mistakes that they have done when they start an embroidery business.
It would almost definitely happen to you at any stage if you work on an embroidery system at home or in a professional store and a pattern is wrongly stitched and has to be changed.
It is a smart idea to train yourself ahead for a simple toolkit with the most common items required to do the job. So, if you’re a beginner at embroidery work then keep your time, money, and embarrassment safe by preventing these common errors which are things new embroiders mistakes.
Top 5 New Embroiders Mistakes Doing Embroidery Business
New Embroiders Mistakes When They Start An Embroidery Business
In the beginning, it is common to create mistakes in embroidery work since we are not mindful of what might go wrong or what seems to make the situation way better. So it is best to avoid embroidery mistakes before they happen, instead of wasting time, strength, and cash to settle them!
A few mistakes are more considerable those are pointing to new embroiders mistakes, so we have made a list of them so that you can save your time and disappointment.
1. Choosing the inappropriate transferring method
2. Using the wrong needles
3. Choosing the wrong embroidery fabric
4. Clumpy long threads at the back
5. Failure to read instructions
Embroidery Digitizing
&
Vector Art Services
Are you looking for embroidery digitizing and vector art services at low cost with superfast turnaround, guaranteed quality and preview before pay? So, you are at right place. We can digitize and vectorize any type of artwork in your required file format.
Choosing The Inappropriate Transferring Method
There are numerous ways of transferring your embroidery design from paper to fabric. You can use easy washed or water-soluble pens over your material.
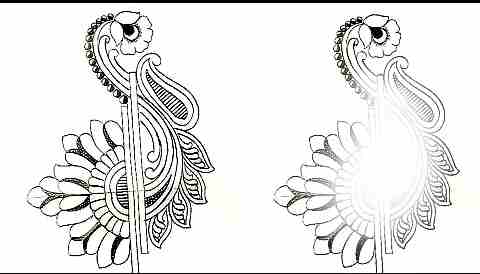
In case they are not accessible, utilize a pencil. Avoid permanent markers and pencils. In some cases, it won’t matter if the transfer lines are lasting as your sewing will cover all the lines.here new embroiders mistakes happened
If your design lines are not entirely covered, then select a transfer method that can be removed when your work is completed. Ceramic chalk pencils and water-soluble color pencils can be utilized.
Choosing The Wrong Needle
Focus on two things when selecting embroidery needles: the type and the size. With your project, the choice of needle is significant. If the needle is too big, it will create holes in the cloth where the needle and thread come in or out.here new embroiders mistakes happened. It would be difficult to embroidery thread and pull the needle through the fabric if the needle is too small.
Similarly, do not use a blunt needle over a finely woven fabric such as cotton or silk-it will not only flow easily and ruin the fabric. Instead, there is a perfect needle for knots and stitches, called the straw needle. This needle is ideal for going through twisted stitches. It is also essential to select the needle you want.
If you choose to pierce the cloth, you can choose a sharp needle and use the ball nose as you try to slide through the holes in the fabric. Try a much bigger needle. That would split the fabric. That makes it possible for the thread to move through. if you accept our suggestions then count in new embroiders mistakes.
Choosing The Wrong Fabric
Remember the sort of embroidery you have in your mind before starting on any fabric design, and then decide which materials can help you produce the best results for that type of stitching.
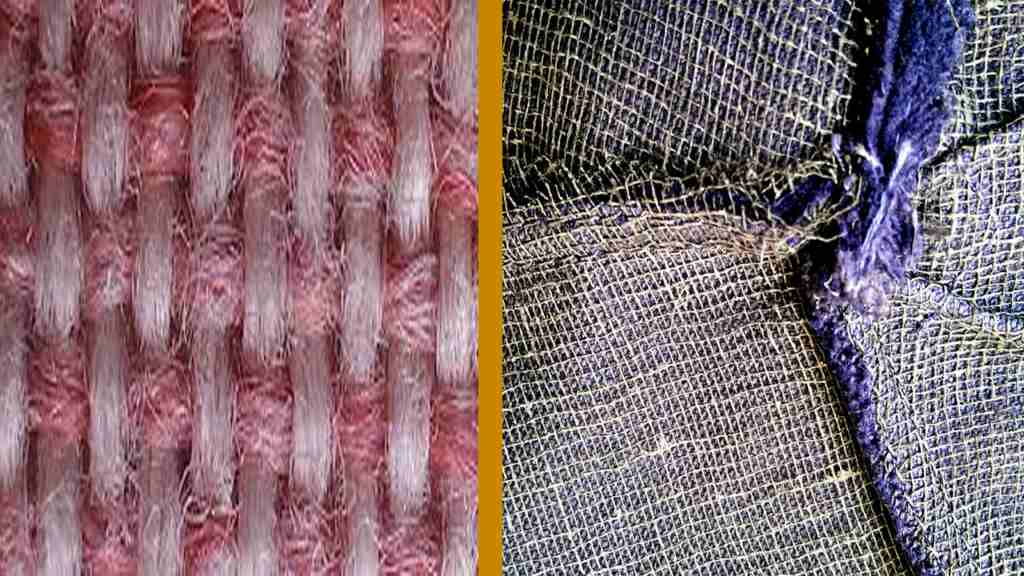
Using an embroidery fabric with a low thread count will lead to poorly-formed stitches, and breakable fabric would not even be the right option.
You could compromise on the consistency, and ultimately, these fabrics may not reflect the effort you would put in to stitch. Heavyweight linen or good cotton fabric will be great for embroidery work.
It happens when the backside of your thread tangles, but you don’t notice it, and you proceed to sew joyfully. You can create big knots and clumps of thread behind the frame if you do not work carefully.
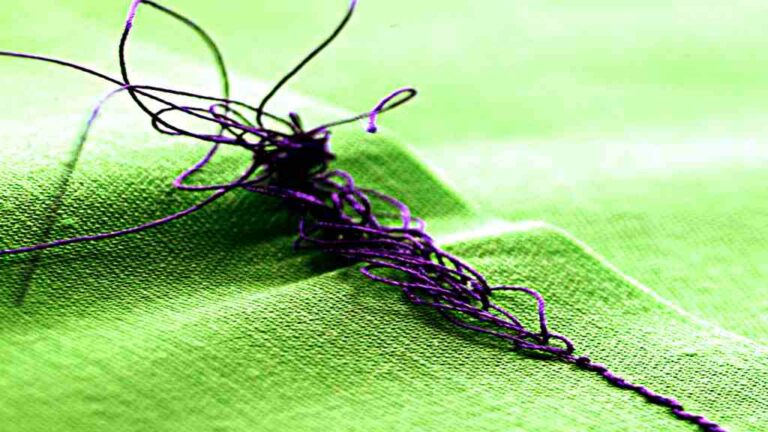
Longer threads seem to be more often tangled, leading to annoying twists and you waste time attempting to pick out knots! If you’re just starting up, you should look at the back of your hoop before and after. It doesn’t take much time, and in the long term, this might save your reasonable time.so it will safe you from those mistakes that new embroiders mistakes happen
Failure To Read Instruction
Always read the instructions before you move forward. The easiest way to prevent errors is to always read the entire list of instructions for every project before starting the project.
One of the significant errors that arise, when you miss reading the instructions is to use the incorrect thread or number of strands of embroidery floss. Then, before continuing, read forward to the next section until you finish a small portion of a design.
Conclusion:
Never fear a mistake! Even professionals can make errors. It is always just a matter of mindset to turn a failure into a positive result. Try to modify and interpret the mistakes as a learning lesson, or even a chance to develop new strategies.so it was some of mistakes that most of new embroiders mistakes counted
Frequently Asked Questions
1. SELECTING THE WRONG EMBROIDERY MATERIAL 2. CHOOSING THE WRONG SIZE OF NEEDLE 3. USING A SHARP NEEDLE INSTEAD OF A BALL-POINT NEEDLE 4. STARTING AND FINISHING A THREAD WITH KNOTS 5. RUSHING TO FIX AN ERROR 6. SHOWCASING NEEDLEWORK IN DIRECT SUNLIGHT 7. STORING NEEDLEWORK MATERIALS AND FINISHED PIECES INCORRECTLY 8. IRONING A FINISHED EMBROIDERY PIECE AND SMASHING THE STITCHING 9. NOT CLEANING OR LAUNDERING THE THREAD OR MATERIAL RIGHTLY 10. NOT REMOVING THE HOOP BEFORE STORING 11. ROLLING MATERIAL ON A SCROLL FRAME IN THE WRONG DIRECTION 12. NOT USING AN EMBROIDERY FRAME OR HOOP
THREAD KEEPS BREAKING Try to re-thread the top thread, making sure the threading indicator on the hand wheel is placed to the top (this places the thread take-up lever at threading point three, the right position for threading). Use a fine quality thread. It is common for cheap low-quality threads or threads that are made for hand sewing to be the cause of what appears to be tension issues when there is nothing wrong with the machine. Using thread that doesn’t pull through smoothly could cause breakage of thread, bad stitching, or damage to your machine. For the finest outcomes, you must use fine quality, branded thread. To check if your thread is appropriate for use on a machine thread your machine with the raised foot. The thread must pull through the machine with zero tightness. THREAD BUNCHING OR BIRDS NESTING OF THREAD UNDER THE MATERIAL: Follow: 1. Re-thread the top thread again making sure the threading line indicator on the hand wheel is placed to the top (this places the thread take-up lever at threading point three, the right position for threading) checking you have not missed the take-up lever (this would cause the thread to gather under the fabric). 2. Re-threading the top thread, with the help of your presser foot raised (threading your machine with the foot down would outcome in zero tension being applied on the top thread because the tension discs are closed) checking the position of your bobbin case and resetting as per guide manual checking the settings of the tension – if the setting is very low, reset the tension to setting number four. NEEDLE THREADER IS NOT WORKING 1. The needle is not raised to the highest point – Raise the highest point for mechanical machines, position the line on the handwheel to the top refer to the upper thread in your manual, for electric machines press the needle position button so that the needle comes back to the top. 2. The needle is not rightly installed – Make sure the needle is completely inserted into the needle bar clamp before you tighten up the screw and the flat parts of the needle are to the back.
Here are five major reasons why your embroidery digitizing looks bad: 1. YOUR MATERIAL IS PUCKERING: Puckering occurs when the material begins bunching up around the embroidery stitches regardless of laying flat. This could deform your stitches and design, leaving an embroidery project that does not look neat and clean. 2. YOUR MATERIAL IS LOOSE: Loose material in your embroidery hoop could outcome in puckering, uneven stitches, and warped designs. It is significant to daily check that your material is tight inside of your embroidery hoop and not becoming loose as you work. 3. YOUR STITCHES ARE NOT EVEN: Uneven stitches could make an embroidery look untidy and messy. It is crucial to lay down your stitches gradually and intentionally so they end up where they have to be. 4. YOU ARE USING THE WRONG STITCH: The types of stitches you utilize for your embroidery project would make a huge difference in how it looks. Think ahead about what stitches you would like to use, and how they would all come together to make the firm embroidery project you are looking for. 5. YOU ARE USING THE WRONG AMOUNT OF STRANDS: Embroidery floss comes with six strands that are twisted together. Embroidery projects could use anywhere from one to six strands, relying on how thick the thread must be in a specific area of the design.
1. Stitch Density: A specialist digitizer’s first and primary measure is the efficiency of his/her digitized designs. How well the pattern fits on a garment, how the design is adopted due to the essence of the clothing. The technique used to digitize a hat pattern would be different from the one used by a t-shirt like a flat garment. The stitch runs efficiently, it does not split, and the most significant feature is that the artwork can be correctly represented. A replica of your assigned artwork should be a digitized design. Therefore, as the structure is the heart of your product, you can never compromise on performance. Saving cash by employing a cheap digitizing service for Embroidery will cost you greater losses during processing. Finally, in the long term, you will end up without your clients. 2. Minimize The Jump Stitches: Stitch density refers to the number of stitches per area. It is a foundational aspect in the digitization of embroidery designs, and it is ignored by the digitizers most of the time. In addition, stitch count plays a vital role in the digitization of embroidery designs. There is a complete science behind adjusting this stitch count, and it is just a nightmare to master the art of managing stitch count for optimized outputs. Every fabric required a different value of stitch density, and it must be set accordingly for obtaining a perfect design. The value between 0.4 to 0.5 is considered a standard value for stitch density. Traditionally, many digitizers put a default value on digitizing software and expect to gain a perfect design that is comfortable for the wearers. But this approach results in a less qualitative design. So, don’t ever forget to consider the stitch density while digitizing embroidery designs. 3. Add Layering: It is a strategy that is Utilized to add profundity to embroidery designs. It makes an essential expansion in it by a new dimension. In layering, you should just digitize those components that are available in the background of the plane. It makes the design more beautiful and creates an extensive 3-D plan. It improves the embroidery design in such a way to look more fascinating. 4. Underlay Stitches: The other significant issue in many designs is that there is no underlay sewing all through the design. Underlay lines are the ones that are weaved before the main fill lines. They are broadly dispersed as compared to fill stitches and help as the foundation of our main design. At the point when you are sewing out a weaving plan on a nappy texture, the underlay sewing assists with packing it down so that the threads don’t pop through the sewing. The potential issues that can emerge because of lacking underlay sewing include incorporating puckering, moving, and penetrating of the Embroidered material. 5. Stitches Angles: The stitch directions and angles are not the same all through, and they are pleasantly adjusted to make up for the push and pull. As a matter of course, the digitizing program likes to fill zones of sewing at a particular degree angle, for example, the 45-degree angle. However, on the off chance that you don’t change this angle all through your design, it will look one-dimensional. In any case, when you change the stitch angle among the various shapes in your plan, there is more significant differentiation between multiple components which delivers a general additionally fascinating looking design.

