Screen printing is a popular and versatile method of printing designs onto t-shirts and other garments. It allows for vibrant and long-lasting prints that can withstand regular wear and washing.
While many people associate screen printing with large-scale production facilities, it is also possible to start screen printing at home.
This article will guide you through the process of setting up a home silk screen printing studio, from gathering the necessary equipment and supplies to creating your own unique designs and printing them onto t-shirts.
Whether you are a hobbyist looking to explore a new creative outlet or considering starting a small business, this article will provide you with the essential knowledge and steps to begin your journey into t-shirt screen printing.
How To Start T-Shirts Screen Printing At Home?
Understanding the Basics of Screen Printing
Screen printing, also known as silk screening, is a popular printing technique used to create high-quality designs on various surfaces, including t-shirts. It involves using a mesh screen, stencils, and ink to transfer the design onto the fabric.
By pushing the ink through the screen using a squeegee, you can achieve vibrant and long-lasting prints. It’s a versatile method that allows you to print intricate designs, logos, and artwork on t-shirts with ease.
The Advantages of Screen Printing at Home
Screen printing your own t-shirts at home can be a fun and rewarding experience. Not only does it give you the creative freedom to design and print personalized shirts, but it also offers a wide range of benefits.
For starters, it’s cost-effective. By printing your own shirts, you can save money on custom orders and bulk prints. Additionally, screen printing ensures durability, making your designs last longer compared to other printing methods.
Plus, it’s a great way to express your unique style and turn your creative ideas into wearable art.
Gathering the Necessary Equipment and Supplies
Gathering the necessary equipment and supplies is a crucial step in any project or endeavor.
Essential Screen Printing Equipment
To get started with screen printing at home, you’ll need a few key pieces of equipment. The essentials include a screen printing press or a DIY setup using a hinged frame, mesh screens, a squeegee, and a drying rack.
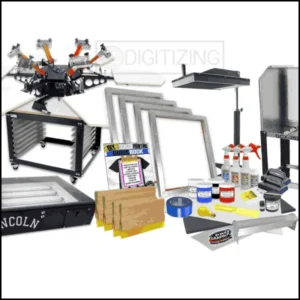
You’ll also need an emulsion and a light source for exposing your designs onto the screens. Depending on your printing needs, you may want to invest in additional tools like a washout booth, a heat press, or a flash dryer to speed up the drying process.
Choosing the Right Printing Inks
Selecting the right ink is crucial for achieving professional-looking prints. Water-based inks are ideal for beginners as they are easy to work with, eco-friendly, and provide a soft feel on the fabric.
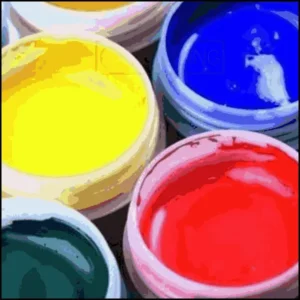
However, if you’re looking for more vibrant and opaque colors, consider using plastisol inks, which require curing with heat. It’s important to choose inks specifically formulated for fabric printing to ensure the durability and longevity of your designs.
Stocking up on T-shirts and Other Materials
Before diving into home screen printing t shirts, make sure you have a good supply of blank t-shirts in various colors and sizes. Look for shirts made from high-quality cotton or a cotton/polyester blend for optimal print results.
You’ll also need a few other materials for screen printing at home, such as screen printing paper or film, emulsion remover, screen degreaser, and screen printing tape. Don’t forget to have some scrap fabric on hand for test prints and practice runs.
Setting up Your Home Silk Screen Printing Studio
Setting up your home screen printing studio is an exciting journey into the world of creative expression and personalized design.
Designating a Dedicated Space
Creating a designated space for your home silk screen printing endeavors is important for organization and ease of use. Choose an area with ample room to work and store your equipment.
A garage, basement, or spare room can make an excellent home studio. Just make sure it has good lighting and ventilation, as the printing process can get messy.
Creating a Functional Layout
Arrange your equipment and supplies in a logical and convenient layout to streamline your printing process. Keep frequently used items within reach and establish designated areas for screen preparation, ink mixing, and printing.
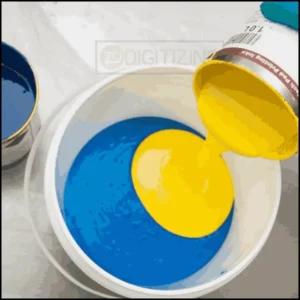
Having a well-organized space will save you time and prevent frustrations during your printing sessions.
Ensuring Adequate Ventilation and Safety Measures
Screen printing at home involves the use of chemicals, such as emulsion and ink, which can emit fumes. Ensure proper ventilation in your studio by opening windows or using fans to improve air circulation.
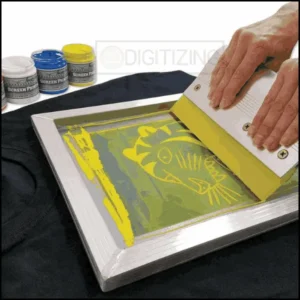
It’s also essential to wear protective gear, such as gloves and goggles when handling chemicals to protect yourself from any potential hazards.
Preparing and Designing Your Artwork
Preparing and designing your artwork is a fundamental step in the creative process, blending imagination with technique to bring your visions to life.
Selecting the Right Design Software
To create or modify your designs, you’ll need graphic design software. Adobe Photoshop and Illustrator are popular choices among professionals, but there are also free alternatives like GIMP and Inkscape available.
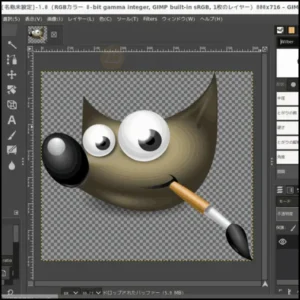
Choose software that suits your skill level and design needs, allowing you to create or edit your artwork efficiencies.
Choosing the Suitable Artwork and Preparing it for Printing
When selecting artwork for screen printing at home, keep in mind that intricate designs with fine details may not translate well onto the fabric. Opt for bold and simplified designs that will be easily recognizable when printed.
Convert your artwork to black and white and adjust the contrast to create clear and distinct stencil-like images suitable for screen printing.
Creating Multiple Screens for Multi-color Designs
For multi-color designs, you’ll need to create separate screens for each color. Using your design software, isolate each color on a different layer and print them on transparent films or create film positives.

Then, expose each film onto a separate screen coated with emulsion. This process allows you to print each color individually, resulting in vibrant and layered designs on your t-shirts.
Transferring the Artwork onto the Screen
Transferring the artwork onto the screen is a pivotal stage in the screen printing at home process, where your designs transition from concept to printable form.
Coating the Screen with Emulsion
To begin the screen printing process, you need to coat the screen with emulsion. Emulsion acts as a light-sensitive layer that will allow your design to be transferred onto the screen. Think of it as the canvas for your t-shirt masterpiece.
Just like painting, you’ll want to apply an even and smooth coat of emulsion onto the screen. It’s like spreading butter on toast, but way artsier.
Exposing the Artwork onto the Screen
Once the emulsion is dry, it’s time to expose your artwork onto the screen. This is where the magic happens. You’ll need a source of light, like a lamp or a specialized exposure unit.
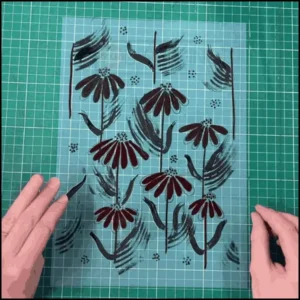
Place your artwork on top of the screen, making sure it aligns perfectly. Then, turn on the light source and let it do its thing. The light will harden the emulsion, except where your design is blocking it. It’s like creating a stencil but with light.
Talk about a bright idea!
Washing Out the Screen to Reveal the Design
After the exposure process, it’s time to wash out the screen and reveal your design. This is the moment of truth. Take your screen to the sink or use a pressure washer if you’re feeling fancy.
Gently spray water on the screen, and watch as the unexposed emulsion washes away, leaving behind your beautiful design. It’s like peeling off the protective plastic on a new phone screen, but way more satisfying.
Printing Your T-Shirt Designs
Printing your T-shirt designs is where your creative vision comes to life in the form of wearable art.
Setting up the Screen and T-Shirt Alignment
Now that your screen is ready, it’s time to print your t-shirt designs. First, secure your screen onto the printing press or a makeshift setup.
Place your t-shirt on the printing board and ensure it’s aligned correctly with the screen. Don’t worry; you’re not auditioning for a reality show. Just make sure your design is centered and where you want it to be on the shirt.
Precision is key!
Applying the Ink onto the Screen
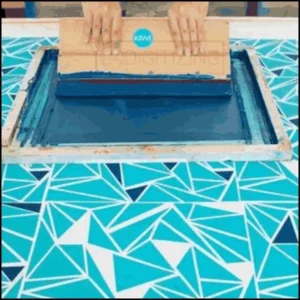
With everything in place, it’s time to apply the ink onto the screen. Scoop a dollop of ink onto the top edge of the screen, right above your design.
Grab your trusty squeegee and slowly pull the ink down the screen, applying pressure as you go. Imagine you’re frosting a cake, but instead of buttercream, you’re using ink. Keep going back and forth a few times to ensure the ink fully covers the design. Voila!
Using Different Printing Techniques
Screen printing offers endless possibilities for creativity. Don’t limit yourself to just one technique. Experiment with different strokes, color combinations, and effects.
Try layering multiple screens for intricate designs or incorporating gradients for a stunning visual. The world is your t-shirt printing oyster. Don’t be afraid to get a little messy and have fun with it.
Picasso would be proud!
Curing and Finishing the Printed Shirts
Curing and finishing the printed shirts are critical final steps in the screen printing at home process, ensuring the durability and quality of your designs.
Drying and Curing the Ink
Once you’ve printed your t-shirts, it’s time to cure the ink. Lay your freshly printed shirts on a flat surface and let them air dry. Patience is a virtue here.
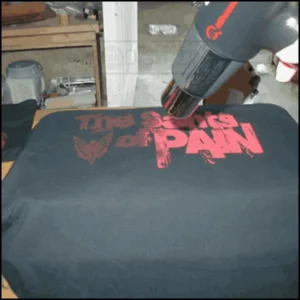
Once they’re dry to the touch, you can speed up the curing process by using a heat gun or a heat press. This will ensure your prints stay vibrant and last longer.
Remember, good things come to those who wait, and those who apply heat.
Heat Setting for Long-lasting Prints
To make your prints withstand the test of time and countless washes, it’s essential to heat set them. Set your heat press to the appropriate temperature and time, then carefully place your printed shirts inside.
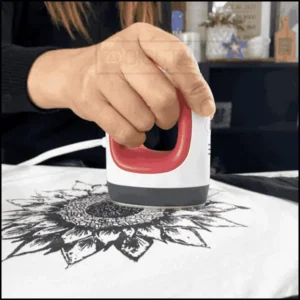
Close the heat press, and let it work its magic. The combination of heat and pressure will bond the ink to the fabric, making it more resistant to fading or peeling.
Your t-shirts are now ready to take on the world!
Post-printing Treatment and Quality Control
Before you proudly display and wear your printed shirts, give them a final quality check. Ensure there are no smudges, smears, or imperfections that could ruin your design.
Trim any loose threads or excess ink. If you’re feeling extra fancy, iron the shirts to give them that polished look. The devil is in the details, so make sure your prints are picture-perfect before showing them off to the world.
Troubleshooting and Tips for Success
Troubleshooting and tips for success are indispensable aspects of mastering any craft, especially in the nuanced field of screen printing.
Common Screen Printing Issues and Solutions
Despite your best efforts, screen printing can sometimes throw you a curveball. Don’t fret; it’s all part of the creative journey. If you encounter issues like ink bleeding, clogged screens, or uneven prints, there’s a solution for every problem.
Research common troubleshooting techniques, seek advice from fellow screen printers, and don’t be afraid to learn from your mistakes. Remember, every mishap is just an opportunity to improve and grow.
Tips for Achieving Professional Results
To achieve professional-looking results, pay attention to the small details. Use high-quality materials, invest in a good screen printing setup, and practice, practice, practice. Keep your workspace clean and organized, and be meticulous with your technique.
Patience and perseverance are your allies in the quest for perfection. Always strive for excellence, but remember to have fun along the way. After all, it’s just t-shirts, not rocket science.
Exploring Advanced Techniques and Experimentation
Once you’ve mastered the basics, don’t be afraid to push the boundaries and explore advanced screen printing techniques. Experiment with different types of inks, add specialty finishes like foil or glitter or even try printing on unconventional materials.
The world of screen printing is vast and ever-evolving. Embrace your inner artist and let your creativity run wild. Who knows, you might just stumble upon the next big trend in t-shirt printing.
The possibilities are endless!
Conclusion
In conclusion, starting t-shirt screen printing at home opens up a world of creativity and possibilities. With the right equipment, supplies, and knowledge, you can turn your ideas into wearable art.
Take the time to set up your home studio, perfect your technique, and experiment with different designs and printing techniques.
With practice and dedication, you’ll be able to produce professional-quality prints right from the comfort of your own home. So, get started on your screen printing journey and enjoy the satisfaction of wearing and sharing your own custom-designed t-shirts.
Happy Printing!
ZDigitizing: #1 Vector Art Service Provider
Looking for great vector designs?
ZDigitizing has got you covered with amazing vector services perfect for your printing projects.
Plus, grab a 50% discount on your first order! Chat with us, get a free quote in just 5 minutes, and enjoy our quick and easy service.
Found this info useful? Tell your friends and let them in on our awesome deals and quality digitizing work.
Thanks for stopping by, and we’re excited to assist with your embroidery designs!
Frequently Asked Questions:
Screen printing can be a profitable venture, especially if you’re able to produce unique, high-quality designs and efficiently manage production costs. Success often depends on your niche, marketing strategies, and the ability to scale operations based on demand.
Similarly, t-shirt printing can be quite profitable. The key lies in identifying target markets, creating appealing designs, and offering quality products. The profit margin can be significantly high, especially with custom or in-demand designs.
When it comes to printers for t-shirt printing, direct-to-garment (DTG) printers are often favored for their quality and efficiency. Brands like Epson and Brother are known for their high-quality DTG printers, which are ideal for detailed, color-rich designs on a variety of fabric types.


