Have you ever wondered how to print on a silkscreen? Or finding printing on a silk screen difficult? Well, look no further. Silk screen printing is a widely used and highly recommended screen printing technique for printing on t-shirts.
You can add serious visual impact to your work with only a few simple printing materials and tools. Plus, it lets you be artistic. So, let me take you on a journey deep into the world of screen printing techniques. We’ll figure out the minute details that can help you improve your work and make an impact in the world of visual interaction.
After reading this, you’ll become a silk screen printing specialist or want to run the silk screen printing industry! Keep on reading
What Are The Important 10 Steps In Silk Screen Printing?
What is Silk Screen Printing?
Silk screen printing, sometimes called screen printing or serigraphy, is a popular printing method of a screen printing business that can transfer designs or images to a wide variety of substrates. Silk cloth was once commonly used as the screen printing material in the printing process, but nowadays, synthetic materials like polyester are more commonly utilized in the screen printing business.
Silk screen printing is widely used in custom garments, posters, signage, and other artistic fields due to its high quality and durability.
Silk Screen Printing: What Materials You Need
Printing on silkscreen needs a range of printing materials, and every material has its own role in the printing process:
Materials | Description |
Screen |
|
Squeegees | |
Ink |
|
Emulsion |
|
Light Source |
|
Substrate |
|
How to do Silk Screen Printing: 10 Easy Step-by-Step Guide
Step # 1: Prepare your Design
Choose the substrate and create the designs you want to print on your screen. The design can be digitally designed, handcrafted, or a combination of both. The design should be in the correct format and size according to your screen and substrate.
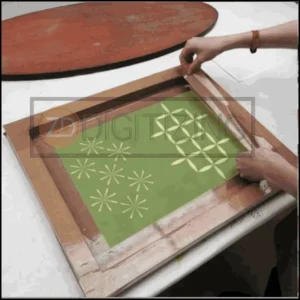
You can also get help from digitizing experts just like Zdigitizing. We manually digitize design for you at very reasonable price that anyone can afford. So contact us right now and book you slot!
Step # 2: Prepare the Screen
In silk screen printing, the screen is the most essential component in the printing process. Coat the screen with photo emulsion. Play sitting dark room for drawing because exposure to light can damage or ruin the emulsion.
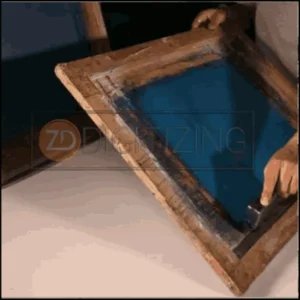
After drawing, place your design and put it in the UV light. Emulsion becomes harder where the design is placed and creating stencils. Remove the unexposed emulsion by rinsing the screen. Then, leave your design in an open area for drying.
Step # 3: Set Up Your Workstation
Choose a spacious and well-ventilated area to set up your screen printing workstation. This will ensure that you have ample space to work and organize your material comfortably.
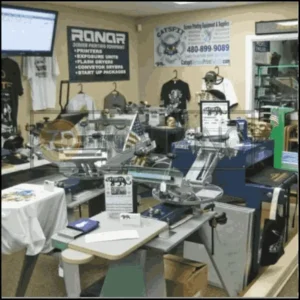
Please spare paper or a cloth on your work surface to prevent ink from staining.
Step # 4: Mixing of Ink
Choose the ink colors you want and mix them carefully according to your design or the manufacturer’s instructions.
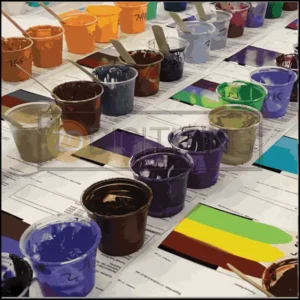
Follow the recommended techniques and ratio because maintaining precise color consistency is vital.
Step # 5: Printing Setup
Place the substrate on the surface where you want to print your design (printing platen). Also, ensure it is secured because it prevents any movement during the printing process.
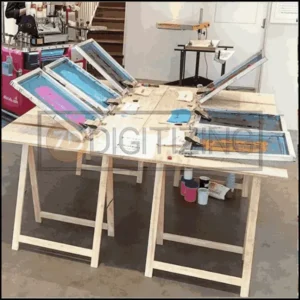
To ensure the design is positioned and centered correctly, align the screen with your substrate.
Step # 6: Printing Process
Now comes the exciting part! Print your design on the substrate.
In this step, apply the ink on the screen and push using a squeegee through the stencil onto the substrate.
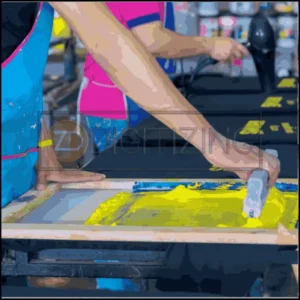
Ensure that you maintain a 45-degree angle with the squeegee and apply consistent pressure while sweeping across the screen. For each print, repeat this process.
Step # 7: Drying the Print
Allow your freshly printed design to dry thoroughly. The type of ink and substrate used may vary the drying time.
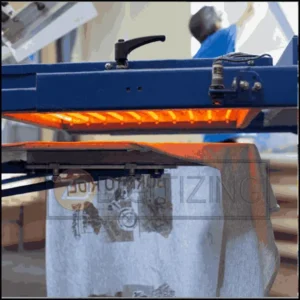
You can usually air dry your print, but sometimes, you may need a heat source or curing unit for setting the ink.
Step # 8: Clean Up
To maintain quality and longevity, cleaning your screen and its equipment after the printing process is essential. Remove the extra ink from tools, squeegees, and screens.
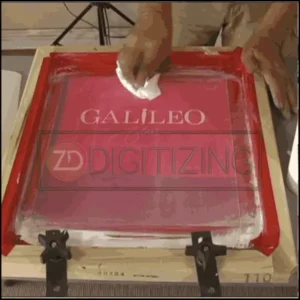
Then wash them with a screen cleaning solution to remove emulsion or ink residues. Dispose of the waste material appropriately.
Step # 9: Quality Control Check
Check every print for imperfections, such as misalignment, streaks, or smudges.

You must ensure that the colors are consistent and vibrant across the print.
Step # 10: Final Touches
Once your print has passed the quality control check, you can consider any final touch or embellishment, such as additional colors, fine details, or post-printing treatments.
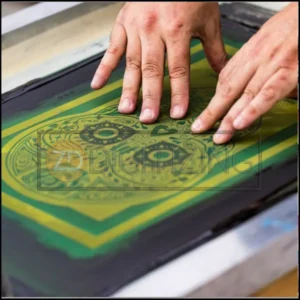
This will help you to achieve the desired look and finish for your silkscreen prints.
Benefits of Silk Screen Printing
- Versatility: Silk screen printing can be done on many things, like cloth banners, T-shirts, and hoodies, as well as paper, glass, metal, plastics, and more. You can use it in a lot of screen printing businesses, different fields and artistic projects because it is so flexible.
- High Resolution and Detail: Screen printing is widely favored because of its ability to reproduce fine details, such as minuscule text and lines, on a variety of substrates, including garments, posters, and art prints.
- Long-Lasting Prints: Screen-printed designs are perfect for clothes and outdoor signage because they are long-lasting and can last being washed repeatedly and exposed to the elements.
- Cost-Effective for Large Orders: Silk screen printing techniques is popular for big orders because the setup costs are spread out over a large number of prints, making them cheaper
Conclusion
Silk screen printing is a versatile and rewarding craft that allows you to create custom designs on various surfaces. By following these ten important steps, you can embark on your silk screen printing journey with confidence.
Remember that practice makes perfect, so don’t be discouraged if your initial prints aren’t flawless. With time and experience, you’ll master the art of silk screen printing techniques and create stunning, personalized prints that reflect your creativity and skill.
Exciting news in store!
If you’re looking for top-notch embroidery digitizing, turn to ZDigitizing. We’re a trusted and professional company that offers comprehensive digitizing and vector art services worldwide.
We’re offering a massive 50% off your first order. Plus, get a FREE QUOTE in just 5 minutes. Plan your budget effortlessly!
Act now and experience our premium services.
Contact us today for your FREE QUOTE and watch your projects come to life.
Your success is our mission!
Frequently Asked Questions:
No, silk screen printing isn’t just for fabrics. It can be used on paper, glass, metal, plastics, and many other things, making it a flexible printing method that can be used for many things.
Checking for connectivity issues, paper jams, and newer printer software should be your first step when troubleshooting printing problems. If problems persist, check the printer’s documentation or get in touch with tech support.
In screen printing, a stencil or mesh screen is used to transfer an image onto a substrate (such as cloth or paper) by forcing ink through tiny holes. It can print on a wide range of substrates with impressive color accuracy and longevity.
A silkscreen is commonly referred to as a “screen” or “screen mesh.” Usually, this screen is made of polyester or nylon mesh that is stretched tightly over a frame.


