We know some of you avoid doing machine embroidery with metallic thread because they’re too complicated to handle.
But who doesn’t love the gorgeous sparkle in their embroidery design?
Everyone loves!
So, we decided to make a post on how to easily embroider with metallic thread and some basic metallic thread embroidery techniques. We keep it easy so everyone can understand.
Let’s jump right into it!
How To Do Machine Embroidery With Metallic Thread
How Metallic Embroidery Threads Are Made?
First, you’ve to understand the structure of these threads to tackle the issue occurring during embroidery. This picture shows two layers of thread.
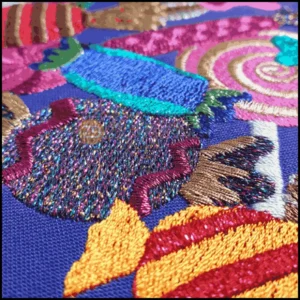
You can see metallic embroidery threads are made with durable polyester or nylon thread wrapped in metallic foil.
They’re so easy to separate with hands so this means your machine can also separate them easily. So, you’ve to set them properly.
Why Stitching With Metallic Embroidery Thread So Hard?
How To Easily Embroider With Metallic Thread?
1. Choose the Right Needle for Metallic Thread
When using these threads it is recommended to use the correct type of needle. If you use a needle with a small eye it leads to breakage or fraying. So, we suggest using a needle with a big eye.
There are two types of needles available in the market: Metallic needles and topstitching needles. These needles have elongated eyes which decrease friction so it minimizes the breakage and shedding of these threads.
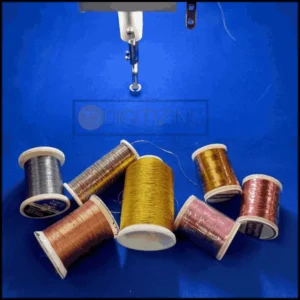
Metallic needle is specially designed for metallic thread and has a large scarf and grove which are really helpful to protect the thin fabric during the embroidery process.
If you want to learn more about machine embroidery needles check out this article about the type of embroidery needles.
2. Metallic Thread Tension Adjustment
You’ve to adjust the upper thread tension because metallic fibers are too thin and if you expose them to high tension they break easily. On the other hand, if working with low tension, the thread might loop on the bobbin and make a mess.
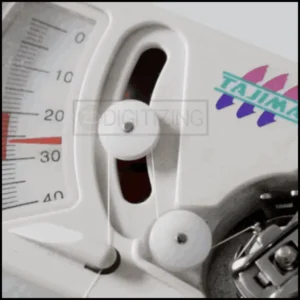
So, adjust the thread tension, and start with small changes until the desired tension is obtained. You can test tension on a spare piece of fabric.
3. Use Vertical Spool Pin
Use a vertical spool to reduce the twisting of the thread. So when a thread comes out from the spool it has fewer tangles which minimizes your headache.
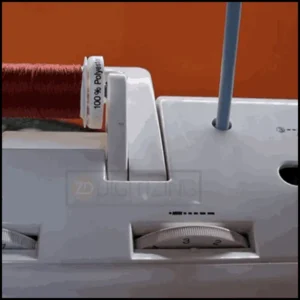
If you’re using embroidery machines with horizontal spools we recommend buying a vertical spool. But ensure that the spool is compatible with your machine.
4. Use Thread Nets
When stitching with metallic embroidery threads, the thread net is an important tool. This is a small elastic net that keeps the spool neat. Also, aids in reducing slipping and tangling from the spool.
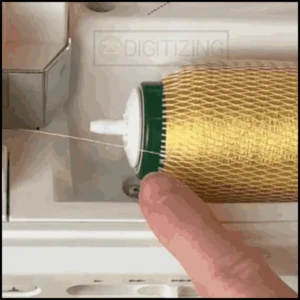
You simply have to place this net on a thread cone and it will minimize the thread twisting. They’re affordable and can be found in any embroidery supply shop.
5. Use Embroidery Design with Low Density
Always choose a design with low stitch density because it has fewer stitches which makes the embroidery process easier with metallic machine embroidery thread. You need to adjust density according to the thickness of thread.
We also recommend avoiding using small stitch types. As a thumb rule, stitch length is not less than 1mm for basic embroidery threads. For smooth metallic design, the stitch length must be a minimum of 2mm while for twisted metallic design, it must be 3mm.
For metallic thread embroidery design avoid designs with many layers because they can be challenging to embroider and result in unprofessional design.
If you don’t have a design with low density you can hire Zdigitizing. Our experts have a deep understanding of stitch density and adjust it according to the design, type of metallic thread, and fabric type you’re using.
6. Choose the Right Stabilizer
When embroidery with metallic embroidery thread, carefully choose the stabilizers. Keep in mind fabric type and design properties while choosing a stabilizer.
We recommend using a no-show mesh or cut-away stabilizer rather than the tear-away stabilizer. These stabilizers are flexible and soft which means they’re less prone to shredding.
Moreover, avoid using anything that may pull the metallic filament of thread like adhesive spray or adhesive stabilizers.
7. Clean Out Your Machine
If all the above things are right and you still face problems then we recommend cleaning the bobbin case. Also, check the thread path if you see any debris clean it with a makeup brush.
Sometimes, you can fix all embroidery problems with a simple fix!
Final Words
Hopefully, the above-mentioned tips will help you to easily embroider with metallic machine embroidery threads. Just with a little practice and patience, you can master embroidery with these threads.
ZDigitizing: Embroidery Digitizing Expert
If you’re looking for embroidery digitizing services then choose ZDigitizing. We’re offering embroidery digitizing and vector art services for your embroidery and printing needs at the most affordable rates possible.
Currently, we’re giving a 50% discount on your first order on all our services. So contact us right now. Don’t miss this limited-time offer and take your embroidery game to the next level with us!
Discuss your needs and get a FREE QUOTE in just 5 minutes.
You can share your ways to use metallic thread in the comment section. If you find it helpful share it with your friends. Thanks for reading.
Happy stitching!
Frequently Asked Questions:
The metallic needle is specially designed for metallic thread and has a large scarf and grove which are helpful to protect the thin fabric during the embroidery process. We suggest you use an 80/12 needle for thin fabric and a 90/14 needle for thick fabric.
For embroidering with metallic thread adjust the upper tension 1.0. This thread is delicate due to its structure so low thread tension will help in high-quality embroidery.
Yes, you can sew metallic thread with a sewing machine but you need to slow the speed. This will minimize thread breakage.
Yes, you can iron metallic thread but make sure not to place iron directly on the thread. Cover it with a press cloth because direct heat can melt or shrink it.
Yes, these are hard to handle because these threads kink or twist at high speed and make the process even more challenging. If this twisted thread reaches the machine tension disk it gets trapped in it and causes shredding or splitting of thread. At this point, only the thread core enters your fabric, and the metal coat is left behind.
- Choose a needle with a large groove
- Select a design with low stitch density
- Adjust the thread tension to 1.0.
- Work on slow speed

