In this article, we’ll learn how to make screen print transfers and cover the steps involved in creating and using screen print transfers with a Cricut machine, as well as some tips for achieving great results with your DIY screen printing projects.
Cricut Screen Print: How to Screen Print with Vinyl
What Is Cricut Screen Print?
Cricut Screen Printing refers to a technique of using a Cricut machine to create screen print transfers printer with vinyl. A screen print transfer is a design that is cut out of vinyl using a Cricut machine and then transferred onto fabric or other materials using a screen printing process. This allows for precise and detailed designs to be created, even on small or intricate areas, without the need for a specialized screen printing setup or equipment. Cricut Screen Print is a popular DIY method for creating custom designs on clothing, bags, home decor, and more.
Embroidery Digitizing
&
Vector Art Services
Are you looking for embroidery digitizing and vector art services at low cost with superfast turnaround, guaranteed quality and preview before pay? So, you are at right place. We can digitize and vectorize any type of artwork in your required file format.
Supplies Needed For Cricut Screen Print
In this article, we will discuss how to use a Cricut machine for screen printing with vinyl. Screen printing is a popular technique for creating custom designs on fabric and other materials, and the Cricut machine offers a convenient and efficient way to make Cricut screen print transfers at home.
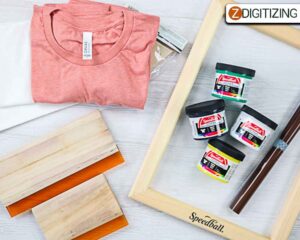
To get started with Cricut Screen Print, you will need the following supplies:
A Cricut Cutting Machine:
The Cricut Explore Air 2 or Cricut Maker are popular options for vinyl printmaking.
Adhesive Vinyl:
Choose a vinyl type that is suitable for heat transfer and screen printing, such as Cricut’s “Everyday Iron-On” or “SportFlex Iron-On” vinyl.
Transfer Tape:
This is used to transfer your design from the vinyl backing to the fabric or other material you are printing on.
Fabric Or Other Material To Print On:
Choose a material that is suitable for screen printing, such as cotton or polyester fabrics.
Screen Printing Ink:
Choose a high-quality ink that is suitable for the material you are printing on.
Squeegee:
This is used to press the ink through the screen and onto the fabric.
Screen Printing Frame:
Choose a frame that is the right size for your design and material.
Emulsion And Emulsion Remover:
These are used to coat the screen and remove the design after printing.
Light Source:
A light source is needed to expose your design onto the screen.
Gloves And Protective Clothing:
Wear gloves and protective clothing to protect yourself from the chemicals used in the screen printing process.
By having these supplies, you will be well-equipped to get started with Cricut Screen Print and create your own custom designs.
How To Screen Print With Vinyl Using A Cricut Machine?
Screen printing is a popular method for applying designs to t-shirts, bags, and other fabric items. However, traditional screen printing requires a lot of equipment, including a screen, emulsion, a light source, and more. Fortunately, with a Cricut machine and some vinyl, you can create a screen print effect without all of the traditional equipment. Here’s how to screen print with vinyl using a Cricut machine.
Step 1: Design Your Image
Before you can begin screen printing at home with vinyl, you need to design your image. You can use any design software, such as Adobe Illustrator or Canva, to create your design. Keep in mind that your design will need to be a solid shape, without any intricate details or fine lines. You can also use pre-made designs from the Cricut Design Space library.
Step 2: Cut Your Vinyl
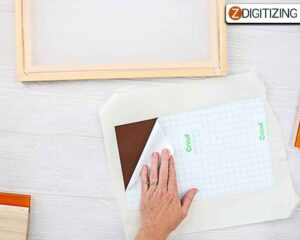
It’s time to cut your vinyl, once you have your design. You’ll need to use a permanent adhesive vinyl for this project, such as Oracal 651. Load your vinyl onto your Cricut cutting mat, making sure to align it with the grid lines. Then, select your design in the Cricut Design Space software and send it to your Cricut machine to cut.
Step 3: Weed Your Vinyl
It’s time to weed it, once your vinyl is cut. Removing the excess vinyl around your design is called weeding. Use a weeding tool to carefully peel away the excess vinyl, leaving only your design on the backing paper.
Step 4: Apply Transfer Tape
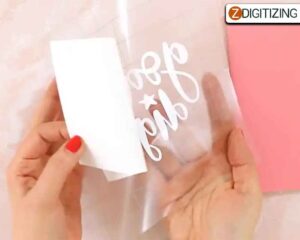
After you’ve weeded your vinyl, it’s time to apply a transfer tape. Transfer tape is a sticky sheet that will help you transfer your vinyl design onto your fabric. Cut a transfer tape that is a bit larger as compared to your vinyl design. Then, carefully apply the transfer tape to the top of your vinyl design, smoothing out any bubbles or wrinkles.
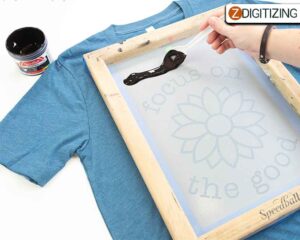
Step 5: Prepare Your Fabric

Before you can apply your vinyl design to your fabric, you need to prepare your fabric. Make sure it is clean.
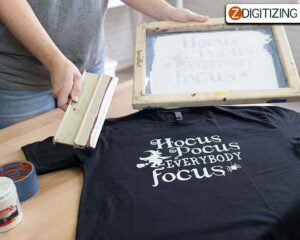
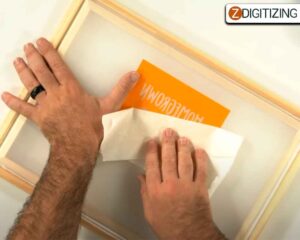
Step 6: Apply Your Vinyl Design
Now it’s time to apply your vinyl design to your fabric. Carefully place your transfer tape with the vinyl design onto your fabric, making sure it is centered and straight. Use a scraper tool or a credit card to press down on the transfer tape, ensuring that the vinyl adheres to the fabric. Then, carefully peel away the transfer tape, leaving your vinyl design on the fabric.
Step 7: Cure Your Vinyl Design

After you’ve applied your vinyl design to your fabric, it’s time to cure it. Curing will help ensure that your vinyl design stays in place and doesn’t peel off. Preheat your oven to 300 degrees Fahrenheit. Then, place your fabric with the vinyl design in the oven for 10-15 minutes. After the allotted time, remove your fabric from the oven and let it cool completely.
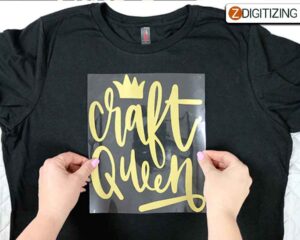
Step 8: Enjoy Your Screen Printed Item
Congratulations, you’ve successfully screen printed with vinyl using your Cricut machine! Your finished product should have a screen print effect, with a solid design and crisp edges. Enjoy your new custom Cricut screen print item, whether it’s a t-shirt, tote bag, or anything else you can think of.
So, screen printing with vinyl using a Cricut machine is a fun and easy way to create custom designs on fabric. With a little practice, you can create professional-looking items that are sure to impress. Just remember to use permanent adhesive vinyl, prepare your fabric properly, and cure your design to ensure it lasts. Happy screen printing!
Winding up with offer:
In conclusion, screen printing with a Cricut machine can be a fun and creative way to transfer designs onto various surfaces. While the process may seem daunting at first, with a little practice and patience, you can create professional-looking designs for a wide range of DIY projects.
However, if you’re looking to digitize an embroidery design, it’s important to seek out a professional like ZDigitizing. Digitizing is a complex process, and ZDigitizing provides complete digitizing and vector art services to businesses, industries, and corporations worldwide.
So, if you need a digitizing or vector art service for your embroidery machine, consider ZDigitizing for a super-fast turnaround and excellent quality. Click the link below to get a free quote in less than 5 minutes and take advantage of our 50% off offer for potential customers.
If you have any questions related to how to do screen printing or embroidery digitizing, feel free to ask in the comment section. Thank you for reading!
Frequently Asked Questions
A Cricut machine cannot make a traditional silk screen as it requires a specialized setup and equipment. However, it can create a similar effect using vinyl and a heat press.
While a Cricut heat press can be used for heat transfer vinyl, it cannot be used for traditional screen printing as it requires a different setup and process.
It depends on the project and personal preference. Vinyl is easier for smaller projects with simple designs, while screen printing is better for larger projects with more intricate designs.
To print on fabric with a Cricut, use a permanent adhesive vinyl and a heat press to transfer the design onto the fabric.
To screen print a shirt with a Cricut, design the image in software, cut the design on permanent adhesive vinyl, weed the design, apply transfer tape, press the design onto the shirt with a heat press, and cure the design in an oven.


