Embroidery is a beautiful and intricate art form that allows individuals to express their creativity through needle and thread. One tool that can greatly enhance the embroidery experience is a multi-position embroidery hoop.
This versatile accessory offers a range of adjustments and positions, allowing embroiderers to work on various fabric sizes and achieve precise stitching.
In this article, we will explore the ins and outs of using a multi-position embroidery hoop, from understanding its components to mastering different techniques.
Let’s dive in and unlock the potential of this versatile tool for your embroidery projects!
How To Use A Multi-position Embroidery Hoop
What Is A Multi-Position Embroidery Hoop?
A multi-position embroidery hoop is a versatile tool that allows you to embroider in different positions, angles, and orientations.
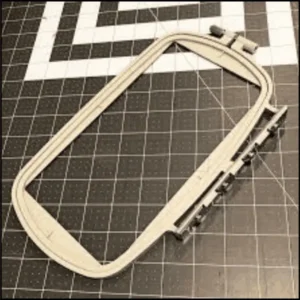
Unlike traditional hoops that only offer one position, multi-position hoops have adjustable arms or mechanisms that can be moved to accommodate various embroidery techniques and designs.
Benefits Of Using A Multi-Position Embroidery Hoop
Using a multi-position embroidery hoop offers several benefits.
- Firstly, it allows you to work on different areas of your fabric without constantly removing and repositioning the hoop. This saves time and effort, especially when working on larger or more complex projects.
- Additionally, the ability to adjust the hoop’s position and angle provides better access to hard-to-reach areas, ensuring you can embroider with precision and ease.
- Whether you’re stitching delicate details or larger designs, a multi-position hoop offers the flexibility and convenience you need.
Understanding The Different Components Of A Multi-Position Embroidery Hoop
First, you need to understand the what’re the components included in this hoop:
Main Hoop
The main hoop is the central component of a multi-position embroidery hoop. It typically consists of two circular frames that hold the fabric in place.
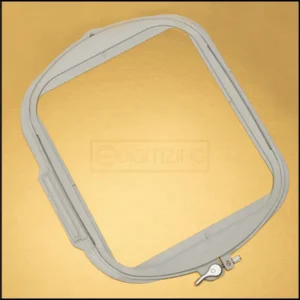
The fabric is secured by tightening a screw or lever, ensuring it remains taut and stable during the embroidery process.
Adjustable Arms or Mechanisms
One of the key features of a multi-position embroidery hoop is its adjustable arms or mechanisms.
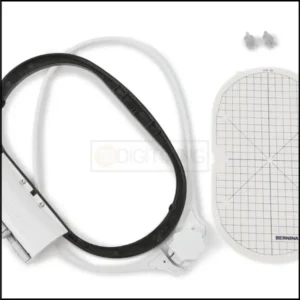
These allow you to change the position, angle, and orientation of the hoop according to your stitching needs. By loosening or tightening the arms, you can easily adjust the tension and angle of the fabric, accommodating different embroidery techniques and designs.
Supporting Frames
Some multi-position embroidery hoops also come with supporting frames. These frames provide additional stability and support, particularly when working on larger or heavier fabrics.
Supporting frames can be attached to the sides of the main hoop, offering extra reinforcement and preventing sagging or distortion of the fabric.
Embroidery Digitizing
&
Vector Art Services
Are you looking for embroidery digitizing and vector art services at low cost with superfast turnaround, guaranteed quality and preview before pay? So, you are at right place. We can digitize and vectorize any type of artwork in your required file format.
Preparing Your Fabric And Hoop For Embroidery
For using this hoop you need to prepare the fabric and then hoop it. Let’s see how you can do it:
Choose the Right Fabric
Before using a multi-position embroidery hoop, it’s essential to choose the right fabric for your project. Consider the type, weight, and weave of the fabric, as well as its compatibility with your chosen embroidery technique.
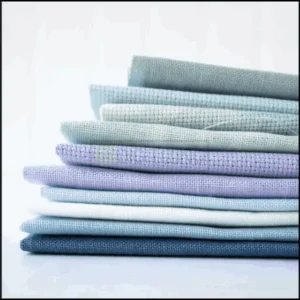
Fabrics like cotton, linen, and even weave are popular choices for embroidery due to their durability and ease of stitching.
Pre-washing and Ironing the Fabric
To ensure your fabric is clean and ready for embroidery, it’s advisable to pre-wash it. This removes any sizing or chemicals that may affect the embroidery process.
After washing, iron the fabric to remove wrinkles and ensure it is smooth and flat, which will make it easier to secure in the hoop.
Securing the Fabric in the Hoop
To secure the fabric in the multi-position embroidery hoop, place the fabric between the two circular frames of the main hoop.
Make sure the fabric is centered and aligned with the grain if applicable. Gently tighten the screw or lever to secure the fabric, ensuring it is taut but not overly stretched.
Exploring The Various Positions And Adjustments Of The Multi-Position Hoop
Let’s discuss which positions you can use to adjust the multipurpose hoop in embroidery:
Understanding the Range of Positions
A multi-position embroidery hoop offers a wide range of positions and adjustments. You can rotate the hoop to stitch in different angles or orientations, allowing you to reach tricky areas or create specific effects.
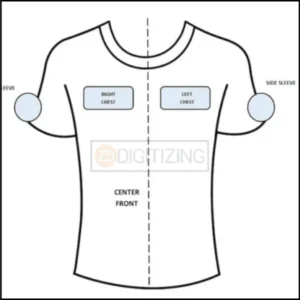
Experiment with different positions to find the most comfortable and efficient way to embroider your design.
Adjusting the Hoop Tension
Adjusting the tension of the hoop is crucial for achieving neat and precise embroidery. If the fabric is too loose, it may pucker or gather, distorting your stitches. Conversely, if it’s too tight, it can cause the fabric to warp or distort the embroidery design.
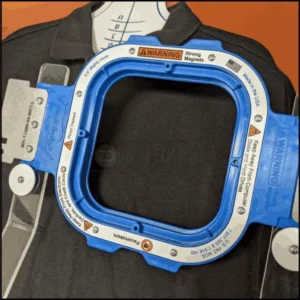
Find the right tension by gently tightening or loosening the screw or lever until the fabric is adequately taut but still allows your needle to pass through smoothly.
Locking mechanisms for stability
Multi-position embroidery hoops often come with locking mechanisms to ensure stability during stitching.
These mechanisms can be engaged to hold the adjustable arms or mechanisms in place, preventing accidental movements or changes in position while you work. Utilize the locking mechanisms when needed to maintain a steady and consistent embroidery process.
Step-By-Step Guide To Using A Multi-Position Embroidery Hoop
Embroidery hoops are a must-have tool for any embroidery enthusiast. But have you tried using a multi-position embroidery hoop?
This versatile tool allows you to embroider at different angles, making it easier to work on intricate designs and large projects.
Here’s a step-by-step guide on how to use a multi-position embroidery hoop like a pro.
Selecting an Embroidery Design
Before you start, it’s essential to choose an embroidery design that suits your project. Whether it’s a floral pattern, a cute animal, or a personalized monogram, pick somethin
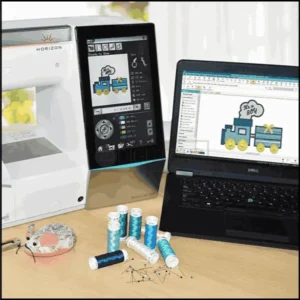
that sparks joy and matches your skill level. Remember, embroidery is all about creativity and self-expression!
Transferring the Design onto the Fabric
Once you’ve chosen your design, it’s time to transfer it onto your fabric. There are various transfer methods, such as using carbon paper, water-soluble markers, or iron-on transfers.
Whichever method you prefer, make sure to follow the instructions carefully to ensure a clean and accurate transfer.
Positioning the hoop for optimal embroidery
Now comes the fun part – positioning the hoop!
The unique feature of a multi-position embroidery hoop allows you to adjust the angle and tilt of the hoop according to your comfort and the intricacy of the design.
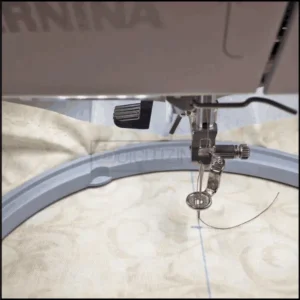
Experiment with different positions to find the one that works best for you. Don’t be afraid to tilt, swivel, or rotate the hoop to get the perfect embroidery angle!
Stitching techniques with a multi-position hoop
With your hoop positioned just right, it’s time to start stitching. Whether you prefer the classic backstitch, the delicate satin stitch, or the intricate French knot, the multi-position hoop provides the stability and flexibility you need to achieve precise and beautiful embroidery.
Remember to take breaks, stretch your hands, and enjoy the process of bringing your design to life!
Embroidery Digitizing
&
Vector Art Services
Are you looking for embroidery digitizing and vector art services at low cost with superfast turnaround, guaranteed quality and preview before pay? So, you are at right place. We can digitize and vectorize any type of artwork in your required file format.
Tips And Techniques For Achieving Precise And Professional Embroidery
Embroidery is both an art and a craft, and with a few tips and techniques, you can take your embroidery game to the next level.
Here are some tried-and-true methods to help you achieve precise and professional results.
Using Embroidery Stabilizers
Embroidery stabilizers are your best friends when it comes to achieving clean and crisp embroidery. These materials provide extra support and prevent fabric puckering or stretching during the stitching process.
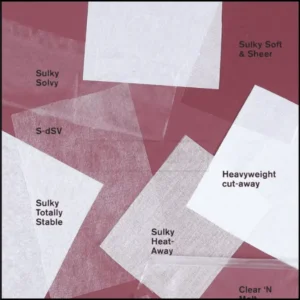
There are a variety of stabilizers available, from tear-away to water-soluble, so choose the right one for your project and follow the instructions for the best results.
Proper Threading and Tensioning of the Embroidery Thread
Threading and tensioning may seem like mundane tasks, but they play a vital role in ensuring smooth and even stitching. Take the time to thread your needle correctly and adjust the tension of your embroidery thread.
Too loose, and your stitches will look sloppy; too tight, and your fabric may pucker. Practice makes perfect, so don’t be afraid to experiment and find the right balance.
Utilizing Different Embroidery Stitches
Embroidery offers a vast array of stitches to add texture and dimension to your designs. Experiment with different stitches, such as the versatile running stitch, the intricate chain stitch, or the elegant feather stitch.
By combining various stitches, you can create unique and eye-catching embroidery pieces that truly stand out.
Troubleshooting Common Issues With Multi-Position Embroidery Hoops
Embroidery, like any craft, can sometimes present challenges. Here are a few common issues you might encounter with your multi-position embroidery hoop and how to overcome them.
Fabric Slippage and How to Prevent It
One frustrating issue you might face is fabric slippage, especially when working with smooth or slippery fabrics.
To overcome this, try using a non-slip fabric stabilizer, gently tighten the hoop, or tape the edges of your fabric to the hoop for extra security.
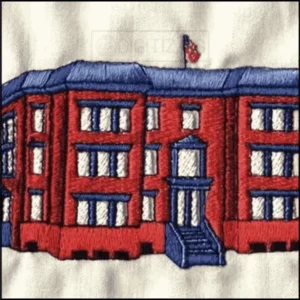
These simple tricks will help keep your fabric in place and prevent unwanted shifts during stitching.
Dealing with Hoop Marks on the Fabric
Hoop marks can leave unwanted impressions on your fabric, causing frustration after all your hard work. To minimize these marks, it’s helpful to change the position of your hoop frequently throughout the embroidery process.
If you still notice hoop marks once you’ve finished stitching, a gentle steam ironing or using a fabric steamer can often remove them.
Adjusting the Hoop for Uneven Tension
Uneven tension is another common issue that can affect the quality of your embroidery. If you notice uneven tension lines or visible pulling in your stitches, it’s time to adjust the hoop.
Loosen the hoop slightly in problem areas and reposition it to distribute the tension more evenly. Don’t be afraid to make small adjustments as you go to maintain a smooth and balanced stitch.
Final Thoughts
Using a multi-position embroidery hoop opens up a world of possibilities for your embroidery projects.
Whether you’re a seasoned stitcher or just starting out, this versatile tool can enhance your creativity and make your embroidery process more enjoyable.
So grab your hoop, choose a design that speaks to you, and let your imagination run wild.
Happy stitching!
ZDigitizing: Ultimate Destination for Premium Embroidery Digitizing Services
Need awesome embroidery digitizing services?
ZDigitizing is here for you! We offer top-notch embroidery digitizing and vector art services that fit both your embroidery and printing needs.
And here’s a cool deal – we’re giving you 50% off your first order!
Getting started is super easy. Just chat with us and we’ll give you a free quote in just 5 minutes. We like to keep things simple and fast for you.
Found this article helpful?
Share it with friends and spread the word about our incredible services and discounts. It’s a chance for everyone to experience top-notch digitizing services.
Thanks for reading, and we can’t wait to help you with your embroidery projects!
Frequently Asked Questions:
A multi-position embroidery hoop allows you to embroider larger designs that don’t fit in a single hoop setting. It enables you to reposition the hoop in multiple orientations without rehooping the fabric, facilitating larger or continuous designs.
The endless embroidery hoop provides a means to create continuous designs seamlessly. It holds the fabric in a way that allows for the repeated alignment of patterns, making it ideal for borders and decorative trims without visible gaps.
Select an embroidery hoop based on your project’s size and fabric type. For most projects, a round, adjustable wooden or plastic hoop is suitable. Use a small hoop for detailed work and a larger one for bigger designs, ensuring the fabric remains taut.
Yes, you can embroider without a hoop, especially for fabrics that maintain their shape well or for more free-form embroidery styles. However, using a hoop helps to keep the fabric taut and even, which is particularly helpful for beginners and detailed work.

