In this article, we will guide you through the process of making embroidery patches on your embroidery machine, from design selection to stitching and finishing.
How to Make Embroidery Patches on Your Embroidery Machine
Embroidery patches are a fantastic way to add personalization and style to your garments, accessories, and crafts. With the help of an embroidery machine, you can create custom patches that showcase your creativity and make a statement. Whether you are a beginner or an experienced embroiderer, this step-by-step guide will equip you with the knowledge and techniques needed to create stunning patches.
Step-By-Step Guide On How To Make Embroidery Patches On Your Embroidery Machine:
Let’s see how to make embroidery patches on your embroidery machine:

Choosing a Design:
When making embroidery patches, selecting the right embroidery pattern/design is crucial. Consider the size, complexity, and colors of the design, ensuring it is suitable for a patch. Look for designs that have clearly defined shapes and minimal fine details. You can choose from pre-made designs or create your own using embroidery software. Take into account the purpose of the patch and the garment or item it will be attached to.
for every material. If you are using heavy fabric to embroider like leather or vinyl, you have to slow down your machine. Usually, the quicker the machine goes, the more pull you would have in the tension, which increases the possibility of puckering. This possibility is higher when it comes to very thick or very light materials.
Materials such as nylons, tulles, and silks require gentle handling. A slow operation mode would make less tension while stitching, enabling the fabric to lie more naturally and reducing puckering in your embroidery patterns.
Preparing the Fabric
Before starting the embroidery process, prepare the fabric for stitching. Choose a fabric that is suitable for embroidery, such as cotton or twill. Before proceeding, it is important to wash and press the fabric to eliminate any wrinkles or sizing present on the surface. Cut the fabric into a size slightly larger than the desired patch size to account for shrinkage during stitching. It’s also helpful to use a stabilizer to reinforce the fabric and prevent distortion during embroidery.
Embroidery Digitizing
&
Vector Art Services
Are you looking for embroidery digitizing and vector art services at low cost with superfast turnaround, guaranteed quality and preview before pay? So, you are at right place. We can digitize and vectorize any type of artwork in your required file format.
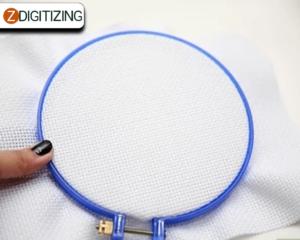
Stabilizing the Fabric:
Stabilizing the fabric is crucial to ensure smooth and precise stitching. Select a stabilizer that matches the fabric and the complexity of the design. Cut the stabilizer slightly larger than the hoop size and hoop it together with the fabric. This will provide stability and support during the embroidery process, preventing puckering or shifting.
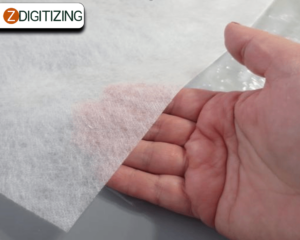
Hooping the Fabric:
Proper hooping is essential for accurate stitching. Place the fabric and stabilizer in the embroidery hoop, making sure it is taut and secure. Adjust the tension of the hoop to prevent the fabric from slipping or becoming too loose. Smooth out any wrinkles or folds in the fabric to ensure even stitching.
Setting Up the Embroidery Machine:
Prepare your embroidery machine for stitching the patches. Thread the machine with the appropriate color threads and attach the correct needle. Set up the machine according to the design specifications, including selecting the stitch type, adjusting the tension, and setting the desired speed. Test the machine on a scrap piece of fabric to ensure everything is working properly before starting the actual patch.
Selecting the Right Threads and Needles:

Choosing the right threads and needles is essential for achieving high-quality embroidery. Use embroidery threads that are colorfast and suitable for the fabric type. Consider the thickness and sheen of the threads to enhance the visual appeal of the patch. Select the appropriate needle size and type based on the fabric and design requirements. A sharp needle will ensure clean and precise stitching.
Digitizing the Design:
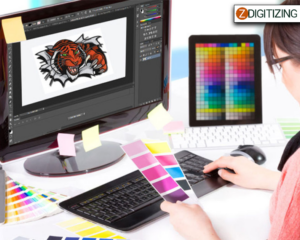
If you are creating your own design, digitize it using embroidery software. In this process, the design is transformed into a digital format that is compatible with the embroidery machine, allowing it to interpret and stitch the design accurately. Follow the software instructions to import the design, adjust the size and colors if needed, and define the stitch types and densities. Ensure the design is compatible with your embroidery machine’s format.
But let me tell you, digitizing on your own is hard. It is better to outsource from a professional digitizing company, like zdigitizing. They are a professional digitizing company providing embroidery digitizing services worldwide in very reasonable rates.
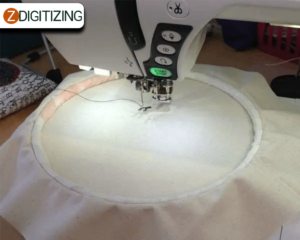
Embroidering the Patch:

Once the setup is complete, it’s time to start embroidering the patch. Attach the hoop to the machine and position it so that the needle aligns with the starting point of the design. Begin the stitching process, following the design’s sequence of colors and stitches. Monitor the machine to ensure smooth operation and make any necessary adjustments along the way.
Trimming and Finishing the Patch
After completing the embroidery, carefully remove the fabric from the hoop. Trim the excess stabilizer and fabric around the design, leaving a small border. Use sharp scissors or a rotary cutter for precise cuts. To give the patch a clean finish, consider using a heat-seal backing or applying an adhesive backing. This will provide stability and make it easier to attach the patch to garments or accessories.
Attaching the Patch
To attach the patch to a garment or item, choose an appropriate method. Options include sewing the patch on using a sewing machine or hand stitching, using fabric glue, or using a heat press. Consider the durability and intended use of the patch when selecting the attachment method. Ensure the patch is securely attached to prevent it from coming loose during use.
Tips and Troubleshooting
To enhance your patch-making experience, here are some valuable tips:
- Experiment with different fabrics, threads, and stitch variations for unique effects.
- Keep your embroidery machine well-maintained and clean to ensure optimal performance.
- Practice on scrap fabric before working on the actual patches to test the design and settings.
- If you encounter stitching issues, such as thread breaks or tension problems, troubleshoot by adjusting the settings or changing the needle.
- Ensure that the fabric and stabilizer are securely hooped without any wrinkles or slack. This will provide a stable foundation for precise stitching and prevent fabric shifting during the embroidery process.
- Pay close attention to the tension of your threads. Incorrect tension can lead to loose stitches, puckering, or thread breakage. Adjust the tension settings on your embroidery machine according to the fabric and design requirements.
- After completing each color or section of your design, trim the excess thread tails to avoid any tangling or interference with subsequent stitching. This will result in cleaner and neater patches.
- Regularly check and change your embroidery machine needle as needed. A dull or damaged needle can cause skipped stitches or fabric damage. Replace the needle after every few projects or if you notice any issues with the stitching quality.
- Choose the appropriate backing or stabilizer for your patches based on the fabric and intended use. Experiment with different types of backings to achieve the desired stability and flexibility for your patches.
- Take time to carefully plan the placement of your design on the fabric, considering the shape and size of the patch. Ensure that the design is centered and aligned correctly to achieve a professional look.
- Adjust the density settings of your embroidery design to achieve the desired level of coverage and stitch thickness. Dense designs may require slower machine speeds or additional stabilization to prevent fabric distortion.
- Regularly clean your embroidery machine to make patches, including the bobbin area, to remove lint, dust, and stray threads. A clean machine will ensure smooth operation and prevent any debris from affecting the stitching quality.
- Explore the capabilities of your embroidery software to further enhance your patch designs. Experiment with different lettering styles, resizing options, and special effects to create unique and eye-catching patches.
- Don’t be afraid to experiment, mix and match colors, and try new techniques. Enjoy the process of creating custom patches that reflect your personal style and vision.
Conclusion:
Making patches with an embroidery machine opens up a world of creative possibilities. With the right materials, techniques, and a bit of practice, you can create stunning patches that add a personalized touch to your garments and accessories. Follow the step-by-step process outlined in this article to successfully make embroidery patches that showcase your style and creativity.
We hope this article would be helpful for you. If you want to digitize embroidery design you would need a professional like ZDigitizing, as digitizing is a complex process.
Zdigitizing is a digitizing embroidery company that provides complete digitizing and vector art services all over the world to businesses, industries, and corporations.
So, if you need a digitizing or vector art service for your embroidery machine, with a super-fast turnaround and excellent quality, Zdigitizing will be your best choice. Just click the link below and get a free quote in less than 5 minutes. We offer 50% off on all our services to our potential customers.
Frequently Asked Questions
Please read our article to know more about custom embroidered patches.
Making custom patches with an embroidery machine takes time and thread but is an amazingly simple project once you know the process. Although, the process could be a bit confusing for embroidery novices!
A piece of material embroidered with an embroidery pattern and with a finished satin stitch edge with a fusible backing is called an embroidered iron on patch. They are generally pretty stiff and durable so they hold up on outerwear and even soft luggage.
Because iron on patches has a fusible backing and they could be ironed onto another piece of material wear or even outerwear or outdoor gear.
Use a bigger sewing needle on your machine, one that is made for heavy-weight materials, 90/14 works amazing.
Polyester threads are the most common threads used by embroidery digitizing and custom patch companies. This thread is firm and could withstand machine wash processes or other harsh conditions also.


