Machine embroidery is like magic for fabric, transforming plain garments into eye-catching masterpieces. But did you know that you can also embroider on paper?
Yes, you read that right!
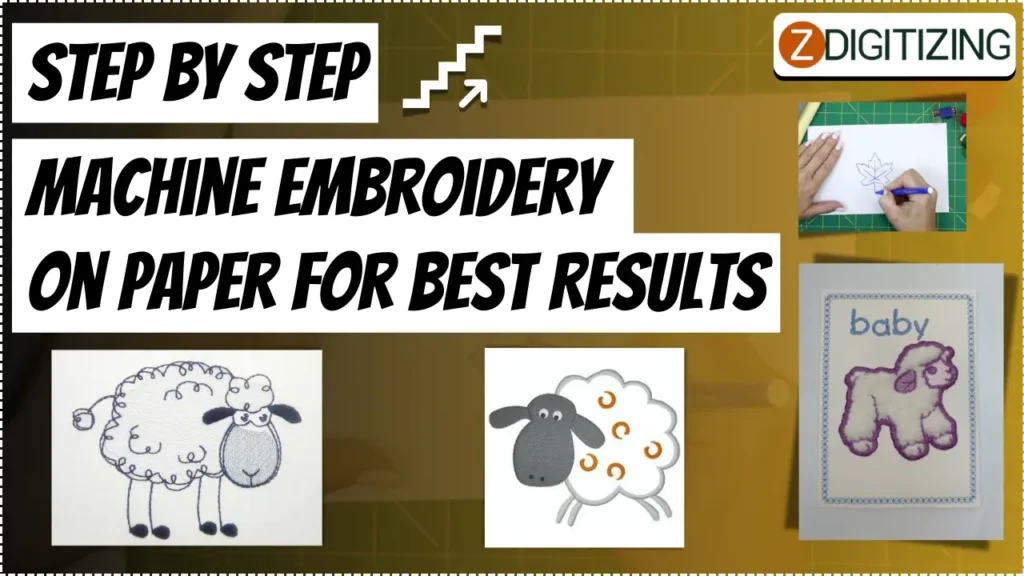
Machine embroidery on paper combines the beauty of stitching with the versatility of paper to create unique and stunning designs.
Step-by-Step: Machine Embroidery On Paper For Best Results
Choosing the Right Materials and Tools
Just like picking the right colors for a coloring book, selecting the best paper embroidery materials and tools for this adventure will make your paper come to life with vibrant stitches and patterns.
Selecting the Appropriate Paper for Embroidery
When it comes to choosing paper for embroidery, not all types are created equal. Look for papers that are sturdy enough to withstand the stitching process without tearing or falling apart.
Cardstock or watercolor paper are great options as they have the necessary strength and thickness. Avoid using thin or flimsy paper that may get damaged easily.
Essential Tools for Machine Embroidery on Paper
To get started with machine embroidery on paper, you’ll need a few essential tools. Firstly, a reliable embroidery machine that allows you to adjust settings for paper embroidery.
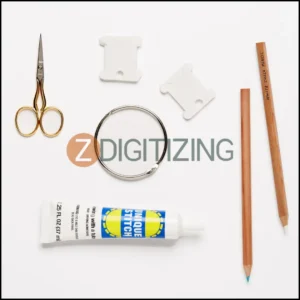
You’ll also need embroidery needles designed specifically for paper, as regular needles may dull quickly.
Don’t forget to stock up on embroidery threads in various colors. Additionally, having a good pair of scissors, adhesive tape, and a ruler will come in handy to cut and secure your paper.
Preparing the Paper for Embroidery
For embroidering paper begins with the preparation of the canvas. The initial steps of priming and securing the fabric lay the foundation for a seamless and beautiful stitching experience.
Cutting and Preparing the Paper
Before you start embroidering paper, it’s important to prepare your paper. Begin by cutting it to the desired size and shape using scissors or a paper cutter.
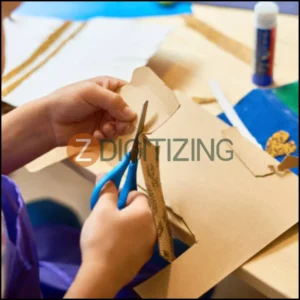
Make sure to leave some space around the edges to avoid any stitching close to the edges from getting caught or torn.
Securing the Paper for Embroidery
To prevent the paper from shifting or wrinkling during embroidery, secure it onto a stabilizing material using adhesive tape. You can use a piece of tear-away stabilizer or even regular masking tape to hold the paper in place.
Just be mindful not to tape over any areas that will be embroidered to avoid sticky residue on your threads.
Setting up the Embroidery Machine
Prior to setting up the embroidery machine, there are a few things we should be aware of. Let’s examine this:
Getting Your Machine Ready for Paper Embroidery
Before you start stitching, make sure to adjust your machine settings accordingly.
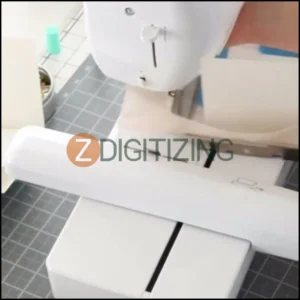
Set the machine to a slower speed since paper is more delicate than fabric. It’s also a good idea to lower the tension slightly to prevent the paper from puckering or tearing.
Adjusting Tension and Stitches
To ensure the best results, do a test run on a scrap piece of paper first. This allows you to check the tension and make any necessary adjustments.

If the stitches are too tight, you may need to loosen the tension, and if they are too loose, tightening it up should do the trick.
Experimenting with different stitch lengths and designs can also add interesting textures and patterns to your final piece.
Setting up the Design and Stabilizing the Paper
Before diving into embroidery on paper, it’s crucial to set up your design thoughtfully and make sure the paper is well-supported.
This not only boosts accuracy but also prevents the paper from getting messed up, setting the stage for impressive and neat creations in this crafty adventure.
Importing and Adjusting the Embroidery Design
Once you have chosen your embroidery design paper, import it into your embroidery machine’s software and make any necessary adjustments. Resize the design if needed or change the colors to match your vision.
Take your time to ensure the design is precisely how you want it before moving on to the stitching process.
Choosing the Suitable Stabilizer for Paper
To prevent the paper from tearing or warping during the embroidery process, it’s essential to use a stabilizer. There are different types of stabilizers available, such as tear-away or wash-away options.
Experiment with different stabilizers to find the one that works best for your chosen design and paper. Remember to follow the manufacturer’s instructions for proper use and removal of the stabilizer.
Machine Embroidery on Paper: Techniques and Tips
Learn exciting techniques and helpful tips to turn your plain paper into a canvas for beautiful, unique designs.
Choosing Suitable Thread and Needles for Paper Embroidery
When it comes to choosing threads for paper embroidery, it’s essential to pick lightweight threads that won’t overwhelm the delicate nature of the paper.
Embroidery floss or thin metallic threads are excellent choices, as they provide a beautiful effect without weighing down the paper.
As for needles, opt for sharp, fine needles that can smoothly pierce through the paper without causing any damage.
Remember, your thread and needles should be BFFs – Best Friends for machine embroidery on paper!
Embroidery Techniques for Paper
Embroidering on paper requires a slightly different approach than fabric embroidery. It’s best to keep your stitches on the shorter side to prevent the paper from tearing. Use a gentle hand and avoid pulling the thread too tightly.
Additionally, you can experiment with different stitch techniques like backstitch, running stitch, or even French knots to add texture and dimension to your paper embroidery.
Don’t be afraid to get creative and let your stitches dance on the paper!
Finishing and Displaying Your Embroidered Paper Artwork
Bringing your embroidered paper creations to life involves thoughtful finishing touches and clever display techniques.
Learn simple yet effective ways to showcase your artwork, ensuring it’s ready to charm and captivate any audience.
Cutting and Trimming the Embroidered Paper
Once you’ve completed your embroidered masterpiece, it’s time to give it a polished finish. Carefully cut out the embroidered paper, making sure to leave a small border around the design to maintain its integrity.
Take your time and use a sharp pair of scissors to avoid any mishaps. Remember, precision is key here!
Creating Unique Display Options for Your Artwork
Now that your artwork is ready, it’s time to showcase it in all its glory! You can frame your embroidered paper, either with a traditional picture frame or a shadow box frame to add depth.

Another fun way to display your artwork is by using it as a cover for a greeting card or incorporating it into a scrapbook page.
Let your imagination run wild and find a display option that best suits your style!
Troubleshooting Common Issues in Machine Embroidery on Paper
These are easy techniques and tips for troubleshooting common issues, ensuring smooth stitching, and turning your paper projects into flawless masterpieces.
Overcoming Thread Breakage or Tension Problems
Embroidery on paper can come with its fair share of challenges. If you encounter issues like thread breakage or tension problems, take a deep breath and don’t panic.
Start by checking your needle and thread combination – make sure they are compatible.
Also, double-check the tension settings on your machine to ensure they are appropriate for paper embroidery. Sometimes, a simple adjustment can work wonders.
And remember, even if things go awry, it’s all part of the creative journey!
Solving Issues with Paper Tear or Perforation
Oh no, paper tear or perforation – the arch-nemesis of every paper embroiderer! If you run into these issues, fear not.
One way to prevent tearing is to add an extra layer of paper or cardstock behind the embroidering area. This will provide some reinforcement and make the paper sturdier.
Another solution is to adjust your stitching technique – try using smaller stitches or even a stabilizer to reinforce the paper.
Remember, with a little problem-solving, you can conquer any tear or perforation that comes your way!
Final thoughts
In conclusion, machine embroidery on paper offers a delightful blend of traditional embroidery and paper art, allowing you to create unique and captivating pieces.
By following the step-by-step instructions provided in this article, you can ensure that your machine embroidery on paper endeavors yield the best results.
So, unleash your creativity, explore new techniques, and embrace the beauty of this art form as you embark on your journey to create stunning embroidered paper artwork.
With practice, patience, and a passion for both embroidery and paper craft, you can achieve remarkable outcomes and enjoy bringing your artistic visions to life.
Happy embroidering!
ZDigitizing: Ultimate Destination for Premium Embroidery Digitizing Services
Need awesome embroidery digitizing services?
ZDigitizing is here for you! We offer top-notch embroidery digitizing and vector art services that fit both your embroidery and printing needs.
And here’s a cool deal – we’re giving you 50% off your first order!
Getting started is super easy. Just chat with us and we’ll give you a free quote in just 5 minutes. We like to keep things simple and fast for you.
Found this article helpful?
Share it with friends and spread the word about our incredible services and discounts. It’s a chance for everyone to experience top-notch digitizing services.
Thanks for reading, and we can’t wait to help you with your embroidery projects!
Frequently Asked Questions:
Yes, you can machine embroider on paper. It’s important to choose a sturdy paper type and use a lightweight stabilizer. Reducing the machine’s speed and tension can help prevent the paper from tearing.
To embroider, first select your design and fabric. Hoop the fabric with a stabilizer, thread the needle, and start stitching the design, following the pattern. Finish by securing the thread and removing the fabric from the hoop.
Improve your embroidery machine by regularly cleaning and oiling it, using quality threads and needles, updating its software (if applicable), and ensuring proper tension settings. Regular servicing by a professional can also help maintain its performance.
Normal paper can be used for embroidery, but it’s best to opt for thicker paper like cardstock to prevent tearing. Use a new, sharp needle and avoid dense or complex designs that require a lot of punctures, which could weaken the paper.